
Why Sewing Machine Thread Bunches Up and How to Fix It!
Disclosure: This post may contain affiliate links. If you make a purchase through these links, I may earn a small commission at no additional cost to you.
Tired of tangled thread and messy stitches? Learn why your sewing machine thread bunches up — and how to fix it fast with these simple troubleshooting tips.
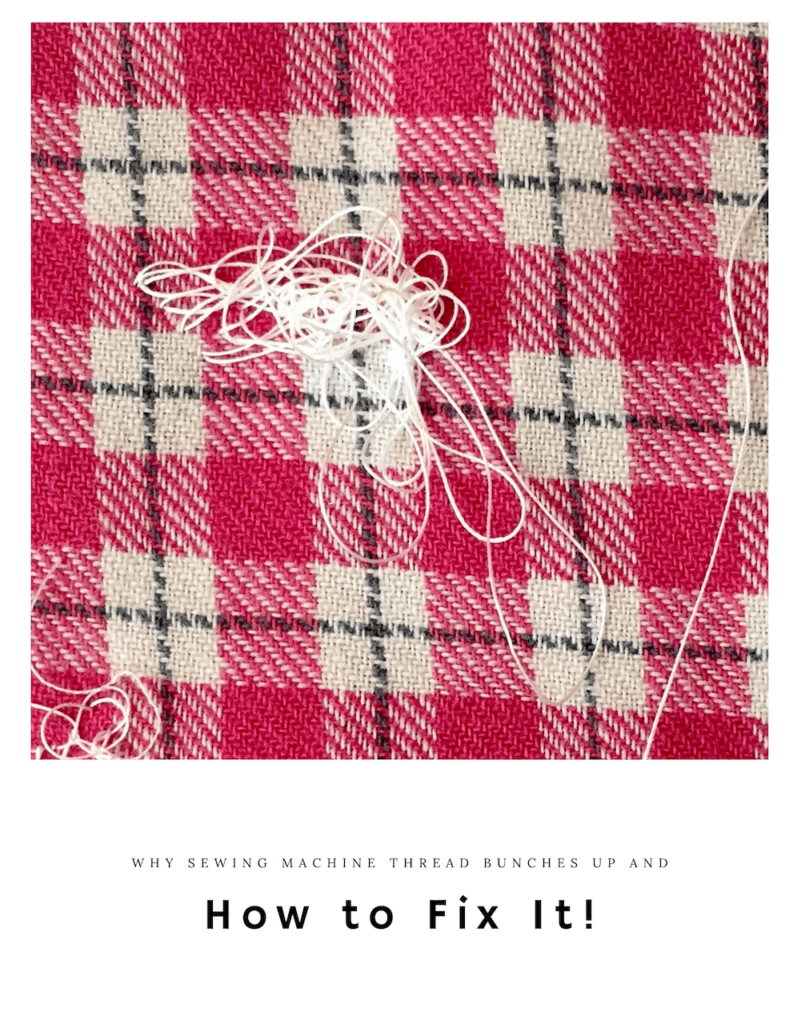
Everything you need to know before calling a sewing machine repairman! This article provides a list of possible reasons for why sewing machine thread bunches up and solutions on how to fix it.
This sewing troubleshooting guide is part of my growing maker resource archive. While I don’t currently publish new sewing tutorials on a regular schedule, I continue to maintain this post and related resources for beginners.
Does this look familiar?
Often called "birdnesting", this is what it looks like when sewing machine thread bunches up on the top of or on the underside of your fabric.
This is one of the most common problems when using a sewing machine. Not only is this an extremely frustrating issue, it can also put a major stopper in the creative process!
I know because it happened to me.
If this is happening to you, first, don't panic!
This situation is normally an easy fix and usually doesn't need a call to your sewing machine repairman.
What Causes Sewing Machine Thread to Bunch Up?
Before I go over all the things you can check to fix this annoying problem, let's first make sure you understand what's causing the problem.
The short and dirty answer is tension.
Tension seems to be the culprit in the majority of cases. However, this isn't always the case, so there are other things you can check as well.
Let's go over tension so you can understand why this can be such a big issue.
Tension is what keeps the top and bottom stitches in perfect balance with one another.
In other words, it's what keeps the front and back stitches looking the same.
When sewing, the top, and bottom stitches should interlock smoothly and look the same.
However, if the stitches are puckered, the seam is unstable, the thread bunches up, or the stitches are just plain ugly, then there is most likely a problem with incorrect tension on either the top or bottom.
It is important that both the top and bottom tension work together to create proper stitches.
For a better understanding of sewing machine tension, I recommend reading the following articles:
Understanding Thread Tension In Your Sewing Machine
Sewing Lesson 10: How to Fix Tension on Your Sewing Machine
Things to Check When Your Sewing Machine Thread Bunches Up.
When your sewing machine thread bunches up you may also experience thread jamming.
In other words, you may have large tangles and huge clumps of bunched up thread not only on your fabric but inside your sewing machine as well.
This typically occurs in the bobbin area and it can be terrifying to witness!
I have had tangles and bunches of thread in the bobbin area so bad that my machine literally became locked up and I couldn't even pull the fabric out!
When this happens to you, you will want to cry. Well, at least I did.
You may even panic and schedule an appointment with a repairman.
Fortunately, I left my phone on the hook the first time this happened to me and consulted the great and powerful Google instead.
After lots of research, I was able to successfully fix the issue.
I then wrote down all the tips I learned and decided to share them in this post.
Believe it or not, every time my thread bunches up I consult this checklist. And, if I learn something new, I add it to this post.
So, these are all the things, in my experience, that you can check before making a 911 call to your sewing machine mechanic.
Note: In order to go through this checklist, you should be familiar with your sewing machine and the basic sewing process. If you are new to sewing and/or recently purchased a new sewing machine, make sure you understand all the parts of a sewing machine.
Also please check out the sewing resources page for more information.
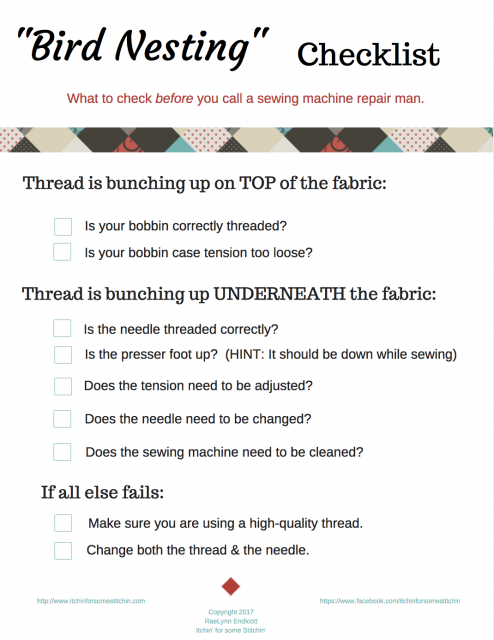
"Birdnesting" Checklist
The thread is bunching up on TOP of your fabric:
Whenever the sewing machine thread bunches up, or "bird nests", on the top of your fabric, the problem typically lies with your bobbin.
Here's what to check:
1. Is your bobbin correctly threaded?
- If the thread has knots, is not smooth, is uneven, or is loose on the bobbin, then it has not been threaded correctly.
- If your machine uses a bobbin case, follow your sewing machine's instructions to remove the bobbin from the case and re-thread it. Make sure you place it back in the case according to your machine's instructions.
- Be sure that you have the bobbin thread engaged in the bobbin tension. To test this, hold the bobbin thread with one hand and if the bobbin drops to the floor then you missed the tension spring in the bobbin case.
Check out The Bobbin Tension Trick You May Not Know for more information.
2. Is your bobbin case tension too loose?
- If you have loosened the screw on your bobbin case to allow for thicker threads you may need to re-adjust it for a regular thread.
- After the bobbin case has been correctly threaded, give the bobbin thread a slight tug. The thread should still move freely with some slight resistance.
The thread is bunching up on UNDERNEATH your fabric:
If the thread is bunching up underneath your fabric, don't assume that the problem is with the bobbin. This is what most people tend to think, however, your needle tension is more likely the true culprit.
Here's what to check:
1. Is the needle threaded correctly?
- Cut the thread a few inches from the spool and pull it out of the machine through the needle. Re-thread according to the instructions for your machine.
- Always thread the sewing machine with the presser foot up. The tension is engaged when the presser foot is down and the thread will not engage properly in the tension discs.
- Complete engagement is necessary so that the discs can snugly “grasp” the thread.
2. Is the presser foot up?
- Don't worry. We all do this occasionally. Just put it down and never speak of it to another soul. ?
Note: It has come to my attention that this one might be a bit tricky for some sewing beginners. So, just to be clear, the presser foot should be down during sewing.
3. Does the tension need to be adjusted?
- Even sewing machines that can "sense" your thread and automatically determine proper tension are sometimes wrong.
- Tighten or loosen the tension as necessary.
4. Does your needle need to be changed?
- Make sure you are using the proper needle for the fabric you are using.
- Also, double-check that the needle is not bent. If you pull the fabric instead of guiding it through the feed dogs as you sew then the needle can bend leading to all sorts of sewing machine problems.
5. Does the sewing machine need to be cleaned?
- Frequent cleaning, dusting, and oiling will prevent many stitching problems.
- Make sure to dust underneath the throat plate, in the bobbin case, and along the thread path.
- Proper maintenance takes only minutes and can save you a multitude of headaches.
Still having problems after going through the checklist?
- Then let's add one more thing to do. It's time to change your thread. Make sure you are using a high-quality thread. No folks, not all threads are created equal. Stop buying thread from the bargain bins!
- Low-quality threads not only tend to break more often, they also generally have looser fibers. Pieces of broken thread and loose fibers mean more lint in your sewing machine. This can lead to all sorts of problems, including your thread bunching up. It can even cause irreparable damage to your machine. A sewing machine is a substantial investment. You don't want that investment destroyed because you then decided to use cheap thread.
So, what's the best sewing machine thread?
Good question. The answer is really one of personal opinion.
- I love Gutermann, but I've heard that Mettler, Aurifill, and Robison Anton are also good. When I was a beginning sewer I was not so picky. I grabbed the cheapest thread I could. I even used old thread my grandma had since the 70's!
- Years of experience, sewing machine problems, and projects that literally fell apart at the seams because I used poor quality thread taught me a valuable lesson. There is no substitute for quality.
- I use Gutermann because it creates less lint, thus, it gunks up your sewing machine less than other threads. It also tangles less than other threads and lasts longer than other threads. Yes, it's a bit more expensive. I usually try to stock up while it's on sale. You can find it at it Michaels or on Amazon. The price varies by spool size. (You can also click on the images)
What do you do when all else fails?
- Change your thread and put in a new, sharp sewing machine needle. It's a winning combination!
I have seriously been at the end of my rope, pulling my hair out in frustration from episodes of birdnesting... tried everything on the list... and failed... only to have it magically fixed by doing these two things at the same time.
This is not an exaggeration.
- Gently hold the end of the thread for the first few stitches when sewing.
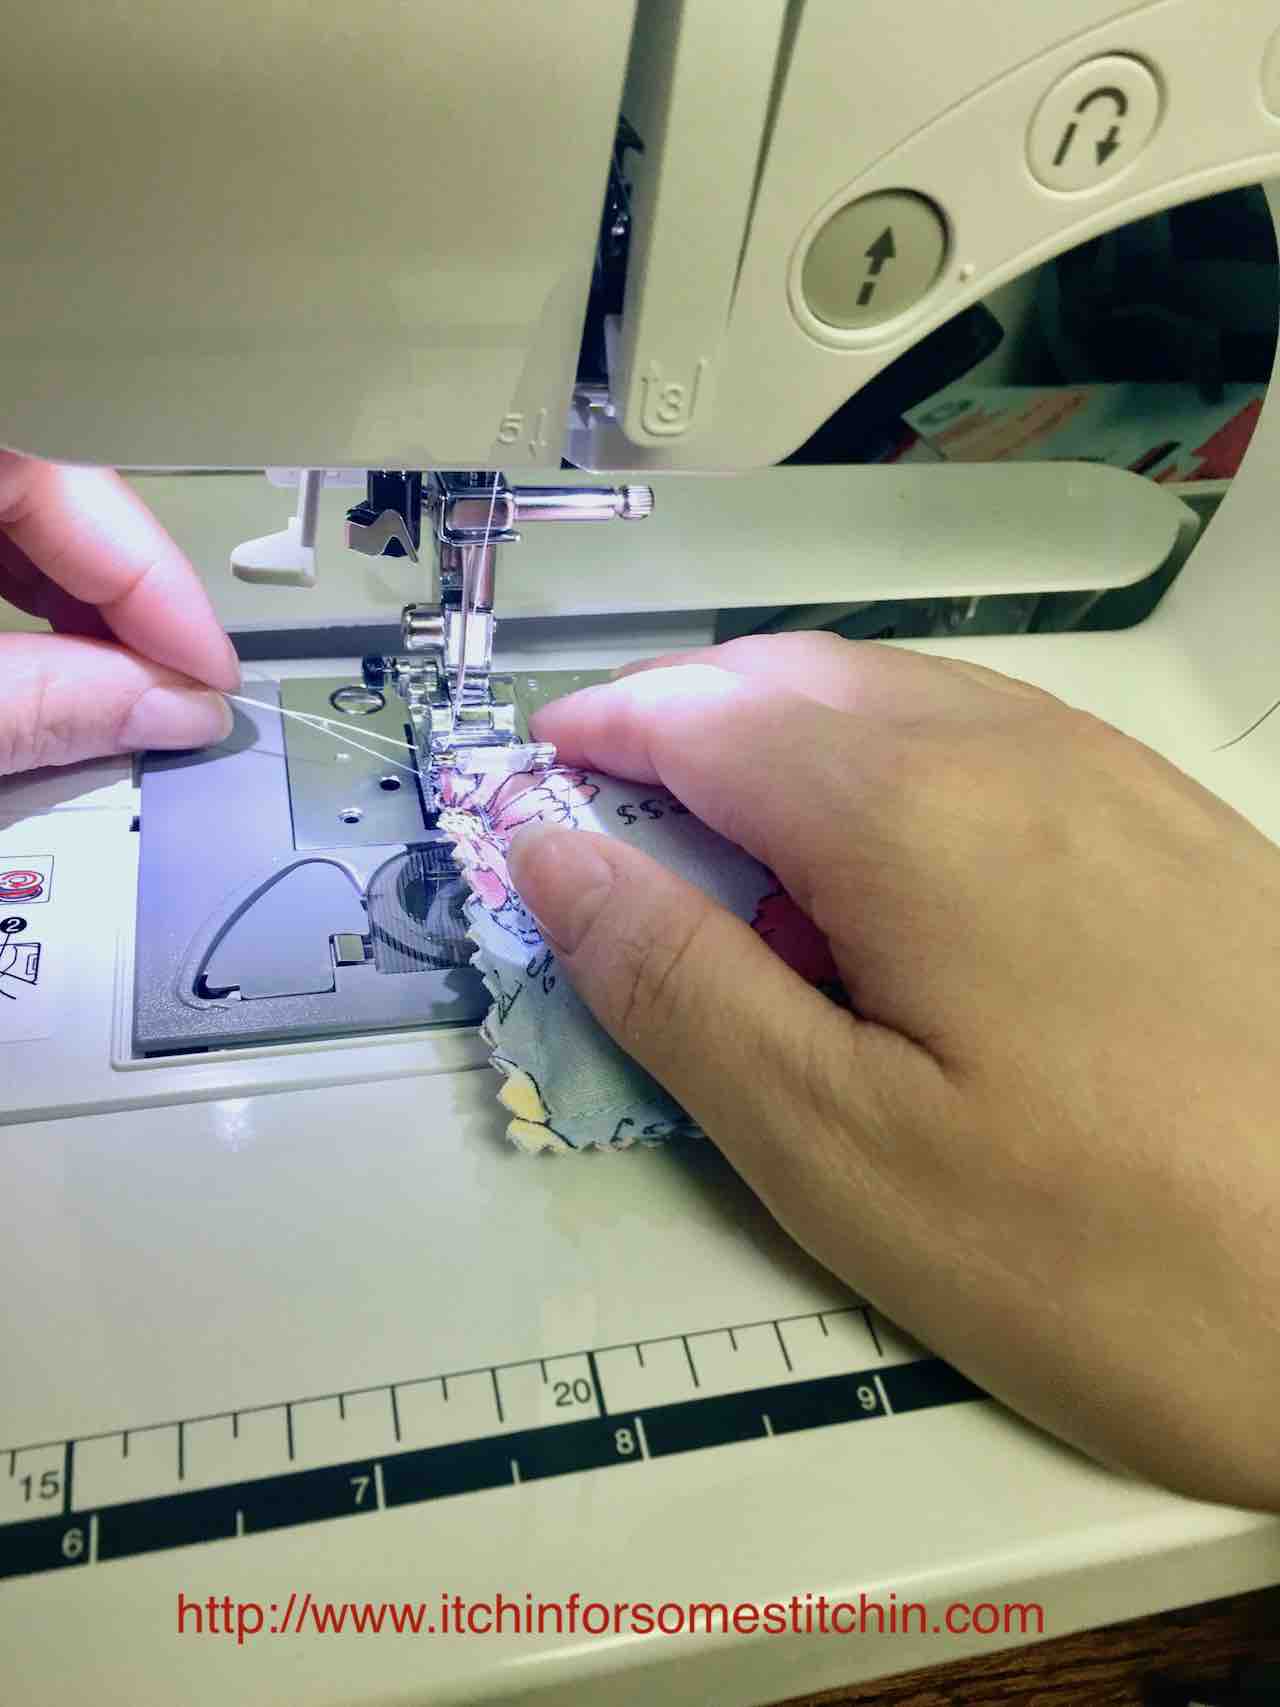
This is a tip given to me by multiple readers (check the comments section) and I have tested it myself. So far, I think it definitely helps, and it is something I have added to my normal sewing process.
- If possible, watch your thread uptake lever while sewing.
What Is the Thread Uptake Lever?
The thread uptake lever is the part of the sewing machine that pulls the thread from the spool, feeds it through the machine, and lifts the thread back up out of the fabric after a stitch has been made.
Basically, it's the part of the sewing machine that goes up and down as you sew.
It's located directly above the presser foot and is often concealed or obscured by the top plastic shell of the sewing machine.
Sometimes, for whatever reason, even after I have tried absolutely everything and I am sure my tension should be right, the thread will simply fall off the uptake lever.
And then you know what happens? Yep, you guessed it... the thread bunches up!
So, now I have removed the plastic piece on my sewing machine so the thread uptake lever is always in view.
When the thread falls off, I use a pen to gently lift up the thread and place it back on the lever.
Magic!
Take my advice folks and learn from my mistakes. The next time your sewing machine thread bunches up refer to this checklist.
Hopefully, these tips will help you troubleshoot and fix the issue quickly so you can keep the creative juices flowing and keep on sewing!
If you are a sewing beginner, perhaps you tackled your sewing project too soon. Don't despair!
This FREE ebook will help guide you on your way to sewing success!
If You Enjoy Understanding How Tools Work
If you like figuring out why things behave the way they do, you may also enjoy my crochet resources, where I focus on clear construction, stitch behavior, and troubleshooting common issues.

Thank you
I sincerely appreciate you visiting my blog! By sharing my content and/or making a purchase you are making it possible for me to continue producing and sharing free content for everyone to enjoy. Your support is amazing!


Thank you, thank you, thank you!
I was almost finished a project, and started experiencing bunching of thread under my fabric. I promptly Googled "sewing machine - thread collecting under fabric", found your web page and now know that there is such a thing as "birdnesting". You learn something new every day, ha, ha.
I've been sewing for decades, and never had to re-adjust the thread tension during a project - but it appears that this is something that does happen. My machine is working like a charm now.
You are the best. Thank you so much for your tip!
Stay healthy and stay safe,
Linda (from Gatineau, Québec, Canada)
You are so very welcome Linda!
I am so glad that this little article helped you - that's exactly why I created it. My thread kept bunching up and I couldn't figure out why. So, I did my research and started keeping track of all the possible solutions. I figured I should share it with the world so that others could benefit. 🙂
Best wishes,
RaeLynn
Thank you for this. I went through your steps and turns out the thread had come out of the arm that goes up and down. I didn’t even notice! Thank you, you saved from a trip to a repair shop!
Ila,
So glad I could help! 🙂
Best wishes,
RaeLynn
On vintage machines, I see a lot of people forget to oil the stitch adjuster parts and feed dog parts. Just as important as making sure your bobbin is in right (it's easy to put the bobbin in wrong) is making sure the feed dogs move smoothly. When feed dogs do not move right, a bobbin area birds nest will happen. Another great tip before adjusting bobbin tension is to use waxed dental floss to clean the bobbin tension parts.
Hi Josey,
Thanks so much for those wonderful tips! I'll be sure to add them when I do an update on this post. 🙂
Sincere thanks,
RaeLynn
This is such a great tutorial. I Love your ideas very well explain.
Hi Aman,
Thank you so much! I do try very hard to put together a good tutorial. It is my goal to help as best as I can and if this tutorial does that then I am very happy. 🙂
Sincerely,
RaeLynn
I use a small scrap of fabric to start sewing on before and after the seam, continuously. This also saves thread. I believe it's called a spider.
Hi Evelyn,
The scrap of fabric is a special one called a spider? I'll take a look into it. Thank you!
Sincerely,
RaeLynn
This was so helpful! Turns out that I had been leaving the presser foot up when re-threading and had no idea! Thank you!
I am so glad this post helped you resolve your problem! I hope it is nothing but happy sewing from here on out! 🙂
Sincerely,
RaeLynn
Thanks for the very informative Hints! My 50 year old White sews so much better than my Costco Brothers. Birdnesting is often a problem. I think you covered it all.
Hi Margaret,
Thanks so much! I am glad you found this article thorough and hope it helps you get rid of those birdnesting issues!
Best wishes,
RaeLynn
Thank you sew much for these tips. I have a retro Singer. Best I have been able to figure out it is a Class 99, almost 100 years old. It has been bunching thread like crazy on the bottom of the stitch, driving me batty. Thanks to your tips, which I had to do every single one of them, I was able to get the best looking stitch since I have had it!
Hi there,
I am so glad this article helped you! Especially with an antique sewing machine. I bet it's gorgeous!
Best wishes,
RaeLynn
I have made a couple hundred masks since the start of Covid for friends, family & to donate. I finally stopped making them because I thought I had put too many miles on my old machine! But yesterday my daughter asked me to make a couple of masks for my son in law. She said the first ones that I had started out making were the only ones that really worked for him. They were the kind with the pleats, that I absolutely HATED making! I stopped with those & went to the cone type rather early on, and although I had sent them dozens, he said they just didn't work for him like the first ones I had made. I got the machine out of the closet & spent the better part of yesterday trying to fulfill my daughter's request. I am 60ish & she is nearly 30, but I just can't stand to disappoint my girl. So...I got on the internet. Started looking for anything I could find that could help me get this old girl going again. Before I locked her up in the closet, I had actually followed all of the "home servicing" tricks that I could find to make her feel better, but nothing really helped. She could only get out a couple of stitches before she would choke & puke. Knots everywhere. Above & below. I thought maybe just resting in the closet for a while might help? It didn't. I know she needs a good physical, but the closest place that services is 45 minutes away, & they are terribly backed up. So last night, try as I might, she just kept on making the birds nests. I was one deep cleansing breath away from putting the old gal into the trash bin when my husband suggested I google - just one more time - so I did. I found your post on "What to do...& how to fix it". I followed every single suggestion. I changed to a better thread, cleaned everything, etc. I actually got a mask completed, but then half way thru the 2nd mask, birds nests again. I got up from the machine & as I started getting her ready for her final dismantle, I noticed that the thread from the upper spool had dropped off of the UPTAKE LEVER!!! OMG! I rethreaded the machine & she was up & running once again! I kept my eye on that thread, & noticed that every few minutes this was happening! All I had to do was gently put it back in place & we were working as a Team again!!! Who knew? She is still in serious need of some deep maintenance, but you saved her from premature demise. AND, you helped me to not have to tell my daughter, "I can't", when I have strived to show her all of her life that "WE CAN!" I know I could've just said, "Thank you for your help", but this was just really serious stuff for me, & I wanted you to know how important it was for ALL of us that YOU took the time to write all this stuff out in hopes of helping us. It means SO much to so many people that just google, get what they need & move on without ever a mention of a thank you. Please keep doing what you do! And THANK YOU!
I have a brand new singer machine that I got from Walmart. I have only used it once since I had an indecent with the foot pedal getting damaged and me having to purchase a new one. I finally got one and was going to try to finish a project but now I am getting the bunching when I start sewing. I am going to try your checklist and see if that makes a difference. The only thing I haven't really tried is to hang on to the threads for the first couple stitches. Is there anything else I might need to try?
Hi Sherrie,
Make sure you go through the checklist and even some of the suggestions in the comments (I need to do an update to add them) after that you may want to consider checking with the manufacturer of the sewing machine to see if there isn't some internal issue they need to take a look at.
I wish you the very best and truly hope that something on this list helps!
Best wishes,
RaeLynn
I’e been sewing on and off with different machines and for the last ~20? years I’ve had a Janome serger where before I had Bernina, brother, and elna machines... anywho, today I was doing a small (really small) project adding “markers” to washcloths and suddenly the thing started “nesting”... so I check the bobbin area for dust, check the tension, re-thread and continue and suddenly it bunches up again, but with a distinctive click from the bobbin area under the foot.... I start inspecting everything and notice that the thread had also bunched up at the needle eye (“roped”? one strand broke or something and kept from going through the eye). So I cut the thread again and re-threaded and paid attention to the needle when I see it happening again, so I slow down (very slow) and notice to my relief that the broken thread part is going through the eye and I was able to finish the last part without Any more incidents.
My question is how or why do these “ropings” occur and how can I prevent them? Could the thread bee either too old or too cheap? I got it at Walmart no idea when (but probably about 15 years ago :/ hmmm ) I do keep it dry and lint-free though...
Hi there,
Every time I have had thread break in the way you've described it turned out to be because I used very old thread from my grandmother. I would highly suggest purchasing new yarn and trying again. If it continues, then I would suggest maybe a tension issue (too tight perhaps?). This may be something to look into!
I hope that helps!
Best wishes,
RaeLynn
Thank you for these tips. used to sew industrially for many years. It ruined my neck and spine, so I no longer sew by machine. Only hand-sew now. I make face masks now for those In need. I am very frugal, raveling thread from garments and reusing it and this material for the masks. But once in a while I get bird’s nests, too. It got me thinking that this may be due to my own tension when pulling the thread to tighten the stitches, or just old thread. This was very helpful information. Who knows how old these garments are. Haha. Anyway, I enjoyed your post and these comments.
Hi Carol,
I thoroughly enjoyed reading your comment. It never occurred to me that one could get bird nesting while hand sewing. It just goes to show you that you can learn something every day! lol. I am very glad you were still able to find this post useful despite the fact that you no longer use a sewing machine -- they can certainly be hard on the body.
I applaud your efforts during this hard time to help other in need. I am sure they are very grateful for your kindness.
Blessings,
RaeLynn
So I had problems with the thread bunching up, but only at the beginning of a seam. I went through your checklist and found the solution.
I hadn't been holding the thread out of the way for the first few stitches.... Thank you for helping me figure it out!
Hi Ariachnae,
You are so very welcome! Glad I could help!
Best wishes,
RaeLynn
In reading many comments I have learned that many readers have a collection of sewing notions from grandmothers or other family members that they don’t know what to do with. I think a sewing wreath would be a sweet decoration using items like old spoils of thread, bobbins, and other small notions. Anyone have anything like that already to share?
Vicki,
I have to say that is absolutely a FABULOUS idea! I love it! I am not a great crafter other than crochet, sewing, and knitting - but I think I really want to give this idea a try.
Thanks so much!
Best wishes,
RaeLynn
Great article, thank you for the tips. I, too, have found that old threads are a big problem in sewing. I have had any issues using threads passed down to me from my grandmother. Oh well, time to go shopping for sewing supplies I guess. Thank you again, Suzanne
Hi Suzanne,
Oh yes! I have had the same issue! My grandmother gave me a ton of threads - but I learned they actually wear out and break easily and can cause bunching up issues. Since then - I only use them for practice. I appreciate the thought grandma, but only fresh threads for me! lol
Best wishes,
RaeLynn
Another often overlooked point that needs oiling is the feed dog arm and stitch adjuster movements. Even on a newer machine parts tend to gum up if not used. The feed dog arm moves on a roller bearing when the machine actuates the feed dogs to go forward, backward, up and down. If these motions are not smooth, everyone starts messing with the bobbin. Bobbins are an easy check and fix, but before you adjust the lower tension, make sure the parts on the motor end and underneath for the feed dog are oiled and moving right.
Hi Joe,
This is a fabulous suggestion! Thank you so much for adding it to this list. I am sure everyone appreciate all the tips they can get!
Best wishes,
RaeLynn
I got nesting in the bottom a lot, and found 3 causes that cleared up once I changed my habits.
1. Slow down when winding your bobbin. I had much more nesting when winding them at high speed, as a lot of the time it wasn’t smooth.
2. If your machine has a “cut” feature, use it. The bobbin thread is cut low so there is no extra to get bound up.
3. When starting, start 3 stitches in, back stitch to edge, then sew. I was using the automatic “fill feature, and it often caught up.
I worked at a sewing factory right out of high school making big lifting slings for cranes and such (not very glamorous). We used big giant ancient looking industrial sewing machines that were very intimidating at first. I spent many frustrated days switching around on machines and hunting up the mechanic because no matter what I did the bobbin thread would nest. It would happen every time I cut the threads and started a new seam. I finally learned while sewing on my own machine at home one weekend that all my problems were caused from yanking the thread out way to fast when finished with a seam causing the bobbin to get spinning too fast and then it would stop and spin backwards causing the thread to get way too loose on the bobbin, especially when it’s almost empty. If you pull your threads out in a slow smooth motion it won’t unwind and keep that bobbin running smooth all the way to the end. This is a very easy fix so hopefully I can help people not have the frustration I experienced.?
Hi Kindy,
Thanks for the great tip! Although I have never experienced this - I think I always pull mine out slowly for fear of wasting thread (I know, it's silly - ha ha), but this may be the issue for others and I appreciate you letting know. Also, super cool that you worked with large industrial sewing machines! I would be so intimidated. LOL.
Take care,
RaeLynn
Hello, I have had the same problem with nesting. Thanks for the tips.
I have a Singer CG-590 commercial sewing machine and a 1951 (which happens to be the year I was born lol) Singer in a cabinet.
I have been sewing on the CG-590 and all of a sudden, my needle keeps breaking or bending and the thread keeps breaking. Do you or any of your readers have any possibilities that I can try to locate the problem?
Thanks in advance for any ideas I can try.
Hi Karen,
Gosh I really wish I knew the answer to this! I know the needles can bend or break if the needle is dull. Have you tried changing out your needles frequently?
Sincerely,
RaeLynn
As one who's been sewing for over 60 years, (Yeah, I'm really old) I've experienced this problem myself - more than a few times! I've learned that (unfortunately) there can be many reasons for it; most of them already discussed above. But there is another that I know can cause it. Of all my machines, some very new, some from the 90's and a few vintage models as well, most have more than one needle plate (the flat piece of metal that goes around the feed dogs). One plate has a wide needle hole for zig-zag sewing and one has a small round hole for straight stitching. The best ones have a metal insert IN the needle plate, which can be quickly and easily reversed, end to end, to switch back and forth. Others require that the whole plate be removed and replaced with another. Until the mid '60's I had sewn with a straight stitch machine only and didn't know there were different plates. When I got my first Kenmore zig-zag in '69, it came with an insert as I described.
SO, why am I boring you with all of this detail? Because, I never bothered to switch plates from zig-zag mode and couldn't figure out why I was getting nests and fabric stuck. I didn't know to switch the insert! When you use a single hole plate for straight stitching, you are MUCH less likely to get fabric snagged and/or thread nests. The hole is too small to pull fabric into the machine. And as others mentioned, leaving your threads long enough before cutting them off is good to do, so you can hold both threads as you begin sew again. But the best technique I've found is what Cheryl Taylor said: "Leaders and Plugs" I use leaders - a scrap of thread folded over at least once or twice and put under the presser foot just before your good fabric. Stitching on the leader first 'pulls' the fabric along behind it and eliminates thread nests. This often eliminates the need to hold threads as well. It's wonderful if you're using a very delicate fabric such as organza, and MAKE SURE you are using the single hole needle plate that hopefully came with your machine. If not, try looking for one on the internet - they really make a difference!
One last little tidbit: I have a student just learning to sew, who became frustrated every time she stopped stitching, lifted the presser foot and tried to pull out a length of thread before cutting. Her threads wouldn't budge! What she didn't realize was her needle was NOT all the way up. If you've ever had this problem, watch the thread lifter lever. If your thread won't pull out, hand-turn the wheel toward you a little until you can see the lever is up as far as it will go. Then you'll have no problem drawing out your threads.
I lied! - another bit: Whenever you have anything difficult to sew, be it organza or elastic, straight stitch or zig-zag, laying a piece of tissue paper beneath it makes the process much easier, and it tears away very easily! Fold it over your stitching line, score it with a fingernail and zip! it comes right off.
Keep on sewing!!
Hi Grandma G,
Thank so much for your wonderful and insightful comment. Wow, over 60 years of sewing experience - that's AMAZING!!!
Your mention of different plates for straight and zigzag stitches is very interesting. I will have to check into it as I believe I always use only one plate! I will do some Investigating to see if I have a second plate. I am pretty are that I don't have an insert.
I am very curious about the "leaders" idea and am very excited to test it out! I will certainly update this post if I find it is in fact helpful.
Sincere thanks,
RaeLynn