


INTRODUCING
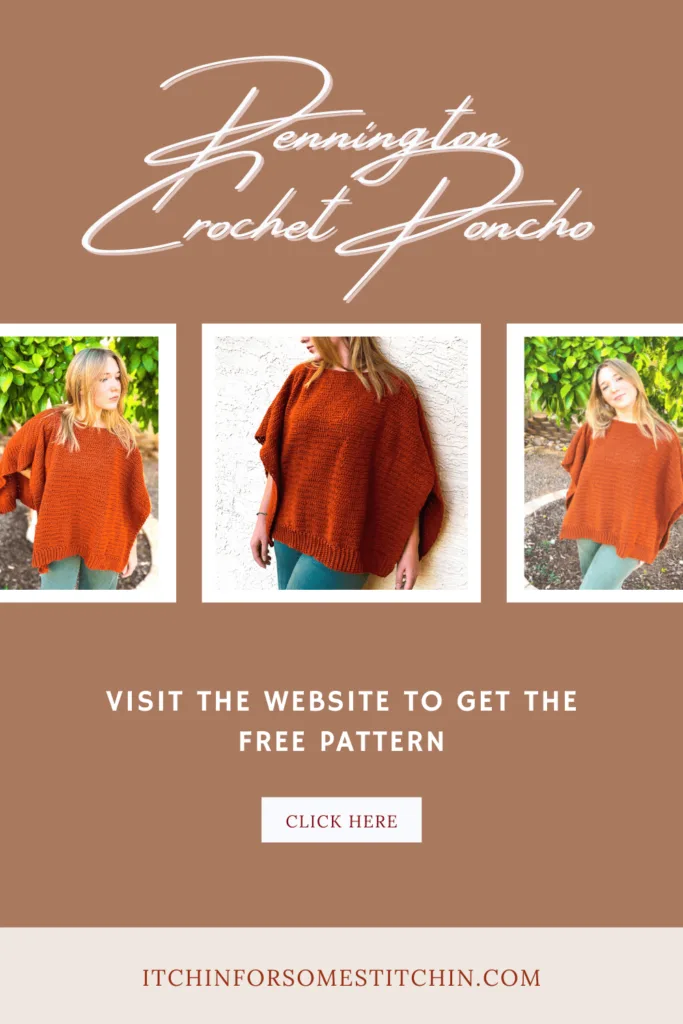
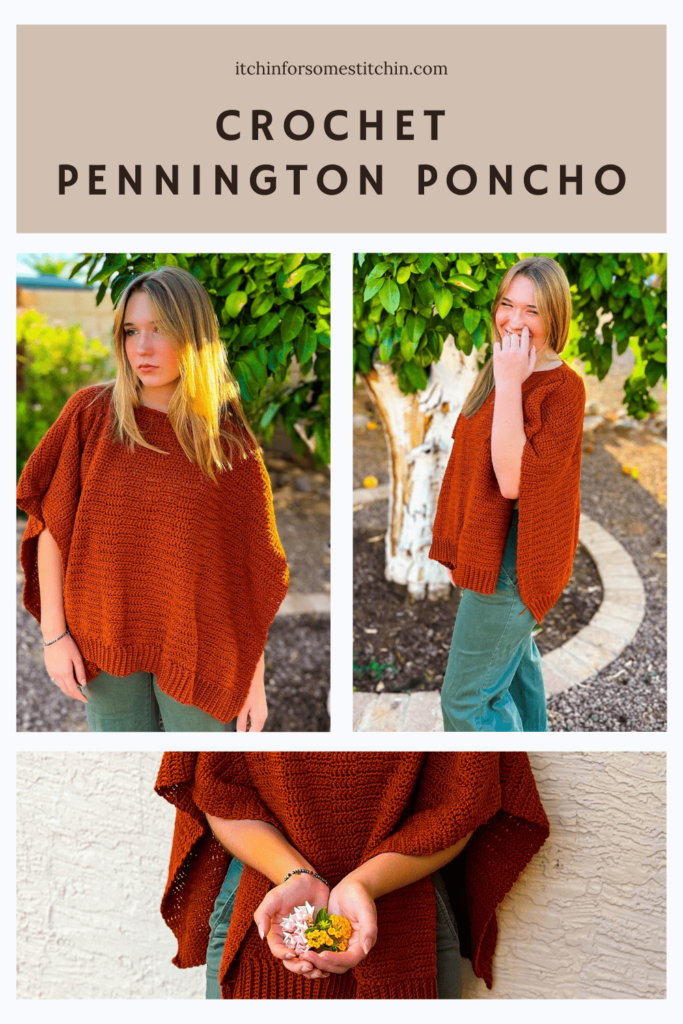
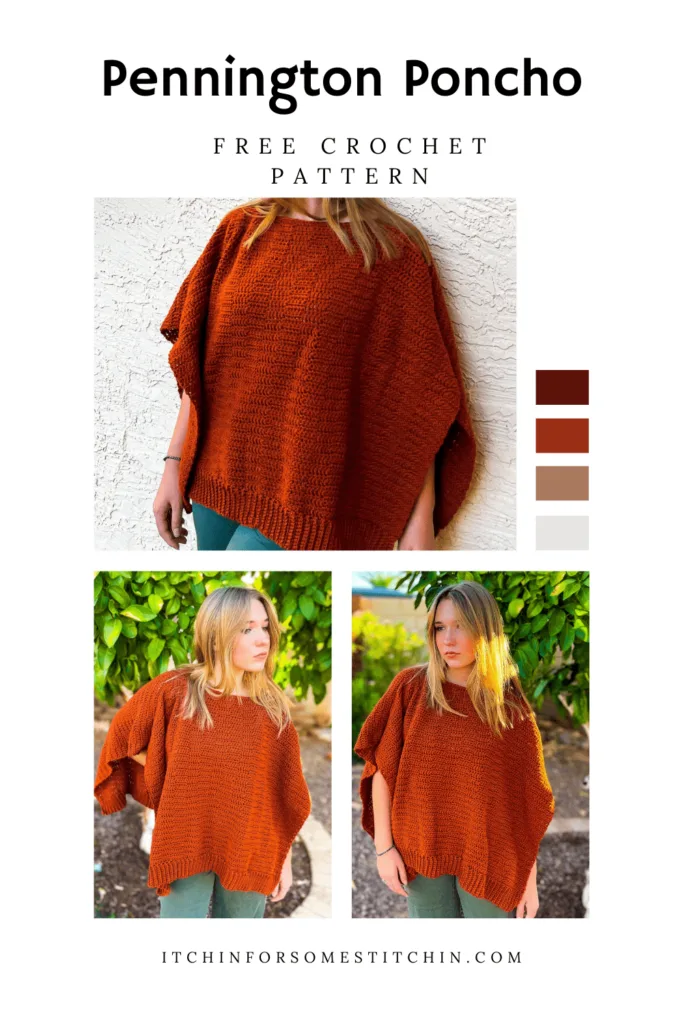
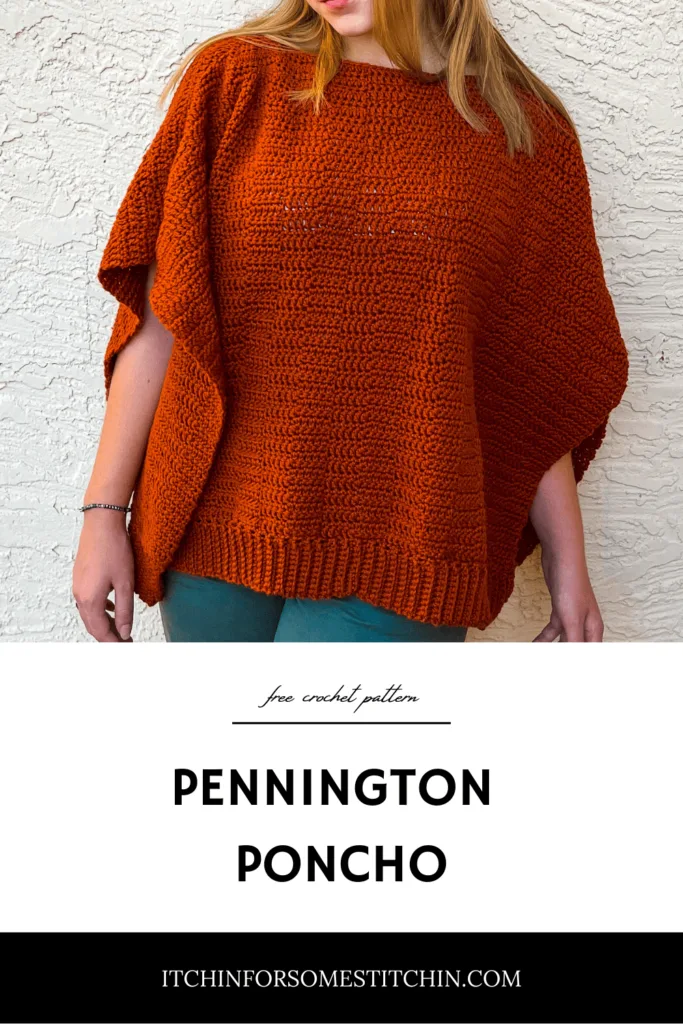
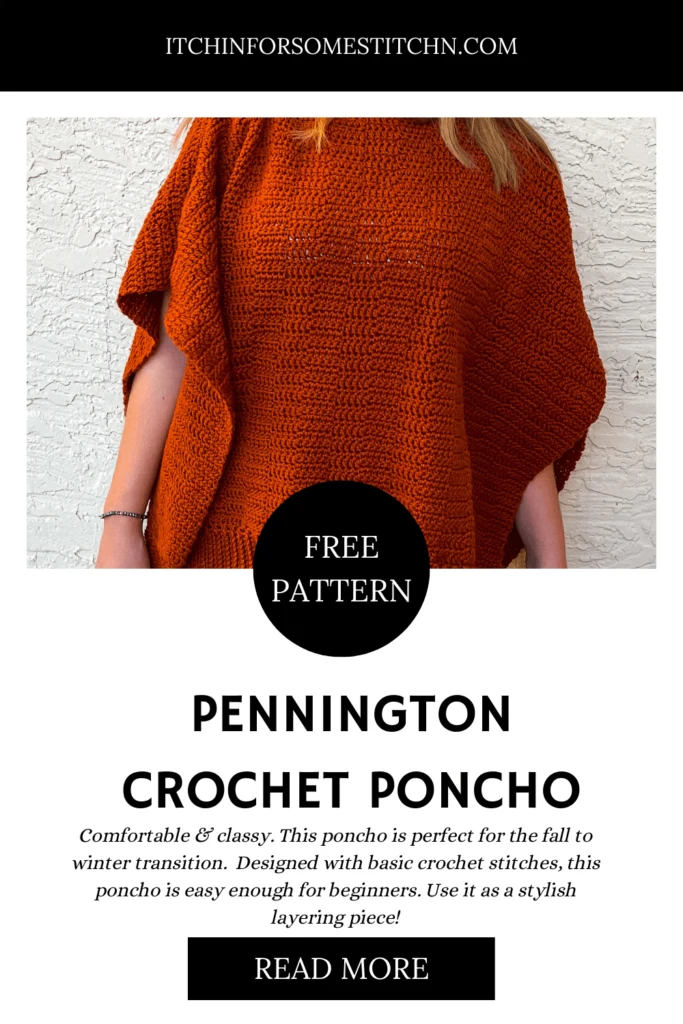
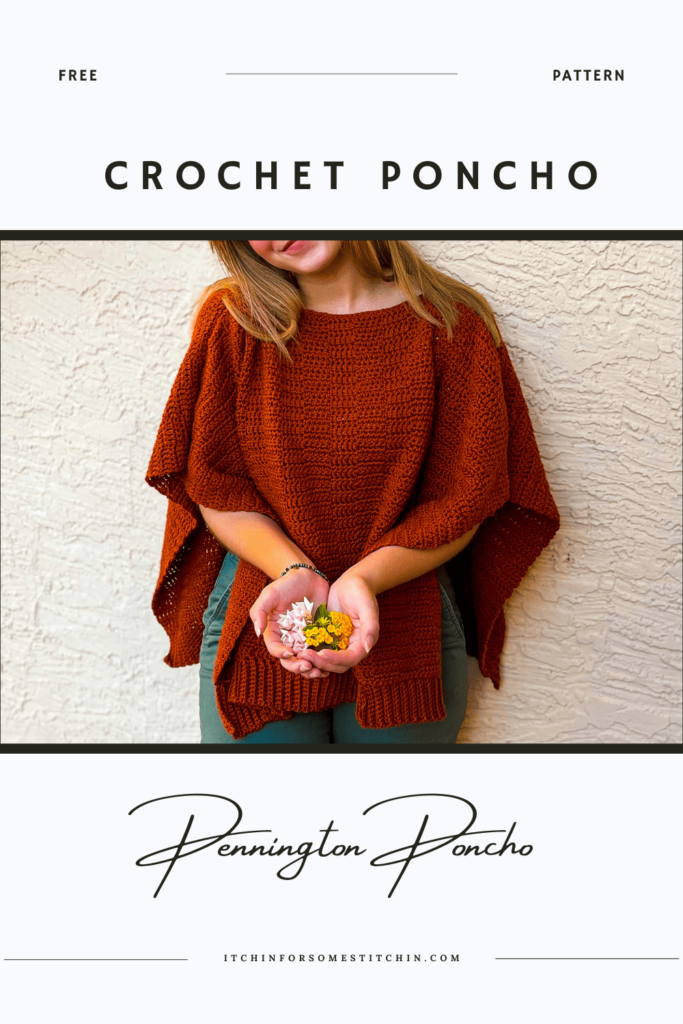
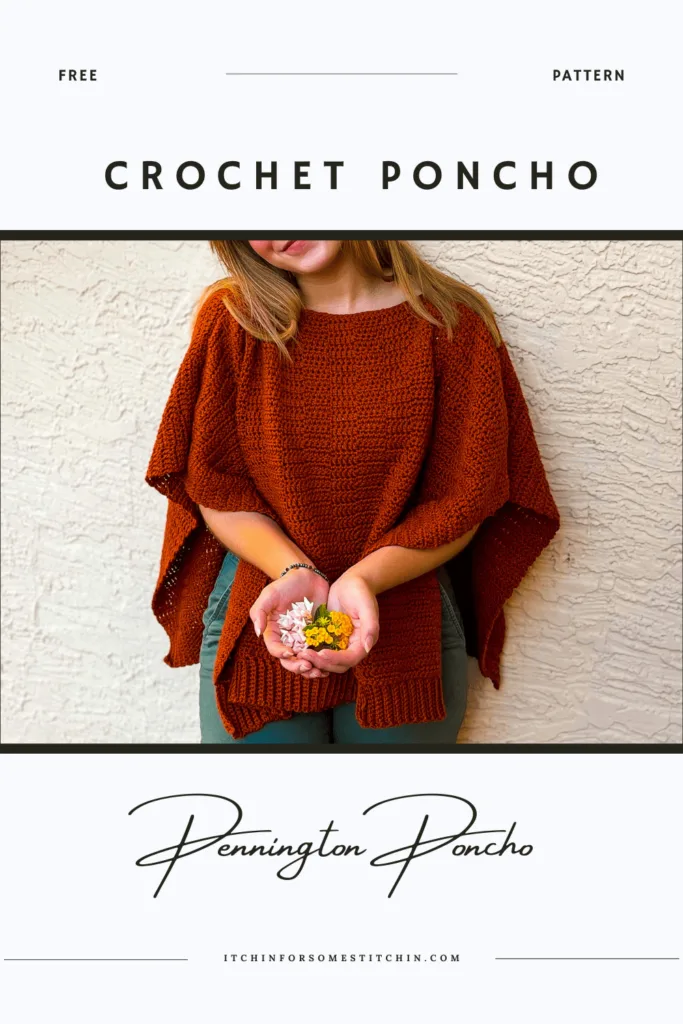
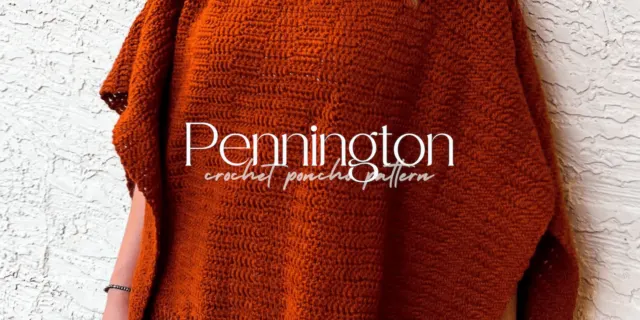
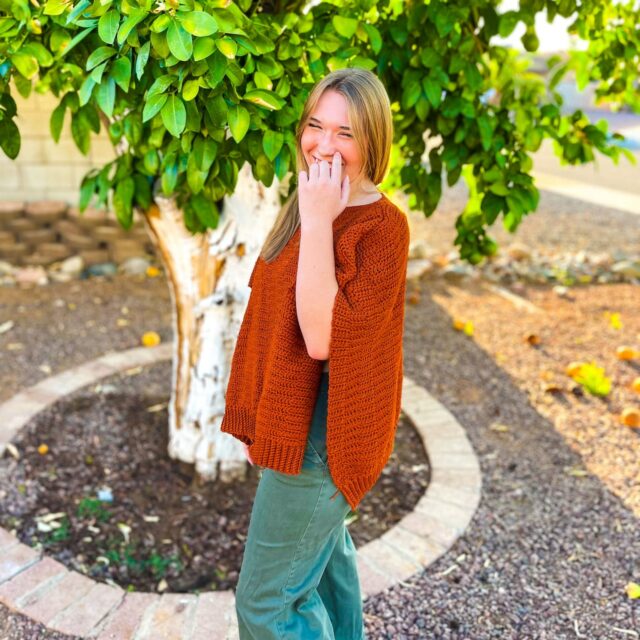
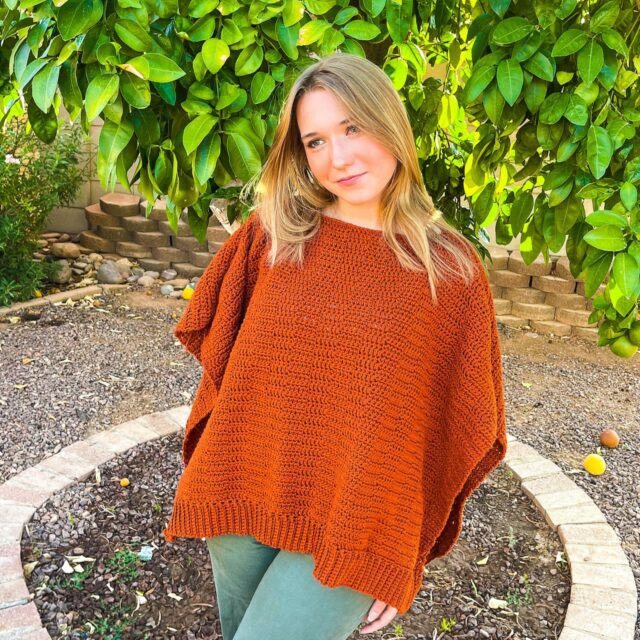
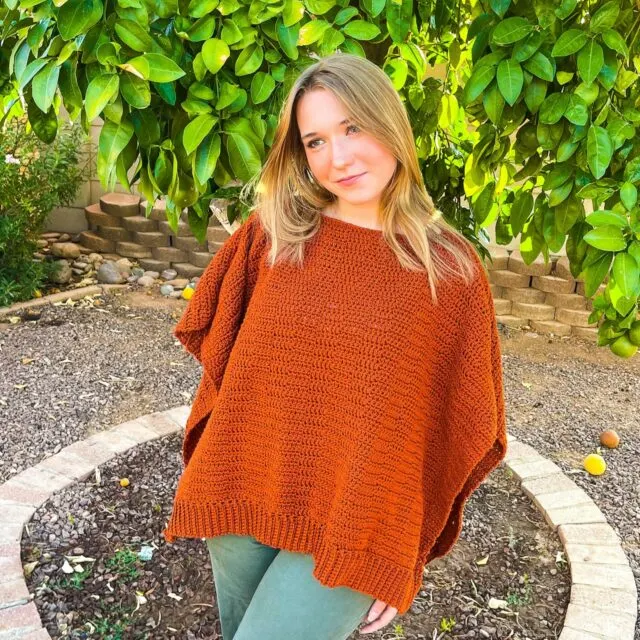
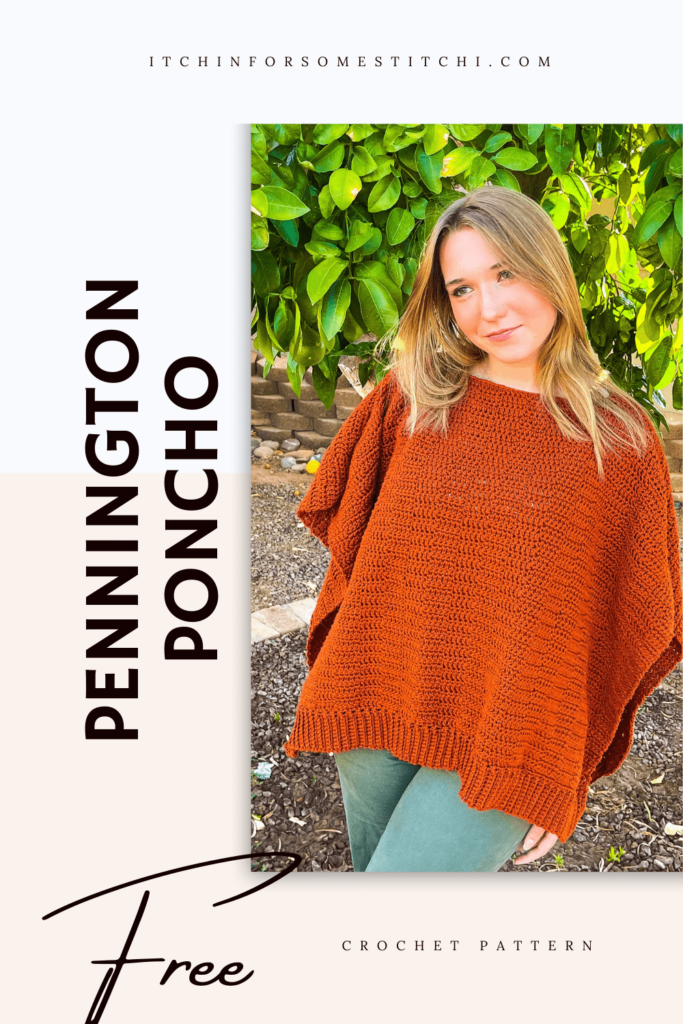
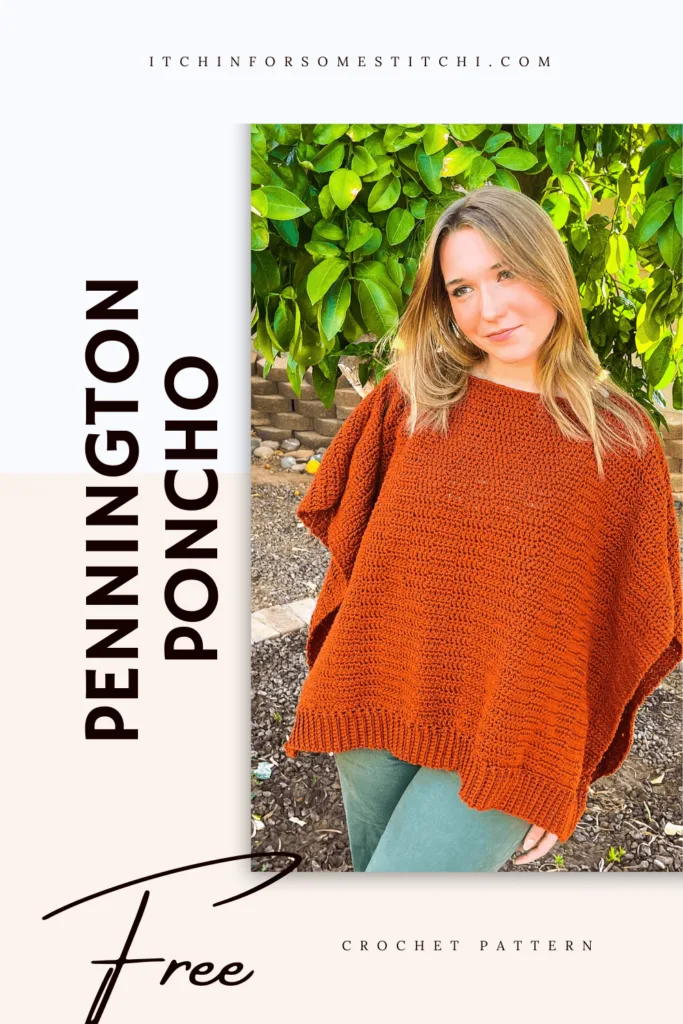
The Pennington Poncho
Comfortable and classy. The Pennington Poncho is perfect for the fall to winter transitional season. Use it as a layering piece or simply wear it for style! Designed using basic crochet stitches with no frills, this poncho is easy enough for beginners. Crocheters of all levels will love this one!
About Pennington
Difficulty Level
This is a level 2 – Advanced Beginner


Gauge
15 stitches and 12 rows = 4 x 4-inches in pattern (see instructions below) using G/6 4.25mm hook
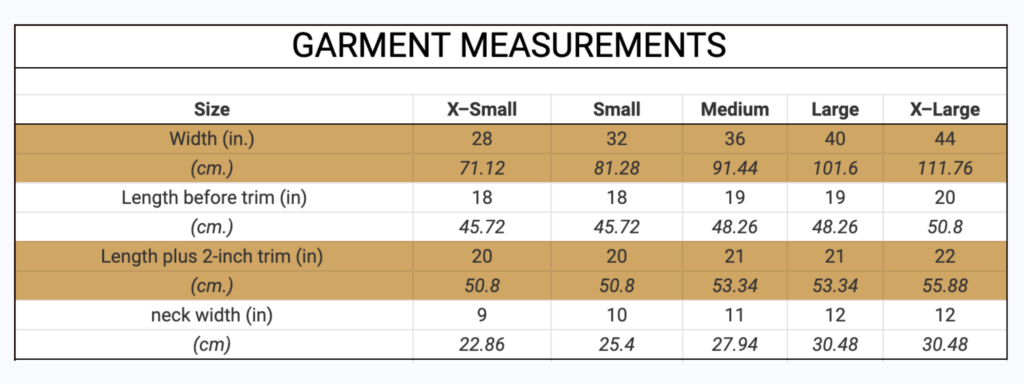
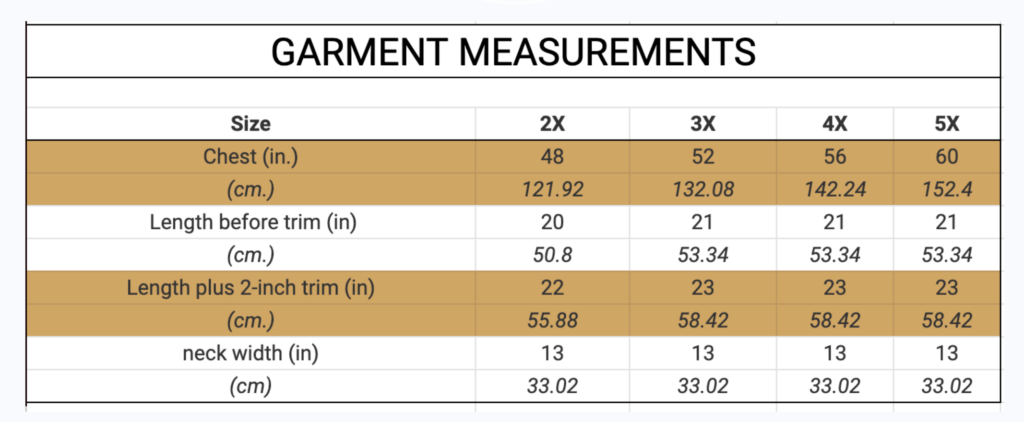
Finished Dimensions/Sizing
Pattern is made based on the Crafty Yarn Council’s Women Size Standards for each size listed in the charts below:
- All measurements are approximate, measured flat pre-wear, and are provided in inches and centimeters and designed to fit women’s sizes according to the Garment Measurements Charts below.
- Please be sure to take your own body measurements and let those measurements serve as your guide. If you measure between sizes, please use the instructions for the next size up.
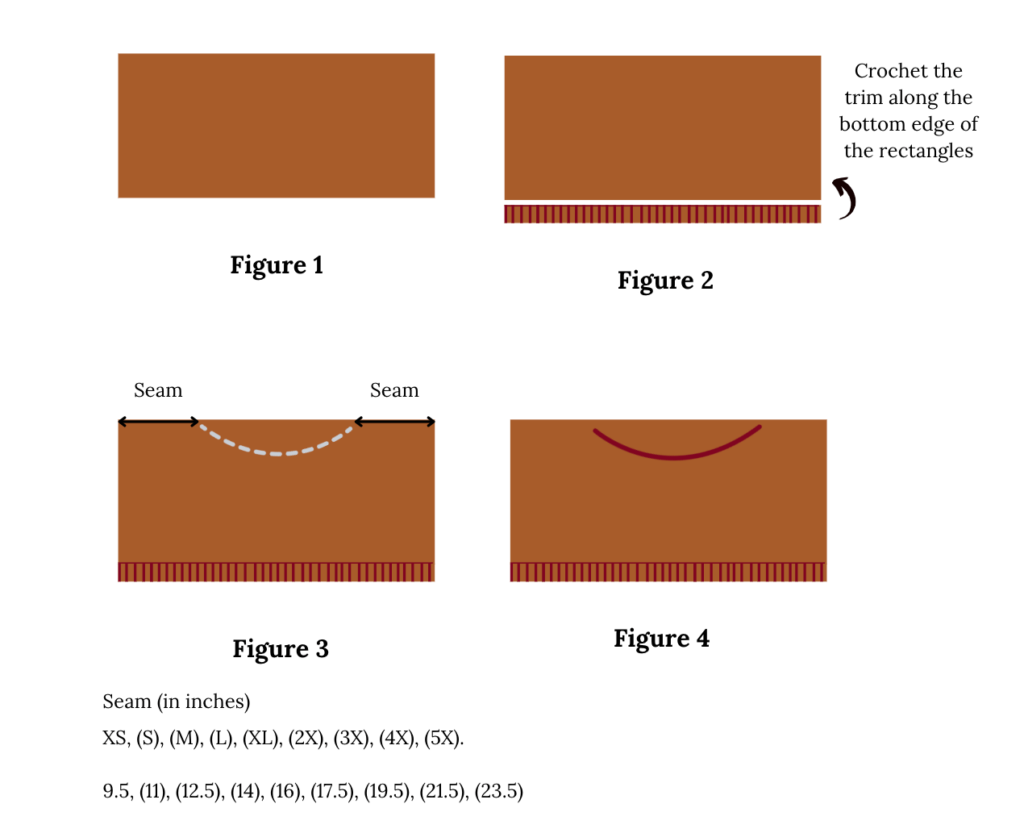
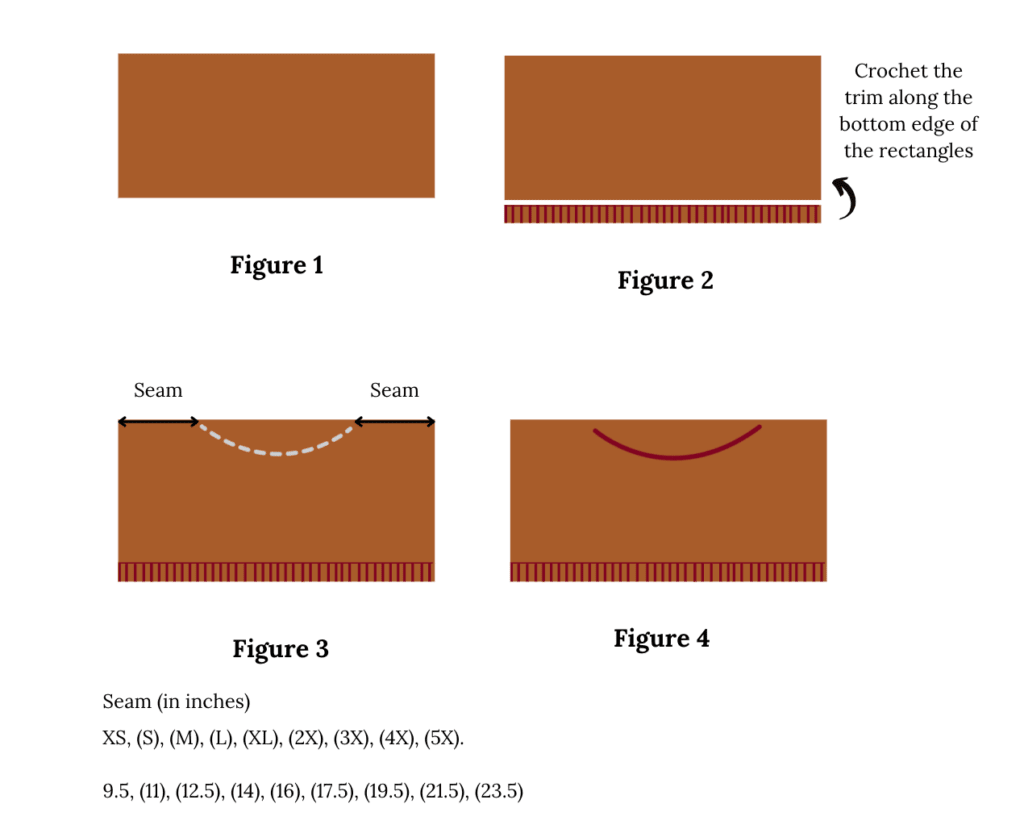
Construction (See Schematic Below)
- This pattern is constructed by crocheting two rectangles. (See figure 1)
- Trim is added to the bottom of each rectangle. (See Figure 2)
- The two rectangles are seamed together leaving a hole for the head. (See figure 3)
- Trim is added around the neckline. (See figure 4).
Abbreviations
This pattern is written in US terminology.
- Stitch/es (st/sts)
- Round/s (rnd/rnds)
- Chain stitch (ch)
- Slip stitch (slp-st)
- Single crochet (sc)
- Double crochet (dc)
- Back Post Only (BPO)
- Back Loop Only (BLO)
- *____* Repeat indicated instructions
Recommended Yarn
KnitPicks/We Crochet Comfy Worsted Weight, 75% Pima Cotton, 25% Acrylic, in color way Copper, 109 yards / 50 grams.
Total yardage: 1049 yds / 959.2 m to 2586 yds / 23651m (*provided requirements are estimates only)
Extra – small (XS) – 10 balls = 1049yds / 959.2m
Small (S) – 11 balls = 1199yds / 1096.4m
Medium (M) – 13 balls = 1417yds / 1296m
Large (L) – 15 balls = 1574yds / 1439.3m
Extra – large (XL) – 18 balls = 1814yds / 1659m
2X – 19 balls = 1979yds / 1810m
3X – 21 balls = 2241yds / 2049.2m
4X – 23 balls = 2413yds / 2206.4m
5X – 24 balls = 2586yds / 2365m
US/UK Conversion
US terminology UK terminology
Slip stitch (slp-st) = Slip stitch (ss)
Single crochet (sc) = Double crochet (dc)
Double crochet (dc) = Treble crochet (tr)
Yarn Alternatives
worsted weight yarn
Other Materials
- Crochet Hook size G/6 4.25mm or whatever hook is necessary to obtain the correct gauge.
- Measuring tape
- Stitch markers (optional)
- Scissors
- Tapestry needle for weaving in ends
Inspiration
This pattern was designed with one thing in mind – simplicity. This one is as simple as it gets! It’s just two large rectangles, a ribbed hem, and a bit of seaming to create a fashionable layering piece that’s just perfect for the fall to winter transition months. Three cheers for super stylish simplicity!

Prefer a PDF?
Get it in these places:
This pattern is available as a large print, ad-free, printable PDF pattern.
Join the Newsletter!
Subscribe to get our latest content by email & receive a Ravelry coupon code for a FREE crochet PDF pattern of your choice!
Yarn Details
For the Pennington Poncho I wanted a soft yarn that was lightweight enough for some warmer weather, but also heavy enough to use as a fall to winter layering piece.
I chose We Crochet Comfy because it had exactly the characteristics I was looking for.
It’s a medium 4 worsted weight yarn, but its fiber content makes it a bit thinner and lighter than other worsted weights.

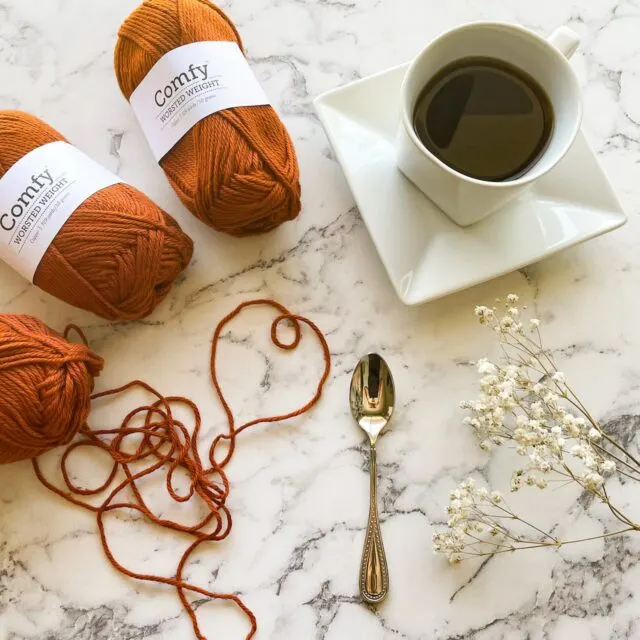
Plus, although I had never worked with it before, I knew it was super soft because I felt some that a friend of mine had.
I remember I liked it so much that I couldn’t wait to test it out!
As a bonus, it comes in a large array of colors and I found the perfect fall color – copper.
You can purchase it via my affiliate link below.
Other Patterns I Love & You Will too!
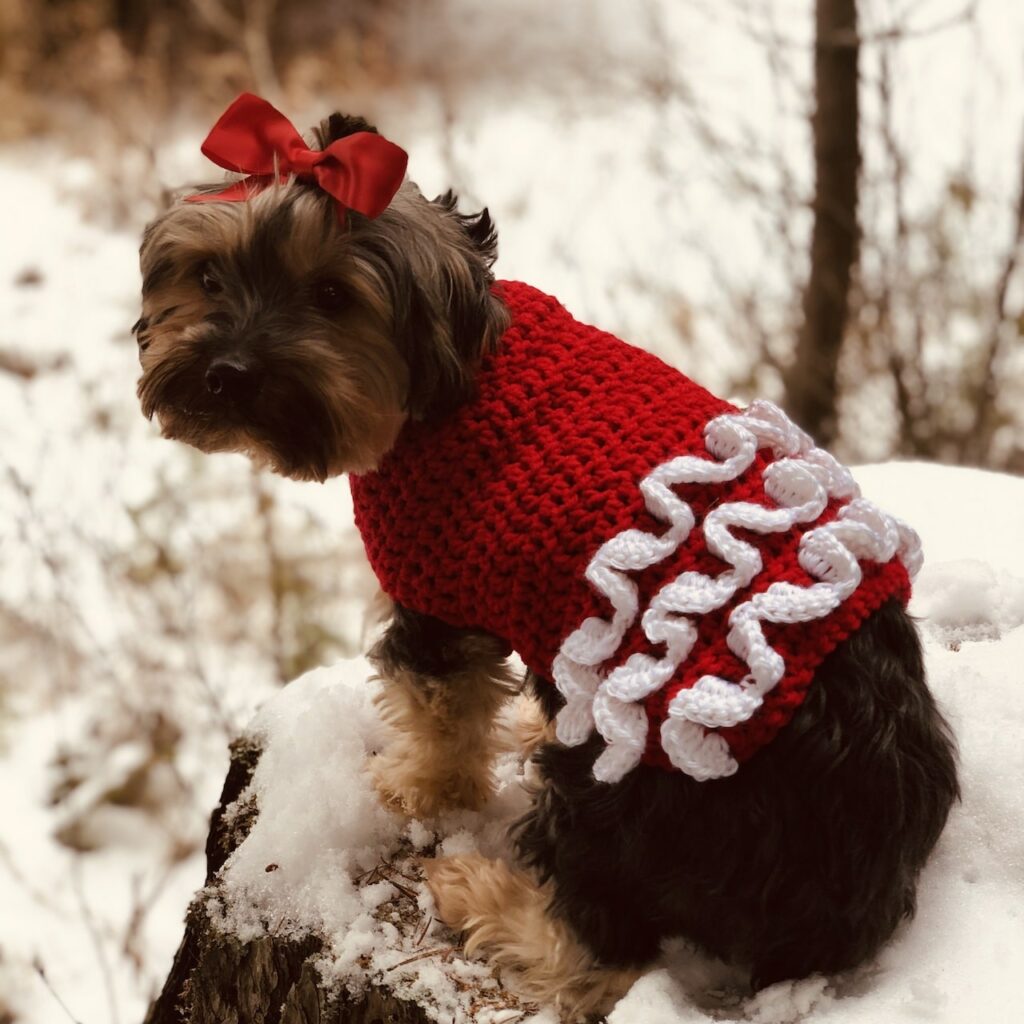
Nessa’s Ruffle Butt Dog Sweater

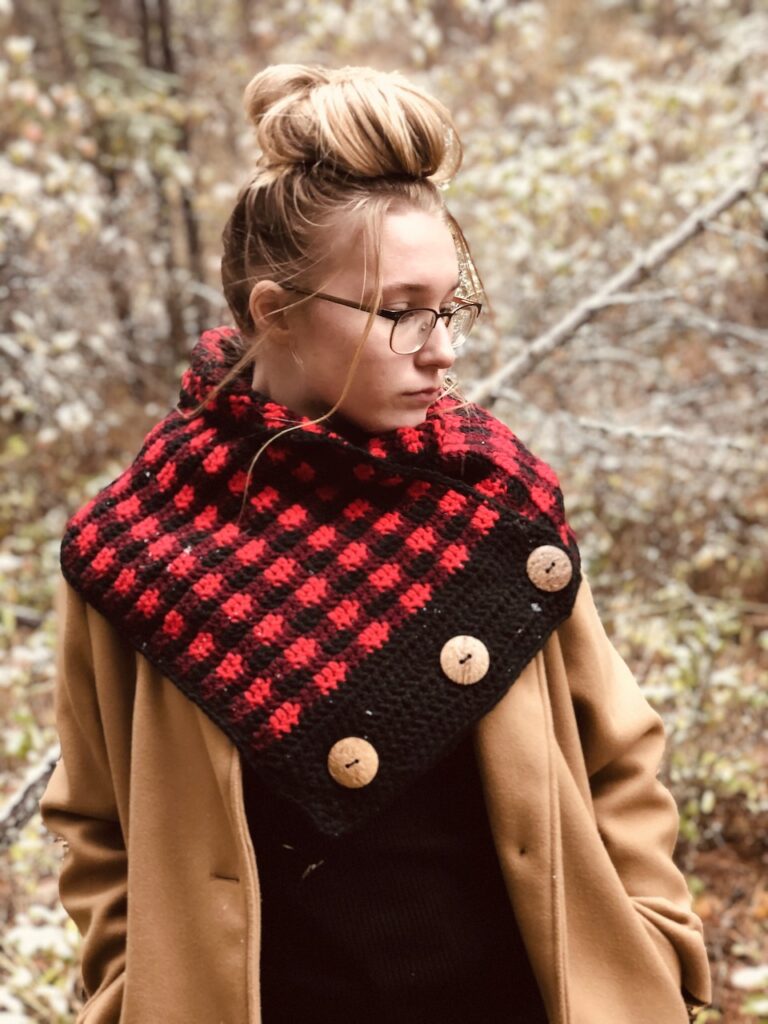
Simply Chic Buffalo Plaid Cowl

You’ll Always Be in My Heart Beanie

Let’s Get Crafty!
Looking for lots of crafty inspiration, tips, tutorials, and a great crochet community?
Join my Facebook group!
Pattern Notes:
Read all pattern notes, instructions, and other provided details carefully before starting the project to make sure you understand everything. It could save you hours & a lot of headaches!
- Make a swatch that measures at least 10 x 10 cm / 4 x 4 inches using the stitch provided under the Gauge Section. If your swatch matches the gauge, then you are all set to start the project. If the gauge is wrong, you might need to change your crochet hook – increase your hook size if your stitches are smaller & decrease your hook size if your stitches are larger.
- All measurements given are unblocked and measured flat pre-wear and pre-seaming as fabric pieces may stretch during/after blocking, wearing, and seaming.
- Provided measurements are as exact as possible, but are given as approximates. This is because yarn variances, crochet tension & individual technique might give variations in the result, which changes from person to person.
- The same size poncho may fit differently depending on each individual due to differences in individual body measurements.
- All color changes in this pattern are made using the slip-stitch (i.e. add the new yarn color with a slip-stitch).
- Instructions are given for the smallest size, with larger sizes in parentheses ( ).
- Stitch counts are given in [ ] at the end of each row. If no stitch count is given, then the count is the same as the previous row.
- All seaming is done using the whip stitch. You can find a tutorial HERE.
- Care Instructions: Hand wash & lay flat to dry or follow instructions on the yarn label.
Love Pinterest?
I do!
PIN this pattern to your Pinterest boards for later.
You can also follow all my boards!
**THIS IS AN ORIGINAL PATTERN. Please see my Copyright Statement for details.
Instructions
Main body (make 2)
Ch 107, (122), (137), (152), (167), (182), (197), (212), (227)
Row 1: Dc in the 4th ch from the hook (counts as a dc), dc in the next 4 chs, *sc in the next 5 chs, dc in the next 5 chs”. Repeat from * to * to end. [105, (120), (135), (150), (165), (180), (195), (210), (225)].
NOTE: Row 2 depends on whether row 1 ended with 5 dc or 5 sc. Please follow the appropriate row 2 instructions.
Row 2 (if row 1 ended with 5 dc): Ch 1 does not count as a st), turn work, *sc in the next 5 dc, dc in the next 5 sc*. Repeat from * to * to end. [105, (120), (135), (150), (165), (180), (195), (210), (225)]
Row 2 (if row 1 ended with 5 sc): Ch 2 (does not count as a st), turn work, *dc in the next 5 sc, sc in the next 5 dc*. Repeat from * to * to end.
Row 3 (if row 2 ended with 5 dc): Ch 1( does not count as a st), turn work, *sc in the next 5 dc, dc in the next 5 sc*. Repeat from * to * to end. [105, (120), (135), (150), (165), (180), (195), (210), (225)].
Row 3 (if row 2 ended with 5 sc): Ch 2 does not count as a st), turn work, *dc in the next 5 sc, sc in the next 5 dc*. Repeat from * to * to end. [105, (120), (135), (150), (165), (180), (195), (210), (225)].
Repeat the appropriate rows 2 & 3 – placing a sc into each dc on the previous row and placing a dc into each sc on the previous row – for [54, (54), (57), (57), (60), (60), (63), (63), (63)] rows which is approximately [18 (18), (19), (19), (20), (20), (21), (21), (21)] inches.
Bind off & Weave in ends
Ribbed Trim
Attach yarn with a slp-st at one end of the bottom edge of each rectangle.
Row 1: Ch 11, turn work, sc in the bpo of the 2nd ch from the hook and in each ch across working towards the bottom edge of the rectangle, slp-st to next st on the bottom edge of the rectangle, slp-st into the next st on the bottom edge of the rectangle.
NOTE: Be sure you have made a slp-st into 2 sts along the bottom edge of the rectangle.
Row 2: Ch 1, turn work * sc in blo of each st working towards the end of the trim.
Row 3: Ch 1, turn work, sc in the blo of each st across working towards the bottom edge of the rectangle, slp-st to next st on the bottom edge of the rectangle, slp-st into the next st on the bottom edge of the rectangle.
Repeat rows 2 and 3 all the way across the bottom edge of the rectangle to the end.
If you end with row 2, bind off and weave in ends.
If you end with row 3, you will only do one slp-st into the final st on the bottom edge of the rectangle instead of the normal two slp-sts. Bind off and weave in ends.
Neckline Trim
Attach yarn anywhere on the neckline with a slp-st, work 1 sc in each st around the neckline, slp-st to beginning slp-st to close.
Bind Off & Weave in Ends
Thank you for coming to my blog! By sharing my content and/or making a purchase you are making it possible for me to continue producing and sharing free content for everyone to enjoy. I sincerely appreciate your support!
Until next time… Happy Crocheting!


Please Share!
Virginia
Saturday 7th of October 2023
Can you please make this poncho PDF link work. The Shop Here button is not clickable. I touch it and nothing happens.
I need this poncho and a PDF version would be better than an ad version as your getting paid for the PDF. Please allow me to pay for the PFD ad free version.
Comment to my comment with a link that actually works and directs me to the paid PDF. I want to buy this. I am sure other people want to buy this but the Shop Here button is not working.
Itchin4Stitchin
Tuesday 10th of October 2023
Hi Virgina,
You poor thing! I got your message on the Penelope Raglan Tee as well. Both links should be fixed. When you add links in this platform you have to hit a small "apply" button and I either failed to do that or they didn't link properly. My sincerest apologies! Thank you so much for reaching out to let me know. Here is the direct link to the poncho: https://shop.itchinforsomestitchin.com/product/pennington-poncho-crochet-pattern/
Sincerely,
RaeLynn
Carolyn
Tuesday 13th of September 2022
How do you connect the front and back panels (shoulder seams)?
I love the sc/dc pattern!
Carolyn
Virginia
Saturday 7th of October 2023
@Carolyn, Seaming totural: I hope this helps! https://youtu.be/vfLaRS78YRM
Itchin4Stitchin
Tuesday 13th of September 2022
Hi Carolyn,
I am so thrilled that you like it! All seaming is done using the whip stitch. There is a link to video tutorial in the additional notes section. Let me know if you have any other questions.
Best wishes,
RaeLynn
Sherry
Thursday 1st of September 2022
Thank you! The Poncho looks perfect for the coming ( soon I hope!) weather.
Itchin4Stitchin
Thursday 1st of September 2022
Hi Sherry,
I am so glad you like it! :)
Sincerely,
RaeLynn