
Why Sewing Machine Thread Bunches Up and How to Fix It!
Disclosure: This post may contain affiliate links. If you make a purchase through these links, I may earn a small commission at no additional cost to you.
Tired of tangled thread and messy stitches? Learn why your sewing machine thread bunches up — and how to fix it fast with these simple troubleshooting tips.
Everything you need to know before calling a sewing machine repairman! This article provides a list of possible reasons for why sewing machine thread bunches up and solutions on how to fix it.
This sewing troubleshooting guide is part of my growing maker resource archive. While I don’t currently publish new sewing tutorials on a regular schedule, I continue to maintain this post and related resources for beginners.
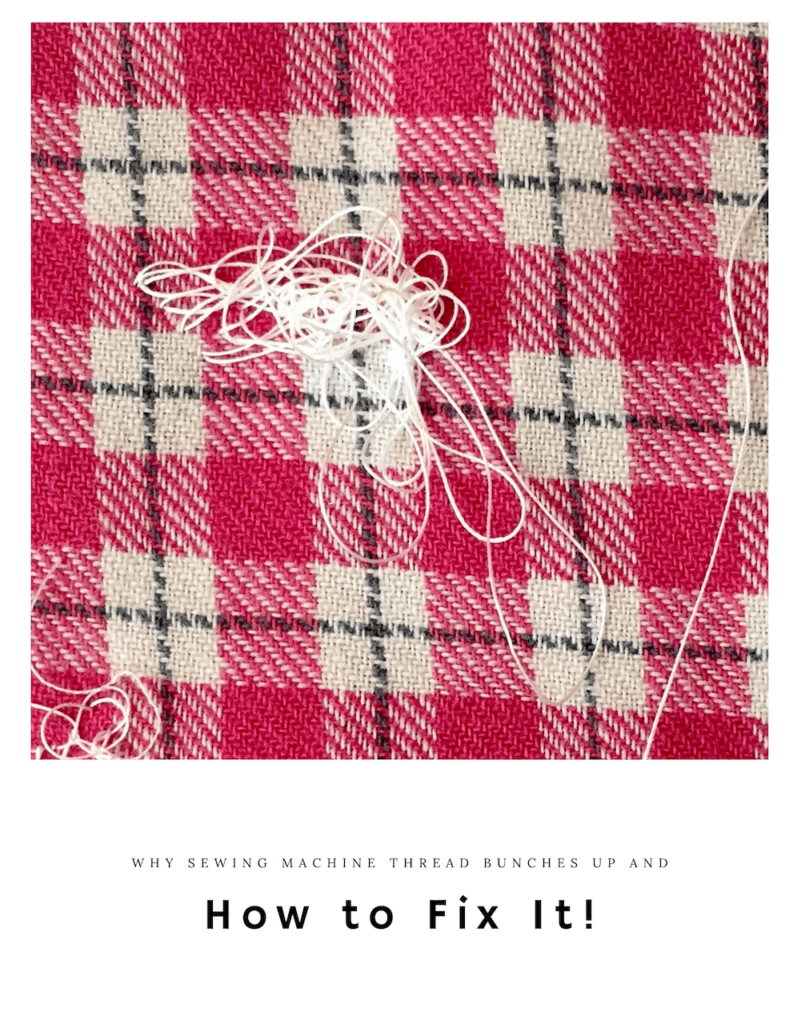
Does this look familiar?
Often called "birdnesting", this is what it looks like when sewing machine thread bunches up on the top of or on the underside of your fabric.
This is one of the most common problems when using a sewing machine. Not only is this an extremely frustrating issue, it can also put a major stopper in the creative process!
I know because it happened to me.
If this is happening to you, first, don't panic!
This situation is normally an easy fix and usually doesn't need a call to your sewing machine repairman.
What Causes Sewing Machine Thread to Bunch Up?
Before I go over all the things you can check to fix this annoying problem, let's first make sure you understand what's causing the problem.
The short and dirty answer is tension.
Tension seems to be the culprit in the majority of cases. However, this isn't always the case, so there are other things you can check as well.
Let's go over tension so you can understand why this can be such a big issue.
Tension is what keeps the top and bottom stitches in perfect balance with one another.
In other words, it's what keeps the front and back stitches looking the same.
When sewing, the top, and bottom stitches should interlock smoothly and look the same.
However, if the stitches are puckered, the seam is unstable, the thread bunches up, or the stitches are just plain ugly, then there is most likely a problem with incorrect tension on either the top or bottom.
It is important that both the top and bottom tension work together to create proper stitches.
For a better understanding of sewing machine tension, I recommend reading the following articles:
Understanding Thread Tension In Your Sewing Machine
Sewing Lesson 10: How to Fix Tension on Your Sewing Machine
Things to Check When Your Sewing Machine Thread Bunches Up.
When your sewing machine thread bunches up you may also experience thread jamming.
In other words, you may have large tangles and huge clumps of bunched up thread not only on your fabric but inside your sewing machine as well.
This typically occurs in the bobbin area and it can be terrifying to witness!
I have had tangles and bunches of thread in the bobbin area so bad that my machine literally became locked up and I couldn't even pull the fabric out!
When this happens to you, you will want to cry. Well, at least I did.
You may even panic and schedule an appointment with a repairman.
Fortunately, I left my phone on the hook the first time this happened to me and consulted the great and powerful Google instead.
After lots of research, I was able to successfully fix the issue.
I then wrote down all the tips I learned and decided to share them in this post.
Believe it or not, every time my thread bunches up I consult this checklist. And, if I learn something new, I add it to this post.
So, these are all the things, in my experience, that you can check before making a 911 call to your sewing machine mechanic.
Note: In order to go through this checklist, you should be familiar with your sewing machine and the basic sewing process. If you are new to sewing and/or recently purchased a new sewing machine, make sure you understand all the parts of a sewing machine.
Also please check out the sewing resources page for more information.
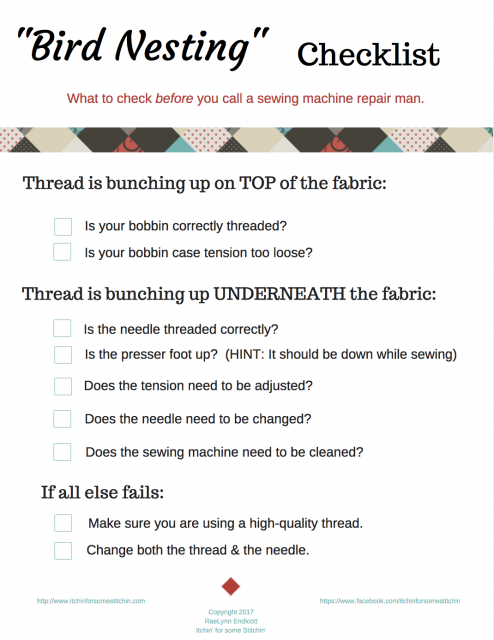
"Birdnesting" Checklist
The thread is bunching up on TOP of your fabric:
Whenever the sewing machine thread bunches up, or "bird nests", on the top of your fabric, the problem typically lies with your bobbin.
Here's what to check:
1. Is your bobbin correctly threaded?
- If the thread has knots, is not smooth, is uneven, or is loose on the bobbin, then it has not been threaded correctly.
- If your machine uses a bobbin case, follow your sewing machine's instructions to remove the bobbin from the case and re-thread it. Make sure you place it back in the case according to your machine's instructions.
- Be sure that you have the bobbin thread engaged in the bobbin tension. To test this, hold the bobbin thread with one hand and if the bobbin drops to the floor then you missed the tension spring in the bobbin case.
Check out The Bobbin Tension Trick You May Not Know for more information.
2. Is your bobbin case tension too loose?
- If you have loosened the screw on your bobbin case to allow for thicker threads you may need to re-adjust it for a regular thread.
- After the bobbin case has been correctly threaded, give the bobbin thread a slight tug. The thread should still move freely with some slight resistance.
The thread is bunching up on UNDERNEATH your fabric:
If the thread is bunching up underneath your fabric, don't assume that the problem is with the bobbin. This is what most people tend to think, however, your needle tension is more likely the true culprit.
Here's what to check:
1. Is the needle threaded correctly?
- Cut the thread a few inches from the spool and pull it out of the machine through the needle. Re-thread according to the instructions for your machine.
- Always thread the sewing machine with the presser foot up. The tension is engaged when the presser foot is down and the thread will not engage properly in the tension discs.
- Complete engagement is necessary so that the discs can snugly “grasp” the thread.
2. Is the presser foot up?
- Don't worry. We all do this occasionally. Just put it down and never speak of it to another soul. ?
Note: It has come to my attention that this one might be a bit tricky for some sewing beginners. So, just to be clear, the presser foot should be down during sewing.
3. Does the tension need to be adjusted?
- Even sewing machines that can "sense" your thread and automatically determine proper tension are sometimes wrong.
- Tighten or loosen the tension as necessary.
4. Does your needle need to be changed?
- Make sure you are using the proper needle for the fabric you are using.
- Also, double-check that the needle is not bent. If you pull the fabric instead of guiding it through the feed dogs as you sew then the needle can bend leading to all sorts of sewing machine problems.
5. Does the sewing machine need to be cleaned?
- Frequent cleaning, dusting, and oiling will prevent many stitching problems.
- Make sure to dust underneath the throat plate, in the bobbin case, and along the thread path.
- Proper maintenance takes only minutes and can save you a multitude of headaches.
Still having problems after going through the checklist?
- Then let's add one more thing to do. It's time to change your thread. Make sure you are using a high-quality thread. No folks, not all threads are created equal. Stop buying thread from the bargain bins!
- Low-quality threads not only tend to break more often, they also generally have looser fibers. Pieces of broken thread and loose fibers mean more lint in your sewing machine. This can lead to all sorts of problems, including your thread bunching up. It can even cause irreparable damage to your machine. A sewing machine is a substantial investment. You don't want that investment destroyed because you then decided to use cheap thread.
So, what's the best sewing machine thread?
Good question. The answer is really one of personal opinion.
- I love Gutermann, but I've heard that Mettler, Aurifill, and Robison Anton are also good. When I was a beginning sewer I was not so picky. I grabbed the cheapest thread I could. I even used old thread my grandma had since the 70's!
- Years of experience, sewing machine problems, and projects that literally fell apart at the seams because I used poor quality thread taught me a valuable lesson. There is no substitute for quality.
- I use Gutermann because it creates less lint, thus, it gunks up your sewing machine less than other threads. It also tangles less than other threads and lasts longer than other threads. Yes, it's a bit more expensive. I usually try to stock up while it's on sale. You can find it at it Michaels or on Amazon. The price varies by spool size. (You can also click on the images)
What do you do when all else fails?
- Change your thread and put in a new, sharp sewing machine needle. It's a winning combination!
I have seriously been at the end of my rope, pulling my hair out in frustration from episodes of birdnesting... tried everything on the list... and failed... only to have it magically fixed by doing these two things at the same time.
This is not an exaggeration.
- Gently hold the end of the thread for the first few stitches when sewing.
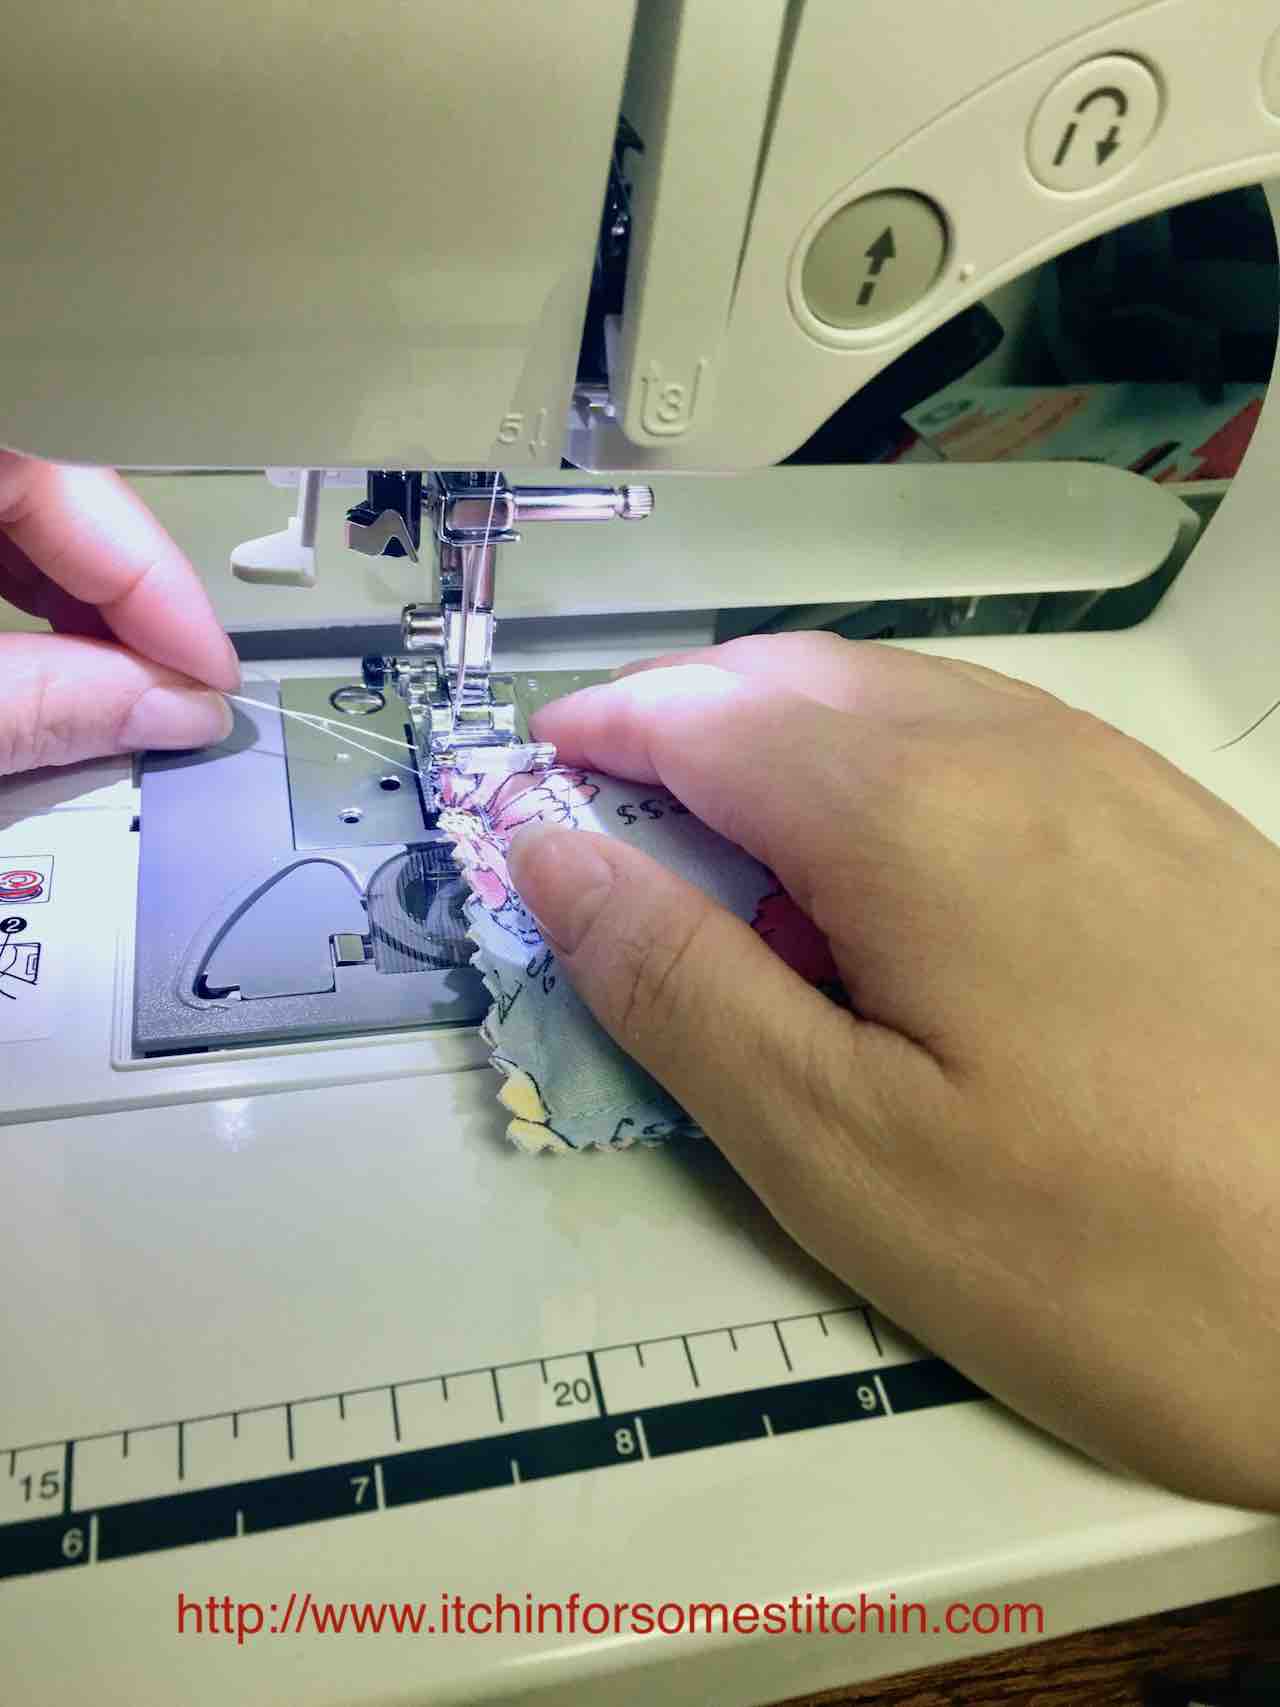
This is a tip given to me by multiple readers (check the comments section) and I have tested it myself. So far, I think it definitely helps, and it is something I have added to my normal sewing process.
- If possible, watch your thread uptake lever while sewing.
What Is the Thread Uptake Lever?
The thread uptake lever is the part of the sewing machine that pulls the thread from the spool, feeds it through the machine, and lifts the thread back up out of the fabric after a stitch has been made.
Basically, it's the part of the sewing machine that goes up and down as you sew.
It's located directly above the presser foot and is often concealed or obscured by the top plastic shell of the sewing machine.
Sometimes, for whatever reason, even after I have tried absolutely everything and I am sure my tension should be right, the thread will simply fall off the uptake lever.
And then you know what happens? Yep, you guessed it... the thread bunches up!
So, now I have removed the plastic piece on my sewing machine so the thread uptake lever is always in view.
When the thread falls off, I use a pen to gently lift up the thread and place it back on the lever.
Magic!
Take my advice folks and learn from my mistakes. The next time your sewing machine thread bunches up refer to this checklist.
Hopefully, these tips will help you troubleshoot and fix the issue quickly so you can keep the creative juices flowing and keep on sewing!
If you are a sewing beginner, perhaps you tackled your sewing project too soon. Don't despair!
This FREE ebook will help guide you on your way to sewing success!
If You Enjoy Understanding How Tools Work
If you like figuring out why things behave the way they do, you may also enjoy my crochet resources, where I focus on clear construction, stitch behavior, and troubleshooting common issues.

Thank you
I sincerely appreciate you visiting my blog! By sharing my content and/or making a purchase you are making it possible for me to continue producing and sharing free content for everyone to enjoy. Your support is amazing!


I am so very late to the party here, but I had the darnedest time with birdnesting! I tried everything; new thread, rethreading, adjusting the tension screw. Finally, I took it in to be cleaned and tuned. You know what I finally figured out? It was the bobbin! I had bought cheap extra bobbins, and when I used those, it nested every time. When I used the proper bobbin, it ran smooth. No more cheap bobbins for me!
Hi Alice,
You are absolutely right! You really must use the proper bobbin for your sewing machine. This is something I will definitely add to this post!
I have a whole thing of bobbins my grandmother gave me and I have no idea what to do with them because I don't want to use them with my machine. LOL
Best wishes,
RaeLynn
Thank you so much for these very helpful tips!!!
You are so very welcome! Thanks for stopping by. 🙂
Sincerely,
RaeLynn
Very helpful! Thanks for sharing. Another thing to check is bobbin size! I was gifted a sewing machine by my aunt. I was new to sewing and never thought it would be the bobbin. A friend switched one of her bobbins with mine. It fit perfectly. I had no idea there were different sized Bobbins!
You just saved the day!!! 🙂 Thank you so much! I pretty much only have a machine to hem pants and stuff like that. Well, my middle-school daughter has always sketched clothing design and expressed an interest in trying her first project - a drawstring bag. So, we got the machine out & I threaded it for her, and sure enough, we were getting this awful bunching on the underside. I did everything I could think of to fix it and read other blogs/websites. Nothing. Well, finally came across YOUR blog. Sure enough - I was putting the presser foot DOWN while threading (just to get it out of the way - I didn't realize how critical that was to have it up)! I am so grateful - honestly, my daughter was looking so disheartened when the machine was acting up (who knows? maybe she would have given up altogether), and now she is sewing on her own for her VERY FIRST TIME! 🙂 If I don't find a link to donate to blog, I will at least be clicking all the ads!
Hi Karen,
I am so glad this post helped you! Thread bunching up really can be a pain and I have been compiling different methods to combat it for a long time now in hopes that at least one method will be able to help anyone who suffers from this issue. Even after all this time, I still struggle with this issue from time to time and have to recheck my own article. LOL.
I hope your daughter's project turned out amazing!
Sincerely,
RaeLynn
I learned a long time ago from an upholstery seamstress to glue a small spot on a quarter in the back of the plate. wrap your thread around that before starting to sew. Works every time!
REALLY?? I am definitely trying this! Thank you so much for the tip, I will certainly pass this onto my readers. I just want to test it out first. 🙂
Sincerely,
RaeLynn
Also the bobbin or the bobbincase can be damaged and in that case need to be changed to new ones.
That's a very good tip! I will add it to the post. Thank you so much. 🙂
Save thread and rough starts to a seam line by using a bridge. This is a small piece of scrap fabric that you butt up to the end of your seam, stitch onto, and leave behind under the needle. To start the next seam, sew off the bridge and onto the fabric you have butted up to position for a smooth start. This saves on thread tails and prevents those stinkers from wandering below deck and causing mischief.
Hi Goldie,
Thanks for stopping by & for the great tip! I will test it out and add it to the list. I just know others will benefit from it.
Sincerely,
RaeLynn
Goldie, Also known as "leaders and Plugs". Don't ask me why but if you watch Margaret Leuwen Quilting on Youtube, she always uses them. They really do seem to prevent birdnesting. A bit of a nuisance if you are in a hurry to finish a project but it works.
Good luck to anyone with this problem.
Cheryl
Thank you for this post! I am still having issues:( I have a brand new spool of thread, the brand you use, and a brand new needle and I am still having this issue underneath my fabric. I am making a ruffled christmas tree skirt with a felt base and layers with burlap, a think plaid fabric, and a knit lace. With all three fabrics I am having this issue. I have had my Singer Talent 3323 machine for a few years and am certainly still a novice. I am pretty much winging it for every project. My tension is sent to 4. I have messed with that and it doesn't seem to be making much difference:( Any other thoughts for me?! Im super tired of having to stop and clean out a jammed up bobbin every few inches:(
Hi there,
I am sorry to hear that you are struggling so much with this issue! It can truly be a frustrating one. When thread bunches underneath it is usually a sign that your needle tension is too loose or the bobbin thread is too tight. Unfortunately, tension is a finicky thing and can get out of whack over the tiniest change... different fabrics, a scratch in your bobbin, lint, etc...
Is your bobbin threaded correctly? Is there any damage to bobbin spring or case? Is there any lint or thread in the bobbin area? These may seem like silly questions, but they are important to check. I am focusing on the bobbin because you said that you already played with the needle tension and that doesn't seem to be helping. Just to be sure, have you tried slowly increasing the needle tension?
You could also try adjust the bobbin tension by using a small screwdriver to turn the screw on the bobbin case. Clockwise should increase the tension and counterclockwise should reduce tension. Be sure to turn it in small increments.
I sure hope you get it figured out. If so, please let me know what worked for you. If not, let me know and I will do some more research to help the best that I can.
Sincerely,
RaeLynn
RaeLynn, I'm wondering if Abbey is using thread to match her needle? She mentioned burlap & felt, not sure what the other fabrics are but if she opted for a 90/14 or higher needle but didn't change to a heavier thread, that could cause some problems as well. Another thought, sewing burlap especially can leave tiny threads and fibers that get down in the bobbin case. I would remove the bobbin, and using a flashlight to look into the case, gently rotate the hand wheel to see if there are threads caught there. They will usually come out with tweezers (UNPLUG MACHINE). If they don't come out.....time for the shop.
Hi Nelda,
Great idea about the heavier thread! I also wonder if Abby is using the proper needle for the fabrics she is using.
Lint & thread in the bobbin case is a huge problem. I have this issue all the time and it definitely affects my tension. I completely agree with your advice to make sure it is completely cleaned out.
Thanks so much for your wonderful input!
Sincerely,
RaeLynn
I'm a beginner and have googled my way through a lot of problems one thing I learned with tension is to adjust it with foot down which is hard to remember since it was drilled into my head to thread with foot up but it was a game changer to adjust tension correctly...way fewer "nests"
Trish,
This is a very good tip. Thank you! It is something I will be sure to add to the post.
Sincerely,
RaeLynn
I use a Bernini 240. Holding the tails is a must. I grew up using a Singer Featherweight and as I recall, holding the tails was required with it.
Hi Esme,
It sounds as if this tip seems to work with nearly any sewing machine!
Thanks so much for stopping by & giving us your input. ?
Best wishes,
RaeLynn
Thanks. I have always taken the upper nesting as a needle problem. Thanks.
Hi Rosetta,
I did too when I first started sewing! I hope you found this post useful when troubleshooting your birdnesting issues. 🙂
Best wishes,
RaeLynn
Hi i have just started sewing. This has happened to me on the bottom stitching. Im a beginner and didnt realise that when you thread the sewing machine around the round dial biit, and you get to the little wiry loop, you need to pull the two sides of the thread up and the wiry loop pushes up and makes a clicking sound. The thread should go into the wiry loop itself when it happens.
Hi Rachael,
I'm curious, what type of sewing machine are you using? I don't have a round dial or wiry loop on my sewing machine, but I'd like to get a better understanding of the issue you are mentioning. I am sure that lots of others may have the same issue and I'd like to be able to clarify how to help them. Thanks so much for stopping by!
Sincerely,
RaeLynn
Most of the vintage machines has the "wiry loop" Rachel mentions. It's part of the tensioner. With all of my machines, I have the habit of holding the thread tail for the first stitch or two and rarely get a birdsnest. If I do, I go looking for all of the above. Very helpful information RaeLynn. Thank you,
Nelda
Hi Nelda,
Thanks so much for clearing that up about the sewing machines with the "wiry loop". Although vintage machines are lovely, I personally have never sewn with one. I love the tip about holding the thread tail for the first few stitches. I hope you don't mind if I add that to this post the next time I do an update. If it is a problem, please let me know, but this is a great tip and I'd love to share it!
Sincere thanks for stopping by and I am glad you found the information useful.
Best wishes,
RaeLynn
By all means, share away. I have a Bernina 730E that I use for fancy stitching and embroidery, but when it comes to piecing and quilting I go to my old (1950s) Singers. They have such a beautiful stitch. Holding the tails works for any machine I think.
Hi Nelda!
First off, let me apologize for the late reply. My notification system never notified me of your response. I found it by accident just now!
Thank you so much for allowing me to add your tip to this post. I know others will greatly appreciate it.
I will first try it with my Husqvarna, which is the one I use for all sewing and embroidery. Then I’ll break out my mom’s old Singer and try it again. I am sure it will be helpful! ?
Best,
RaeLynn
I agree with Nelda, for some reason holding the thread tail for the first couple of stitches helps...but all your tips are a necessary starting base as well as a good reminder, thanks!
Hi Micka,
Glad you stopped by! It sounds like holding the thread for the first 1-2 stitches is definitely a valuable tip. I will definitely be adding it to this post. Thanks so much!
Sincerely,
RaeLynn
Thanks, I am an experienced seamstress but it has been awhile. I was doing just about everything wrong. Will go back and fix. I have been making bags and the frustration level is high.
Hi Elizabeth,
I completely understand! This kept happening to me while I was trying to quilt, which is why I decided to find the solution and write this post. I hope it helped and your bags are turning out beautifully. 🙂
Best wishes,
RaeLynn
Number 2 is confusing, isn't the foot supposed to be up?
Thanks for the tips, I'm still trying to solve tension problems.
Hi Jessica,
Thanks for the question. During sewing the presser foot should be down. However, on occasion, we can all make the mistake of putting the needle down, but leaving the presser foot up. This could cause tension problems that lead to the thread bunching up. You are very welcome for the tips! If you try all of them and have no luck, make sure you are using a high quality thread and are using a fresh needle. I found that this sometimes helps when all else fails. I will be updating this post soon with this little tid-bit.
Best wishes,
RaeLynn
I love your tips. I havent done any sewing for 50 years and needless to say the machines have changed so much. My machine keeps bunching up below where the bobbin is . I keep clearing it and rethreading but after two stitches it just bunches up again.Please help I am quarter way sewing the squares for a bed spread.
Hi Rita! First of all, let me apologize for taking so long to get back to you. I had written you a response first thing this morning, but apparently forgot to hit the reply button! So, let me try again, is your thread bunching on top of the fabric or under the fabric? Are you using a high quality thread & did you try the tips? Are you using an older sewing machine? If so, it may need some maintenance. Feel free to send me an email if you like and I will do my best to help!
If these adjustments don't fix the problem???
Hi there, thanks for this great question! This has only happened to me once. Changing the needle & using a higher quality thread fixed the issue. If you've tried everything on the list and anything else you know of, you may want to bring your sewing machine in for service or cleaning.
Thank you for this information. Some of it I already knew, but needed a refresher. And then I learned something that should have been obvious.
Hi Roxann,
I am so glad you found this post useful! It really is a great guide to keep around, especially if you do a lot of sewing as tension seem to be a common issue. Thanks so much for stopping by. 🙂
Thank you for the tips!
You are so very welcome!
Thread snarls are no fun! Thanks for sharing the fixes. I've got a Craft Gossip post scheduled for later this evening that features your post: http://sewing.craftgossip.com/?p=88688 --Anne
Hi Anne,
Thanks for stopping by! I hope these tips come in handy. I did check out your like but got an error message. I appreciate you sharing the post though & would love to see it!
Best,
RaeLynn
Great tips--thanks!
You are very welcome! ?
yes! that looks so familiar 🙁 thanks for the tips and help! pinned to my tips board!
I feel for you. It really can be frustrating! I hope this guide helps & feel free to contact me if you have any questions. 🙂
Thanks for these tips. I have found that holding the thread for the first few stitches does help. But I have found it difficult to do that with some smaller items. I am now using poster tacky and pushing these first threads into it to hold these threads works great.
Hi Kris,
Thanks for the new tip! I will give it a test. 🙂
Best,
RaeLynn