Plaid Crochet Beanie Pattern
Disclosure: This post may contain affiliate links. If you make a purchase through these links, I may earn a small commission at no additional cost to you.
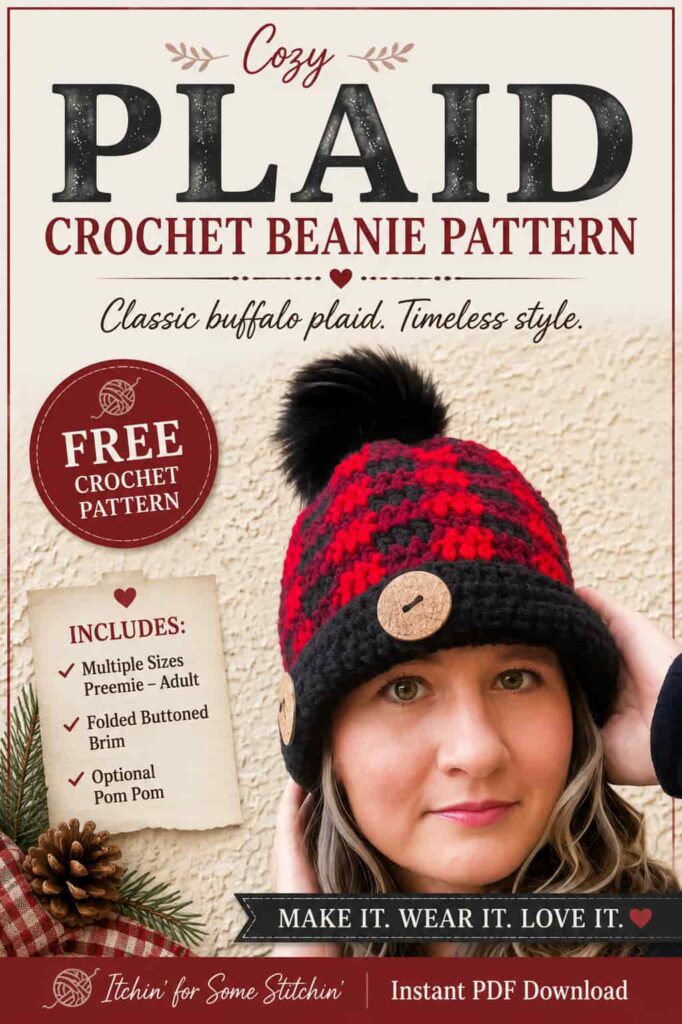
Create a cozy winter staple with this free Plaid Crochet Beanie Pattern! Featuring a timeless Buffalo Plaid design, multiple sizes, and step-by-step instructions, this stylish hat is perfect for gifts, matching sets, and keeping warm all season long.
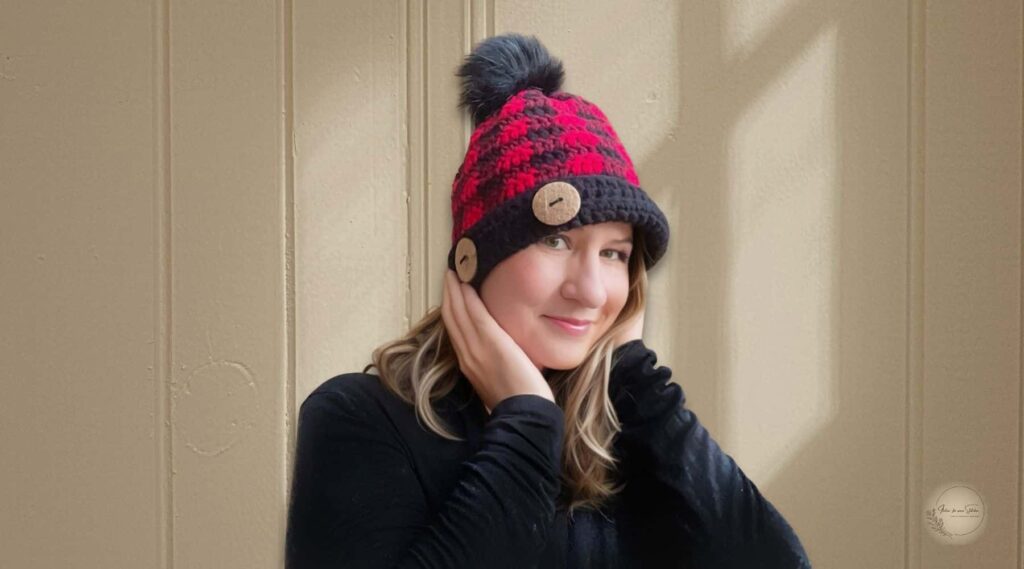
There's something about Buffalo Plaid that never goes out of style - it just has a timeless appeal to it. Cozy, bold, and effortlessly classic, it's a pattern that feels completely at home whether you're settling in for a snowy mountain weekend or grabbing a coffee on a crisp afternoon in town. If you're after a crochet beanie that manages to blend style with everyday practicality, then the Simply Chic Buffalo Plaid Beanie is a project you'll reach for over and over again.
This free Plaid Crochet Beanie Pattern uses a couple of really simple stitches and just three different yarn colours to get that iconic plaid effect. While the finished hat does look pretty intricate, the stitch pattern starts to become almost automatic as soon as you get a feel for it - which makes it perfect for unwinding and enjoying the process. The beanie is worked flat and then folded up and seamed together, which makes the construction process straightforward, while giving it a polished, finished look.
This crochet hat is designed to come in a range of sizes, which makes it perfect for making one for yourself, teaming up with a matching hat for a family set or even whipping up a few as thoughtful gifts during the holiday season. And to give it an extra special touch you can finish it off with some decorative buttons or even try adding a pom-pom - it's a great way to make your beanie truly unique.
If you're new to plaid crochet, dont worry! Throughout this post you'll find lots of helpful tips, links to my Plaid Stitch Tutorial, and all the guidance you need to get the hang of it & crochet your beanie with confidence. Whether you've never tackled a colourwork project before or are just looking to add another cosy hat to your winter wardrobe, you'll find everything you need right here.
What You'll Find Inside this Pattern:
Classic Plaid, Everyday Comfort
The Simply Chic Buffalo Plaid Beanie was designed to bring together timeless style and practical comfort in a project that's as enjoyable to make as it is to wear. Inspired by the iconic Buffalo Plaid pattern, this beanie pairs bold colorwork with a clean, modern silhouette, creating an accessory that looks just as at home on a winter walk as it does during holiday gatherings.
Thoughtfully designed with multiple sizes and straightforward construction, it's a pattern you can return to season after season. Whether you're crocheting a single beanie for yourself or creating matching sets for family and friends, this project offers the perfect balance of style, warmth, and versatility.
Design Highlights
✔ Classic Buffalo Plaid design with a modern, wearable look
✔ Multiple sizes for a custom fit
✔ Worked flat and seamed for simple construction
✔ Uses the plaid stitch to create a woven-look fabric
✔ Step-by-step written instructions with helpful photos
✔ Perfect for gifts, craft fairs, and matching family sets
✔ Optional decorative buttons and pom pom for easy customization
✔ Printable, ad-free PDF available for offline crocheting
How to Crochet a Plaid Beanie
Crocheting a plaid beanie is easier than it looks! The Simply Chic Buffalo Plaid Beanie is made using the Plaid Stitch, a simple colorwork technique that creates the illusion of woven Buffalo Plaid by carrying unused yarn inside your stitches. Once you establish the repeating pattern, the stitch sequence becomes rhythmic and enjoyable to crochet.
If you're new to the Plaid Stitch or would like a refresher before you begin, I recommend visiting my step-by-step Plaid Stitch Tutorial. It covers everything you need to know, including carrying yarn, changing colors, and creating crisp, even plaid, so you can crochet this beanie with confidence.
At a Glance
Materials
Gather your supplies before you begin to make crocheting your Simply Chic Buffalo Plaid Beanie as enjoyable as possible. This pattern uses three coordinating colors to create the classic Buffalo Plaid effect, but you can easily customize the look with your favorite color combinations.
Yarn:
Medium #4 Worsted Weight Yarn
Sample Shown:
- Light (A): Red Heart With Love, Holly
- Medium (B): Red Heart Super Saver, Claret
- Dark (C): Red Heart Super Saver, Black
Estimated Yardage: Approximately 100 to 225 yards total, depending on size.
Yarn Substitutions
This pattern was designed using medium #4 acrylic yarn, but many worsted weight yarns will work beautifully. If you choose a substitute, be sure to make a gauge swatch before starting to ensure your finished beanie has the correct fit.
Choose yarns with similar weight and fiber content for the best results.
Here are some great chocies:
Hook
- US I/9 (5.5 mm) crochet hook
Notions
- Two buttons size 1.5-inch diameter (38.1 mm) (optional)
- Tapestry needle for seaming and shaping
- Scissors
- Stitch markers (optional)
- Coordinating sewing thread
- Sewing needle
- Measuring tape
- Faux fur pom pom or yarn pom pom (optional)
Yarn & Yardage Requirements for the Plaid Crochet Beanie Pattern
This Plaid Crochet Beanie Pattern is another fantastic stash-busting project, making it easy to transform leftover yarn into a cozy winter accessory you'll reach for season after season. Using just three coordinating colors, you'll create the signature Buffalo Plaid design that's both timeless and effortlessly stylish.
The exact amount of yarn you'll need will vary depending on the size you make, but this pattern requires only a modest amount of Medium Weight #4 yarn, making it perfect for using partial skeins from your stash or coordinating colors from previous projects.
Approximate Yardage
- 100 to 225 yards (91 to 206 m) total of Medium Weight #4 yarn (depending on size)
- One dark shade
- One medium shade
- One light shade
For my sample, I used:
- Black (Dark Shade)
- Claret (Medium Shade)
- Holly Berry (Light Shade)
The secret to achieving the classic Buffalo Plaid look is choosing colors that work together. Your medium shade should naturally bridge the dark and light shades, creating the bold, woven appearance that makes this design so recognizable.
While traditional black, burgundy, and red never go out of style, don't hesitate to experiment with your own color palette. Deep forest greens, warm browns, navy blues, soft grays, or elegant neutrals can all create a beautiful Plaid Crochet Beanie that's uniquely yours.
Whether you're making a cozy crochet winter hat for yourself, thoughtful handmade gifts, or matching accessories for the whole family, this pattern is an enjoyable way to put your yarn stash to good use.
Skill level
Level of Difficulty - Intermediate

Gauge / Tension for the Plaid Crochet Beanie Pattern
Gauge is important for achieving the correct fit, especially when making an ear warmer designed to comfortably stretch around the Taking a few minutes to check your gauge before you begin will help ensure your Plaid Crochet Beanie fits as intended. Since this pattern includes multiple sizes, matching the pattern gauge is the best way to achieve the correct circumference and a comfortable fit.
Gauge
15 stitches and 6 rows = 4 inches (10 cm) in Plaid Stitch
Why Gauge Matters
The plaid stitch naturally creates a dense, structured fabric, making gauge especially important in a fitted project like a beanie. Even small differences in tension can affect the finished size and overall fit.
Gauge Tips
- Crochet your gauge swatch using the Plaid Stitch, not a solid-color stitch pattern.
- Measure your swatch after completing several repeats to ensure an accurate measurement.
- If your swatch is too small, try increasing your hook size.
- If your swatch is too large, try decreasing your hook size.
- Maintain consistent tension when carrying your yarn and changing colors to create crisp plaid blocks and an even finished fabric.
Taking the time to check your gauge before starting will help your finished Buffalo Plaid Crochet Beanie match the sizing chart and provide the comfortable fit the pattern was designed for.
Crochet Abbreviations & Stitches Used
This Plaid Crochet Beanie Pattern is written in Standard US crochet terminology.
*Click on abbreviation names for tutorials
Helpful Stitch Tutorials & Techniques
If you'd like a refresher before you begin, these tutorials will walk you through the techniques used in this pattern.
- Chainless Standing Double Crochet
- Starting and Standing Stitches (scroll to the section on standing stitches)
- How to Change Colors in Crochet
- How to Carry Yarn Through Your Work
- Plaid Stitch Tutorial
Pattern Instructions – Simply Chic Buffalo Plaid Beanie
Now that you've gathered your materials and reviewed the Plaid Stitch basics, it's time to crochet your Simply Chic Buffalo Plaid Beanie.
This Plaid Crochet Beanie Pattern is worked flat in rows using three coordinating yarn colors before being folded and seamed to create the finished hat. Ribbing is added separately to provide a comfortable, stretchy fit, while the gathered crown creates the classic beanie shape.
Although the plaid color changes may look intimidating at first, they're created using a simple repeating sequence. After the first few rows, you'll begin to see the Buffalo Plaid pattern emerge, making the color placement much easier to follow.
If you're new to plaid crochet, keep the Plaid Stitch Tutorial open in another tab as you work through the first few rows. Once you establish the rhythm, you'll find this pattern relaxing and enjoyable to crochet.
Beanie Construction
Understanding how the beanie is constructed before you begin can make the pattern much easier to follow.
The Simply Chic Buffalo Plaid Beanie is worked as a flat rectangle using the Plaid Stitch and three coordinating yarn colors. Once the desired height is reached, the rectangle is folded in half and seamed to form a tube.
The top of the tube is then gathered closed to shape the crown, while a ribbed edging is added to the bottom for a comfortable, stretchy fit. Finish your beanie with decorative buttons and an optional pom pom for a polished look.
Because the plaid design is created by repeating simple color blocks, the stitch pattern quickly becomes easy to memorize, allowing you to focus on creating crisp, even plaid throughout your project.
Prefer an Ad-Free Version?
If you'd rather crochet without interruptions, the printable PDF version of the Buffalo Plaid Crochet Hat Pattern is available in my shop.
The PDF includes:
- Ad-free, printer-friendly formatting
- Complete Construction Photo Tutorial
- Complete pattern instructions
- Plaid stitch chart
- Step-by-step photo tutorials
- Sizing information from child through adult
- Lifetime access to download and save
Finished Dimensions
The Simply Chic Buffalo Plaid Beanie includes multiple sizes from Preemie through Adult/Men's, making it easy to crochet the perfect fit for babies, children, teens, and adults. All measurements are approximate and are taken flat before wear.
For the best fit, choose the size that most closely matches the wearer's head circumference. The beanie is designed with negative ease, allowing the fabric to stretch comfortably while maintaining a snug, cozy fit. If you're between sizes or prefer a slouchier fit, consider sizing up.
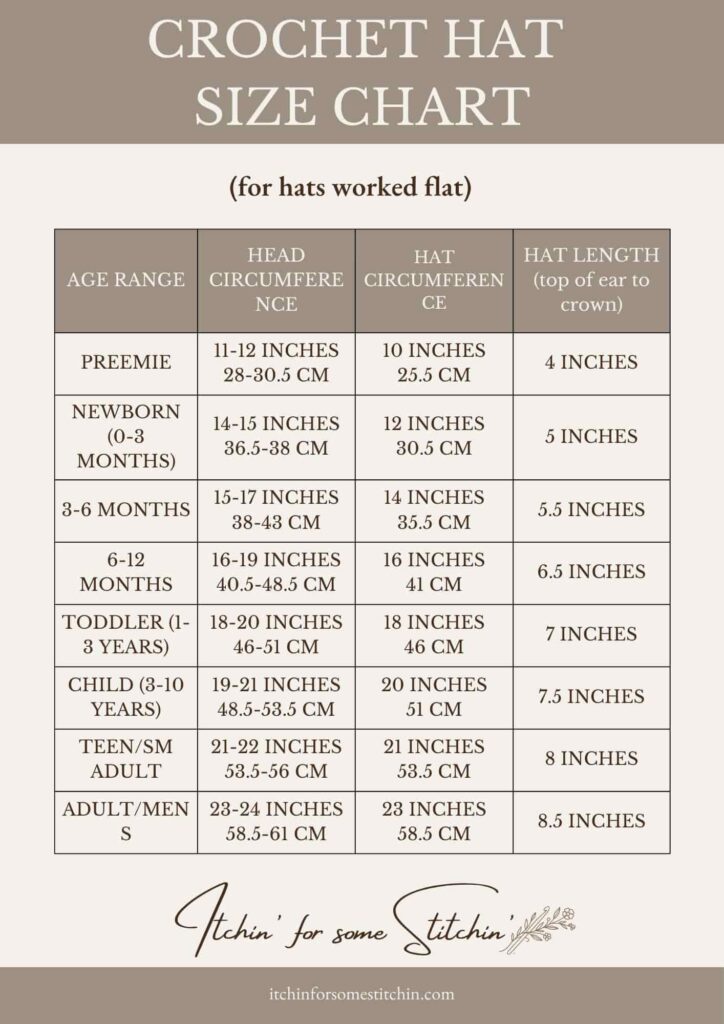
Free Crochet Hat Sizing Chart
Want to keep this sizing chart handy? Download the printable Crochet Hat Sizing Chart PDF from the Fiber Stash Library, along with other crochet reference guides, planners, and printable tools designed to make your crochet projects even easier.
Get access to the Fiber Stash here →
Sizing Tips
- Measure the head circumference just above the eyebrows and ears for the most accurate fit.
- If you're between sizes, choose the larger size for a more relaxed fit or the smaller size for a classic fitted beanie.
- Always check your gauge before beginning, as even small differences in tension can affect the finished size.
- The finished hat length can be adjusted by adding or removing rows before seaming the beanie, allowing you to customize the fit to your preference.
Additional Notes:
Before you begin, here are a few helpful tips to ensure your Buffalo Plaid Crochet Beanie turns out just as intended.
Simply Chic Buffalo Plaid Beanie Pattern
With your materials ready and gauge checked, it's time to start crocheting your Simply Chic Buffalo Plaid Beanie!
This pattern is worked flat using the Plaid Stitch before being folded, seamed, and gathered to create the finished beanie. The first few rows establish the buffalo plaid pattern, then you'll simply repeat those rows until the desired height is reached. Once complete, you'll assemble the beanie, add the buttons, and finish it with an optional pom pom.
Brim
With Black (Dark Shade), chain to the Head Circumference listed in the Hat Sizing Chart above.
PRO TIP: Be sure to keep track of your stitch count.
Row 1
Turn. Dc in the 3rd ch from the hook and in each remaining chain across.
Row 2
Ch 3, turn. Dc in each of the next 24 sts, skip 2 sts, ch 2, dc in each of the next 8 sts, skip 2 sts, ch 2, dc in each of the next 24 sts.
Preemie & Newborn Sizes Only
Because these sizes are very small, standard buttons are typically too large. Skip Row 2 and continue directly to Row 3. The smallest sizes are designed without buttonholes.
Remaining Sizes
Row 3
Ch 3, dc in each stitch across.
Rows 4-5
Ch 3, dc in each stitch across.
Body
The next three rows establish the Buffalo Plaid pattern. Pay close attention to the color placement during these rows. Once the pattern is established, the remaining repeats become much easier to follow.
Row 7 (PLAID row 1)
Turn. Ch 3, dc in the first stitch (or work a Standing Double Crochet) and in the next 2 stitches. (3 dc)
Change to Claret (Medium Shade). Dc in the next 3 stitches. (3 dc)
Repeat the following sequence across the row:
- Black (Dark Shade): 3 dc
- Claret (Medium Shade): 3 dc
Continue alternating these two colors every 3 double crochet stitches until the end of the row.
Designer Tip: You should finish with an equal number of Black and Claret plaid blocks. For example, 10 Black blocks and 10 Claret blocks.
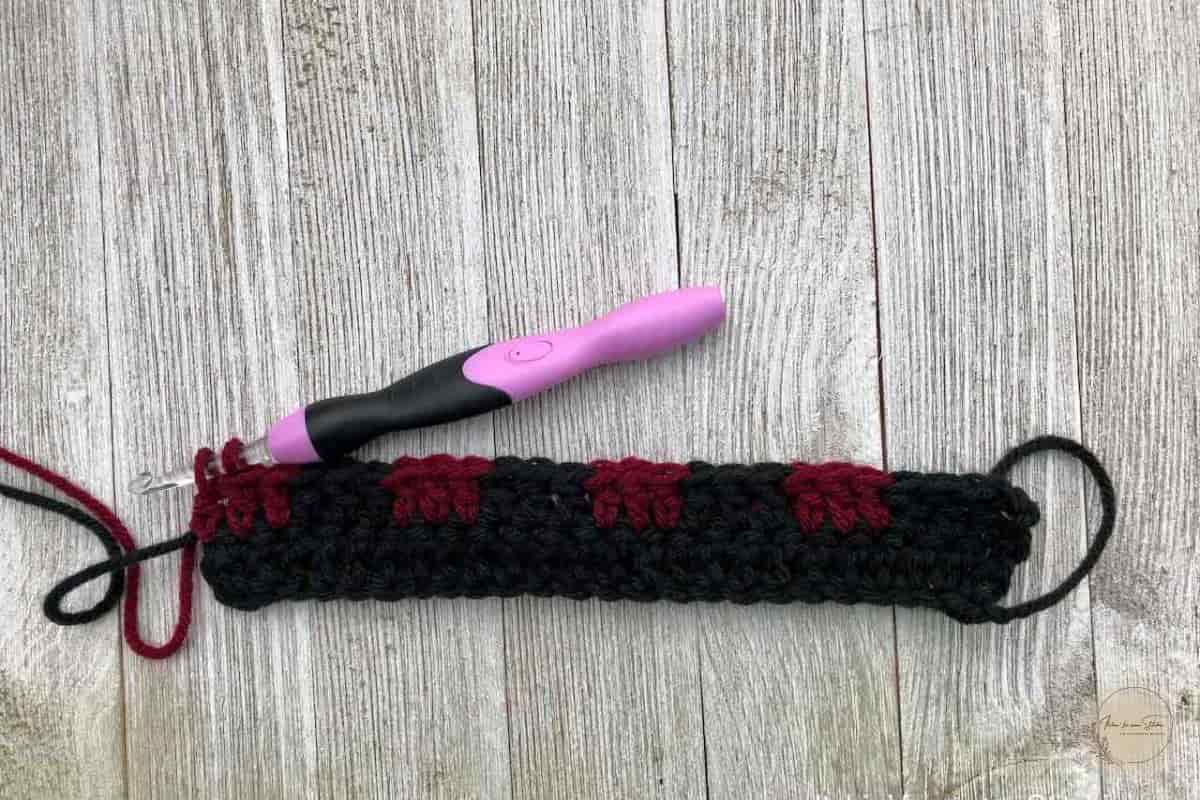
Row 8 (Plaid Row 2)
Change to Holly Berry (Light Shade).
Turn. Ch 3, dc in the first stitch (or Standing Double Crochet) and in the next 2 stitches. (3 dc)
Change to Claret (Medium Shade) and work 3 dc.
Repeat across:
- Holly Berry (Light Shade): 3 dc
- Claret (Medium Shade): 3 dc
Continue alternating every 3 double crochet stitches until the end of the row.
Designer Tip: The Claret blocks should sit directly above the Black blocks from the previous row, while the Holly Berry blocks should sit directly above the Claret blocks. This offset creates the classic Buffalo Plaid effect.
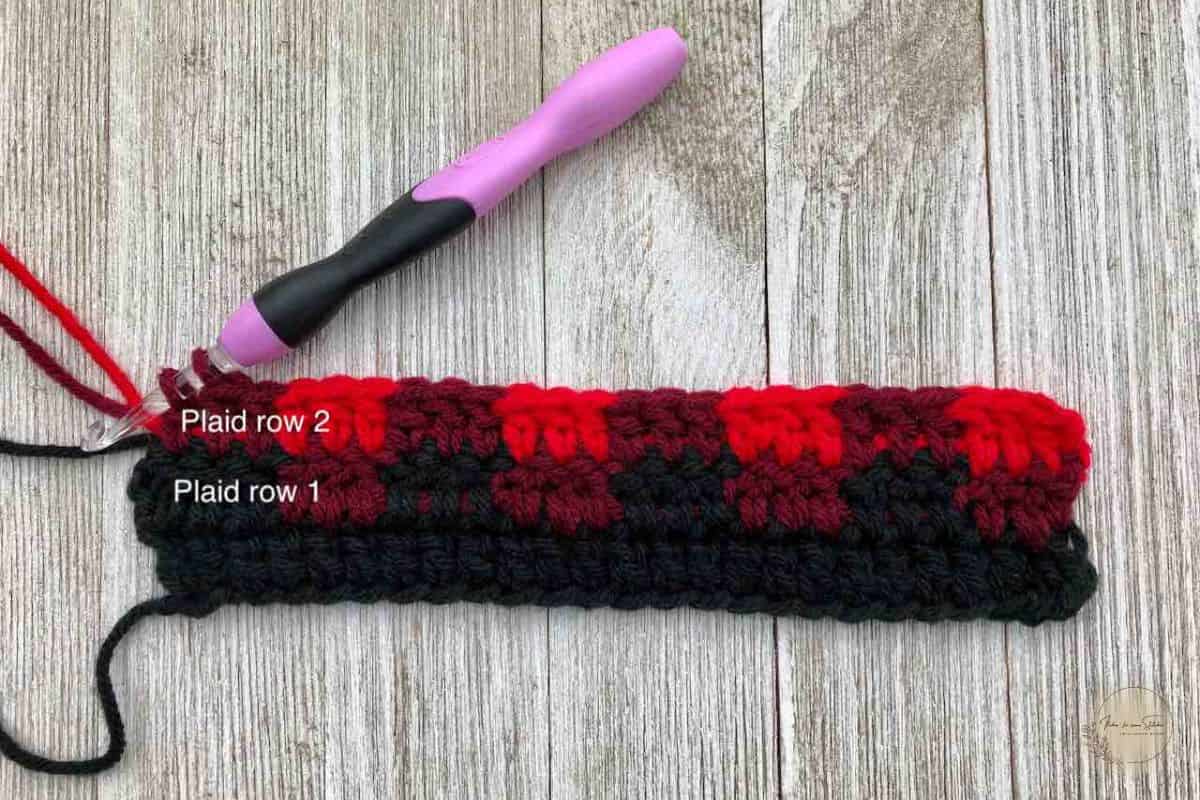
Row 9 (Plaid Row 3)
Change to Black (Dark Shade).
Turn. Ch 3, dc in the first stitch (or Standing Double Crochet) and in the next 2 stitches. (3 dc)
Change to Claret (Medium Shade) and work 3 dc.
Repeat across:
- Black (Dark Shade): 3 dc
- Claret (Medium Shade): 3 dc
Continue alternating every 3 double crochet stitches until the end of the row.
Designer Tip: The Black blocks should now sit directly above the Claret blocks from the previous row, while the Claret blocks sit above the Holly Berry blocks.
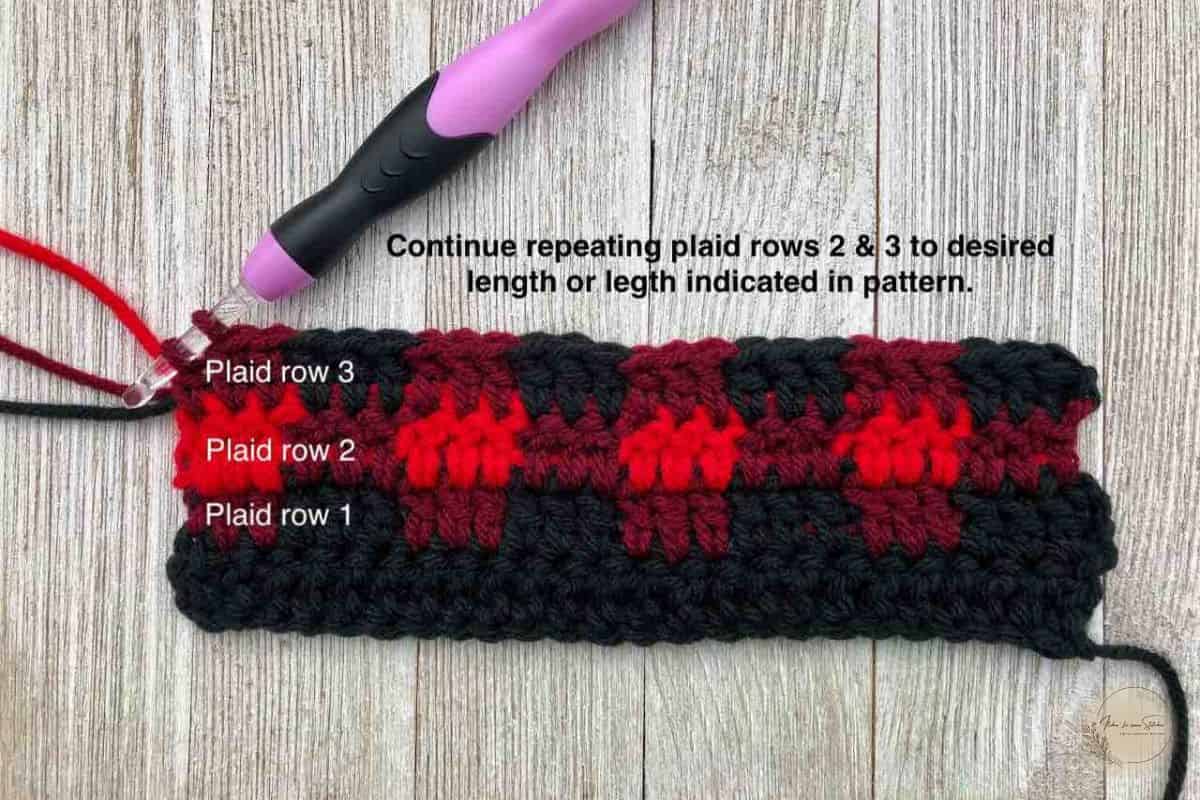
Continue the Plaid Repeat
Repeat Rows 8 and 9 (Plaid Rows 2 and 3) until your work measures the Hat Length listed in the Hat Sizing Chart for your chosen size.
Alternative Finishing Method: Instead of weaving in your final yarn tail, leave a 12 to 24-inch tail. Use this tail to seam the side of the beanie and gather the crown during assembly, eliminating one extra yarn end to weave in later.
Assembly
(See the Construction Schematics on Pages 7-9 of the printable PDF for step-by-step photos.)
- Fold the rectangle in half with the right sides together, matching the two short edges.
- Carefully align the plaid blocks and secure them with stitch markers to prevent shifting during seaming.
- Starting at the bottom edge of the brim, seam the short edges together, ending at the top of the plaid section.
- Using the remaining yarn tail, weave through the stitches along the top edge of the beanie and gently pull to gather the crown closed.
- Stitch any remaining opening closed securely.
- Weave in any remaining ends.
Embellishments
(See the Construction Schematics on Pages 7-9 of the printable PDF for photo references.)
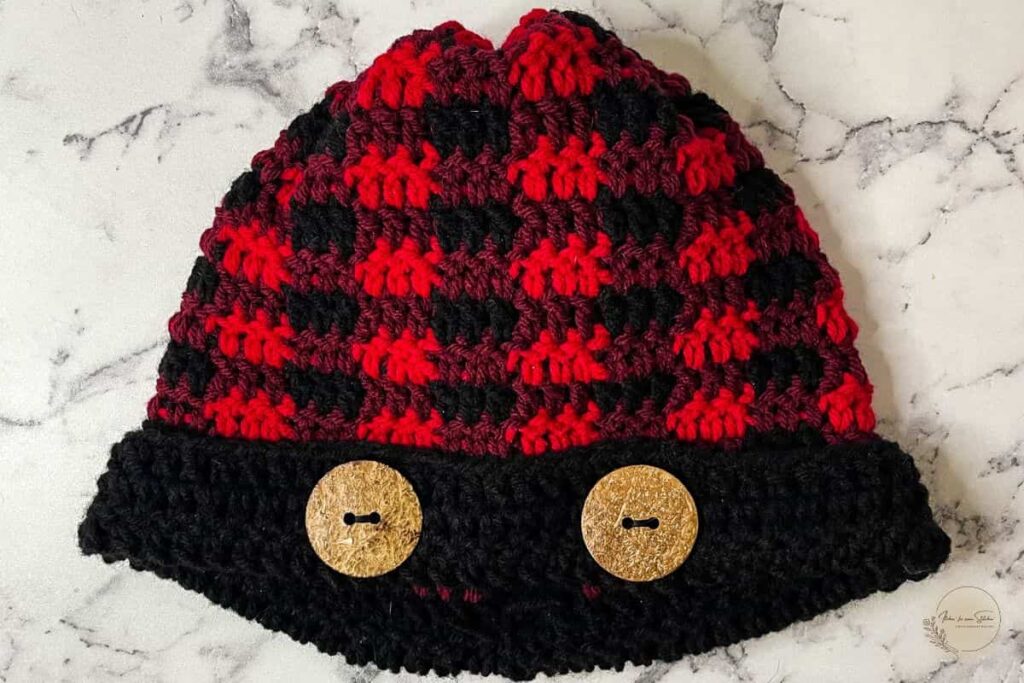
- Fold the brim upward and mark the button placement directly behind each buttonhole.
- Unfold the brim and sew the buttons in place using coordinating sewing thread.
- Fold the brim back into position and fasten the buttons.
- If desired, attach a pom pom to the top of the beanie.
- Weave in any remaining ends.
Frequently Asked Questions – Buffalo Plaid Crochet Beanie Pattern
Have questions while making your buffalo plaid crochet hat? These FAQs cover the most common concerns and tips for success.
Love This Pattern? Keep It Forever.
Grab the ad-free, printable PDF version and crochet with ease, no scrolling required.
The full PDF includes:
- Complete Buffalo Plaid Crochet Beanie Pattern
- Child through Adult sizing
- Printable plaid stitch chart
- Step-by-step photo tutorials
- Lifetime access to download and save
Perfect for crocheting on the go, printing for your project binder, or keeping in your digital library.
Shop the Pattern Here or access it in the The Crochet Conservatory.

Your Plaid Crochet Beanie Is Complete
Your Simply Chic Buffalo Plaid Beanie is finished and ready to wear! With its timeless plaid design, cozy fit, and classic style, this Plaid Crochet Beanie is the perfect accessory for crisp fall days and chilly winter weather. Whether you made it for yourself, a family member, or as a thoughtful handmade gift, it's a piece that's sure to be treasured for years to come.
I'd love to hear how your project turned out! Leave a comment below and let me know which color combination you chose. Did you stick with the classic black, claret, and holly berry palette, or did you create your own unique take on Buffalo Plaid?
I’d also love to see your finished beanie! Share your photos on Instagram and Facebook, tag @itchinforsomestitchin, and use #IFSS_BuffaloPlaidBeanie and #itchinforsomestitchin so I can celebrate your beautiful work. Don’t forget to follow me for more crochet patterns, tips, and inspiration!
If you're looking for a welcoming place to share your crochet projects, ask questions, and connect with fellow makers, I'd love for you to join the Itchin’ for Some Stitchin’ Crochet Community on Facebook. We'd love to see what you've created!
Part of the Simply Chic Buffalo Plaid Collection
Love buffalo plaid crochet?
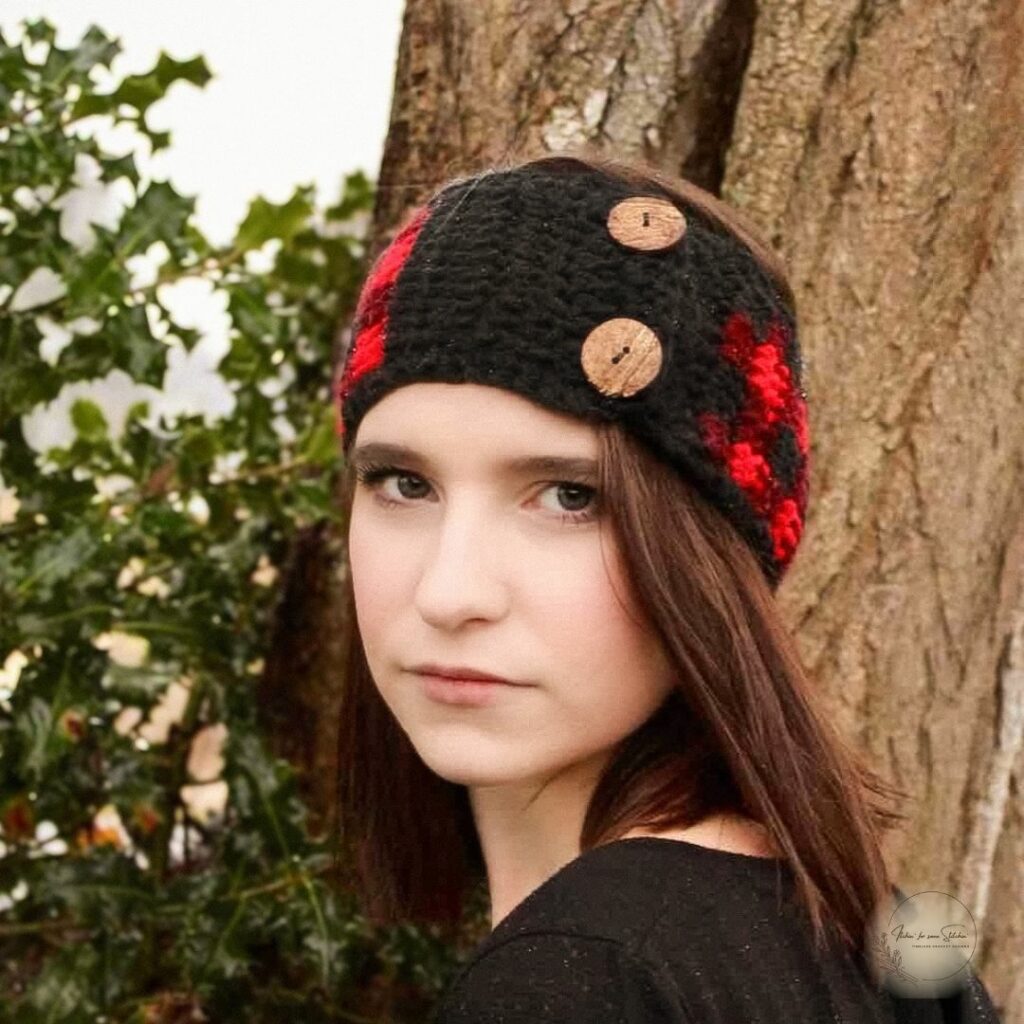
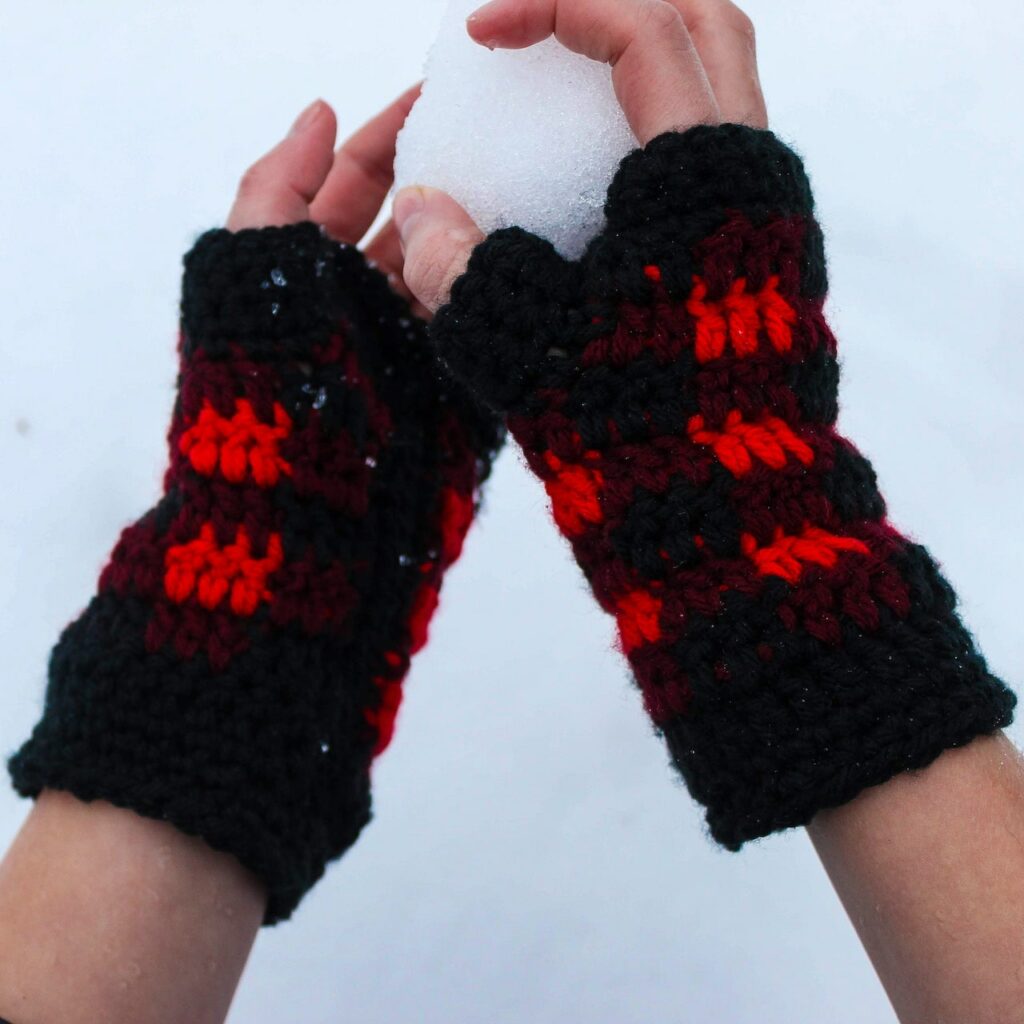
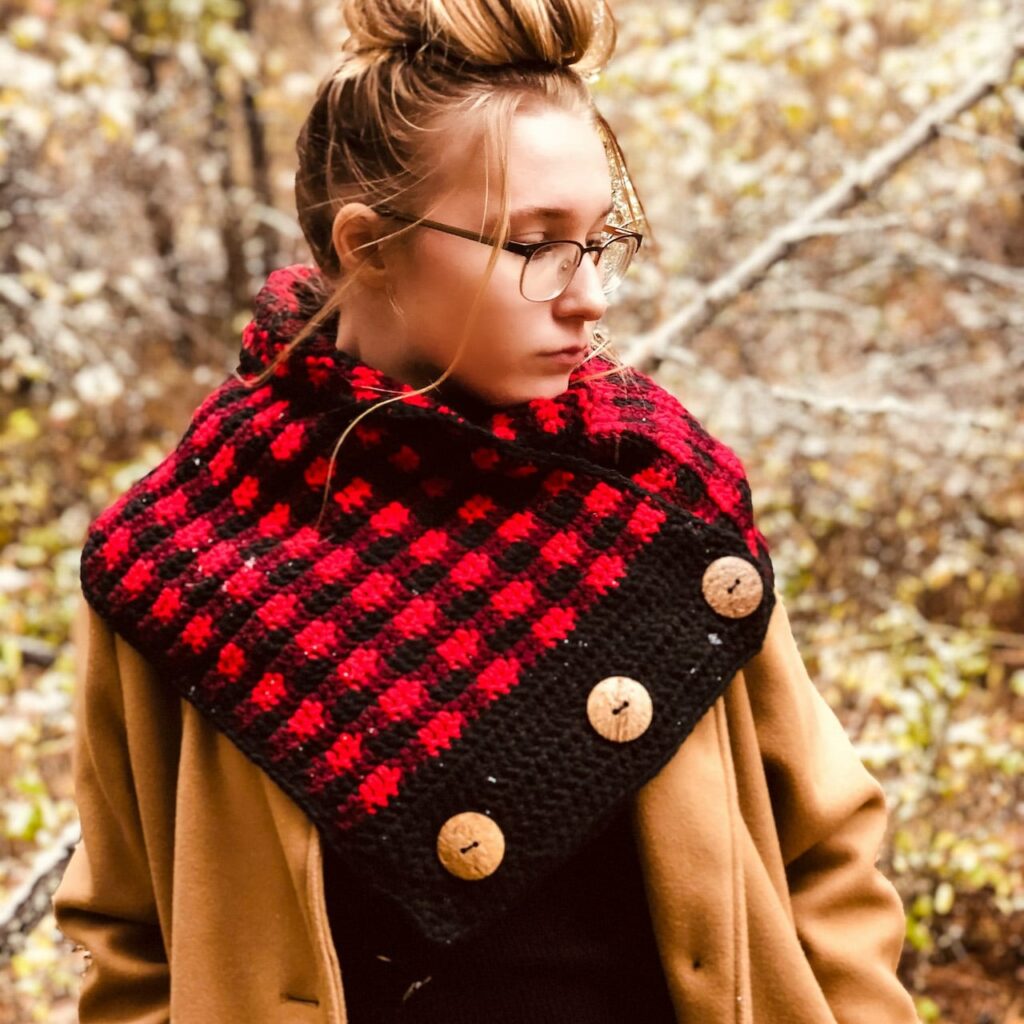
This ear warmer is part of my coordinating Simply Chic Buffalo Plaid Collection, which also includes matching fingerless gloves, a cowl, and a ear warmer.
Click on images to view the patterns or Browse the collection here

Thank you
I sincerely appreciate you visiting my blog! By sharing my content and/or making a purchase you are making it possible for me to continue producing and sharing free content for everyone to enjoy. Your support is amazing!