Everley Beanie - Textured Berry Stitch Crochet Pattern
Disclosure: This post may contain affiliate links. If you make a purchase through these links, I may earn a small commission at no additional cost to you.
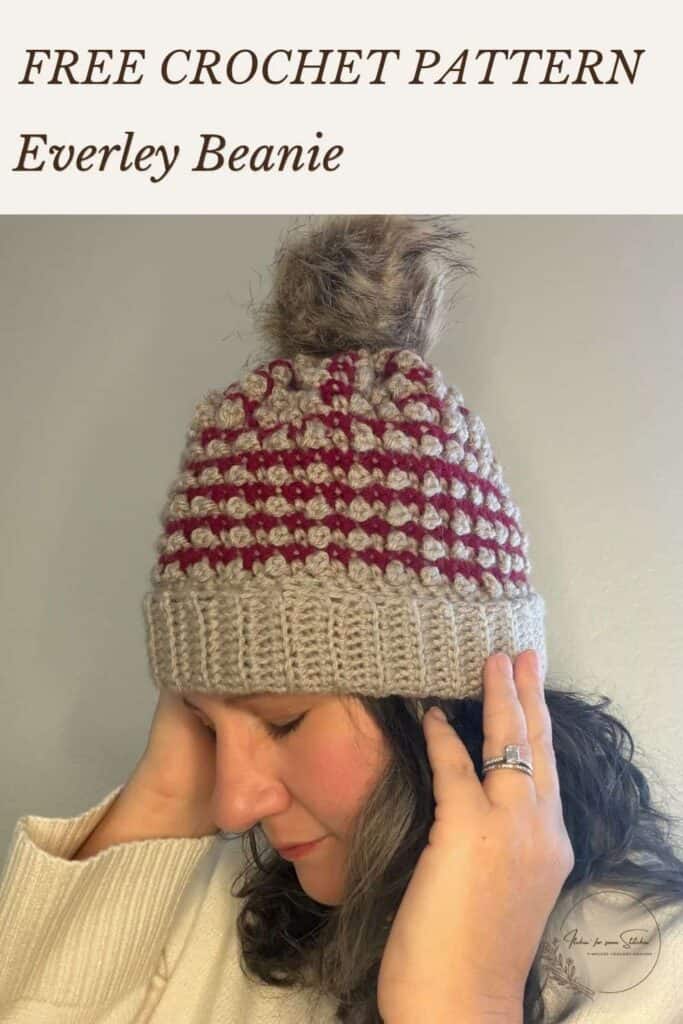
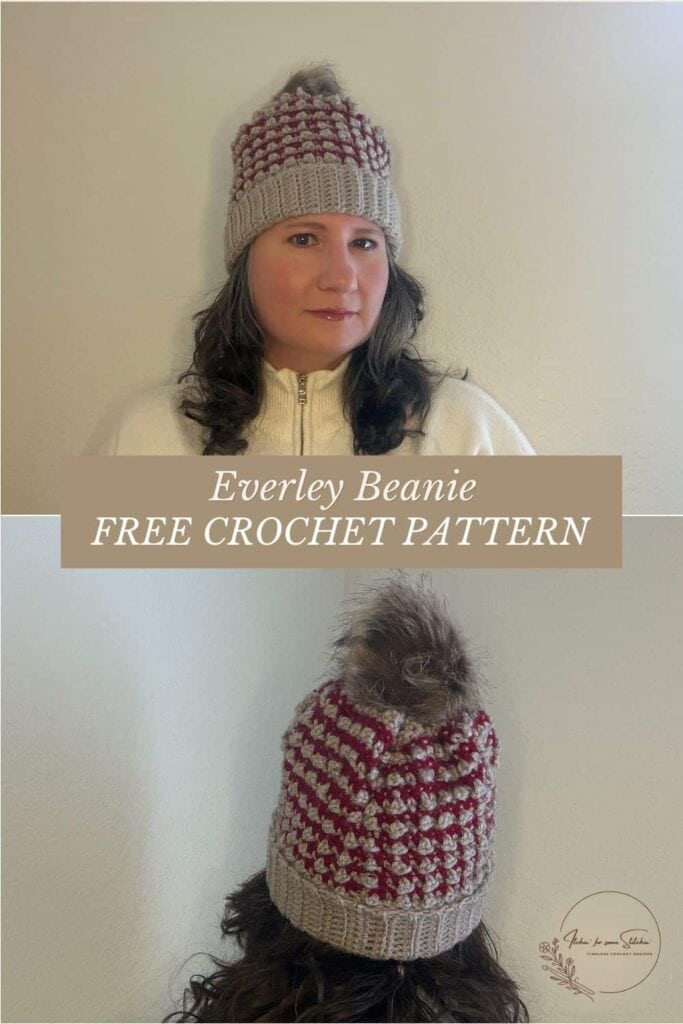
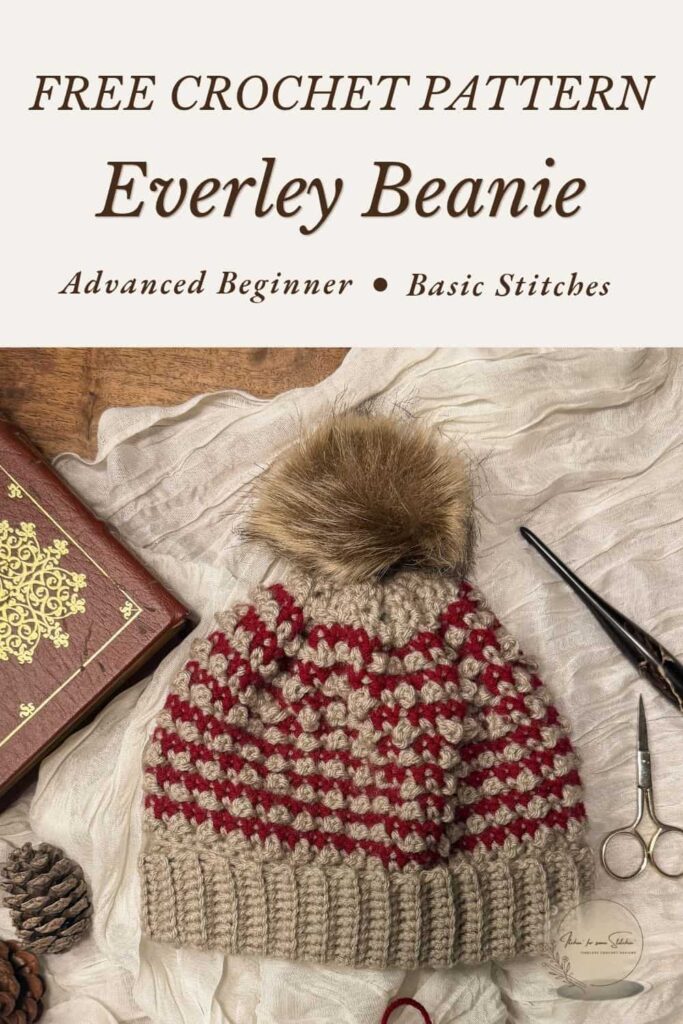
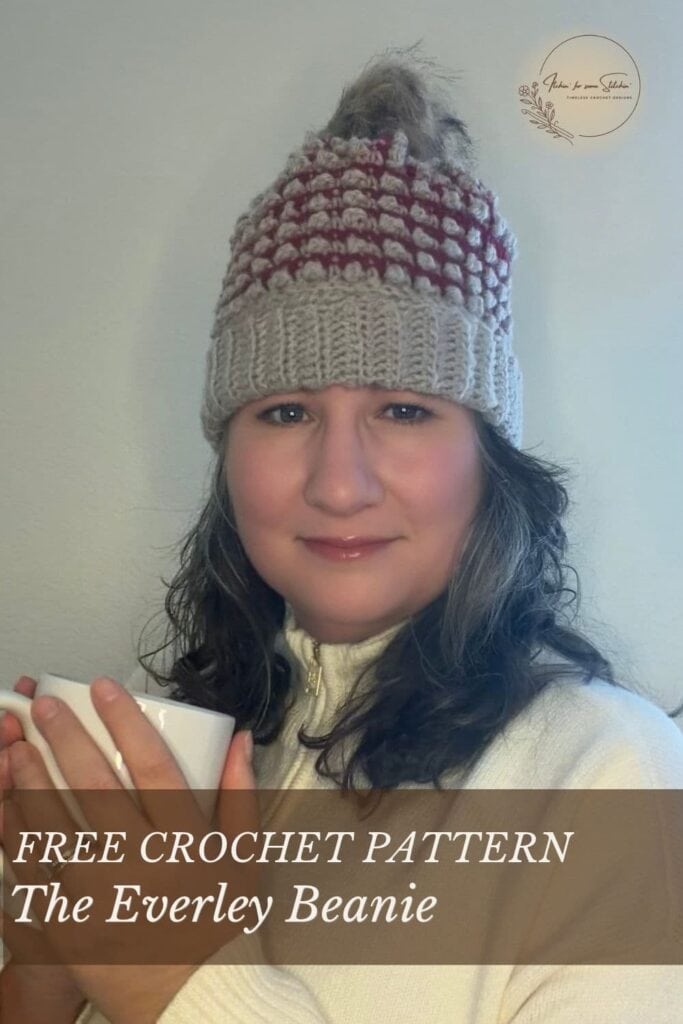
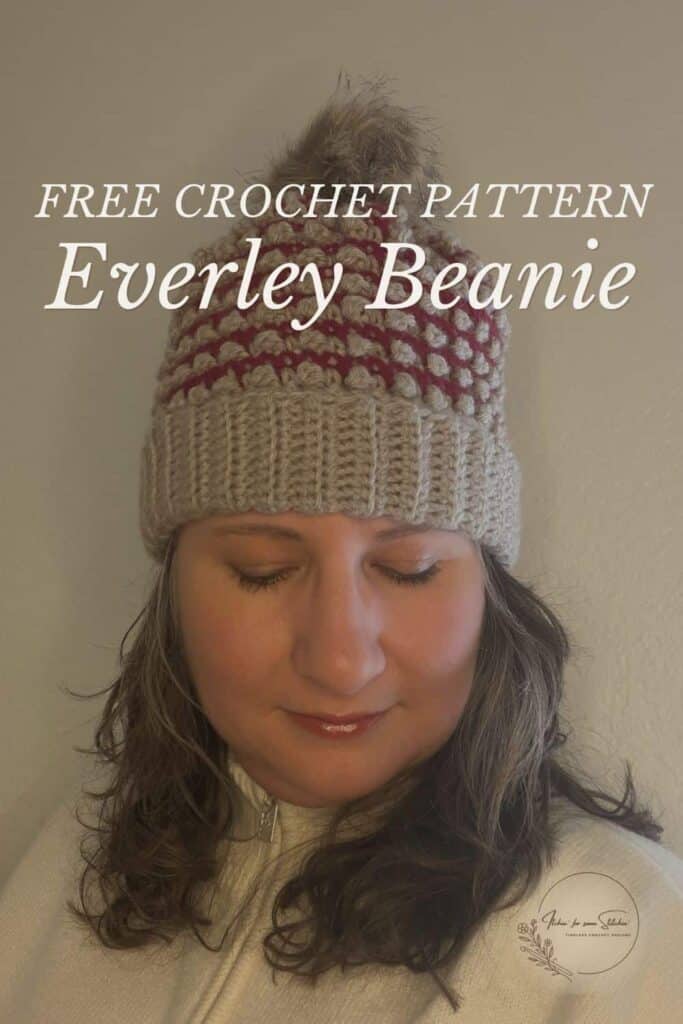
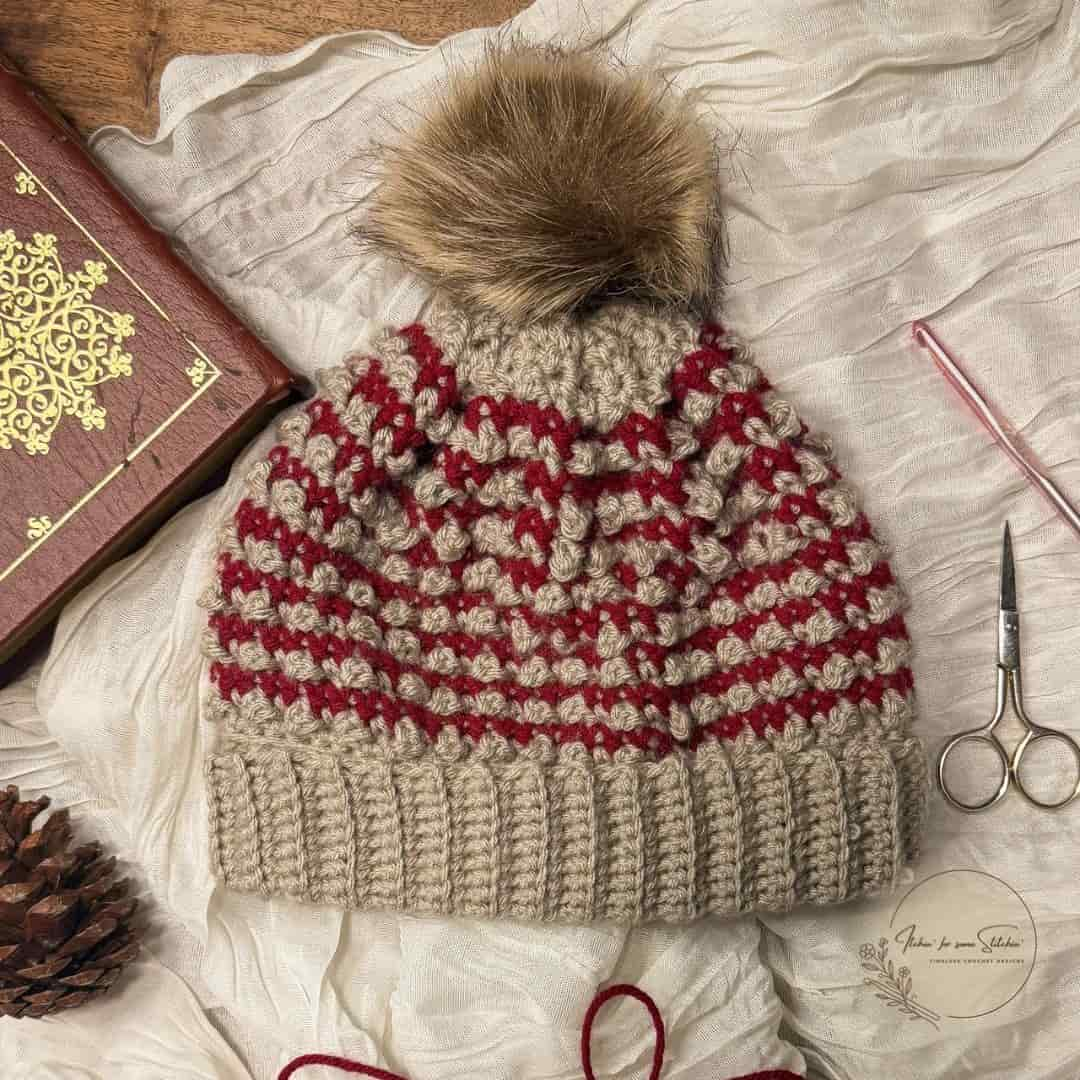
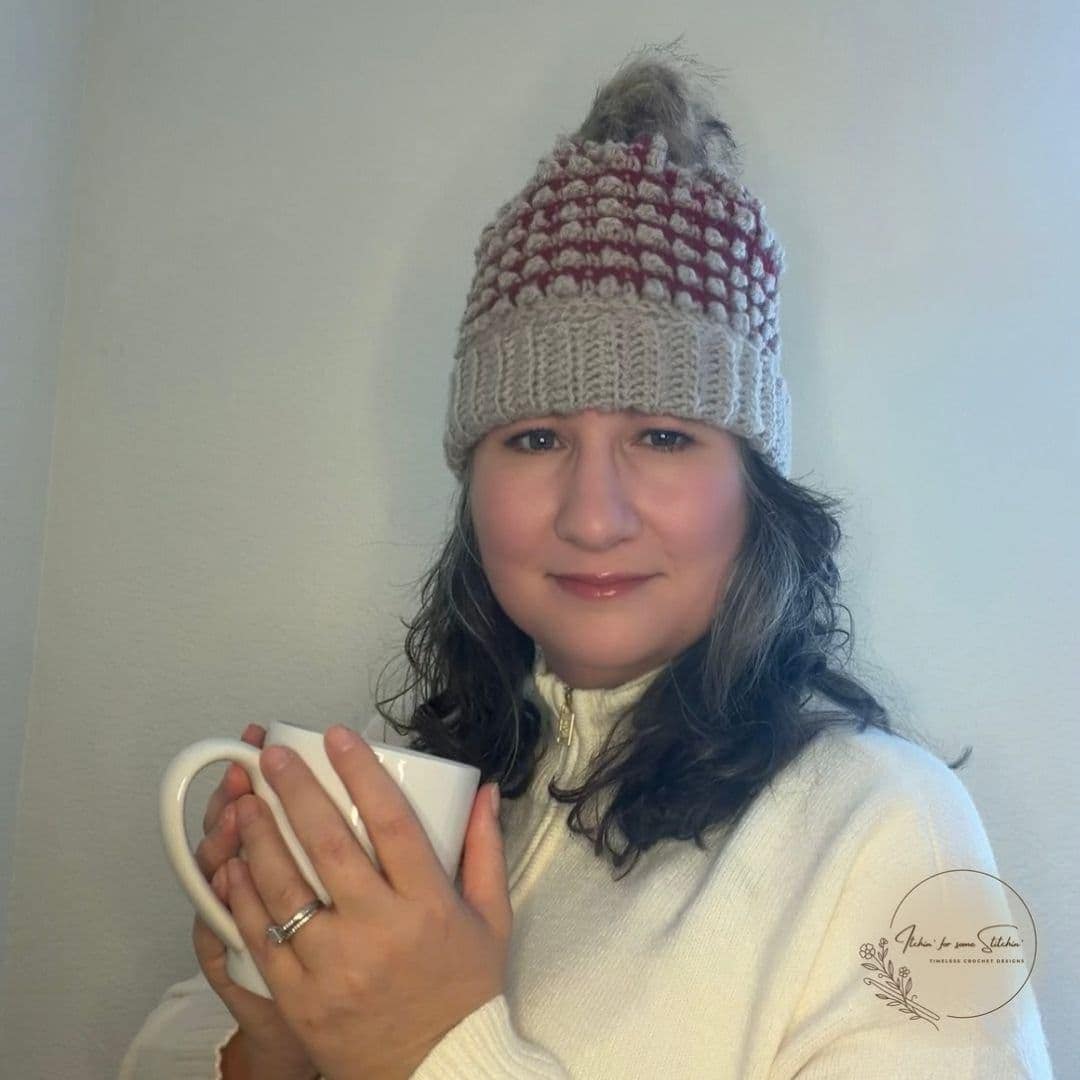
Looking for a berry stitch crochet beanie pattern that's cozy, beautifully textured, and timeless? Meet the Everley Beanie, a modern vintage crochet hat featuring softly raised Mini Berry stitches, classic two-color stripes, and a deep folded ribbed brim.
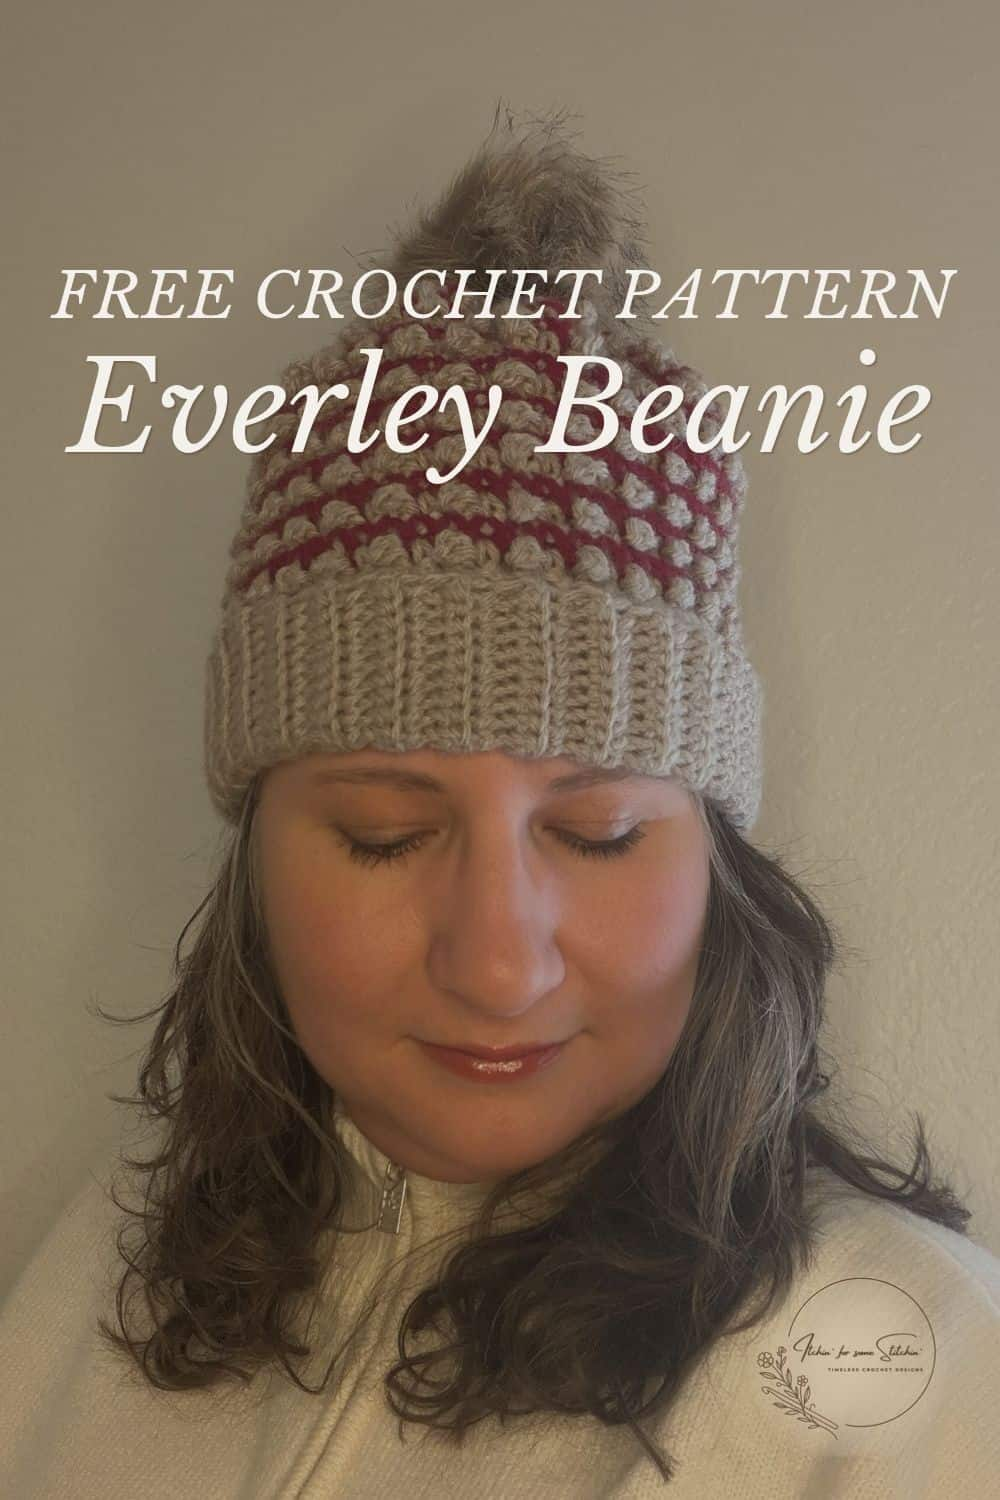
This textured crochet beanie is worked flat in rows rather than in the round, making it a great choice for crocheters who enjoy straightforward construction with beautiful stitch details. The finished hat is seamed, gathered at the crown, and topped with a fluffy faux-fur pom-pom for a classic finishing touch.
Available in five sizes, from Child through Men's Large, the Everley Beanie is perfect for making a cozy accessory for yourself or a thoughtful handmade gift for someone special.
Whether you stick with the classic oatmeal and burgundy combination or choose colors that reflect your own personal style, this charming crochet beanie is sure to become a handmade favorite!
Crochet a Little Warmth: Thanksgiving Caps CAL 2026
This November, I'm delighted to participate in the Thanksgiving Caps Crochet-Along, hosted by April of Banana Moon Studio!
This special event is all about putting our crochet skills to good use by making warm, handmade hats to donate to individuals and organizations helping those in need.
Throughout November, participating designers are sharing free and discounted crochet hat patterns, giving you plenty of inspiration to make a little something special for someone who could use extra warmth and kindness.
The Everley Beanie is my contribution to this wonderful event, and I'm so happy to be part of a project that celebrates both creativity and generosity. Download the Everley Beanieat the bottomof this post.
Ready to spread a little handmade warmth? Explore the Thanksgiving Caps CAL roundup, choose a pattern (or several!), and join us in crocheting for a cause.
A Closer Look at the Everley Beanie
There's something special about a handmade beanie that combines beautiful texture with classic, everyday style. The Everley Beanie brings together charming details and simple construction to create a cozy accessory you'll reach for again and again.
Here's what makes this berry stitch crochet beanie pattern so lovely:
- Beautiful Mini Berry texture: Softly raised stitches add dimension and visual interest without overwhelming the design.
- Classic two-color stripes: The contrasting colors highlight the textured stitches and give the beanie its distinctive look.
- Worked flat for easy construction: No working in the round! The hat is crocheted in rows, seamed, and gathered at the crown.
- A cozy folded ribbed brim: The deep brim adds warmth, stretch, and a polished finishing touch.
- Five versatile sizes: With instructions from Child through Men's Large, you can make one for nearly everyone in the family.
- Endless color possibilities: Choose subtle neutrals, rich vintage-inspired shades, or playful combinations to make the design your own.
With its timeless silhouette and thoughtful details, the Everley Beanie is a wonderful way to create something both beautiful and practical.
New to Textured Crochet Hats? Start Here
If you've never crocheted a textured beanie before, the Everley Beanie is a wonderful place to build your skills!
Rated Advanced Beginner, this pattern is designed for crocheters who are already comfortable with basic stitches and are ready to explore a little more texture and color.
The Mini Berry stitch creates the beautiful raised texture you see throughout the hat. Although it looks intricate, the pattern follows a simple two-row repeat that becomes easier to remember as you work.
You'll also practice changing colors, working in rows, and adding a ribbed brim directly to the hat body.
If you're familiar with single crochet, slip stitches, and basic color changes, you're well on your way to making your own Everley Beanie!
And don't worry if you need a little refresher along the way. I'll share helpful stitch information and resources in the pattern sections below.
What You'll Find Inside this Pattern:
Love Pinterest? I do!
Save this post for Later and follow all my boards.
At a Glance
Free Everley Beanie Crochet Pattern
Ready to make your own Everley Beanie? Grab your yarn and crochet hooks, and let's get started!
Below, you'll find everything you need to crochet this textured, two-color beanie, including materials, sizing information, helpful notes, and step-by-step instructions.
Be sure to read through the pattern notes and choose your size before beginning. A little preparation now can make your crochet experience much smoother!
Materials
To crochet your Everley Beanie, you'll need two colors of medium-weight yarn, two crochet hooks, and a few basic finishing supplies.
Recommended Yarn:
Medium #4 worsted weight yarn
Color A (Main Color):
- Loops & Threads Soft Classic
- Color: Oatmeal
- Weight: Medium #4 (Worsted)
- Fiber: 100% Acrylic
- Skein Size: 354 yd / 7 oz (324 m / 198 g)
Color B (Contrasting Color):
- Red Heart Super Saver
- Color: Burgundy (0376)
- Weight: Medium #4 (Worsted)
- Fiber: 100% Acrylic
- Skein Size: 364 yd / 7 oz (333 m / 198 g)
Yarn substitutions
If you prefer a different yarn, these medium #4 acrylic options are suitable alternatives to consider:
- Lion Brand Basic Stitch Anti-Pilling
- Premier Everyday Worsted
- Caron One Pound
- Red Heart With Love
When substituting yarn, always make a gauge swatch to ensure your finished beanie will fit as intended.
Hooks
- 5.00 mm (I/9) crochet hook: For the hat body, or size needed to obtain gauge.
- 4.25 mm (G/6) crochet hook: For the attached ribbed brim.
Notions
- Tapestry needle for attaching the handle and weaving in ends
- One 4–5 inch (10–12.5 cm) faux-fur pom-pom
- Scissors
Prefer to shop the complete supply list?
Find the yarn, crochet hooks, tapestry needle, and other supplies used for the project in my Amazon storefront.
Browse all my favorite crochet tools and project supply lists.
Yarn & Yardage Requirements: fHow Much Yarn Do You Need for the Everley Beanie?
One of the lovely things about this berry stitch crochet beanie pattern is that you don't need a tremendous amount of yarn to create a beautifully textured, cozy hat!
The Everley Beanie uses two colors of medium #4 worsted-weight yarn to create its classic striped design. Color A forms the main textured fabric and folded ribbed brim, while Color B adds contrasting stripes that help the Mini Berry stitches stand out.
Because this textured crochet beanie is available in five sizes, the amount of yarn you'll need will depend on the size you're making. Whether you're crocheting a smaller hat for a child or a larger beanie for an adult, the chart below makes it easy to plan your project.
Approximate Yardage Used
| Size | Color A (Oatmeal) | Color B (Burgundy) |
|---|---|---|
| Child | 125 yd / 115 m | 40 yd / 37 m |
| Teen / Women S | 140 yd / 128 m | 50 yd / 46 m |
| Women M / Men S | 145 yd / 133 m | 50 yd / 46 m |
| Women L / Men M | 160 yd / 147 m | 60 yd / 55 m |
| Men L | 165 yd / 151 m | 60 yd / 55 m |
These estimates include approximately 12–15% extra yarn to account for gauge differences, yarn tails, seaming, and swatching.
A Little Yarn Tip: When choosing colors for your two color crochet beanie, try pairing a soft neutral with a deeper, contrasting shade. This helps the beautiful berry stitch texture shine while giving your finished hat a timeless look.
Of course, you're welcome to experiment with your favorite color combinations to make the Everley Beanie uniquely yours!
Please Note: Actual yarn usage may vary depending on your tension, hook size, and yarn choice. The faux-fur pom-pom is not included in the yardage estimates.
Skill level
Level of Difficulty - Advanced Beginner
Gauge & Tension
Getting the right gauge is important when making your berry stitch crochet beanie pattern, especially if you want your finished hat to fit comfortably!
Because the Everley Beanie is worked flat in rows, your stitch gauge affects the circumference of the hat, while your row gauge helps determine its height. Taking a few minutes to check your gauge before beginning can save you from ending up with a beanie that's too snug, too loose, or not quite the right length.
Everley Beanie Gauge
13 stitches × 13 rows = 4 × 4 inches (10 × 10 cm)
Measured in the Mini Berry stitch pattern using a 5.5 mm (I/9) crochet hook.
How to Make a Gauge Swatch
Using Color A and your 5.5 mm crochet hook:
Foundation: Ch 21.
Row 1: Sc in 2nd ch from hook and across. Turn. [20 sts]
Rows 2–3: Ch 1, sc across. Turn. [20 sts]
Row 4: Ch 1, MB in next st, sc in next st; repeat across. Turn. [20 sts]
Row 5: Ch 1, sc across. Turn. [20 sts]
Repeat Rows 4–5 until your swatch measures at least 6 inches (15 cm).
Measure the center 4 × 4 inches (10 × 10 cm) of your swatch without stretching the fabric.
What If Your Gauge Doesn't Match?
If you have more than 13 stitches within 4 inches, your stitches are too small. Try a slightly larger crochet hook.
If you have fewer than 13 stitches, your stitches are too large. Try a slightly smaller hook.
Remember to check your row gauge, too! If your stitch gauge matches but your row gauge doesn't, your finished beanie may be taller or shorter than expected.
The goal is a fabric that's comfortable, flexible, and beautifully textured while matching the pattern's intended measurements.
Crochet Abbreviations & Stitches Used
The Everley Beanie combines familiar crochet stitches with the lovely raised texture of the Mini Berry stitch. Although the finished hat looks intricate, this textured crochet beanie uses a simple two-row repeat that becomes easier to follow as you work.
This pattern is written in standard US crochet terminology. Turning chains do not count as stitches unless otherwise stated.
Crochet Abbreviations
*Click on abbreviation names for tutorials
- Stitch / stitches (st / sts)
- Slip stitch (sl st)
- Chain stitch (ch/chs)
- Single crochet (sc)
- Back loop only (blo)
- Mini Berry (MB)
- Yarn over (yo)
- * ___ * Repeat indicated instructions
Special Stitch: Mini Berry (MB)
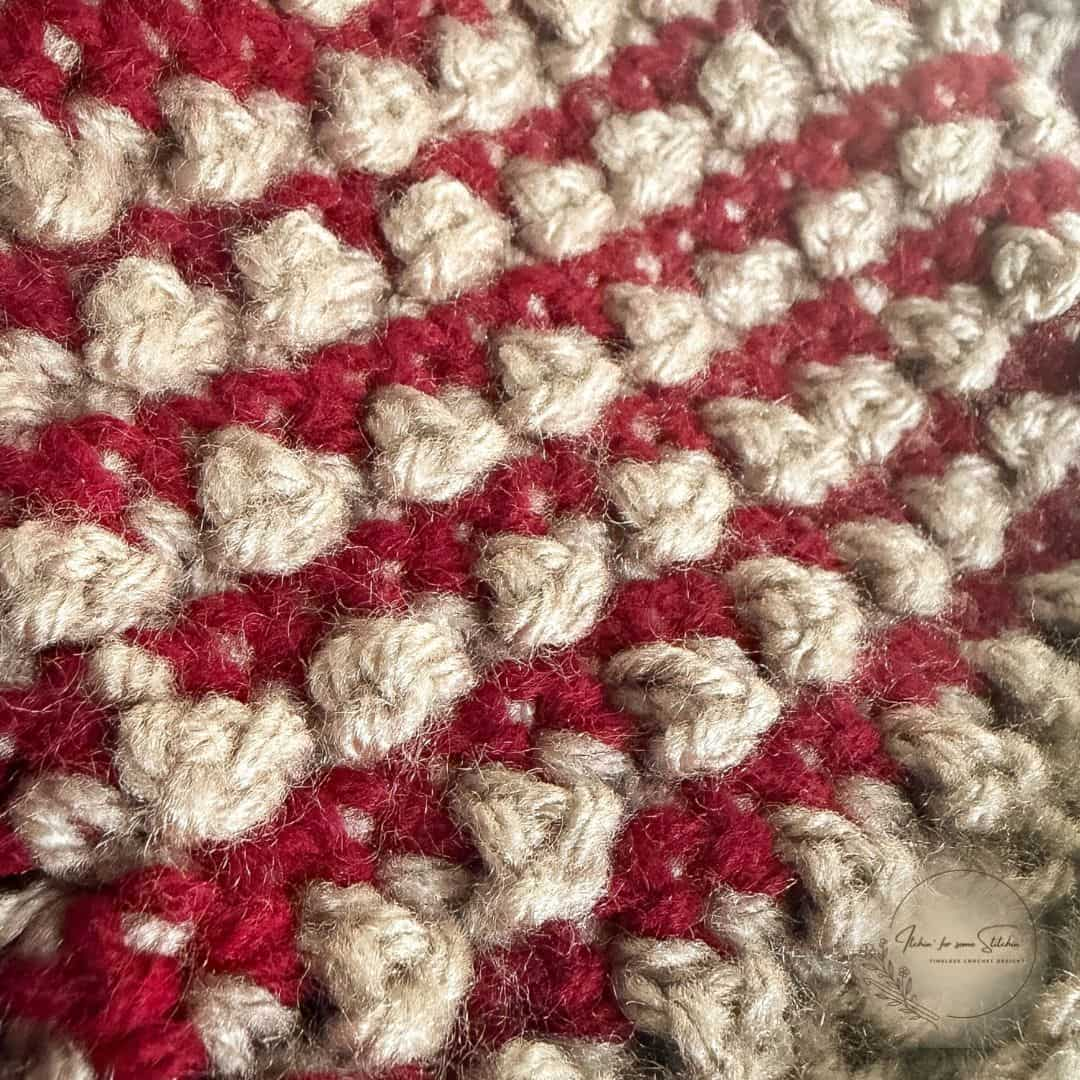
The Mini Berry stitch creates the softly raised texture that gives the Everley Beanie its distinctive appearance.
Mini Berry (MB): Insert hook in indicated stitch and pull up a loop. Yarn over, pull through the first loop on hook 3 times. Yarn over and pull through both loops on hook.
Each Mini Berry counts as 1 stitch. In this pattern, work 1 single crochet in the next stitch after each Mini Berry.
Helpful Stitch Tips
When working the Mini Berry stitch, try to maintain an even tension so the raised stitches remain consistent throughout your beanie.
The ribbed brim uses single crochet stitches worked in the back loop only (BLO) to create its stretchy, ribbed appearance.
If you're new to either technique, practicing a few stitches before beginning your beanie can help you feel more comfortable with the pattern.
Once you've mastered the Mini Berry stitch, you'll be ready to create the beautiful texture and contrasting stripes that make this berry stitch crochet beanie pattern so charming!
How Is the Everley Beanie Constructed?
One of the things that makes the Everley Beanie such an approachable project is its simple, flat construction. If you've ever wanted to make a crochet hat worked flat instead of crocheting in the round, this pattern is a wonderful option!
The Everley Beanie begins as a rectangular panel worked in turned rows. The foundation chain determines the finished circumference of the hat, while the rows build its height from the crown toward the brim.
Once the textured body is complete, a ribbed brim is worked directly along the lower edge using a smaller crochet hook. The brim is crocheted perpendicular to the body, creating beautiful ridges that fold upward for a cozy, classic finish.
After completing the brim, the short side edges are seamed together to form the hat. The foundation-chain edge is then gathered to close the crown, and a fluffy faux-fur pom-pom adds the finishing touch.
The result is a beautifully textured crochet beanie with a folded brim that looks polished without requiring complicated shaping or working in continuous rounds.
You'll find the complete written instructions below, so you can follow along from the first foundation chain to the final stitch!
Prefer a little extra visual guidance? The printable Everley Beanie PDF includes step-by-step construction photos to help you see how the hat comes together. View the printable PDF for more details.
Everley Beanie Finished Sizes & Measurements
Finding the perfect fit is an important part of making a comfortable, cozy crochet hat! The Everley Beanie comes in five sizes, ranging from Child through Men's Large, making it easy to create a beautifully textured beanie for almost everyone in the family.
This berry stitch crochet beanie pattern is designed with approximately 1–2 inches (2.5–5 cm) of negative ease. That simply means the finished hat is slightly smaller than the head it's meant to fit, allowing the crocheted fabric to stretch comfortably and stay securely in place.
Everley Beanie Size Chart
| Size | Fits Head Circumference | Finished Circumference | Total Height |
|---|---|---|---|
| Child | 19.5–20.5 in / 49.5–52 cm | 18.5 in / 47 cm | 8.5 in / 21.5 cm |
| Teen / Women S | 21.25–22.25 in / 54–56.5 cm | 20.25 in / 51.5 cm | 9 in / 23 cm |
| Women M / Men S | 22–23 in / 56–58.5 cm | 21 in / 53.5 cm | 9.5 in / 24 cm |
| Women L / Men M | 23.25–24.25 in / 59–61.5 cm | 22.25 in / 56.5 cm | 10 in / 25.5 cm |
| Men L | 23.75–24.75 in / 60.5–63 cm | 22.75 in / 58 cm | 10.5 in / 26.5 cm |
How to Choose the Right Size
For the best fit, measure around the widest part of the head, just above the eyebrows and ears. Compare that measurement with the Fits Head Circumference column in the chart above.
If the measurement falls between sizes, I recommend choosing the larger size for a more comfortable fit.
A Little Fit Tip: The Everley Beanie is designed with a folded ribbed brim measuring approximately 2 inches (5 cm) deep. This adds warmth and gives your finished hat its classic, timeless appearance.
Please Note: All finished measurements are approximate. Your yarn choice, crochet tension, and gauge can affect the final size of your beanie.
Additional Notes: Before You Begin
Before you grab your hook and start crocheting your Everley Beanie, take a few minutes to read through these helpful notes. A little preparation now can save you hours of frustration later!
Pattern Notes
- This pattern is written in standard US crochet terminology.
- The hat body is worked flat in turned rows, then seamed. The foundation chain determines the finished circumference, while the body rows determine the hat height.
- Numbers are written in this order: Child (Teen/Women S, Women M/Men S, Women L/Men M, Men L).
- Stitch counts are shown in brackets [ ] at the end of each row as needed.
- Ch 1 at the beginning of a row does not count as a stitch unless stated otherwise.
- Keep turning chains loose so the side edges remain flexible and easy to seam.
- Each Mini Berry (MB) counts as one stitch and is followed by one single crochet.
- Change colors on the final yarn-over of the stitch before the new-color row.
- Carry the unused color loosely up the side edge; this edge will be enclosed in the seam. After the final Color B row, cut Color B as directed.
- Color A is used for the foundation, setup rows, Mini Berry rows, final body row, and brim. Color B is used for the single-crochet stripe rows.
- The ribbed brim is worked directly onto the final body row using the smaller hook. During finishing, it folds to approximately 2 inches (5 cm) deep.
- Choose a finished circumference with approximately 1–2 inches (2.5–5 cm) of negative ease. If the head measurement falls between sizes, choose the larger size.
- To adjust the hat height, add or remove complete pairs of Rows 5–6. Always finish with the final Color A single-crochet row before beginning the brim.
- The sample pom-pom is permanently attached. For a removable pom, use a secure button or compatible snap attachment.
- Follow the yarn-label care instructions. Because the sample pom-pom is not removable, spot clean the finished hat and avoid machine drying the faux fur. Reshape the brim and fluff the pom after drying.
A Helpful Tip Before Starting
Because this crochet hat is worked flat, keeping your stitch count consistent and your edges neat will make assembly much easier. Take your time with the color changes and enjoy watching the beautiful Mini Berry texture develop as you work!
Everley Beanie Crochet Pattern Instructions
It's time to bring your Everley Beanie to life! With your yarn, crochet hooks, and chosen size ready, follow the instructions below to create your beautifully textured crochet hat.
Remember that the stitch counts are written in this order: Child (Teen/Women S, Women M/Men S, Women L/Men M, Men L).
Stitch Reminder: Each Mini Berry (MB) counts as one stitch and is followed by one single crochet. The stitch counts shown at the end of each row include both the Mini Berry stitches and single crochets.
Body Setup – All Sizes
With Color A and 5.5 mm (I/9) hook
FOUNDATION
Ch 61 (67, 69, 73, 75).
Row 1: Sc in 2nd ch from hook and in each ch across. Turn. [60 (66, 68, 72, 74) sts]
Rows 2–3: Ch 1, sc in each st across. Turn. [60 (66, 68, 72, 74) sts]
Row 4 – Mini Berry: Ch 1, MB in next st, sc in next st; repeat from * to * across. Turn. [60 (66, 68, 72, 74) sts; 30 (33, 34, 36, 37) MB]
At the end of Row 4, change to Color B on the final yarn-over. Carry Color A loosely up the side edge.
Row 5 – Color B: Ch 1, sc in each st across. Turn. Change to Color A on the final yarn-over. [60 (66, 68, 72, 74) sts]
Row 6 – Color A: Ch 1, MB in next st, sc in next st; repeat from * to * across. Turn. Change to Color B on the final yarn-over, except after the final repeat. [60 (66, 68, 72, 74) sts]
Work Rows 5–6 the following number of times total:
- Child: 7 times
- Teen / Women S: 8 times
- Women M / Men S: 9 times
- Women L / Men M: 10 times
- Men L: 11 times
On the final repeat of Rows 5–6 only: Work Row 5 in Color B, changing to Color A on the final yarn-over.
Cut Color B, leaving a tail to weave in. Work Row 6 in Color A without changing colors at the end.
Keep Color A attached for the final body row.
FINAL ROW – COLOR A
Ch 1, sc in each st across. Do not fasten off. [60 (66, 68, 72, 74) sts]
Body row totals: 19 (21, 23, 25, 27) rows.
Continue directly to the Ribbed Brim.
Ribbed Brim
Keep Color A attached after the final body row. Change to the 4.25 mm (G/6) hook.
The brim is worked in short rows perpendicular to the body.
Foundation: From the active loop, ch 18.
Brim Row 1: Sc in 2nd ch from hook and in each ch across. Sl st into each of the next 2 unworked sts along the final body row. Turn. [17 sc]
Brim Row 2: Skip the 2 joining sl sts. Working back across the brim, sc in the BLO of each sc. Ch 1, turn. [17 sc]
Brim Row 3: Sc in the BLO of each sc across toward the body. Sl st into each of the next 2 unworked sts along the final body row. Turn. [17 sc]
Repeat Brim Rows 2–3 across the lower edge until every body st has been used. Keep the joining sl sts relaxed so the brim remains stretchy.
After the final join, fasten off Color A, leaving a long tail for seaming.
The unfolded brim measures approximately 4 in (10 cm) deep and folds to approximately 2 in (5 cm).
Assembly & Finishing
Seam the Hat
- Fold the piece with the wrong side facing out.
- Align the short side edges, matching the color stripes and ends of the ribbed brim.
- With the long Color A tail and a tapestry needle, seam from the brim edge to the crown edge using mattress stitch or whip stitch.
- Seam the brim ends so the ridge pattern remains continuous. Keep the seam firm but flexible.
- Secure the yarn, weave in the tail, and turn the hat right side out.
Gather the Crown
- Thread a tapestry needle with a separate, generous length of Color A.
- Weave the yarn evenly through the end loops or stitches around the foundation-chain edge.
- Pull firmly to close the crown.
- Stitch across the opening several times, then knot securely inside. If a small opening remains, stitch it closed.
- Weave in the end.
Attach the Pom-Pom
- Center the faux-fur pom-pom over the gathered crown.
- For permanent attachment, use strong sewing thread or the pom's attached cords to sew through the crown several times; knot securely inside.
- For a removable pom-pom, sew a sturdy flat button inside the crown and fasten the pom's elastic loop around it, or install a compatible pom-pom snap.
Finishing
- Weave in all remaining ends.
- Fold the brim upward approximately 2 in (5 cm).
- Gently shape the hat and fluff the pom-pom.
Get Your FREE Everley Beanie PDF!
A special November treat for the Thanksgiving Make-Along!
I'm excited to offer the printable Everley Beanie PDF FREE throughout November 2026 as part of the Thanksgiving Make-Along hosted by Banana Moon Studio!
The PDF includes the complete crochet pattern in all five sizes, along with step-by-step construction photos to help you create your own beautiful Everley Beanie.
How to Unlock Your Free PDF
- Click the Unlock Free Download button below.
- Create your free GROW account or sign in if you already have one.
- Once unlocked, your PDF will appear with a Download button so you can save it to your device.
Already have a GROW account? Just sign in to access your free download!
This special free PDF offer is available November 1–30, 2026. After November 30, the printable PDF will return to its regular paid price.
Frequently Asked Questions About the Everley Beanie
Have questions while making your Everley Beanie? These FAQs cover the most common concerns and tips for success.
How to Care for Your Everley Beanie
After putting so much love into crocheting your Everley Beanie, you'll want to keep it looking just as beautiful as the day you finished it!
Because this textured crochet beanie features delicate Mini Berry stitches, a folded ribbed brim, and a fluffy faux-fur pom-pom, a little extra care will help preserve its shape and appearance.
Here are a few simple tips for caring for your handmade beanie:
- Follow your yarn's care instructions. Always check the yarn label for washing and drying recommendations, especially if you've substituted a different yarn.
- Spot clean when possible. If your faux-fur pom-pom is permanently attached, spot cleaning is the best option for keeping it looking its best.
- Avoid machine drying the faux fur. Heat can damage the fibers and affect the pom-pom's fluffy appearance.
- Reshape after cleaning. Gently smooth the textured body and folded ribbed brim back into shape.
- Fluff the pom-pom. Once everything is completely dry, gently fluff the faux fur to restore its fullness.
A Little Tip: If you plan to wash your beanie frequently, consider using a removable pom-pom. This makes caring for your handmade hat much easier!
Made Your Own Everley Beanie?
I'd love to see it!
Share a photo of your finished beanie on Instagram and Facebook, tag @itchinforsomestitchin, and use #IFSS_EverleyBeanie and #itchinforsomestitchin so I can celebrate your beautiful work. Don’t forget to follow me for more crochet patterns, tips, and inspiration!
If you're looking for a welcoming place to share your crochet projects, ask questions, and connect with fellow makers, I'd love for you to join the Itchin’ for Some Stitchin’ Crochet Community on Facebook. We'd love to see what you've created!
More Cozy Crochet Patterns You'll Love
If you enjoyed making the Everley Beanie, why stop at just one cozy creation?
Whether you love beautiful stitch textures, timeless designs, or simple everyday accessories, there are plenty of other crochet beanie patterns waiting for your hook!
Here are a few more favorites to inspire your next handmade project:
Click on images to view the patterns

Explore More Free Fall Crochet Patterns →

Thank you
I sincerely appreciate you visiting my blog! By sharing my content and/or making a purchase you are making it possible for me to continue producing and sharing free content for everyone to enjoy. Your support is amazing!