
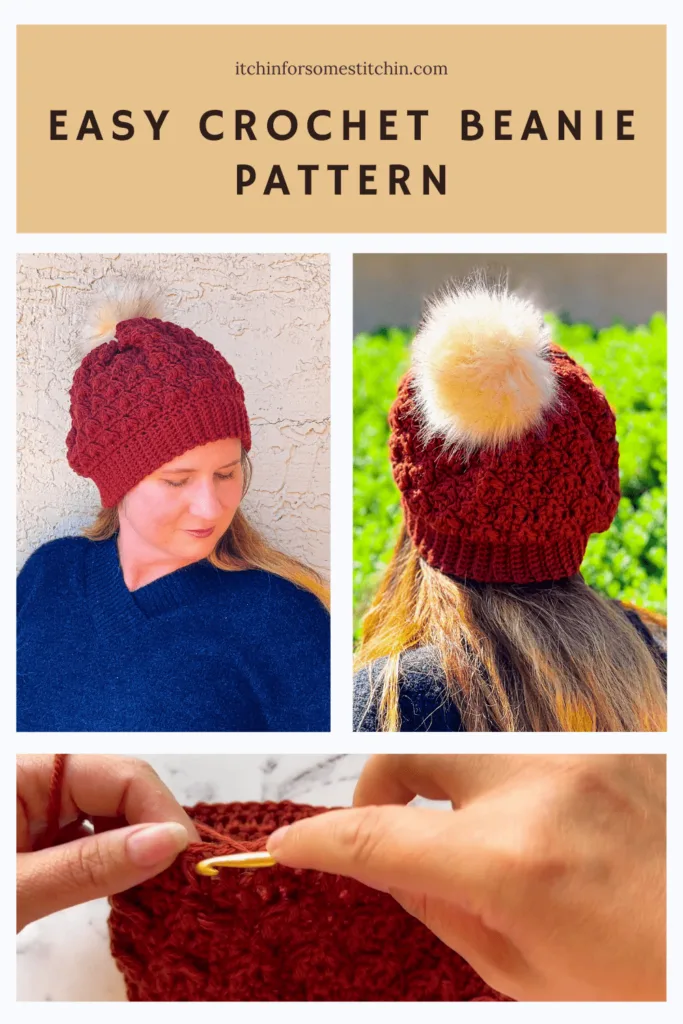


This easy textured crochet beanie is a cozy hat pattern that uses the beautiful Leafhopper stitch to create rich texture.
If you enjoy crochet stitches that add depth and visual interest without being difficult to work, this beanie is a fun project to try. The Leafhopper stitch creates a soft, bumpy texture that gives the hat a warm and modern look.
Below you’ll find the free crochet beanie pattern written step-by-step, so you can crochet the hat right from the page.

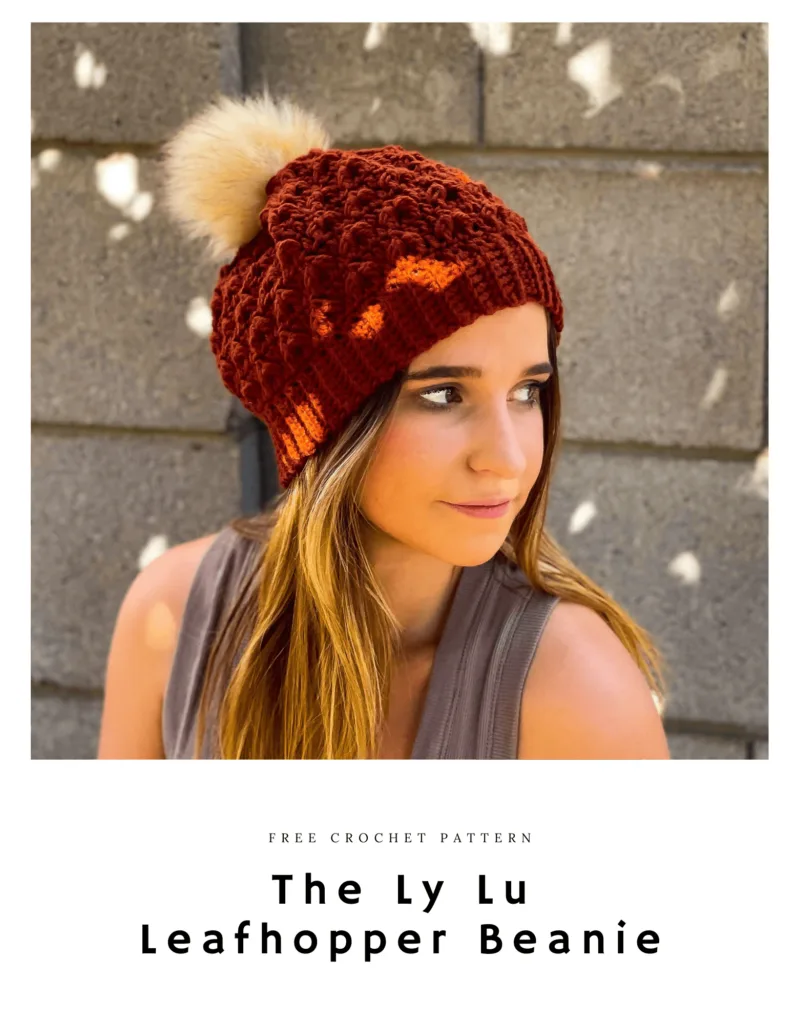
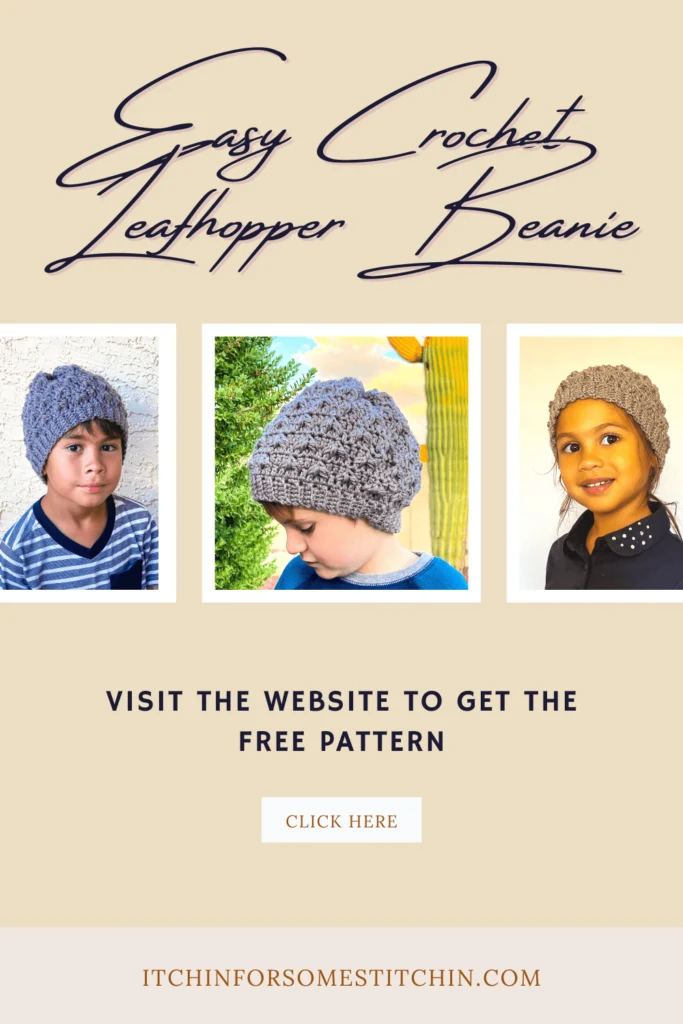
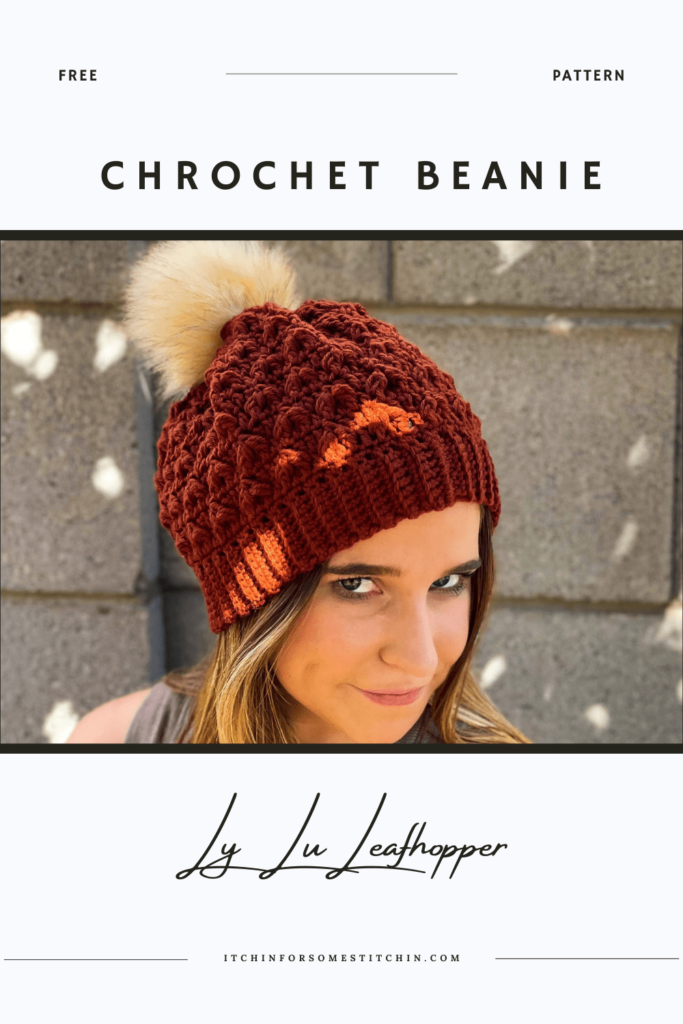
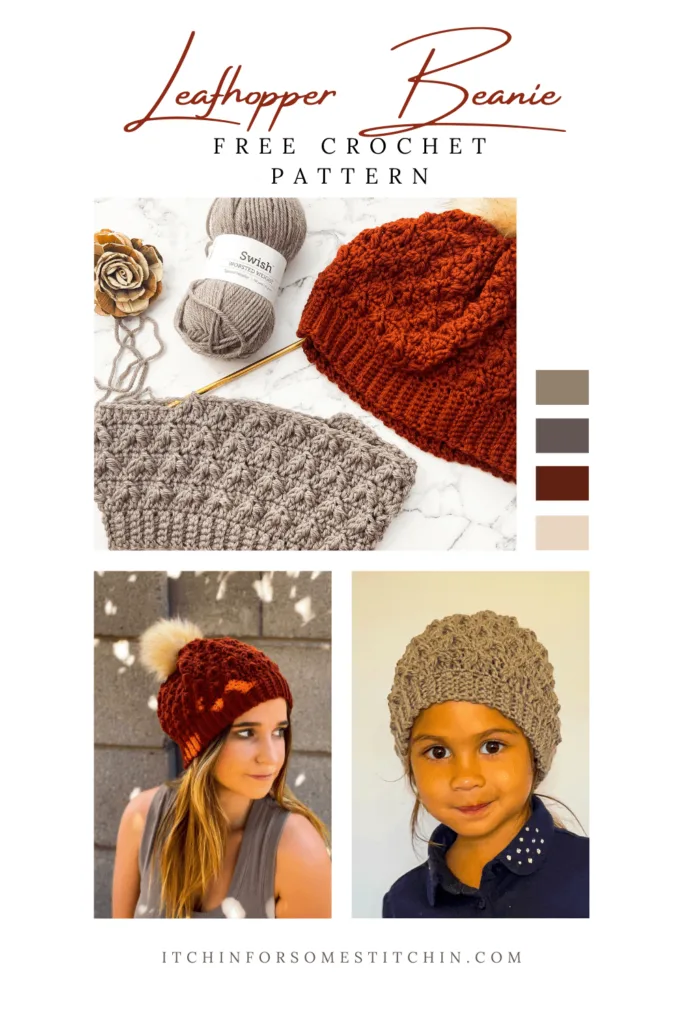
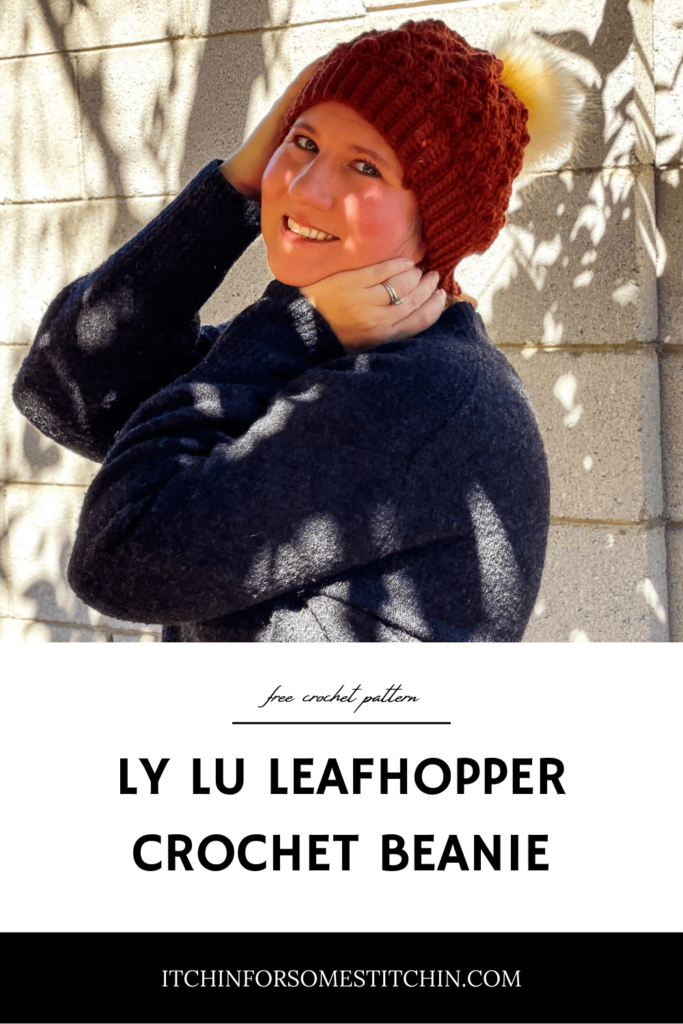
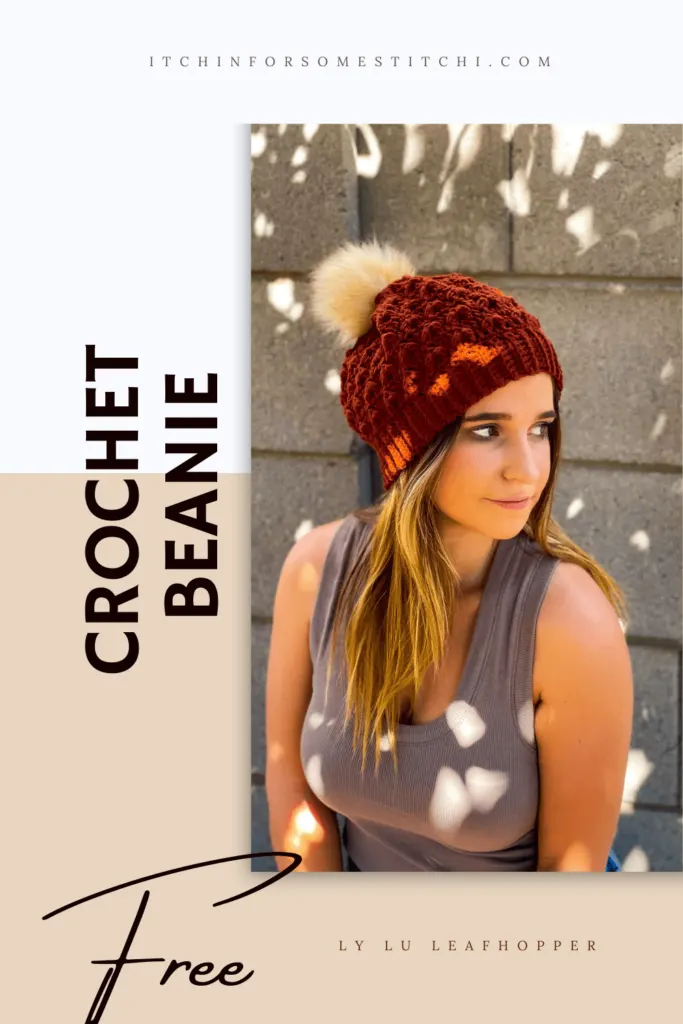
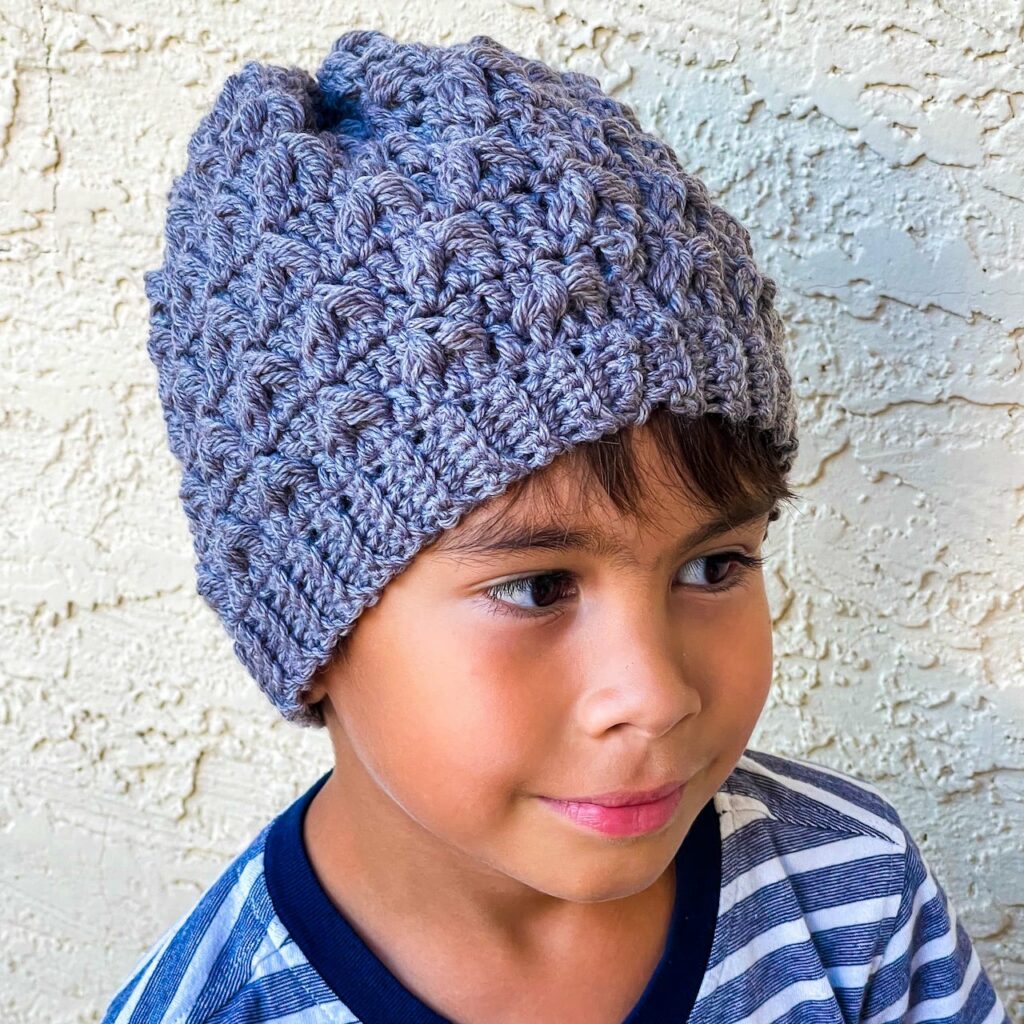
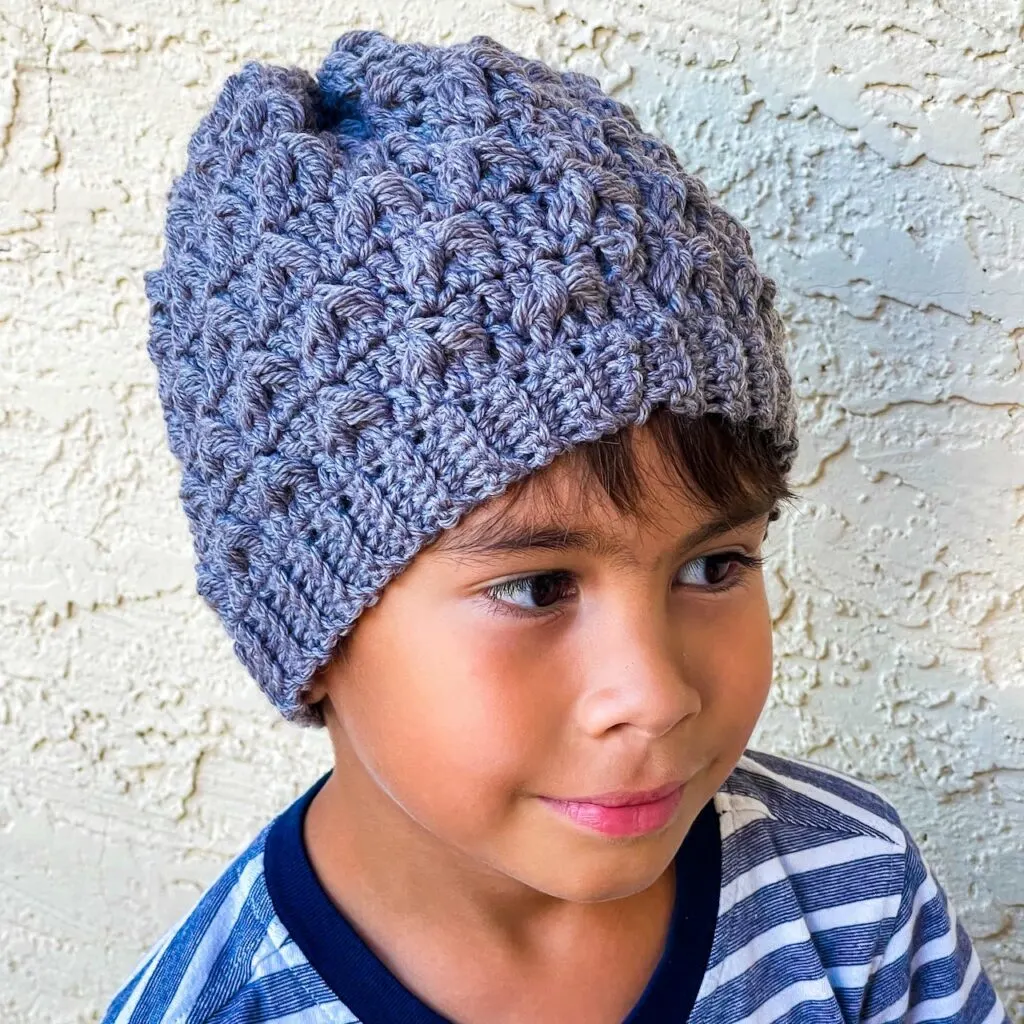
The Ly Lu Leafhopper Beanie is a chic, textured accessory that adds style to any outfit! Perfectly cozy for fall and winter yet stylish enough to wear year-round, this free pattern comes with full video tutorial and written instructions.
The Easy Textured Crochet Beanie combines a simple hat construction with a textured stitch pattern that really stands out.
This crochet beanie pattern works up into a warm, comfortable hat that’s perfect for cooler weather. The Leafhopper stitch creates a soft raised texture that adds style while still keeping the project relaxing to crochet.
In this pattern you’ll learn:
• how to crochet the Leafhopper stitch
• how the textured stitch pattern builds across the hat
• how to shape the crown of the beanie
• how to finish the beanie with a comfortable ribbed edge
If you enjoy crochet hats that feature interesting texture but still work up easily, this beanie is a great addition to your crochet projects.
Not Sure What to Crochet Next?
Once you learn a textured stitch like the Leafhopper stitch, it opens the door to many other crochet projects.
Try another textured accessory
If you enjoyed the texture in this beanie, the Simply Classic Cable Ear Warmer is a great follow-up project that creates a knit-inspired texture using crochet stitches.
Prefer a printable pattern?
If you’d rather crochet without scrolling through a webpage, the printable PDF version includes the same pattern laid out in a clean, easy-to-follow format.
Want your patterns organized in one place?
Inside the Crochet Conservatory, every pattern is available as an ad-free PDF and organized by project type so you can easily find your next project.
Help Keep Patterns Free!
Your support makes a difference!
If you enjoy having access to free patterns like the Ly Lu Leafhopper Beanie, please consider sharing this post with friends and fellow crocheters. You can easily share by clicking the social media buttons on this post or pin it to Pinterest to save for later and help others discover it too.
Thank you for helping keep patterns free and accessible for the crochet community!
PIN this pattern to your Pinterest boards for later.
You can also follow all my boards!

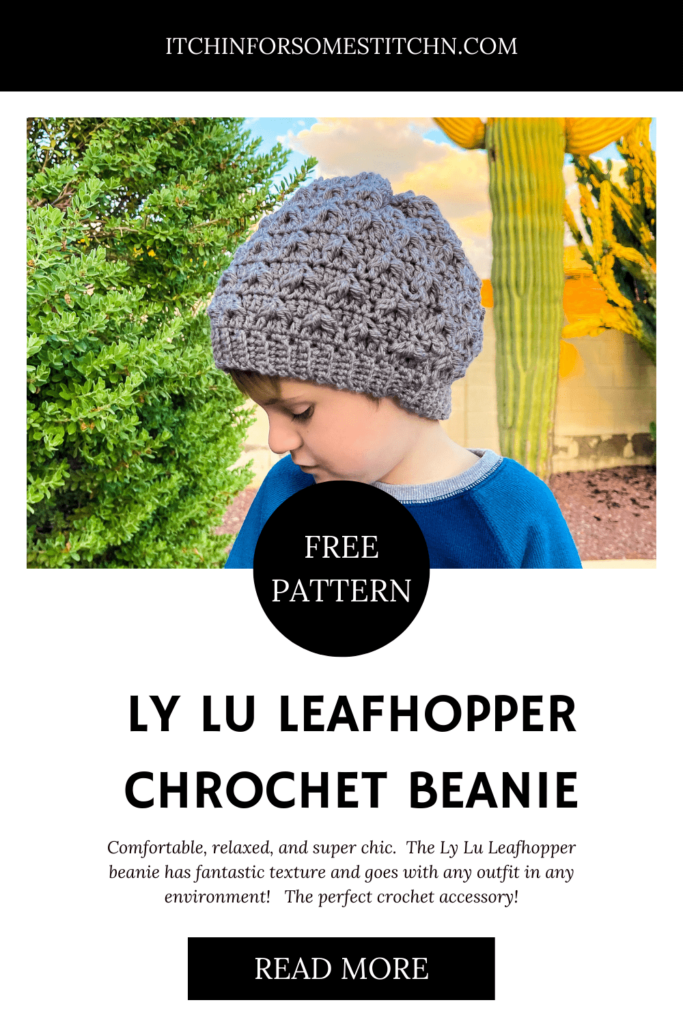
The Ly Lu Leafhopper Beanie
Comfortable, relaxed, and super chic. The Ly Lu Leafhopper beanie has fantastic texture and goes with any outfit in any environment! Adds a sassy touch to jeans and t-shirt or a classy look to your favorite sweater. Stylish enough to wear year-round, yet warm enough to keep your ears toasty in the fall and winter seasons. The perfect crochet accessory!
Pattern Inspiration
This pattern came be simply out of luck! I had some Knit Picks Swish yarn, which I really love, leftover from my Veruca Two Tone Sweater pattern. Plus, We Crochet had sent me an extra ball in a different color. I knew I wanted to do a beanie for the Winter Wonders blog hop and the extra ball, plus my leftover was the perfect amount!
Then i t was only a matter of finding the right stitch. As soon as I saw the Leafhopper I knew it was the one! I just had to teak it to work in the round and voilà this easy crochet beanie was born!
Yarn Details
As I previously mentioned, I already had the yarn for the project on hand. And fortunately, it’s a yarn I really love working with for three main reasons.
1. Made of 100% Merino Superwash Wool – It is amazingly soft.
I seriously can’t stop touching & wearing the projects I have made with this yarn!
2. It has fantastic drape.
I would say it’s good for those project in which you want a medium amount of drape. As I’ve said, I used it for a sweater and a beanie and the lovely drape gave the beanie a bit more a of a slouchy look without even trying.
3. It is super easy & smooth to work with.
For many people, this point isn’t always that important, but for me, it is. As a crocheter with limited arm strength and nerve damage to my crocheting arm, working with a yarn that is easy to pull through is critical, especially as I get older. It causes less stress on my crocheting arm & hand, allowing me to work faster for longer periods of time.
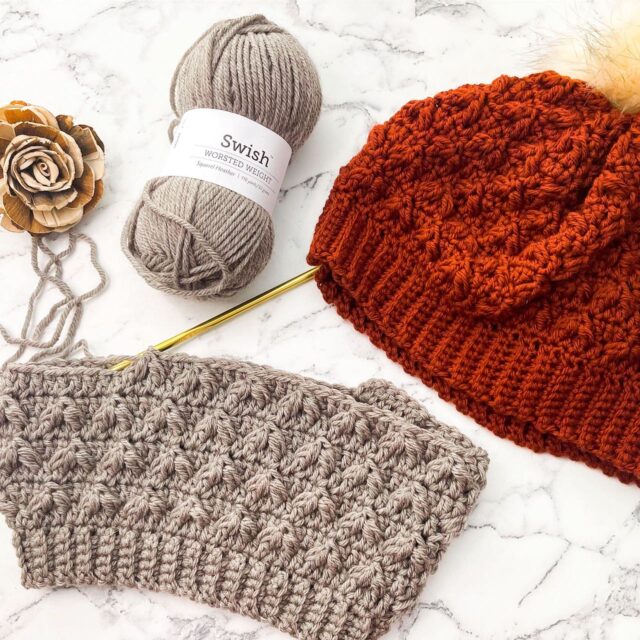

For these three reasons, Swish has moved to the top of my favorite list for medium 4 worsted weight yarns.
You can purchase it via my affiliate link below.
Difficulty Level
This pattern is level 4 – Advanced


Gauge
14 stitches and 8 rows = 4 x 4-inches in double crochet using H/8 5.0mm hook.
Finished Dimensions/Sizing
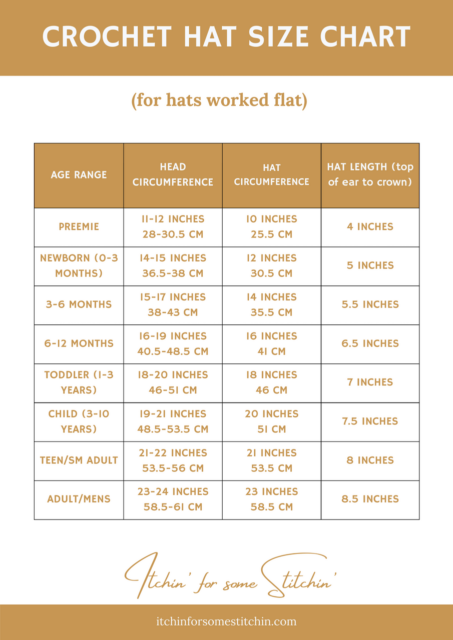
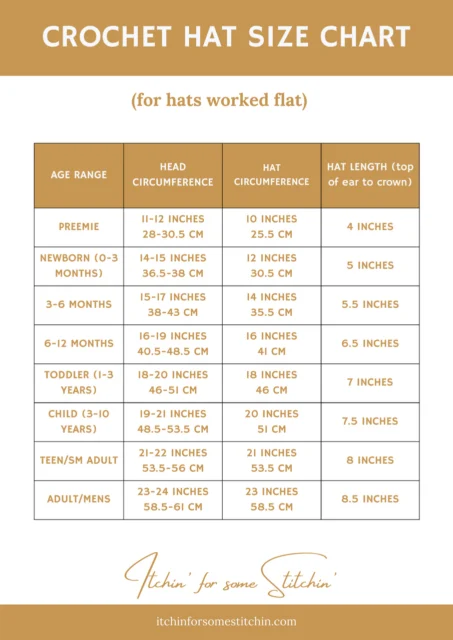
Pattern is made based on the Crafty Yarn Council’s Head Circumference Chart for each size listed in the charts below:
- All measurements are approximate, measured flat pre-wear, and are provided in inches and centimeters and designed for sizes according to the Hat Measurements Charts below.
- Please be sure to take your own head measurements and let those measurements serve as your guide. If you measure between sizes, please use the instructions for the next size up.
Construction & Schematics
- This pattern is constructed by creating a ribbed brim worked flat in rows. (See Figure 1)
- Brim is folded so that the two short edges align. (See Figure 2)
- Brim is seamed to create a large ring. (See Figures 3a and 3b)


- The main body of the hat is worked in Joined, unturned rounds along the top edge of the brim. (See Figure 4a)
- As the hat grows, it will create a square/rectangle tube. (See Figure 4b)
- A tapestry needle with yarn attached is inserted and pushed around the top edge of the beanie.
- As the needle is pulled out it will cinch the top of the hat. (See Figures 5a and 5b)


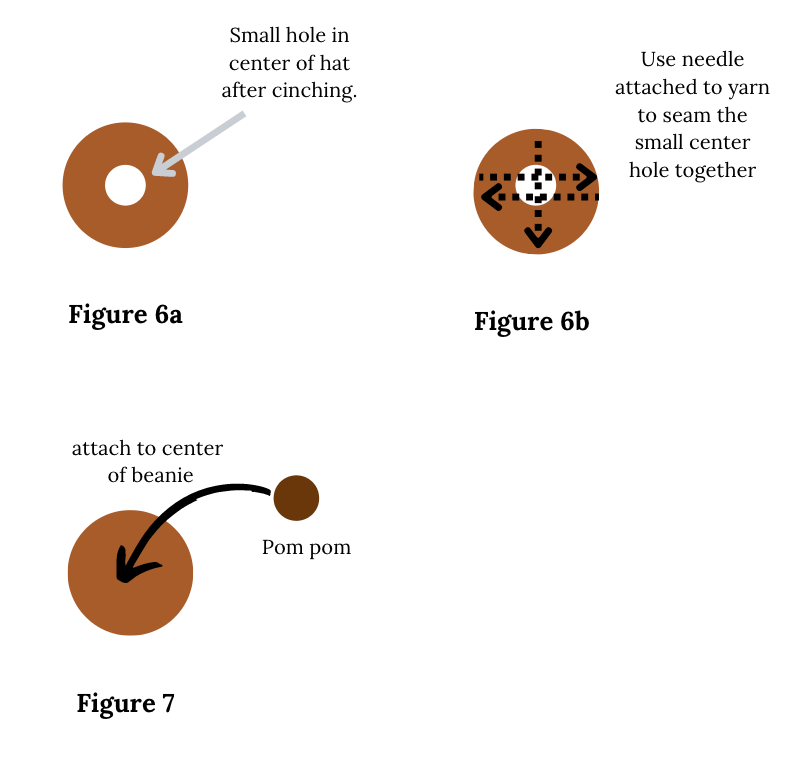
- A tapestry needle attached to yarn is used to seam the small hole left in the top of the beanie after cinching the top edge together. (See Figures 6a and 6b)
- Optional pom pom is added once the top hole is sealed. (See Figure 7)

Abbreviations
This pattern is written in US terminology.
- Stitch/es (st/sts)
- Round/s (rnd/rnds)
- Skip (sk)
- Chain stitch (ch)
- Slip stitch (slp-st)
- Single crochet (sc)
- Double crochet (dc)
- Back Post Only (BPO)
- Back Loop Only (BLO)
- *____* Repeat indicated instructions
Special Stitches
Leafhopper cluster (LCL) – *[yo, insert hook at front and from right to left behind stem of st before next st, yo, draw loop through and up to the height of htr (see Appendix A on page 14) ] twice, yo, draw through 4 loops*, skip next st, rep from * to * around stem of next st, yo, draw through all 3 loops on hook.
Double crochet 2 together (dc2tog) – yo, insert hook into the first st, yo, pull through one loop, yo, pull through 2 loops, yo, insert hook into next st, yo, pull through one loop, yo, pull through 2 loops, yo, pull through all 3 loops on hook.
US/UK Conversion
US terminology UK terminology
Slip stitch (slp-st) = Slip stitch (ss)
Single crochet (sc) = Double crochet (dc)
Double crochet (dc) = Treble crochet (tr)
Recommended Yarn
KnitPicks/We Crochet Swish Worsted Weight, 100% Fine Merino Superwash Wool in color way Copper, 110 yards / 50 grams.
Total yardage: 110yds / 101m to 330 yds / 302m
*provided requirements are estimates only
Preemie – Toddler – 1 balls = 110yds / 101m
Child – Teen/Sm Adult – 2 balls = 220yds / 201m
Adult Lg/Mens – 3 balls = 330yds / 302m
Yarn Alternatives
worsted weight yarn
Other Materials
- Crochet Hook size H/8 5.00 mm or whatever hook is necessary to obtain the correct gauge.
- Measuring tape
- Stitch markers (optional)
- Scissors
- Tapestry needle for weaving in ends
Pattern Notes:
Read all pattern notes, instructions, and other provided details carefully before starting the project to make sure you understand everything. It could save you hours & a lot of headaches!
- Make a swatch that measures at least 10 x 10 cm / 4 x 4 inches using the stitch provided under the Gauge Section. If your swatch matches the gauge, then you are all set to start the project. If the gauge is wrong, you might need to change your crochet hook – increase your hook size if your stitches are smaller & decrease your hook size if your stitches are larger.
- All measurements given are unblocked and measured flat pre-wear and pre-seaming as fabric pieces may stretch during/after blocking, wearing, and seaming.
- Provided measurements are as exact as possible, but are given as approximates. This is because yarn variances, crochet tension & individual technique might give variations in the result, which changes from person to person.
- The brim of the hat is worked flat in rows.
- The main body of this pattern is worked in in joined rounds. There will be no turning at the end of each round, but there will be chaining to move to the next round.
- All ch 3’s count as stitches throughout the pattern.
- Care Instructions: Hand wash & lay flat to dry or follow instructions on the yarn label.
**THIS IS AN ORIGINAL PATTERN. Please see my Copyright Statement for details.
Need to see it in action?
Instructions
Brim
Preemie
Ch 4
Newborn – Child
Ch 6
Teen/Sm Adult – Adult Lg/Mens
Ch 9
Row 1: Turn work, sc in the bpo of the 2nd ch from the hook and in the bpo of each ch across. [3, (5), (8)]
Row 2: Ch 1, turn work, sc in the blo of each st across. [3, (5), (8)]
Repeat row 2 to two inches LESS (this is for stretch) than the head circumference measurement in the Crochet Hat Size Chart on page above for the size you are crocheting.
NOTE: Swish yarn is very elastic. Using a yarn that is less elastic means you will need to get closer to the Head Circumference measurement outlined in the Crochet Hat Size Chart.
Do NOT bind off.
Fold brim as indicated in Figure 2 above.
Slp-st the short edges of the brim together to form a large ring as indicated in Figures 3a and 3b.
Do NOT bind off.
Turn brim so that the seam edges are on the inside of the hat and the edge with the yarn and hook is facing up.
Ch 1, sc evenly around the top of the brim making a multiple of 4 plus 1 sts, slp-st to ch 1 to close.
Take note of your stitch count.
No stitch counts are provided throughout the rest of the pattern as it will be specific to each individual hat.
It is important to space your stitches evenly so the body of the hat is not too loose or too tight.
Main body
Round 1: Ch 1, sc evenly around the brim of the hat making a multiple of 4 plus 1 sts, slp-st to the ch 1 to close.
NOTE: Remember to take note of your stitch count and make sure you end up with this stitch count at the end of every double crochet round.
Round 2 (Dc round): Ch 3, dc in next sc and each sc around, slp-st to the top of the ch 3 to close.
Round 3 (LCL round): Ch 3, dc in the next dc, *1 LCL over next st ** work 1 dc into each of the next 3 sts*. Repeat from * to * ending last repeat at **, dc in the final 2 sts, slp-st to top of ch 3 to close.
NOTE: Please see video tutorial for exact placement of stitches.
Round 4 (Dc round): Ch 3, dc in next st and each st around, slp-st to the top of the ch 3 to close.
NOTE: You should have one extra st at this point. You will need to make a reduction in the next Dc round to get back to your original stitch count.
Round 5 (LCL round): Ch 3, work 1 dc in each of the next 4 dc, *1 LCL over next st, work 1 dc into each of the next 3 sts*. Repeat from * to * around, ending with a dc in the final st, slp-st to top of ch 3 to close. Next work 1 LCL over the sts between the two LCL directly below on round 3, slp-st to the top of the dc directly behind the last LCL st.
Round 6 (Dc round): Ch 3, dc in each st around to the last 2 sts, dc2tog the last 2 sts, slp-st to the top of the ch 3 to close.
NOTE: Dc2tog reduces your stitch count by one – so you will be back to your original stitch count.
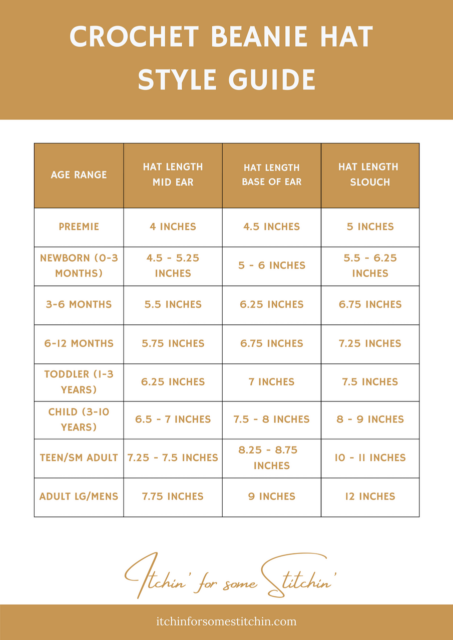
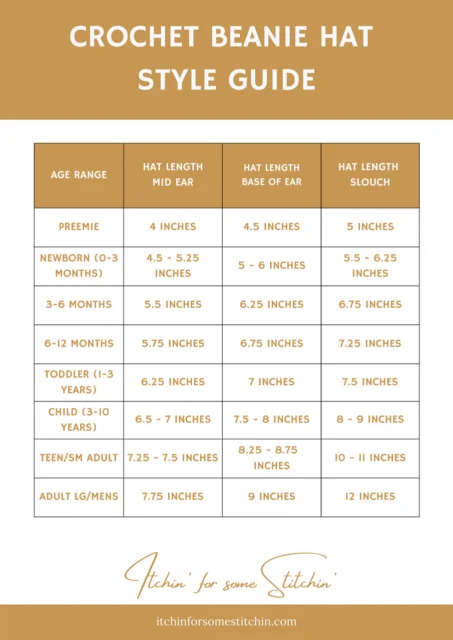
Repeat rounds 3 – 6 until beanie reaches the desired hat length for your beanie size based on the the Crochet Beanie Hat Style Guide above. You can end on any round.
Bind off leaving a 12-inch yarn tail.
Assembly
Step 1. Thread yarn tail into a tapestry needle.
Step 2. Weave tapestry needle around the top edge of the beanie as indicated in Figures 5a and 5b.
Step 3. Pull tapestry needle out on the opposite side of where you inserted it to cinch the top of the beanie.
Step 4. Use tapestry needle with attached yarn to sew together the small hole that remains after cinching the top of the beanie together as indicated in Figures 6a and 6b.
Step 5. Use the tapestry needle with attached yarn to add a pom pom if desired.
Bind off & Weave in ends
Other Patterns I Love & You Will too!
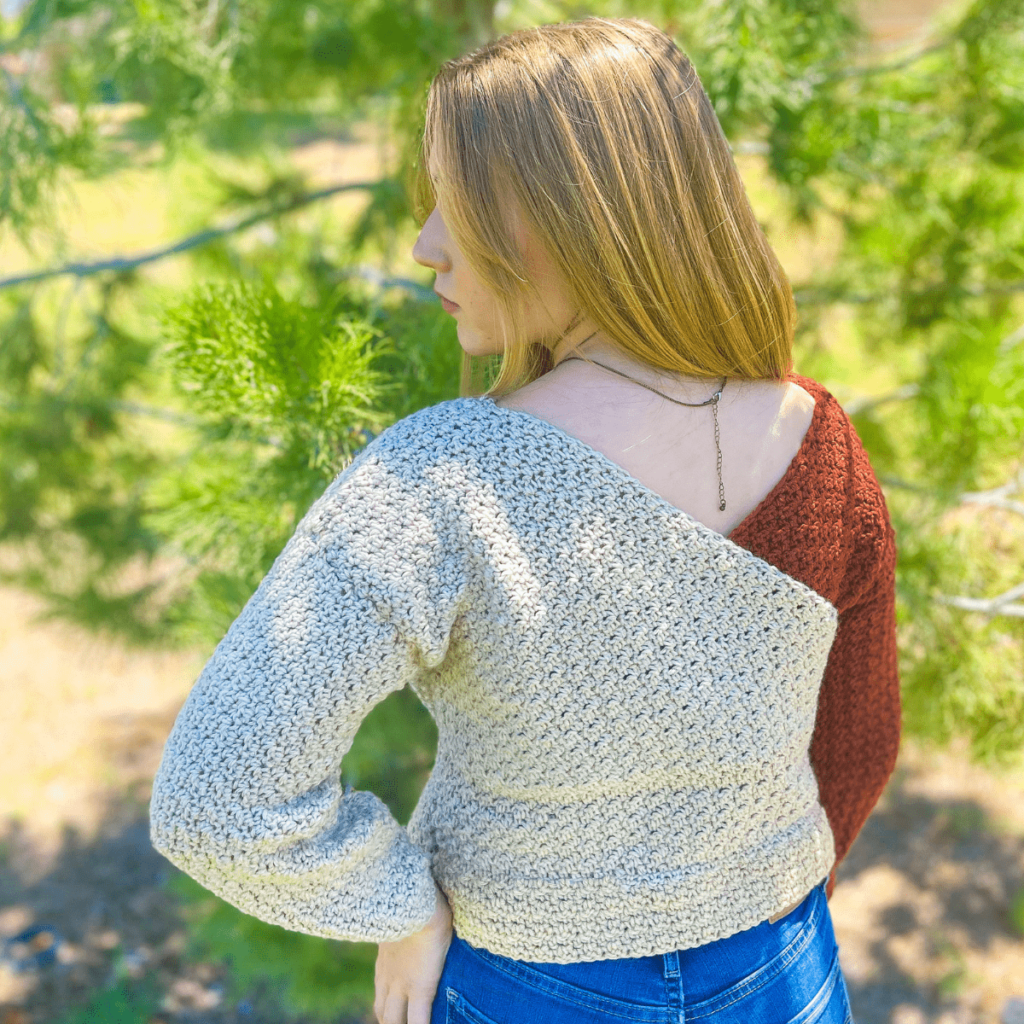
Vercua Two – Tone Crochet Sweater

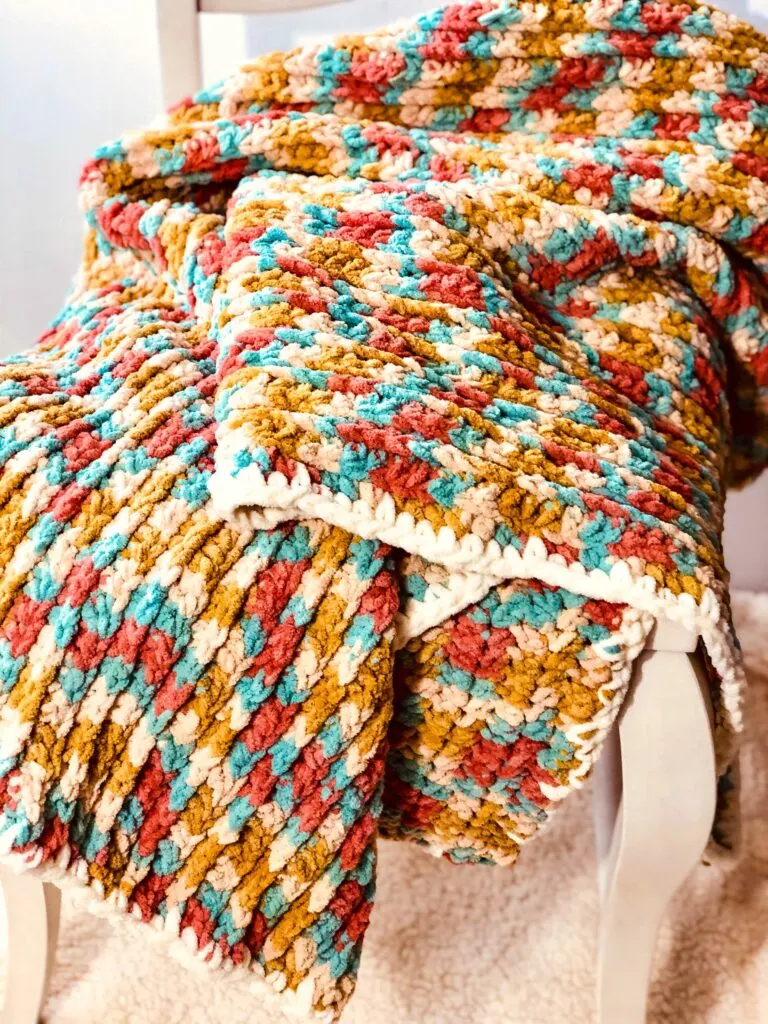
Easy Chunky Crochet Blanket

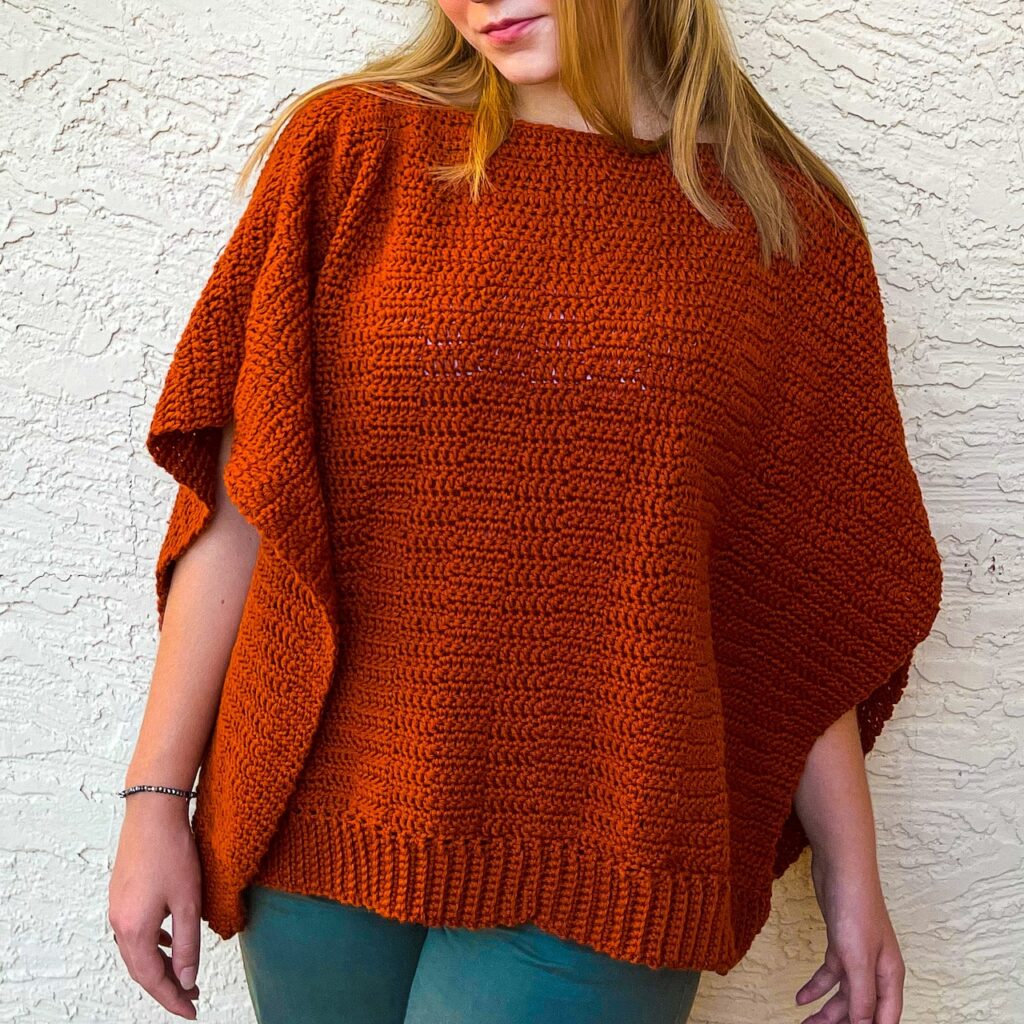
The Pennington Crochet Poncho

Thank you for visiting my blog!
Your support, whether through sharing my content or making a purchase, enables me to keep creating and sharing free content for everyone’s enjoyment.
Your support is truly valued and greatly appreciated!


Until next time… Happy Crocheting!


How to Get This Pattern
Looking to make the Ly Lu Leafhopper Beanie?
There are a few ways to get this cozy and stylish pattern to fit your needs! Whether you want it free from the website or as a convenient PDF, here’s how you can get started:
- Free on My Website: Scoll down to get the free pattern version below to start crocheting right away!
- PDF in My Shop: Prefer a printable version? Click the button below to purchase.


- PDF on Ravelry: Find it on Ravelry for easy access to your library! Grab the PDF here.
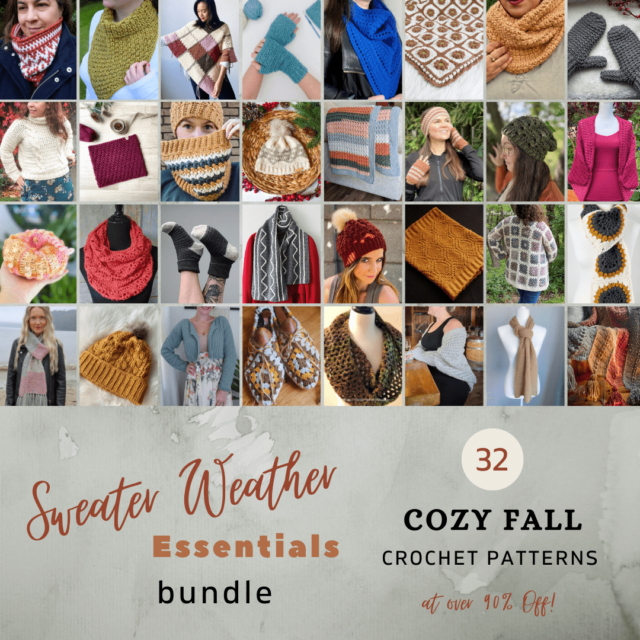
- Sweater Weather Essentials Bundle: Get this pattern along with 32 other fall-inspired designs in one bundle! Check out the bundle here.
- VIP Crochet Committed Community: Access this pattern and more exclusive content as a Crochet Committed level member! Learn more about joining here.
Choose the option that suits you best and enjoy creating the Ly Lu Leafhopper Beanie!