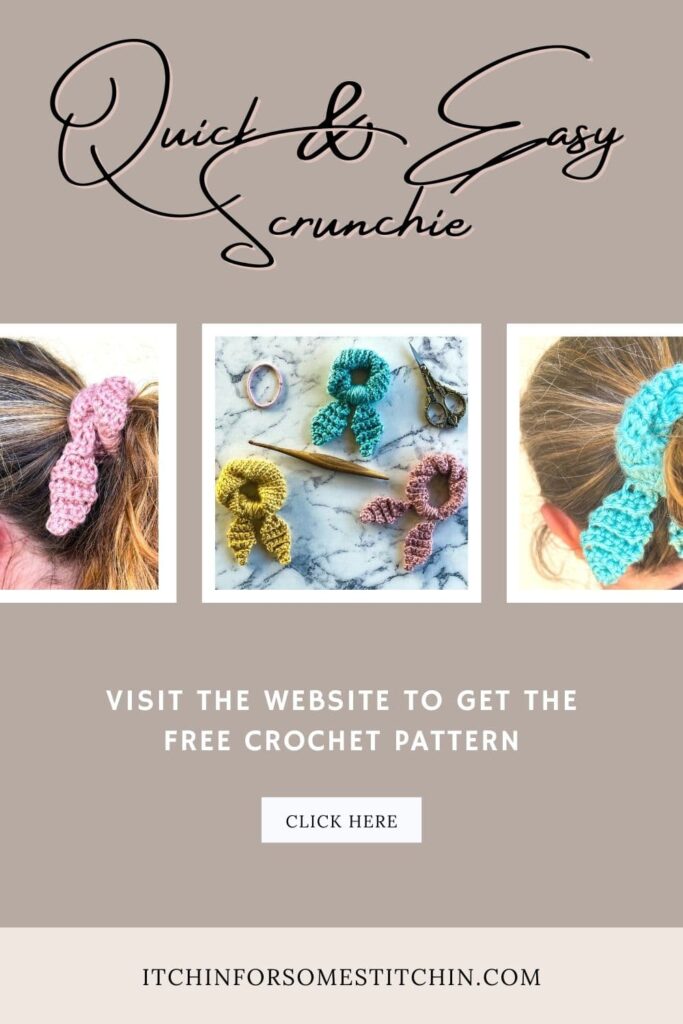
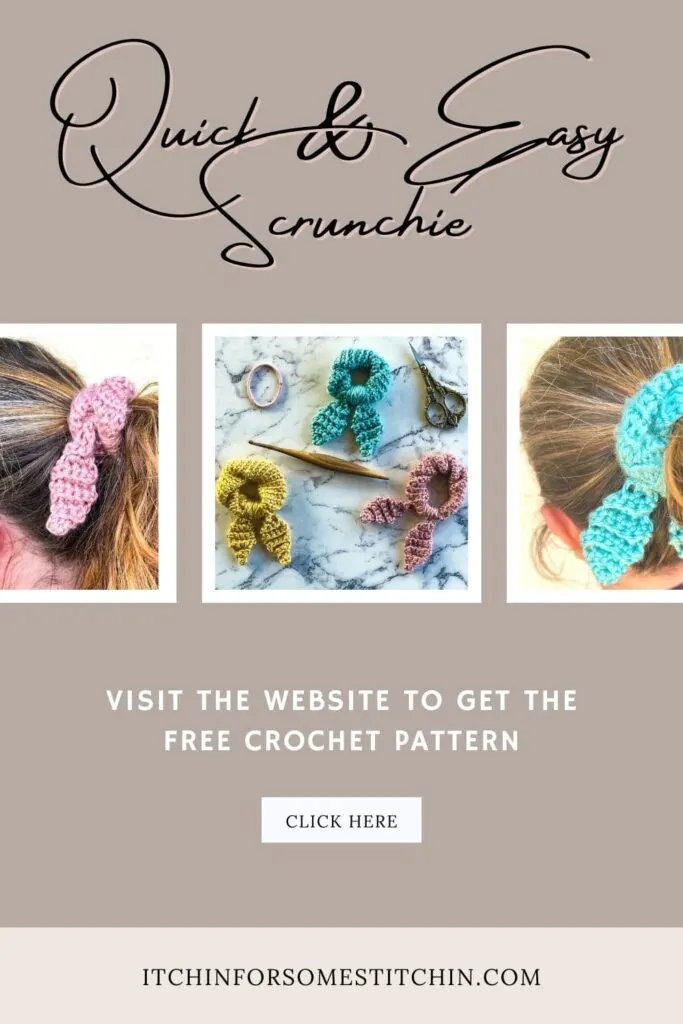

Learn all about crochet scrunchies; what they are, why you should use them, the best yarn to use when crocheting one, and a free pattern for a quick & easy crochet scrunchie that can be worked up with just a few yards of scrap yarn!
What is a scrunchie?
If you are not a child of the 80’s and 90’s, you might not know exactly what scrunchies are. Or perhaps you do as they seem to be trendy now days!
Scrunchies are fabric-covered elastic hair ties used to fasten medium to long hair and pull it away from the face typically into a “ponytail”. The elastic hair tie is enclosed in a loose fabric that forms a ruffle or scrunched look.
Unlike hair ties, scrunchies don’t cause hair breakage. So they are much better for your hair!
The fabric between the elastic band and your hair creates as a barrier that protects your lovely locks.
Plus, scrunchies don’t need to be wound as tightly around your hair which prevents additional hair damage.
What is the best yarn for a crochet scrunchie?
I think scrunchies can be made using multiple yarn types.
I’ve seen chunky scrnchies crocheted with bulky yarn. These take less stitches and thus work up quickly, but they will also be quite thick. Depending on the yarn used, this could make it difficult for the scrunchie to stay in place on your hair.
If you use a thinner fingering weigh or crochet thread, you may not get the full scrunchie look without having to work a ton of stitches. This could potentially mean that your scrunchie could take hours to crochet up!
I personally feel the best yarn for crochet scrunchies is a medium 4 worsted weight. It’s thick enough to create a fluffy scrunchie, but not too thick so it still fastens well.
How much yarn does it take to crochet a scrunchie?
The amount of yarn needed to crochet a scrunchie really depends on the scrunchie size, the yarn used, and the complexity of the pattern.
However, in general, scrunchies take about 10 – 30 yards for an average simple scrunchie worked with medium weight yarn.
The Quick and Easy Crochet Scrunchie provided below fits exactly this criteria!
How to crochet an easy scrunchie
First gather your materials!
Here’s a simple list of what you need:
- yarn
- crochet hook
- elastic band
- scissors
- tapestry needle
Second, crochet around the scrunchie.
Third, bind off & weave in ends.
It’s that simple! Only 3 easy steps!
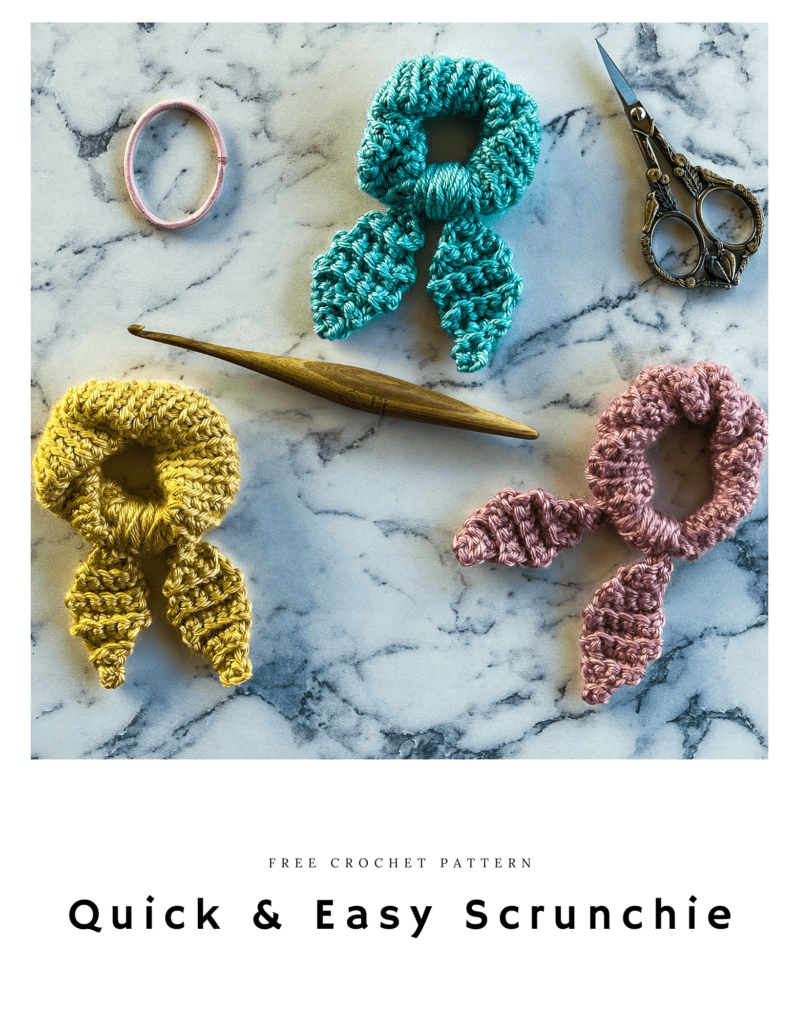
Quick & Easy Crochet Scrunchie Pattern
**THIS IS AN ORIGINAL PATTERN. Please see my Copyright Statement for details.
- Pin this pattern to your Pinterest Boards to Save It
The Quick & Easy Crochet Scrunchie Pattern is currently only available in the Stash Busting Pattern Bundle.

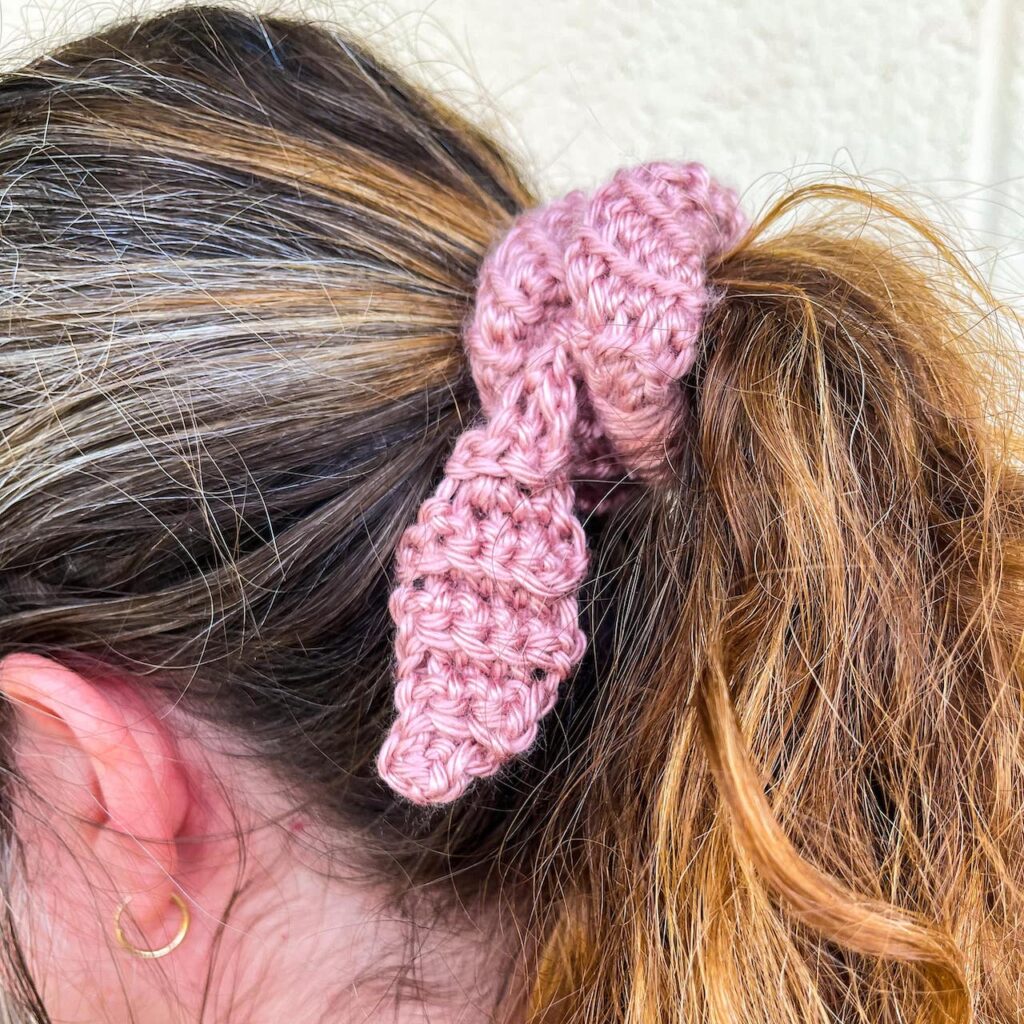
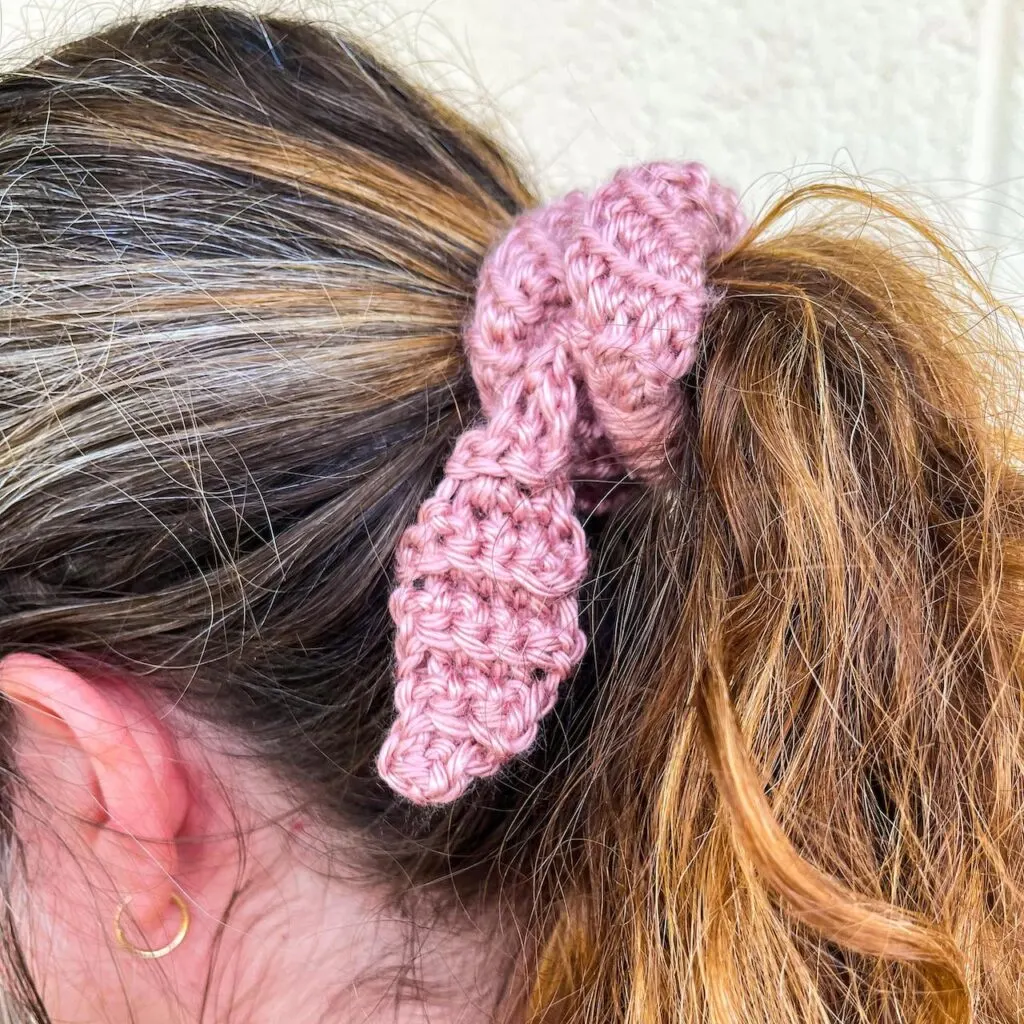
Scrunchies are in! Add style, class, and fun to your wardrobe. These quick and easy hair scrunchies can be crocheted in about 30 mins or less. Keep your hair tied back with a great pop of color! These scrunchies can be left plain if desired or add the ribbon for fun & fresh look!
It also makes a great stash buster project!
Construction
This pattern is constructed as 2 pieces and then assembled.
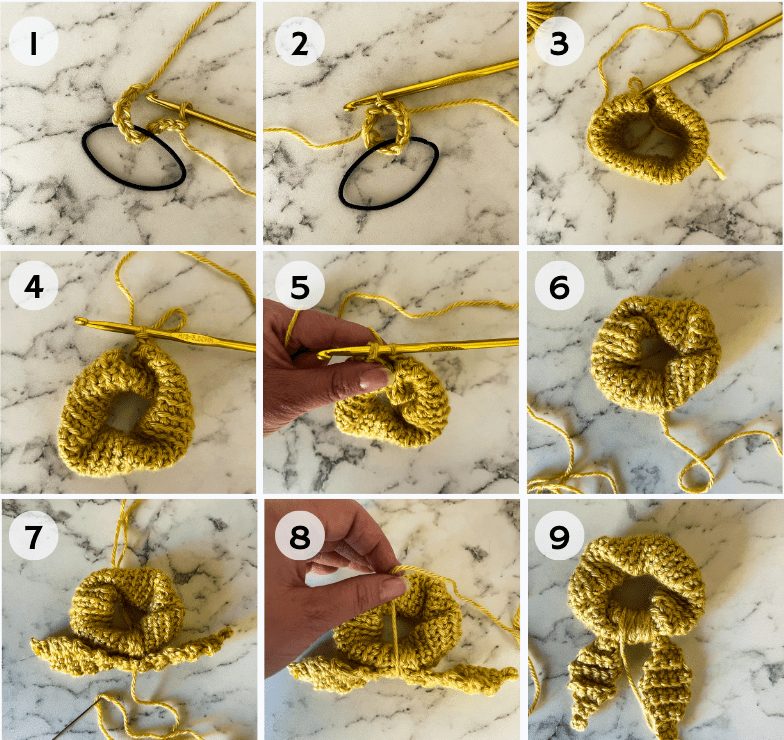
- The main body of the scrunchie is worked by creating a tubular structure around a hair tie and the ends are seamed together to form a large ring. (Images 1 – 6)
- The ribbon is constructed and sealed onto the bottom of the scrunchie. (Images 7 – 9)

Difficulty level
Difficulty level : Advanced Beginner


Gauge/Tension
3 stitches and 8 rows = 4 x 4-inches in double crochet using H/8 5.00mm hook in double crochet.
Recommended yarn
Caron Simply Soft, 4 Medium (Worsted), 100% acrylic, 170g/6oz, 315 Yards/288m per skein.
Yardage requirements
*provided requirements are estimates only
Total yardage: 25yds / 23m to 30 yds / 27m
Yarn alternatives
Medium 4 worsted weight
Other Materials
- Crochet Hook size H/8 5.00 mm or whatever hook is necessary to obtain the correct gauge.
- Measuring tape (optional)
- Stitch markers (optional)
- Scissors
- Tapestry needle for weaving in ends
- 1 elastic hair tie
Abbreviations
Pattern is written in US terms.
- Stitch / es (st / sts)
- Yarn over (Yo)
- Skip (sk)
- Turning chain (tch)
- Back Loop Only (BLO)
- Back Post Only (BPO)
- Slip stitch (slp-st)
- Chain stitch (ch / chs)
- Single crochet (sc)
- * ___ * Repeat indicated instructions
Special Stitches
Single crochet 2 together (sc2tog) – insert hook into the stitch to be worked, yarn over, pull up a loop (2 loops on hook), insert hook into the next stitch to be worked, yarn over, pull up a loop (3 loops on hook), yarn over, pull through all 3 loops.
Finished Dimensions
All measurements are approximate, measured flat pre-use, and are provided in inches.
This pattern has no specific finished dimensions because it can be made to suit any hair tie, which vary in diameter and thickness.
Additional Notes
Read all pattern notes, instructions, and other provided details carefully before starting the project to make sure you understand everything. It could save you hours & a lot of headaches!
- The gauge/tension is not critical for this pattern, however, if you want to be sure you meet the gauge for this pattern then make a swatch of each square that measures at least 10 x 10 cm / 4 x 4 inches using the stitch provided under the Gauge Section. If your swatch matches the gauge, then you are all set to start the project. If the gauge is wrong, you might need to change your crochet hook – increase your hook size if your stitches are smaller & decrease your hook size if your stitches are larger.
- All given measurements are unblocked and measured pre-wear and as fabric pieces may stretch during/after blocking, and wearing.
- Provided measurements are as exact as possible, but are given as approximates. This is because yarn variances, crochet tension & individual technique might give variations in the result, which changes from person to person.
- The main body of this pattern is worked in continuous rounds. There will be NO joining at the end of each round, or turning and chaining.
- The ribbon section of this pattern is worked flat in rows.
- Stitch counts are given in [ ] at the end of each round. If no stitch count is given, then the count is the same as the previous round.
- Care Instructions: Hand wash & lay flat to dry or follow instructions on the yarn label.
Instructions
Body
Chain 12
Place the chain around the hair tie as indicated in Image 1.
Slp-st the 1st and last chs together to form a ring as indicated in Image 2.
Round 1: Ch 1, sc in the bpo of the next ch and in each ch around.
Continue crocheting continuously by making 1 sc in the blo of each st around until you’ve gone all the way around the hair tie.
NOTE: This should create a tubular structure around the hair tie. See Image 3.
Twist and squish the tube to give the “scrunchie look” to your preference. See Image 4.
Slp-st the two ends of the tube together. See Image 5.
Bind off leaving at least a 3 foot tail and continue to Ribbon Section. See Image 6.
Ribbon
Row 1: Ch 2, sc in the 2nd ch from the hook. [1]
Row 2: Ch 1, turn work, work 2 sc into the blo of the st. [2]
Row 3: Ch 1, turn work, work 2 sc into the blo of the 1st st, work 1 sc into the blo of the 2nd st. [3]
Row 4: Ch 1, turn work, work 2 sc into the blo of the 1st st, work 1 sc int the blo of the 2nd st, work 2 sc into the blo of the last st. [5]
Row 5: Ch 1, sc into the blo of each st across. [5]
Rows 6 – 7: Repeat row 5. [5]
Row 8: Ch 1, turn work, sc2tog the next 2 sts, sc in the blo of the next 3 sts. [4]
Row 9: Ch 1, turn work, sc2tog the next 2 sts, sc in the blo of the next 2 sts. [3]
Row 10: Ch 1, turn work, sc2tog the next 2 sts, sc into the blo of the last st. [2]
Row 11: Ch 1, turn work, sc in the blo of each st. [2]
Rows 12 – 14: Repeat row 11. [2]
Row 15: Ch 1, work 2 sc into the blo of the 1st st, work 1 sc into the blo of the last st. [3]
Row 16: Ch 1, work 2 sc into the blo of the 1st st, work 1 sc into the blo of each of the next 2 sts. [4]
Row 17: Ch 1, work 2 sc into the blo of the 1st st, work 1 sc into the blo of each of the next 3 sts. [5]
Row 18: Ch 1, turn work, sc in the blo each st. [5]
Rows 19 – 20: Repeat row 18. [5]
Row 21: Ch 1, sc2tog the next 2 sts, sc in the blo of each of the next 3 sts. [4]
Row 22: Ch 1, sc2tog the next 2 sts, sc in the blo of each of the next 2 sts. [3]
Row 23: Ch 1, sc2tog the next 2 sts, sc in the blo of the last st. [2]
Row 24: Ch 1, sc2tog the last 2 sts. [1]
Bind off & weave in ends.
Assembly
- Thread the long tail on the body of the scrunchie into a tapestry needle.
- Run the tapestry needle from the top – through the center of the scrunchie where the two edges of the body were seamed together – to the bottom AND through the center of the ribbon. See Image 7.
- Wrap the long tail around the scrunchie and ribbon sealing the ribbon to the bottom of the scrunchie. See Images 8 – 9.
Weave in ends and snip any remaining tail.
Crochet Scrunchie FAQs
Let’s answer some of the common questions people have about soap savers!
How do you wash crochet scrunchies?
There are several ways to wash crochet scrunchies. You can hand wash or machine wash them.
Hand wash:
- Fill a large bowl or bucket with warm water and add a few drops of detergent or shampoo.
- Scrub and soak your scrunchies a few times gently by hand.
- Rinse the scrunchies in fresh water
Machine wash:
- Place scrunchies in a laundry bag, net bag or empty pillow case.
- Wash on the hand wash or delicate cycle on your machine.
- Choose warm or cold water options with the lowest spin cycle possible.
What are the benefits of crochet scrunchies?
Believe it or not crochet scrunchie do more that just make a fashion statement!
Firstly, they reduce the amount of damage to your hair! As mentioned before, they provide a protective barrier between your hair and the elastic band.
Hair you ever worn a pony tail for more than a few days straight?
I have. The pony tail is my “go to” hair style and I literally wear it every day. And after a few days, my head hurts event when I take the elastic band out!
Well, because crochet scrunchies do not hold your hair as tightly as a plain elastic band, they reduce headaches and prevent creases and kinks in your hair during prolonged use.
Why crochet scrunchies when you can buy them?
There are multiple reasons!
Crochet scrunchies are a great scrap buster! If you have a ton of little yarn balls in your stash, crochet scrunchies are a great way to use them up!
Plus, they make great gifts! My daughters love them!
Believe it or not they sell really well too. Crochet scrunchies are trendy and easily sell for $3 – $5 each!
What a great way to make a little side income!
More crochet accessory patterns
Thank you for coming to my blog! By sharing my content and/or making a purchase you are making it possible for me to continue producing and sharing free content for everyone to enjoy. I sincerely appreciate your support!
Until next time… Happy Crocheting!


Please share!