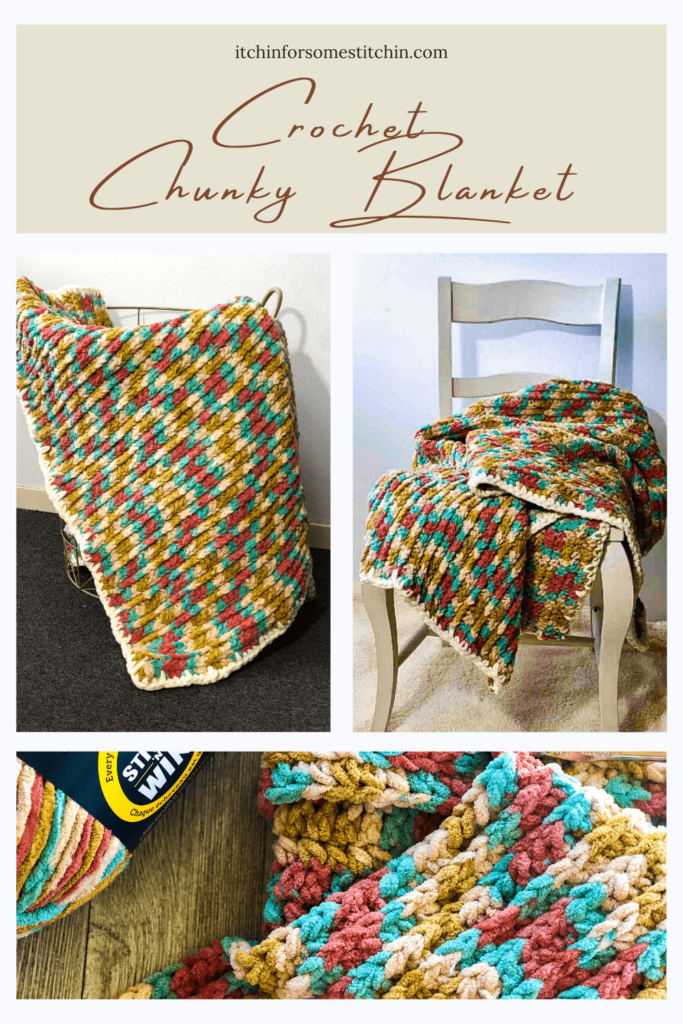


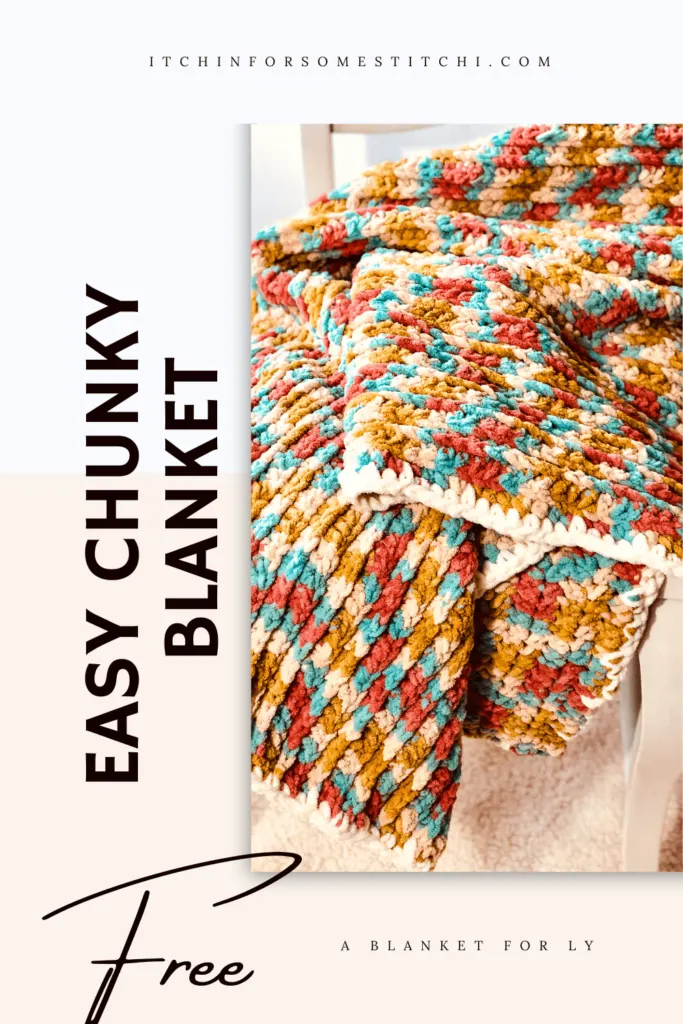


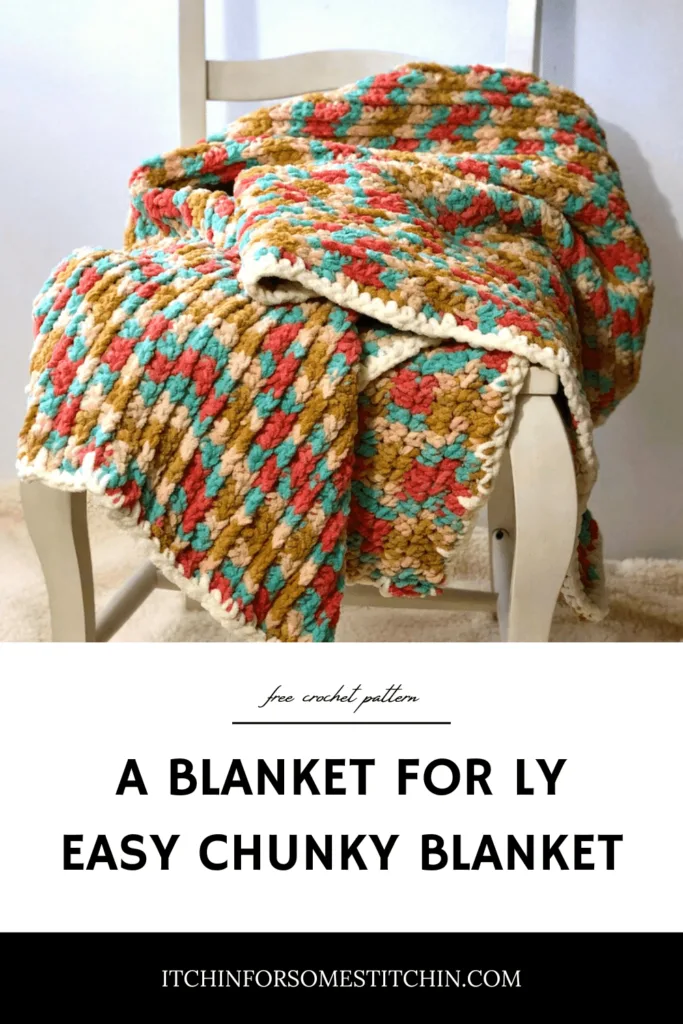

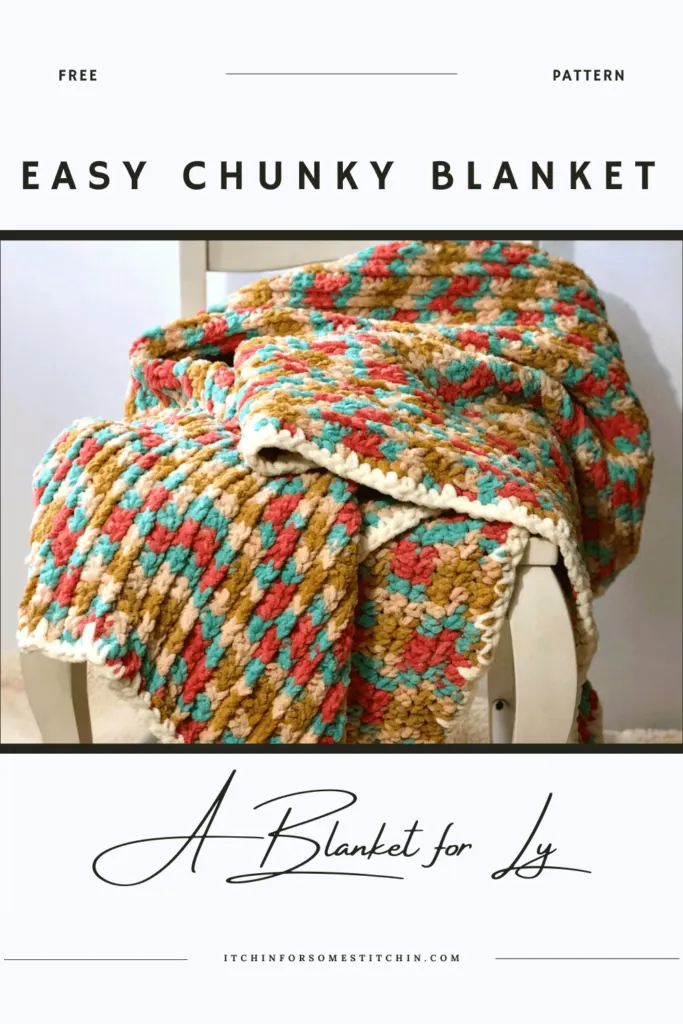

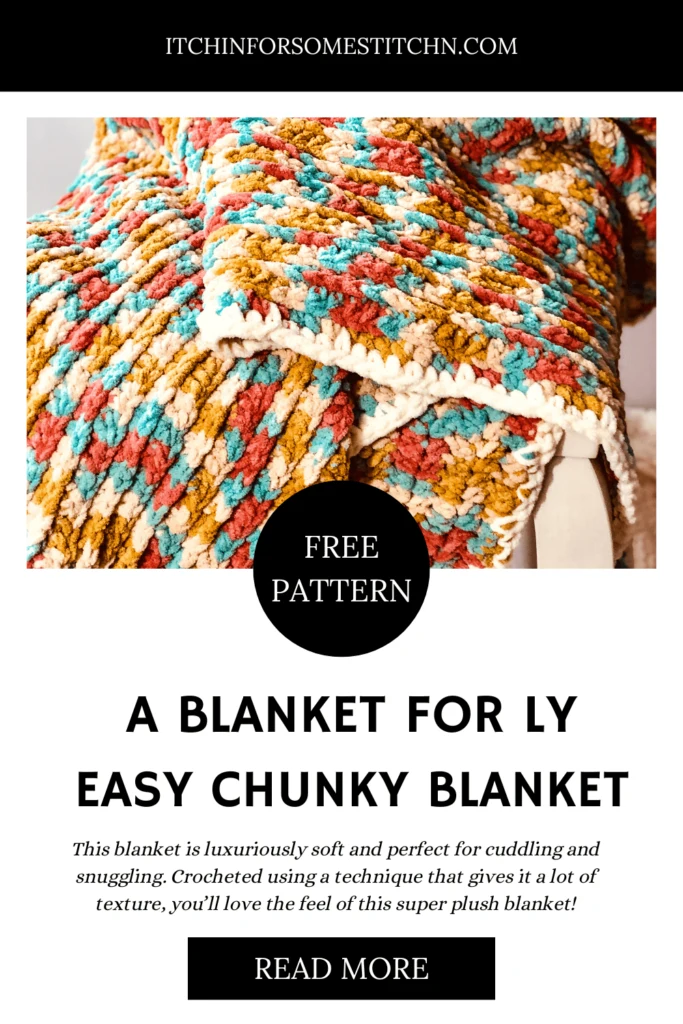


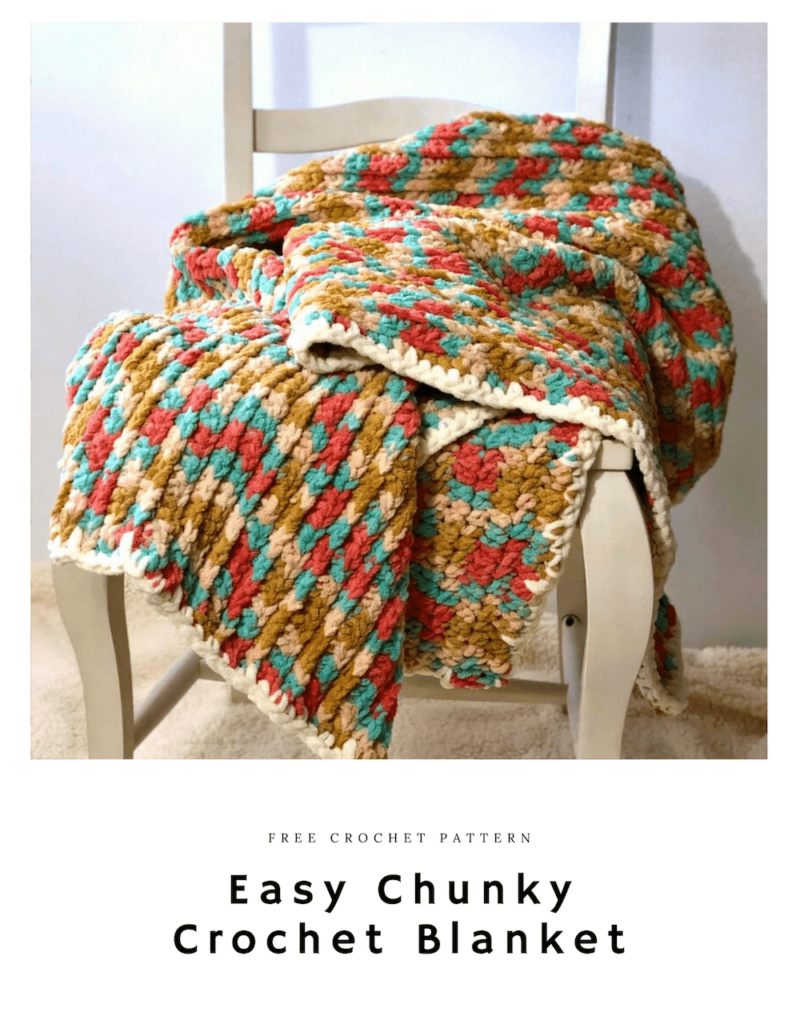
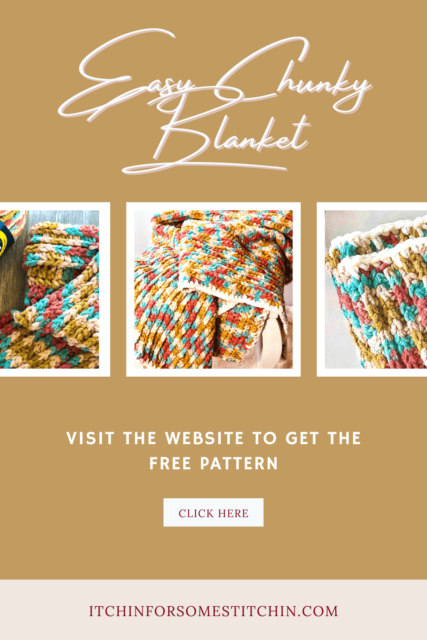
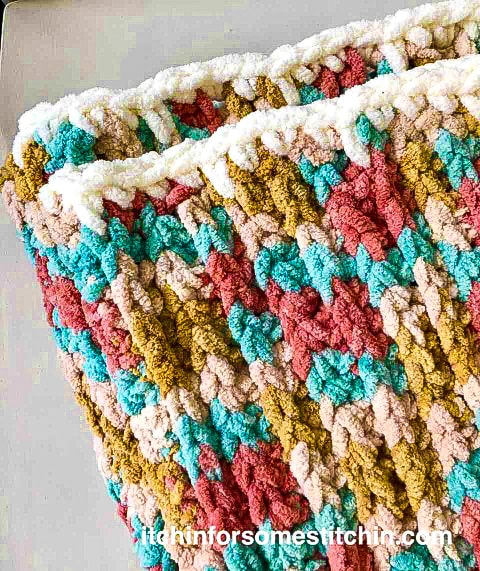
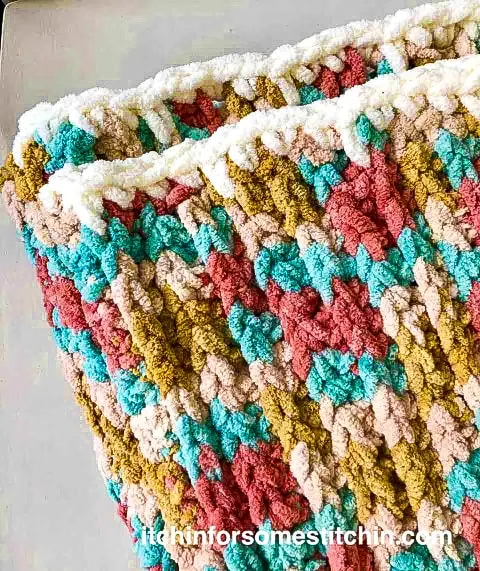
If cozy had a crochet form, this would be it. Ly’s Chunky Blanket is a soft, textured crochet blanket designed for comfort, simplicity, and everyday use. Made with a single, beginner-friendly stitch and bulky yarn, this pattern creates a plush, snuggly fabric that works up beautifully and quickly.
This free crochet blanket pattern is perfect for beginners and experienced crocheters alike, whether you’re making a small lap blanket, a cozy throw, or a larger blanket sized for lounging and relaxing.

Ly’s Blanket was designed with comfort at its core. Using thick, super-soft yarn and a simple stitch pattern, the goal was to create a blanket that felt warm, calming, and easy to live with — the kind of blanket you reach for without thinking.
The design itself is intentionally uncomplicated. One stitch creates rich texture and a plush finish, making this an ideal project if you want something relaxing to crochet without complex shaping or counting. Despite its simplicity, the texture gives the blanket a substantial, luxurious feel that works just as well for gifting as it does for keeping.
This pattern is highly adaptable, allowing you to customize the size depending on how you plan to use it — from a cozy lapghan to a generously sized blanket meant for everyday comfort.
The Story Behind Ly’s Blanket
This cozy crochet blanket was originally designed for my sister-in-law, Ly, when she was pregnant with her first child, my niece, Thalia. During that time, she wanted something soft and comforting — a blanket she could curl up with on the couch and truly relax.
Choosing a thick yarn and focusing on texture, I designed this blanket to feel like a gentle, reassuring presence. More than just a practical project, it became a piece made for quiet moments, rest, and comfort — and that intention has stayed with the pattern ever since.
Where To Go Next With This Pattern
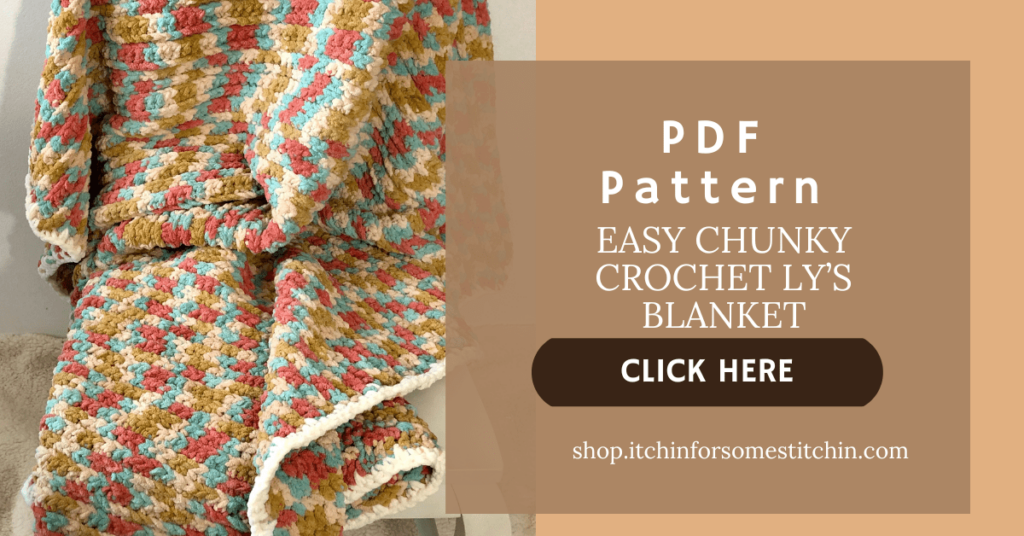
Ly’s Chunky Blanket is a wonderful introduction to crocheting textured home pieces and comfort-focused projects. If you’re here for the free pattern, everything you need to make the blanket is included below. For those who prefer a printable format, this pattern is also available as an ad-free PDF for easy reference while you work.
If you enjoy creating cozy home projects, you may also enjoy exploring crochet patterns designed for pillows, baby blankets, and other comforting pieces that bring warmth and texture into everyday spaces. And if you’re part of the Crochet Conservatory, this pattern is included in the Library alongside other home and gift-focused designs created to be both practical and meaningful.
Yarn Details: Unraveling the Perfect Blend for Cozy Bliss
For Ly’s Blanket, I sought a yarn that would be irresistibly soft and luxuriously thick, creating the ultimate cuddle-worthy masterpiece for my sister-in-law.
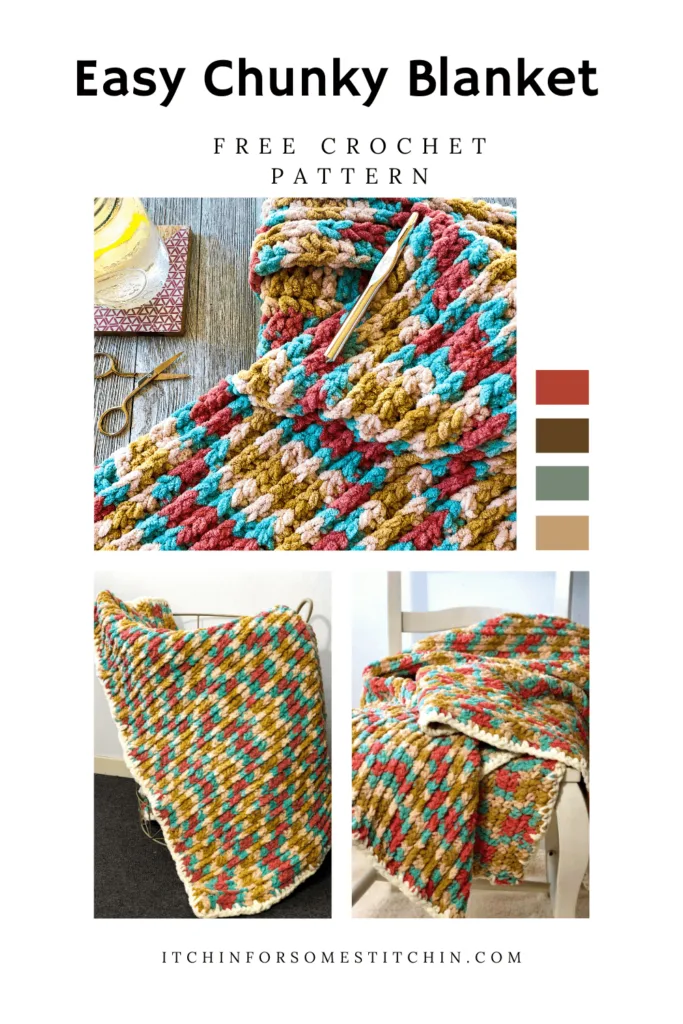
Bernat Blanket emerged as the perfect choice, meeting all the criteria and capturing Ly’s heart with its enchanting Sailor’s Delight colorway, a selection she adored.

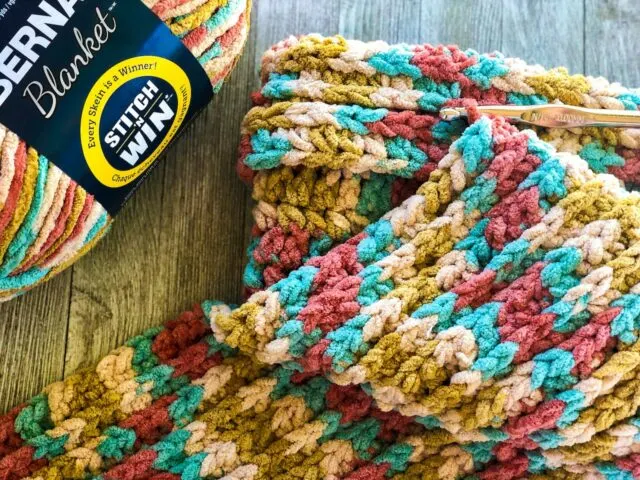
Little did I know that the colors would come to life in such a spectacular way, leaving me absolutely thrilled with the final results.
Bernat Blanket yarn proved itself as the perfect choice for crocheting chunky blankets, offering not only exceptional quality but also a vibrant palette.
With a plethora of colors and variations available, the creative possibilities with this pattern and yarn are truly endless!
Explore and purchase your Bernat Blanket yarn through my affiliate link below
Ly’s Easy Chunky Crochet Blanket Pattern
**THIS IS AN ORIGINAL PATTERN. Please see my Copyright Statement for details.
Construction (See Schematic Below)
- This pattern is constructed as one square piece.
- Trim is added around the outside edge.
Difficulty Level
This is a level 2 – Advanced Beginner Pattern


Gauge/Tension
9 stitches and 5 rows = 4 x 4-inches in pattern (see instructions below) using N/15 10.00mm hook
Finished Dimensions/Sizing
Pattern can be made to your personal preference or use the chart below for general reference.
NOTE: The blanket I created for Ly is a small throw with dimensions of 52 – inches wide and 60 – inches in length.

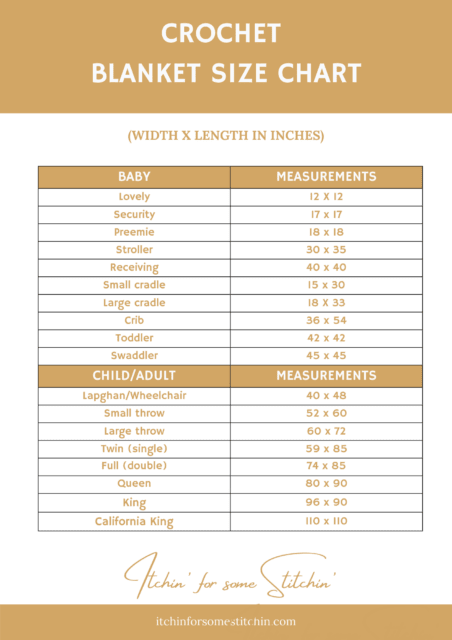
You can download the Blanket Sizes Chart by unlocking the Exclusive Subscriber Content below.
To unlock Exclusive Subscriber Content click on the “Sign Up For Free!” button in the box below. The Grow.me App window will pop up and you can then subscribe.
Click here to learn more about GROW.
To create an account you can sign in with your existing Google or Facebook account or, alternatively, with an email address and new password.
Whenever you see “Unlock Exclusive Content” on my website, you can simply log in to your Grow account by clicking on the “Sign Up for Free!” button and then press the “switch to login” button in the top right corner.
If you’ve forgotten your password, click the forgot password link and follow the instructions on how to reset your password.
Unfortunately, I cannot assist with accessing your Grow account or resetting your Grow password.
Abbreviations
- Stitch/es (st/sts)
- Chain stitch (ch)
- Slip stitch (slp-st)
- Single crochet (sc)
- Half-double crochet (hdc)
- Back Post Only (BPO)
- Back Loop Only (BLO)
US/UK Conversion
US terminology UK terminology
Slip stitch (slp-st) = Slip stitch (ss)
Single crochet (sc) = Double crochet (dc)
Half – double crochet (hdc) = Half – treble crochet (tr)
Special Stitches
3rd loop (aka. diagonal loop or front loop)
Spike stitch – insert the hook into the row below the one you are currently working and then complete the stitch as if it were a single crochet.
Recommended Yarn
- Color A – 7 skeins Bernat Blanket in Sailors Delight (for body), super bulky, 100% Polyester, 10.5 oz/ 300g/ 220 yards/ 201m per skein.
- Color B – 1 skein Bernat Blanket in Vintage White (for trim), super bulky, 100% Polyester, 10.5 oz/ 300g/ 220 yards/ 201m per skein.
Total yardage: 1749 yds / 1599 m (*provided requirements are estimates only)
Yarn Alternatives
worsted weight yarn
Other Materials
- Crochet Hook size N/15 10.00mm or whatever hook is necessary to obtain the correct gauge.
- Measuring tape
- Stitch markers (optional)
- Scissors
- Tapestry needle for weaving in ends

Pattern Notes:
Read all pattern notes, instructions, and other provided details carefully before starting the project to make sure you understand everything. It could save you hours & a lot of headaches!
- Make a swatch that measures at least 10 x 10 cm / 4 x 4 inches using the stitch provided under the Gauge Section. If your swatch matches the gauge, then you are all set to start the project. If the gauge is wrong, you might need to change your crochet hook – increase your hook size if your stitches are smaller & decrease your hook size if your stitches are larger.
- All measurements given are unblocked and measured flat pre-wear and pre-seaming as fabric pieces may stretch during/after blocking, wearing, and seaming.
- Provided measurements are as exact as possible, but are given as approximates. This is because yarn variances, crochet tension & individual technique might give variations in the result, which changes from person to person.
- All color changes in this pattern are made using the slip-stitch (i.e. add the new yarn color with a slip-stitch).
- Care Instructions: Hand wash & lay flat to dry or follow instructions on the yarn label.
Love Pinterest?
I do!
PIN this pattern to your Pinterest boards for later.
You can also follow all my boards!

Instructions
This pattern uses the “knit-like” stitch – a two row repeat in which one row you hdc in the 3rd loop and in the other row you hdc into the blo. This creates a ribbing effect.
With color A, chain the number of chains needed to create the length of the blanket you desire per the chart provided, plus 3 chains.
Row 1: Hdc in 4th ch from hook (counts as your first hdc st) and in each ch across.
Row 2: Ch2 (does not count as a st), turn work, hdc in the 3rd loop across to last st, hdc under the top two loops of the last st (this should be the first hdc of row 1 that counted as a st)..
Reference: How to Work in the 3rd Loop

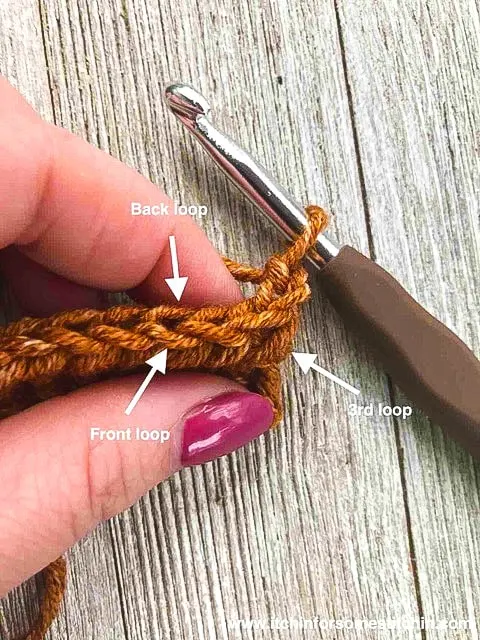
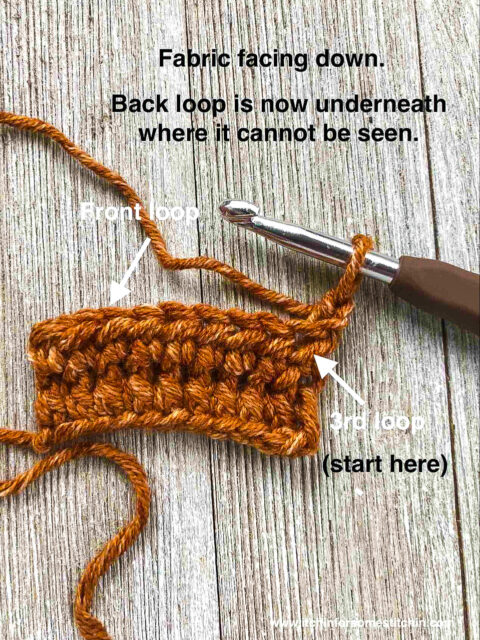
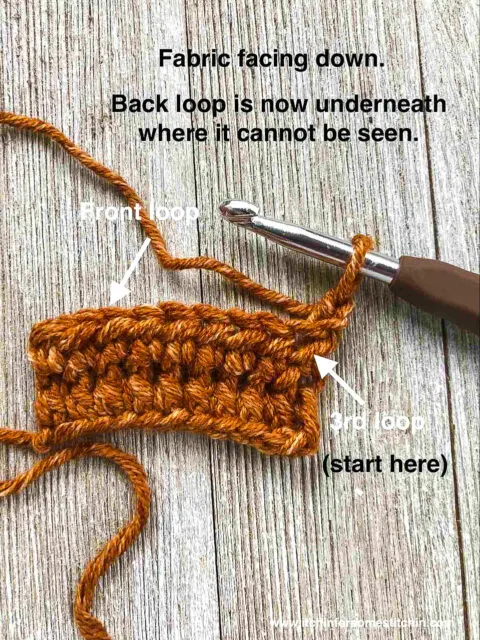
Row 3: Ch2 (does not count as a st), turn work, hdc in blo across to the last st, hdc (as normal, ie. under both front & back loops).
Row 4: Ch2 (does not count as a st), turn work, hdc in the 3rd loop across to last st, hdc (as normal, ie. under both front & back loops).
Repeat rows 3 and 4 until fabric measures the width you desire per the provided chart.
TIP: When the right (textured) side is facing you, work in blo. When the flat back is facing you, work in 3rd loop.
Finishing:
Attach color B using a slp-st (the easiest place to do this is in a corner)
*Sc in the next 3 sts, spike st, sc in the next 3 sts* Repeat from * to * around the entire blanket.

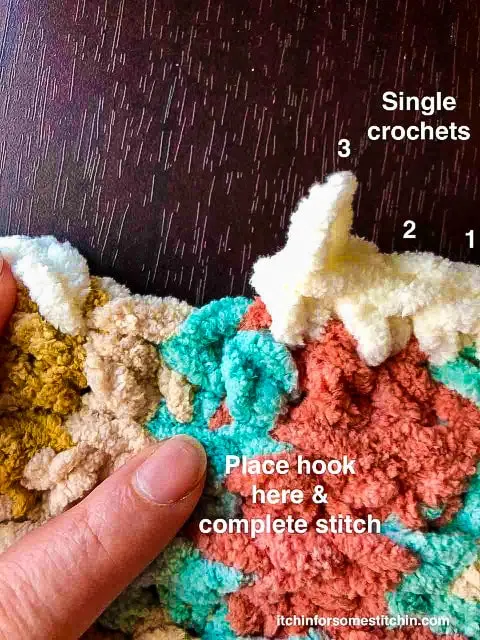
NOTE: When stitching around the rough edges it does not matter specifically where you place the stitches as there is no particular stitch count. Simply place the stitches where possible. For the spikes, go down about 1-inch from the top edge, but try to keep them similar in length with the spikes produced on the clean edges
Other Patterns I Love & You Will too!
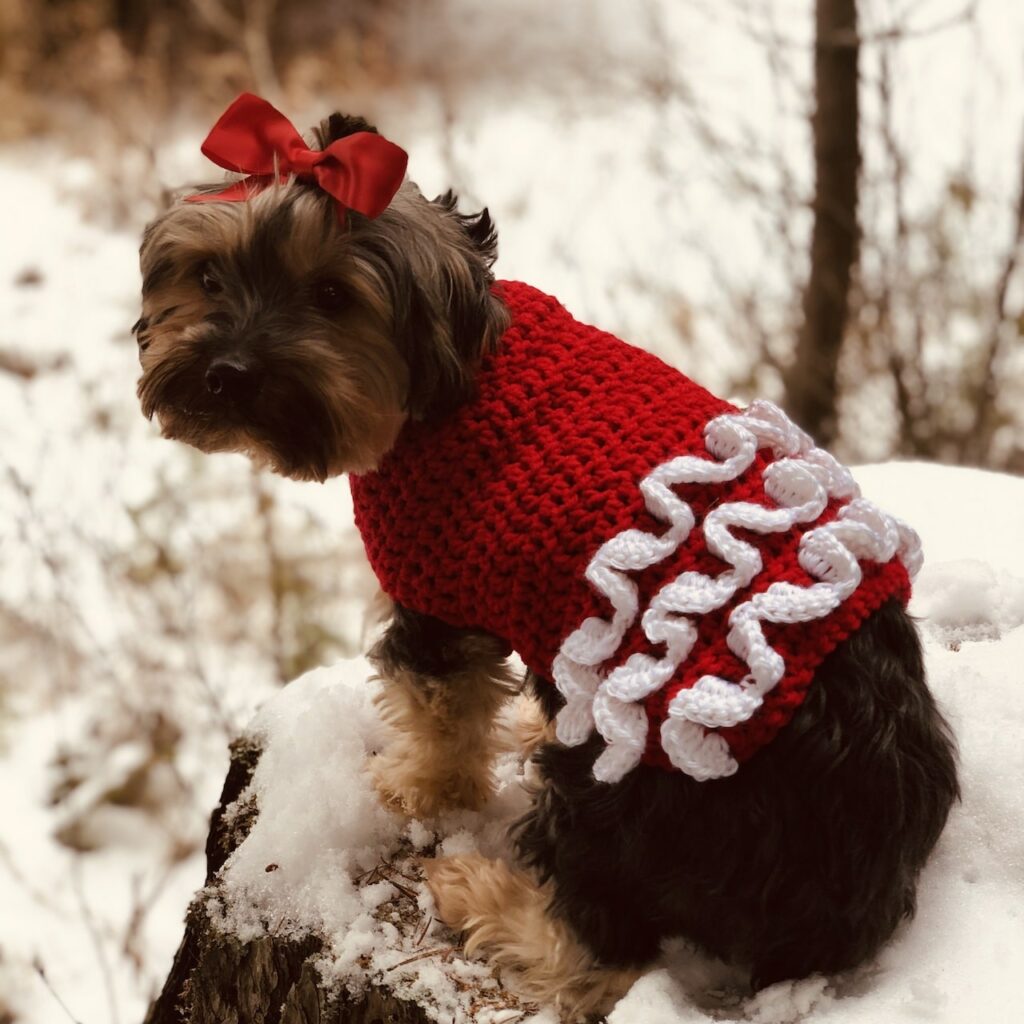
Nessa’s Ruffle Butt Dog Sweater

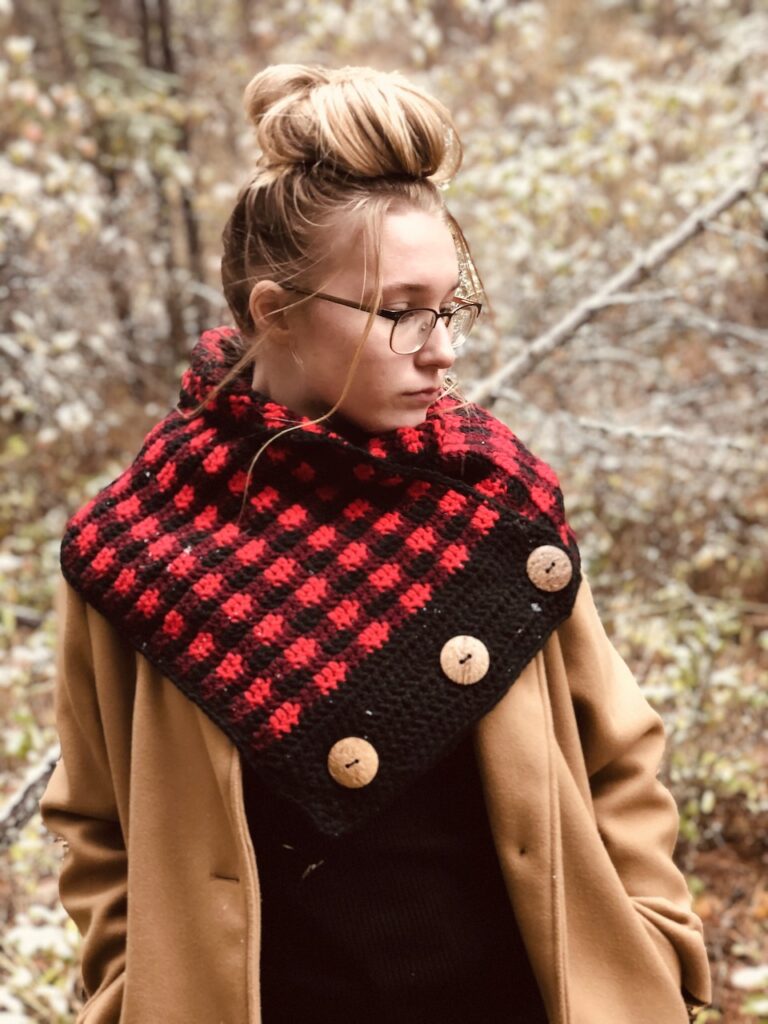
Simply Chic Buffalo Plaid Cowl

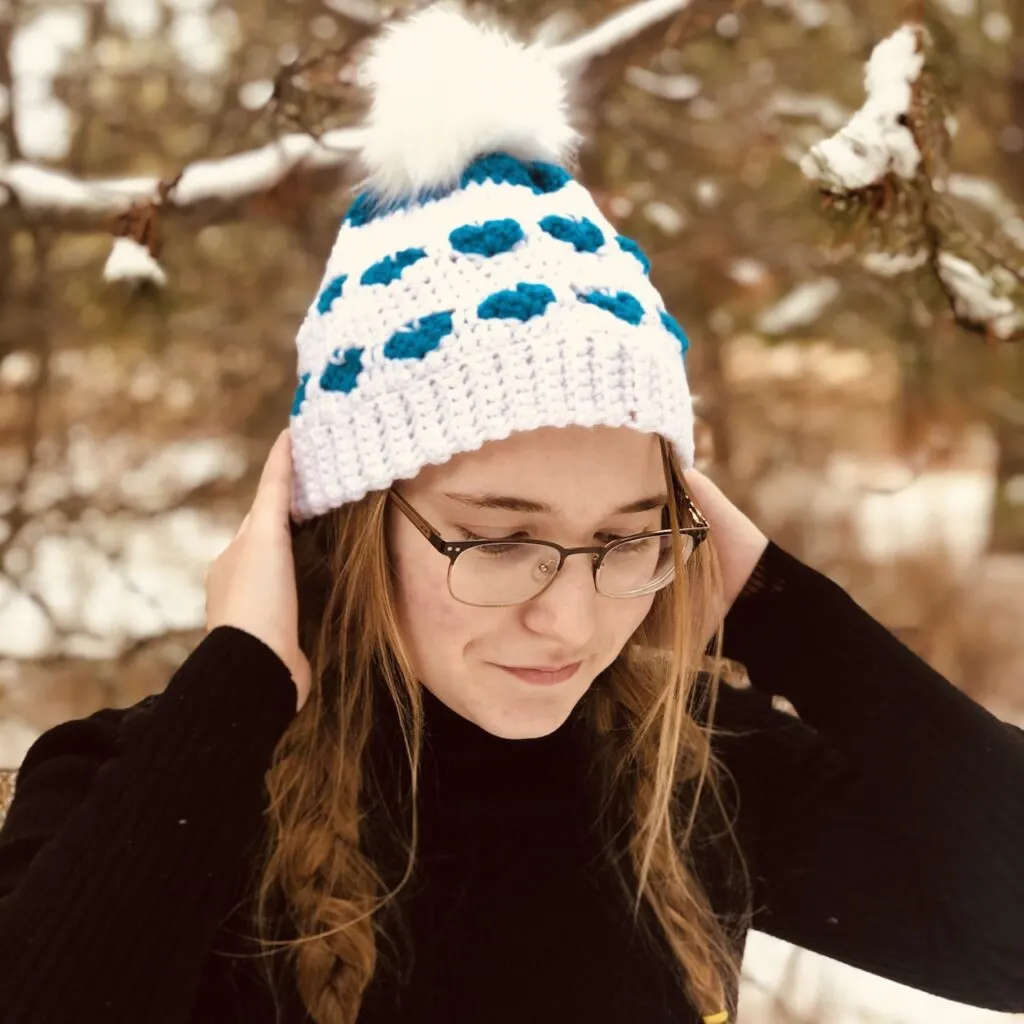
You’ll Always Be in My Heart Beanie

Thank you for visiting my blog!
Your support, whether through sharing my content or making a purchase, enables me to keep creating and sharing free content for everyone’s enjoyment.
Your support is truly valued and greatly appreciated!


Until next time… Happy Crocheting!


Help Us Make an Impact – Share with Your Network!
Let’s Get Crafty!
Looking for lots of crafty inspiration, tips, tutorials, and a great crochet community?
Join my Facebook group!
Violeta
Friday 13th of September 2024
This chunky crochet blanket is simply gorgeous - what a fantastic idea! I just wanted to drop a quick message to let you know that I’ve featured your tutorial on Crafts on Display today. I hope you enjoy it, and keep up the amazing work! https://craftsondisplay.com/crochet/free-chunky-crochet-blanket-pattern-128909/
Itchin4Stitchin
Thursday 17th of October 2024
Hi Vioeta,
Why thank you so much! You totally made my day!
Best wishes,
RaeLynn
Jodi
Tuesday 30th of April 2024
Hello, What size did you make that used 7 skeins of the Bernat Blanket main color? I’ve read through your story and the pattern and couldn’t find mention of the size. Thank you!
Itchin4Stitchin
Thursday 2nd of May 2024
Hi Jodi,
Thank you so much for reaching out. I have added the dimensions to the post - it is a small throw, so the size is 52 inches wide and 60 inches in length. Sorry for the inconvenience!
Best wishes,
RaeLynn
Sandy R
Tuesday 30th of April 2024
I love the texture! What size was the blanket you made with 7 skeins of Sailors' Delight?
Itchin4Stitchin
Thursday 2nd of May 2024
Hi Sandy,
I am so glad you like it! I believe I responded to your email. I have double-check and this blanket is a small throw with dimensions of 52 x 60. I've added this to the post. Thank you so much for reaching out and letting me know this details was missing.
Best wishes
RaeLynn