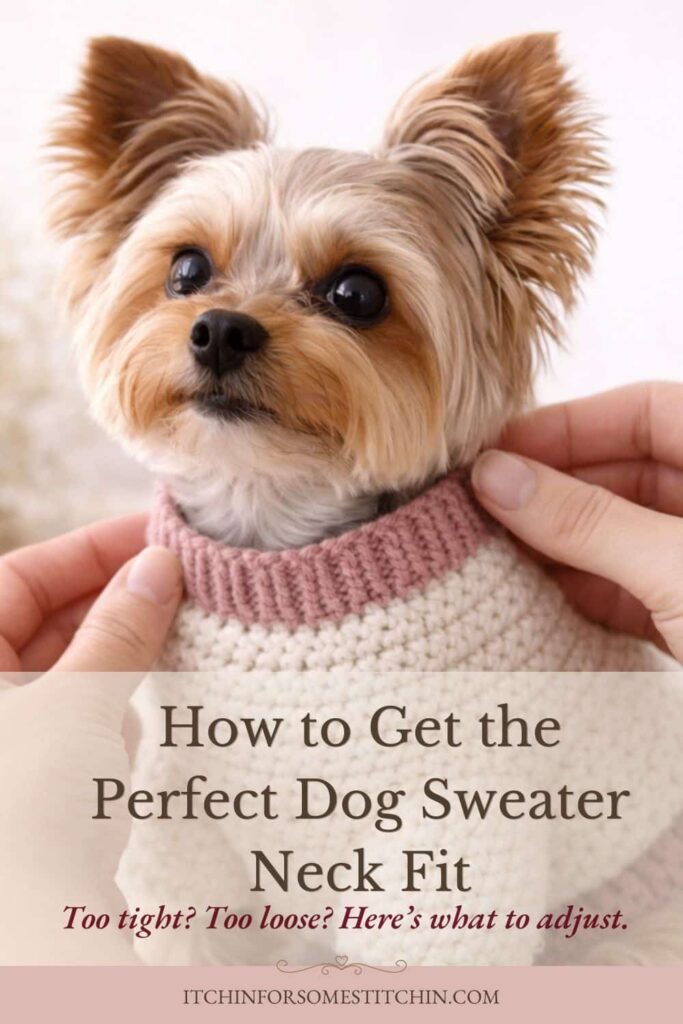
If you’ve ever tried to adjust crochet dog sweater neck opening and ended up frustrated, you’re not alone.
This is one of those areas that seems like it should be simple… but somehow isn’t.
You can follow a pattern exactly, take your time with your stitches, and feel really good about how everything is coming together. The back looks right. The chest fits nicely. And then you go to put it on your dog…
… and the neck just doesn’t work.
Sometimes it’s too tight, and you can barely get it over their head. Other times it slips down and refuses to stay where it should. And sometimes it technically fits, but still feels slightly off, even if you can’t quite explain why.
That’s usually the moment when frustration starts to creep in.
But this isn’t about your skill, and it doesn’t mean you did anything wrong.
→ the neck opening isn’t just about size
→ it’s about how the sweater is built
Once you understand that, everything starts to shift.
Instead of guessing or reworking entire sections, you begin to see exactly where the adjustment needs to happen… and how to fix it with confidence.
Table of Contents
Love Pinterest? I do!
Save this post for Later and follow all my boards.
What Controls the Neck Opening
Before we start changing anything, it helps to take a step back and look at what’s actually shaping the neckline in the first place.
Most crocheters assume the neck opening is determined by a single measurement, but in reality, it’s influenced by several different factors working together. Your stitch count plays a role, of course, and so does your tension. Even the type of stitch you choose can affect how much stretch or structure the neckline has.
But there’s one factor that matters more than all the others.
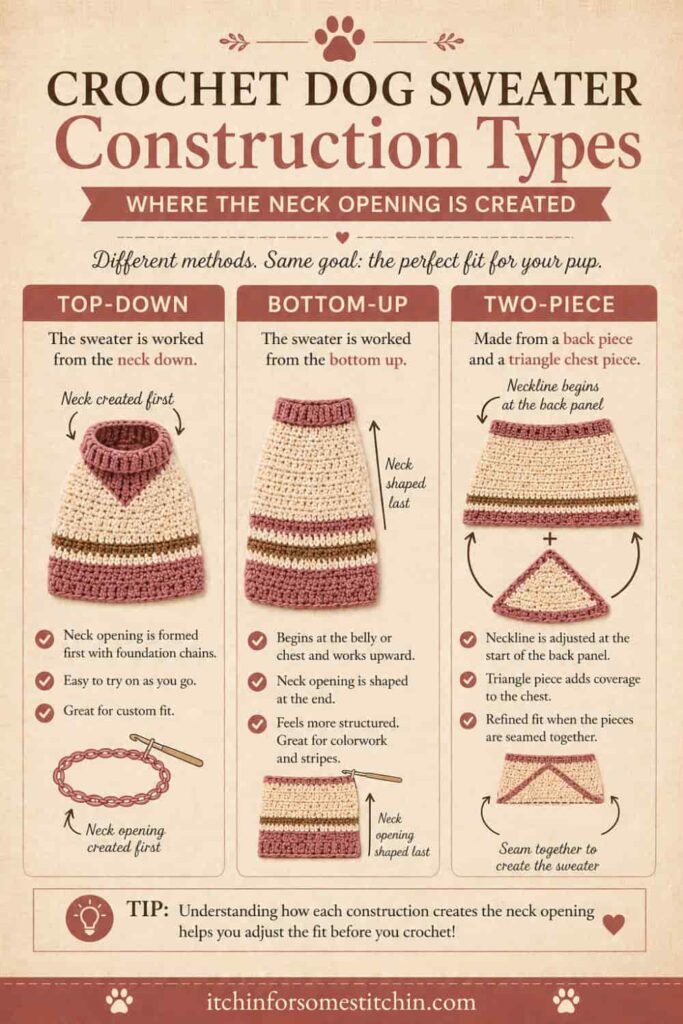
→ where the neck opening is created in the pattern
That one detail changes everything.
In some sweaters, the neck is formed right at the beginning, which means every stitch that follows depends on that initial size. In others, the neck is shaped at the very end, gradually closing in as you work. And in designs like my two-piece Quick & Easy Small Dog Sweater, the neck is actually adjusted twice — once when you begin, and again during assembly when everything is seamed together
If you’ve ever felt like a fix worked perfectly in one pattern but completely failed in another, this is why.
You weren’t wrong… the construction was just different.
And once you see that, it becomes clear why the same fix doesn’t work for every pattern — and why learning to adjust crochet dog sweater neck opening starts with understanding how the sweater is built.
How to Tell if the Neck Opening is Off
Before you start adjusting anything, it helps to slow down and really look at what the sweater is doing on your dog.
Sometimes the issue is obvious right away. Other times, it’s more subtle… it just doesn’t sit quite right, even if you can’t immediately explain why.
So instead of guessing, take a moment to observe how the sweater behaves.
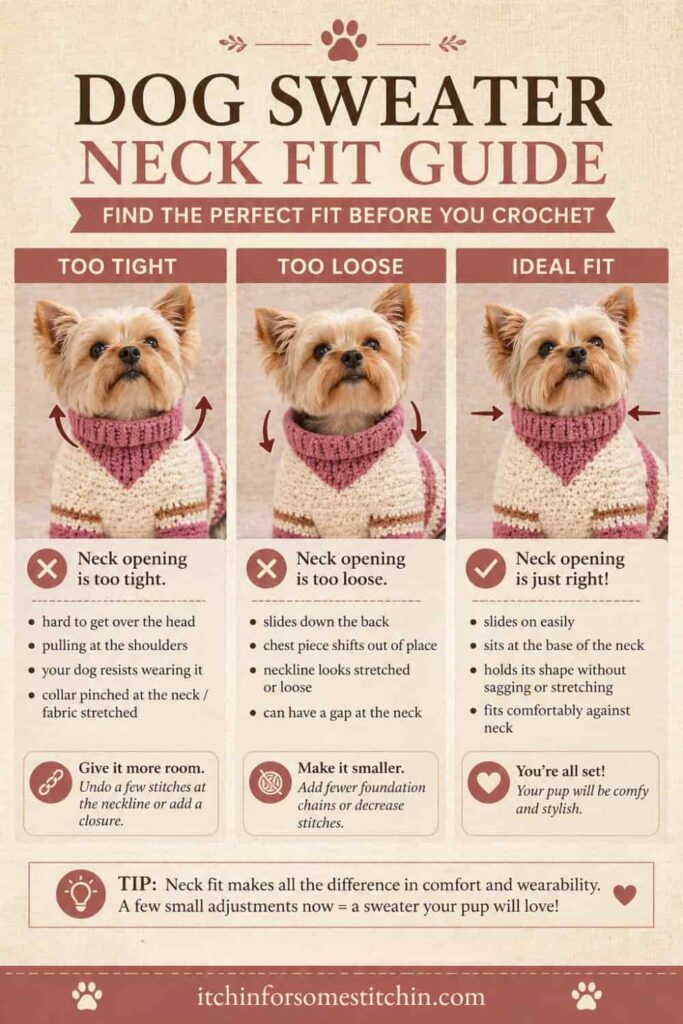
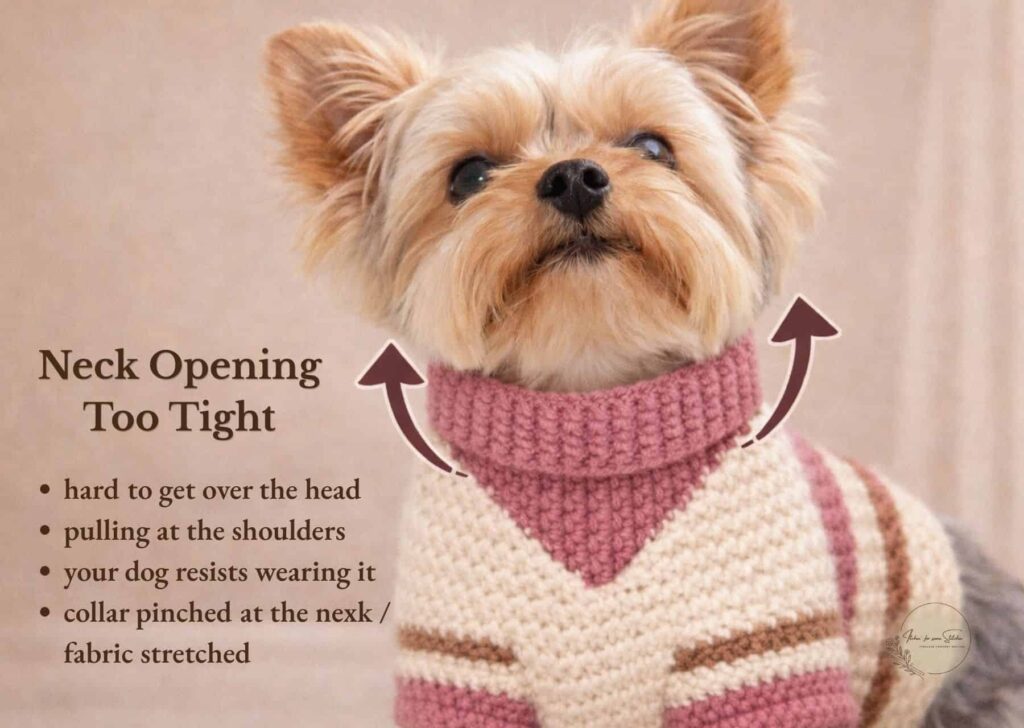
If the neck is too tight, you’ll usually notice it as soon as you try to put it on. It can be difficult to get over your dog’s head, and once it’s in place, you may see pulling around the shoulders. Some dogs will resist wearing it altogether, which is often your clearest sign that something isn’t comfortable.
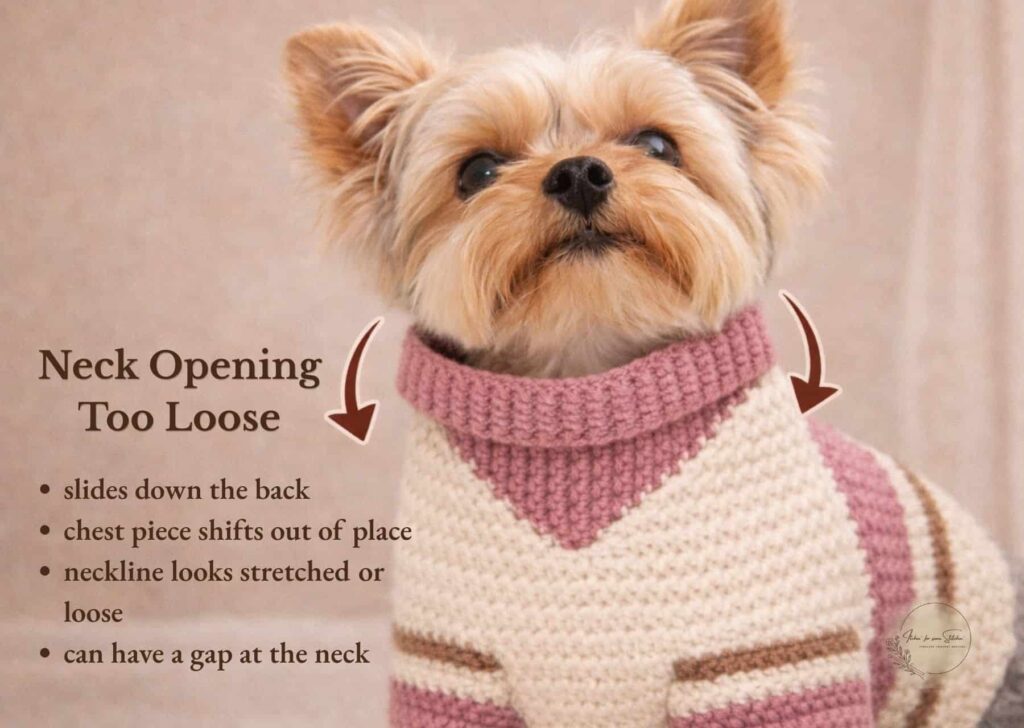
If the neck is too loose, the sweater behaves very differently. Instead of holding its shape, it starts to shift. You may notice it sliding down the back or the chest piece moving out of place. The neckline itself can look stretched or floppy, even if your stitches are otherwise neat.
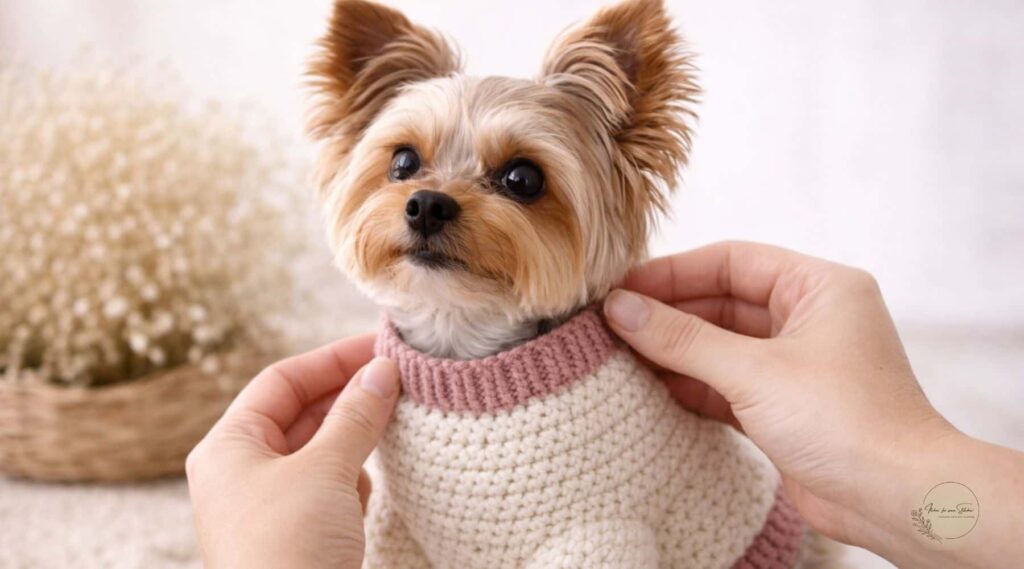
And then there’s the fit you’re aiming for.
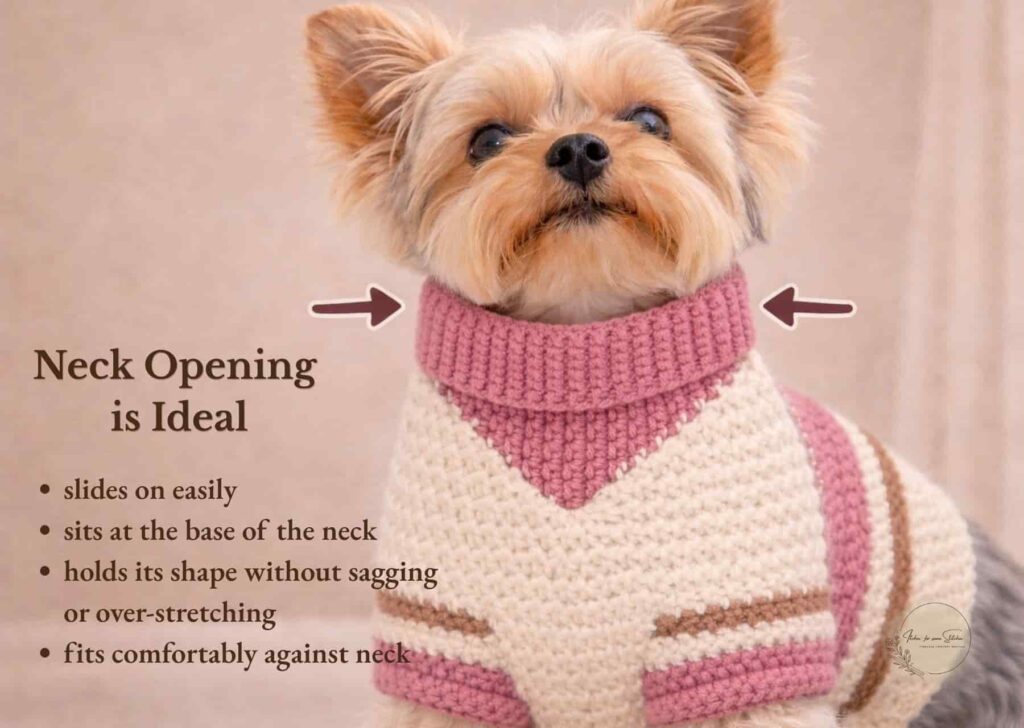
A well-fitting neck opening should slide on easily without resistance, then settle naturally at the base of the neck. It shouldn’t feel tight or restrictive, but it also shouldn’t drift or sag as your dog moves.
Once you can recognize these differences, it becomes much easier to decide what kind of adjustment you actually need — and where to make it.
How to Think About Adjusting the Neck
When something doesn’t fit, it’s very easy to jump straight into problem-solving mode and start trying random fixes.
But with crochet, especially with something like a dog sweater, a small shift in how you think about the problem can make everything feel a lot more manageable.
Instead of asking:
“Why doesn’t this neck fit?”
Pause for a moment and ask:
→ where is the neck opening created in this pattern?
That one question gives you direction.
It tells you whether the adjustment needs to happen at the very beginning, somewhere in the middle, or right at the end. And once you know that, you’re no longer guessing or undoing large sections of work unnecessarily.
You’re making a targeted adjustment, right where it matters.
And that’s where things start to click.
Because once you can see where the neck is being formed, you can see exactly how to adjust crochet dog sweater neck opening in a way that actually works for that specific pattern.
How Neck Openings Are Created in Different Sweater Styles
Not all crochet dog sweaters are built the same, and that’s why neck adjustments don’t always work the way you expect them to.
If you’ve ever tried to fix the neckline in one pattern using advice from another and ended up more confused than when you started, this is usually why.
You weren’t doing anything wrong.
You were just working with a different construction.
And when the construction changes, the way the neck is formed changes with it.
So instead of trying to force one fix to work everywhere, it helps to slow down and look at how the sweater is actually built… because that tells you exactly where the adjustment needs to happen.
Two-Piece Sweaters (Back + Chest Piece)
If you’re working a sweater made in separate pieces, like my Nessa’s Ruffle Butt Dog Sweater, this is the construction you’re dealing with.
And this is where a lot of crocheters get tripped up, because at first glance, it looks like the neck opening is already set when you begin.
You start with your foundation chain at the neckline, and it feels like that number is going to determine everything.
But in this type of sweater, that’s only part of the story.
The neckline is actually shaped in two different stages.
→ first when you create the starting chain
→ and then again when you seam the pieces together
That second step is easy to overlook, but it’s doing a lot more than just joining your work.
When you attach the chest piece and close up the neckline, you’re also controlling how wide or narrow that opening becomes and how it sits on your dog.
So if your neck opening isn’t fitting quite right, this is where you want to pause and take a closer look.
If it feels too tight, you have room to adjust in two places.
→ add a few stitches to your starting chain
→ seam a little less at the neckline so it doesn’t close in as much
If it feels too loose, you move in the opposite direction.
→ take a few stitches out of your starting chain
→ seam a little more of the neckline closed
This is what makes this construction so forgiving.
You’re not locked into one decision at the very beginning, and even if you don’t notice the issue until later, you still have an opportunity to adjust the fit during assembly.
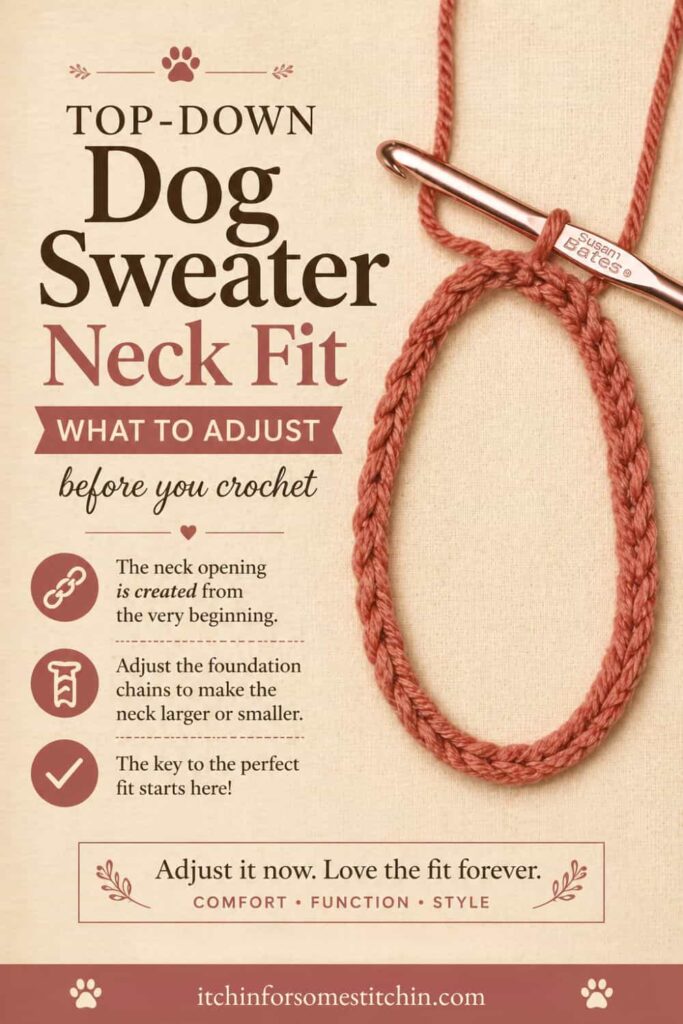
Top-Down Sweaters (Worked from the Neck Down)
Top-down sweaters work very differently.
In this type of design, everything begins at the neck and grows outward from that point. There’s no separate assembly step, and there’s no second opportunity to reshape the neckline later on.
What you create at the beginning is what you’re working with for the rest of the project.
That’s why the neck opening in this style carries so much weight in the overall fit. If it’s even slightly off, you’ll feel it throughout the entire sweater.
So when you need to adjust crochet dog sweater neck opening in a top-down design, the changes have to happen right at the start.
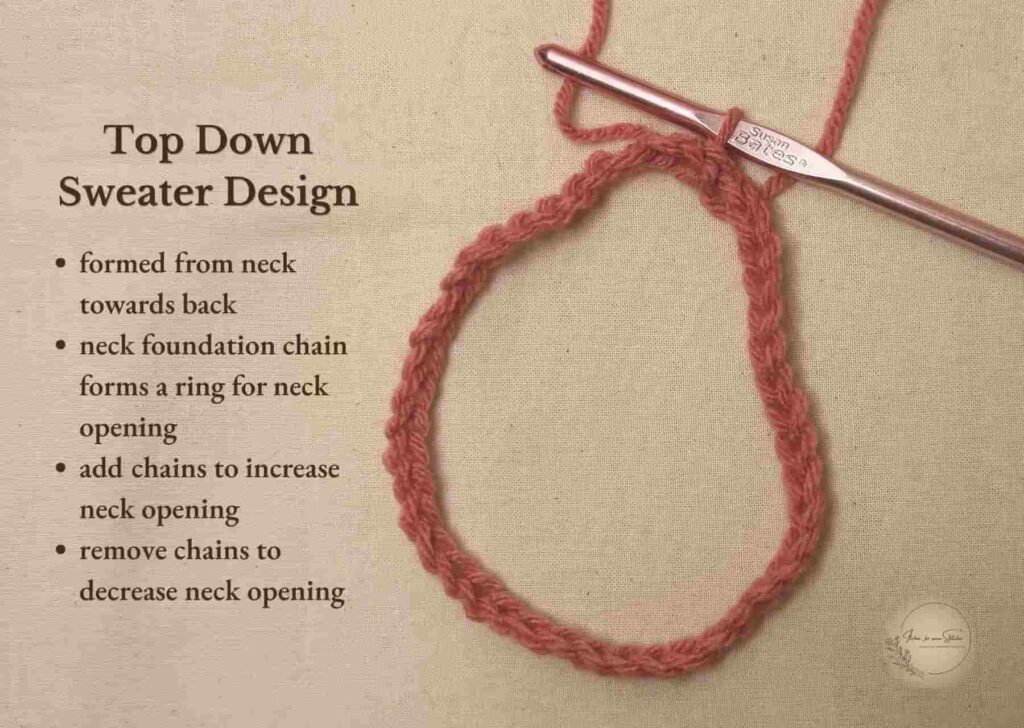
→ adding stitches creates a larger opening
→ reducing stitches creates a smaller one
→ adjusting hook size helps fine-tune the fit
There isn’t really a clean way to fix it later, which is why this construction benefits from a quick test fit early on.
Taking a moment to check the size before moving too far forward can save you from having to unravel later.
Bottom-Up Sweaters (Worked Toward the Neck)
Bottom-up construction introduces a completely different way of thinking about the neck.
Instead of starting with it, you work your way toward it.
As you move up the sweater, you begin shaping the neckline through decreases. Little by little, the opening forms as the stitches come together.
Because of that, the fit of the neck depends on how those decreases are handled.
If the neck turns out too tight, it usually means the decreases happened too quickly or too aggressively.
If it’s too loose, the decreases were too gradual, leaving more space than needed at the top.
Adjusting this type of neckline is less about changing a starting number and more about controlling how the shaping happens.
→ slower decreases create a larger opening
→ faster decreases create a smaller one
It’s a more gradual process, but once you understand what’s happening, it becomes much easier to control.
The Big Takeaway
By now, you may have noticed a pattern.
No matter which type of sweater you’re working, everything comes back to one simple question:
→ where is the neck created?
And the answer to that question is what tells you how — and when — to make your adjustments.
Once you see that, the process becomes a lot more predictable. You’re no longer guessing or trying fixes that may or may not work. You’re adjusting at the point where the neck is actually being formed.
Here’s how that looks across the different construction types:
| Construction Type | Neck Created | Adjustment Timing |
|---|---|---|
| Two-Piece | Start + Seam | Before and after |
| Top-Down | Start only | Before only |
| Bottom-Up | End | During shaping |
This is the piece that brings everything together.
When something feels off, come back to this question first. It will point you in the right direction every time.
Adjusting the Neck Before You Crochet
The easiest adjustments are always the ones you make before you get too far into the project.
If you can catch the issue early, you won’t need to rework anything later, and that alone can save you a lot of time and frustration.
So before you move forward, this is where you want to pause and make small, intentional changes that will affect the final fit.
Adjusting the Starting Chain
In many patterns, including mine, you’ll often see something like:
“Chain less for dogs of less girth or chain more for dogs of greater girth.”
That’s helpful… but it’s also a little vague when you’re trying to make a specific adjustment.
So let’s make it more concrete.
If you need a slightly larger neck opening, adding just a few stitches can make a noticeable difference. In most cases, increasing your starting chain by two to four stitches is enough to open things up without affecting the overall structure of the sweater.
→ add 2–4 stitches for a small adjustment
→ add 4–6 stitches if you need more room
If the neck is too large, you’ll move in the opposite direction. Removing a few stitches will bring the opening in, but you want to keep everything balanced so the shape of the sweater stays consistent.
→ remove 2–4 stitches to tighten the opening
→ maintain symmetry as you adjust
These changes may seem small, but at the neckline, even a couple of stitches can completely change how the sweater fits and feels.
Adjusting Stitch Type and Structure
Stitch count is only part of the picture.
The type of stitch you use also plays a big role in how the neckline behaves, and this is something that often gets overlooked.
Some stitches are firm and structured, holding their shape with very little give. Others are softer and more flexible, allowing the fabric to stretch and move more easily.
So if your neckline feels too tight, it may not just be the number of stitches.
→ a tighter stitch creates a more rigid edge
→ a more flexible stitch adds natural stretch
Switching to something like half double crochet or a simple ribbing can make the neckline more forgiving without significantly changing the size.
If the neck is too loose, the opposite approach can help. A tighter stitch or slightly firmer tension can give the neckline more structure so it holds its shape instead of stretching out.
These are small adjustments, but they have a noticeable impact on how the finished sweater fits and behaves.
Fixing a Neckline After the Sweater is Finished
Even with all the planning in the world, sometimes the issue doesn’t show up until the very end.
And that’s okay.
It doesn’t mean you did anything wrong, and it definitely doesn’t mean you have to start over. Most of the time, you can make small adjustments that fix the fit without undoing all your work.
If the neck is too loose, the goal is to gently bring it in so it sits more securely without losing its shape.
One of the easiest ways to do that is by adding a simple ribbed collar. By joining your yarn at the neckline and working a few rounds in the back loop, you create a soft, flexible edge that hugs the neck a little more closely while also giving the sweater a more finished look.
→ work 1–2 inches of ribbing
→ use single crochet or half double crochet in the back loop
If the looseness is minor, you may not need that much structure. A single round of slip stitches can be enough to subtly draw the neckline in without changing the overall appearance of the sweater.
→ work one round of slip stitches around the neckline
It’s a small adjustment, but sometimes that’s all it takes to get the fit just right.
If the neck is too tight, the goal shifts in the opposite direction. Instead of bringing the opening in, you need to give it a little more flexibility.
And this is where it’s important to approach things a bit more intentionally.
Unlike fabric, crochet doesn’t have a stable weave. The stitches are all connected in one continuous structure, which means cutting into them can cause the fabric to unravel if it isn’t secured properly.
So instead of cutting into the neckline, the better approach is to create flexibility in a controlled way.
One option is to open up a small section at the neckline seam, if your sweater is constructed in pieces. Because that area is already joined, you can carefully remove a few stitches to create space without compromising the rest of the structure.
→ undo a small portion of the seam at the neckline
→ leave a short opening for easier wear
From there, you can add a simple closure to keep the sweater secure while still allowing it to open when needed.
→ attach a button, snap, or tie closure
→ position it so it blends into the design
This gives you the extra room you need without risking the integrity of your stitches.
If you’re working with a one-piece sweater, the safest option is usually to add a bit of stretch rather than creating an opening. Reworking the edge with a more flexible stitch or adding a short ribbed section can make the neckline easier to get on and off without cutting into the fabric.
And if you’re working with a two-piece construction, there’s one more adjustment point that’s easy to overlook.
Because the neckline is finalized during seaming , you can often change the fit simply by adjusting how much of that seam is closed.
→ seam less for a larger opening
→ seam more for a tighter fit
This is one of those hidden adjustments that can make a big difference, and it’s often enough to fix the issue without any major changes.
Pro Tips for a Better Fit
As you work through different patterns, there are a few simple things that will consistently help you get a better result.
One of the most important is taking the time to measure your dog’s neck directly, rather than relying on weight alone. Dogs that weigh the same can still have very different proportions, and that difference shows up quickly in the neckline.
Giving yourself a small amount of ease also makes a big difference. You want the sweater to be comfortable and easy to put on, without feeling tight or restrictive.
→ measure neck circumference directly
→ add 0.5–1 inch of ease
If possible, it’s also worth testing the fit before you fully finish the neckline. This is especially helpful in two-piece designs, where you still have some flexibility during the seaming stage and can make small adjustments before everything is locked in.
And when you’re adjusting stitch counts, keeping things even matters more than it might seem at first. Using stitch markers can help you track your placement and keep the neckline balanced so it sits correctly once the sweater is worn.
These are small steps, but together they make the entire process feel more controlled… and the final fit much more consistent.
A Common Mistake to Watch For
One of the most common issues I see is assuming that the neck size should match the chest.
It makes sense at first. If the sweater fits the body, it feels like the neck should follow the same measurement.
But they’re actually doing two very different jobs.
→ the chest needs room for movement
→ the neck needs to sit securely without slipping
When those two get treated the same, the fit starts to fall apart.
You end up with a sweater that fits the body beautifully… but traps the head like a stubborn turtleneck.
Or the opposite — a neckline that’s loose enough to slide, even though the body fits just fine.
Once you separate those two measurements and start treating them differently, the fit becomes much easier to control.
A Simple Way to Think About It
When something doesn’t fit, it’s easy to assume the whole project needs to be redone.
But most of the time, that’s not actually what’s happening.
More often than not, the issue comes back to one simple idea:
→ find where the neck is created
→ adjust at that point
Once you start approaching your projects this way, things begin to feel a lot more manageable.
You’re no longer guessing, second-guessing, or hoping a fix will work.
You’re making intentional adjustments, right where they matter.
And that’s what leads to a better fit… not just this time, but every time you pick up your hook.
Frequently Asked Questions About Adjusting Dog Sweater Chest Width
Have questions while learning how to adjust crochet dog sweater chest width? These FAQs cover the most common concerns and tips for success.
Your Next Step
If you’re working toward a better fit, this is just one piece of the process.
Now that you understand how to adjust crochet dog sweater neck opening, you can start refining the other areas that work alongside it.
Because a good fit doesn’t come from just one adjustment… it comes from how everything works together.
So as you move forward, this is the path you want to follow:
→ start with measuring your dog
→ adjust chest width
→ refine neck opening (you’re here)
→ adjust back length
Each step builds on the one before it, and together they create a sweater that actually fits your dog, not just the pattern.
If you’d like everything organized in one place, the Dog Sweater Fit Planner walks you through each of these adjustments step by step, so you can approach your projects with confidence instead of guesswork.


Thank you
I sincerely appreciate you visiting my website! By sharing my content and/or making a purchase you are making it possible for me to continue producing and sharing free content for everyone to enjoy. Your support is amazing!