Hi folks!
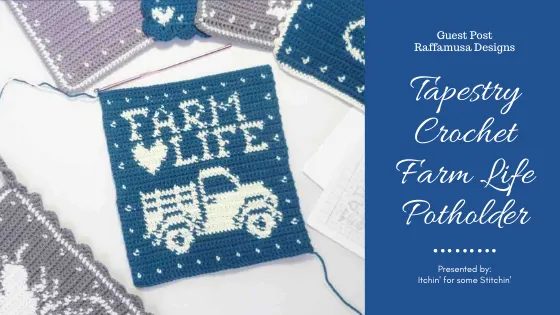
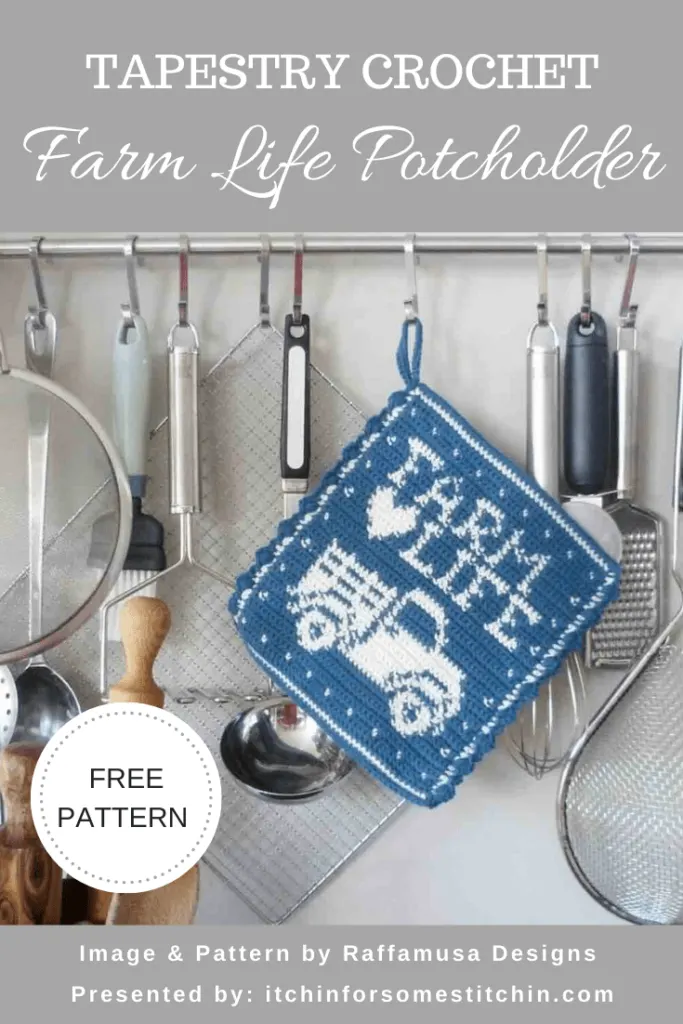
Today’s pattern is a tapestry crochet farm life crochet potholder and it is very near and dear to my heart.
For those of you who don’t know, I live on a “mini-farm” with lots of chickens, ducks, geese, a goat, and even a few horses in the neighboring pastures.
So, I absolutely jumped at the opportunity to bring you my second guest designer, Raffaella Tassoni of Raffamusa Designs who has an AMAZING tapestry crochet potholder collection and is sharing her latest potholder pattern with us!
Hello,
This is Raffaella. I know, such a long name, but you can call me Raffa! I am the creator and blogger behind Raffamusa Designs.
Here are three quick things about me. I am Italian, I work as a scientist, and I am a true crochet addict! I enjoy creating all sorts of things, but home décor has got my heart.
Today, I am so excited to share with you one of my home décor projects, the Tapestry Crochet Farm Life Potholder.
Farmhouse Collection
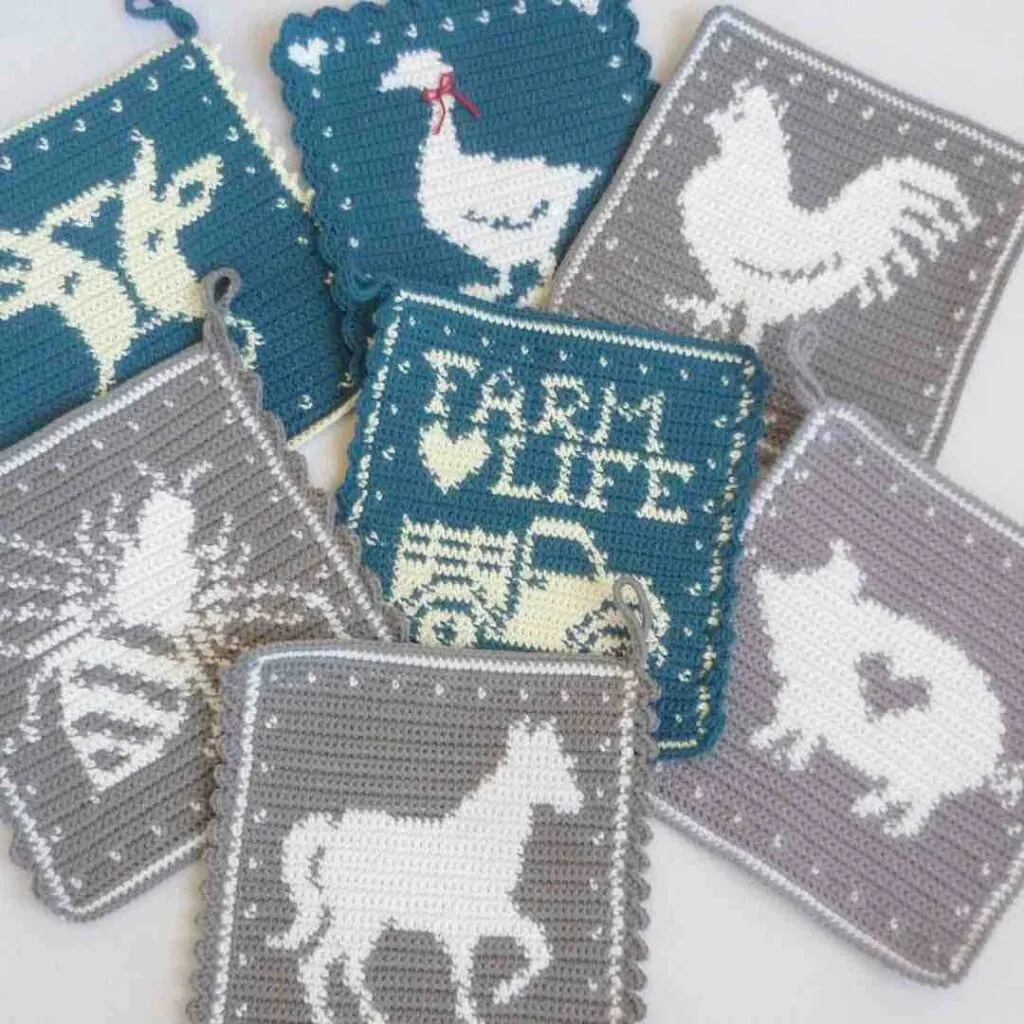
I particularly love this pattern because it is the latest addition to my Farmhouse Collection of tapestry crochet potholders.
This collection has been taking shape over the past year or so, and now counts 7 different farmhouse-themed potholders.
You can take a look at all my Farmhouse potholders in this blog post:
Before moving on to the pattern of the Farm Life Potholder, here are some things to keep in mind.
What’s the Best Yarn for Potholders?
In general, natural fibers, such as cotton or wool, are the best choice for potholders. Avoid any synthetic yarns, such as acrylic or polyamide, because they are not heat resistant and could actually melt in contact with very hot pots.
Construction
The Farm Life potholder is crocheted bottom-up. At the end of each row, you turn your work to crochet the next series of stitches. This means that there is a good and a wrong side to your potholder!
The border is added at the end, and it consists of two rounds all around the potholder edges.
Techniques
Even though the completion of this potholder does not require advanced skills, it still uses a couple of techniques that might be a bit challenging for crochet beginners.
- Foundation Row – You will need to crochet a single crochet foundation row to start your project. If you do not know how to crochet a foundation row, don’t panic! It might need some practice but you can totally learn it. Check out: 9 Must-Know Steps for Crochet Beginners, step two demonstrates how to crochet a foundation row.
- Tapestry Crochet – For a good result with tapestry crochet projects and with this one in particular, there are two things to watch out for. The first one is your crochet tension. Make sure that you keep your tension the same throughout the pattern, and avoid pulling your non-working yarn too hard when switching colors. The second thing is color change. Make sure to close every final stitch in one color-series with the yarn in the next color. If you would like to read more about how to change color in tapestry crochet, you can take a look at this free tutorial. The tutorial also includes a little trick for a better color change when working on the wrong side!
Instructions
**THIS IS AN ORIGINAL PATTERN. Please see Raffamusa Design’s Copyright Statement for details.
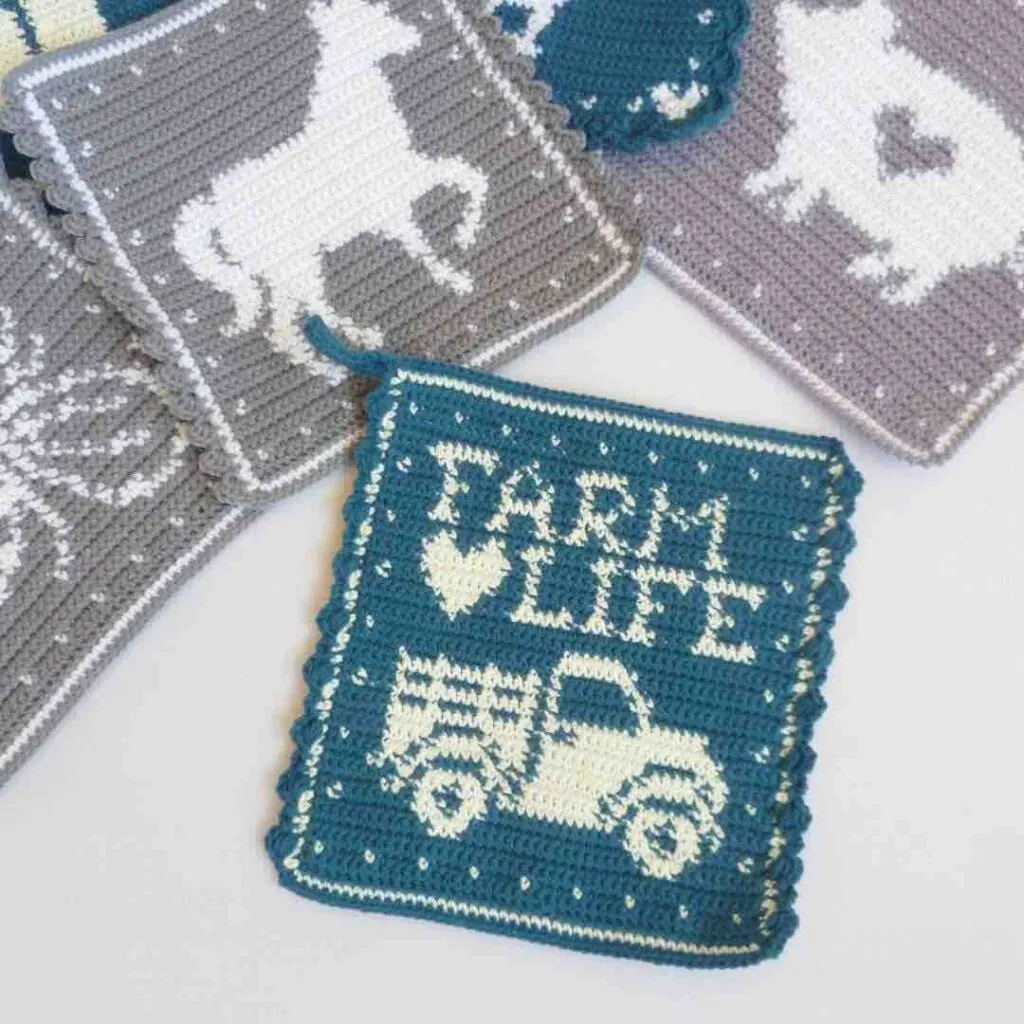
This post only includes written instructions.
If you prefer crocheting from a chart, you can find one in the downloadable PDF pattern.
You can purchase your copy of the Farm Life Potholder pattern here:
Love Pinterest? I do!
PIN this to your boards for later HERE. You can also follow all Itchin’ for some Stitchin’s boards!
Materials
– 3.5-mm (E-4 USA, 9 UK) Crochet Hook
– Approximately 32 g of DK/Light 3 Cotton yarn (15 wpi) in two contrasting colors. I will refer to them as main color (M) and secondary color (S).
Crochet Abbreviations (US Terms)
Ch – Chain
Sc – Single Crochet
Sk – Skip
Sl St – Slip Stitch
St – Stitch
Yo – Yarn Over
Special Stitches
Puff Stitch (Puff St)
(Yo, insert your hook into the indicated st and pull up a loop to the level of your work) three times. You should have 7 loops on your hook. Yo, pull through all 7 loops.
Finished Dimensions
The finished Tapestry Crochet Farm Life Potholder is a square with a side of approximately 8” (20 cm).
Gauge
22 sc for 22 rows in 4” (10 cm) worked in tapestry crochet.
How to Read the Pattern
- (…) – Repeat the instructions within brackets for the indicated number of times.
- If the pattern says “5 sc”, it means that you have to make one single crochet in each of the next 5 stitches.
Pattern Notes
- At the end of each row, you turn your work to crochet the next series of sts.
- The starting ch 1 counts as your first stitch and is always made with the main color.
- The right side is determined after row 3, which is crocheted on the right side.
- All uneven rows are crocheted with the right side up, while the even-numbered rows are crocheted on the wrong side.
- Throughout the pattern with the exception of the border, the stitch count is always 45 sts.
Pattern
1. Using the yarn in the main color (M), make a foundation row of 45 chainless sc sts.
2. Ch 1, sc in each st to the end.
3. Ch 1 and join the secondary color (S). Make 1 sc with M, (1 sc with S, 4 sc with M) eight times, 1 sc with S, 2 sc with M.
4-5. Ch 1, 44 sc with M.
6. Ch 1, 11 sc with M, 3 sc with S, 18 sc with M, 3 sc with S, 9 sc with M.
7. Ch 1, 7 sc with M, 5 sc with S, 16 sc with M, 5 sc with S, 11 sc with M.
8. Ch 1, 1 sc with M, 1 sc with S, 7 sc with M, 3 sc with S, 1 sc with M, 3 sc with S, 14 sc with M, 3 sc with S, 1 sc with M, 3 sc with S, 4 sc with M, 1 sc with S, 2 sc with M.
9. Ch 1, 4 sc with M, 1 sc with S, 1 sc with M, 2 sc with S, 3 sc with M, 2 sc with S, 1 sc with M, 12 sc with S, 1 sc with M, 2 sc with S, 3 sc with M, 2 sc with S, 1 sc with M, 2 sc with S, 7 sc with M.
10. Ch 1, 7 sc with M, 1 sc with S, (1 sc with M, 3 sc with S) twice, 1 sc with M, 1 sc with S, 1 sc with M, 8 sc with S, 1 sc with M, 1 sc with S, 1 sc with M, (3 sc with S, 1 sc with M) twice, 1 sc with S, 5 sc with M.
11. Ch 1, 4 sc with M, 2 sc with S, 1 sc with M, 5 sc with S, 1 sc with M, 2 sc with S, 1 sc with M, 8 sc with S, 1 sc with M, 2 sc with S, 1 sc with M, 5 sc with S, (1 sc with M, 2 sc with S) twice, 5 sc with M.
12. Ch 1, 5 sc with M, 2 sc with S, 1 sc with M, 2 sc with S, 5 sc with M, 2 sc with S, 1 sc with M, 1 sc with S, 1 sc with M, 8 sc with S, 1 sc with M, 2 sc with S, 5 sc with M, 2 sc with S, 6 sc with M.
13. Ch 1, 1 sc with M, 1 sc with S, 2 sc with M, 1 sc with S, 1 sc with M, 7 sc with S, 1 sc with M, 9 sc with S, 1 sc with M, 2 sc with S, 1 sc with M, 7 sc with S, 1 sc with M, 3 sc with S, 3 sc with M, 1 sc with S, 2 sc with M.
14. Ch 1, 5 sc with M, 4 sc with S, 1 sc with M, 5 sc with S, 1 sc with M, 3 sc with S, 1 sc with M, 10 sc with S, 1 sc with M, 5 sc with S, 1 sc with M, 2 sc with S, 5 sc with M.
15. Ch 1, 4 sc with M, 3 sc with S, 5 sc with M, 11 sc with S, 1 sc with M, 4 sc with S, 5 sc with M, 5 sc with S, 6 sc with M.
16. Ch 1, 5 sc with M, 14 sc with S, 1 sc with M, 1 sc with S, 2 sc with M, 15 sc with S, 6 sc with M.
17. Ch 1, 6 sc with M, 17 sc with S, 1 sc with M, 1 sc with S, 3 sc with M, 1 sc with S, 4 sc with M, 1 sc with S, 3 sc with M, 1 sc with S, 6 sc with M.
18. Ch 1, 1 sc with M, 1 sc with S, 3 sc with M, 14 sc with S, 1 sc with M, 1 sc with S, 8 sc with M, 6 sc with S, 6 sc with M, 1 sc with S, 2 sc with M.
19. Ch 1, 13 sc with M, 1 sc with S, 8 sc with M, 1 sc with S, 1 sc with M, 1 sc with S, 3 sc with M, 1 sc with S, 4 sc with M, 1 sc with S, 3 sc with M, 1 sc with S, 6 sc with M.
20. Ch 1, 5 sc with M, 14 sc with S, 1 sc with M, 1 sc with S, 7 sc with M, 2 sc with S, 14 sc with M.
21. Ch 1, 14 sc with M, 2 sc with S, 6 sc with M, 1 sc with S, 1 sc with M, 1 sc with S, 3 sc with M, 1 sc with S, 4 sc with M, 1 sc with S, 3 sc with M, 1 sc with S, 6 sc with M.
22. Ch 1, 20 sc with M, 8 sc with S, 16 sc with M.
23. Ch 1, 1 sc with M, 1 sc with S, 14 sc with M, 7 sc with S, 18 sc with M, 1 sc with S, 2 sc with M.
24-25. Ch 1, 44 sc with M.
26. Ch 1, 9 sc with M, 1 sc with S, 5 sc with M, 6 sc with S, (1 sc with M, 3 sc with S) twice, 4 sc with M, 6 sc with S, 5 sc with M.
27. Ch 1, 4 sc with M, 1 sc with S, 3 sc with M, 1 sc with S, 6 sc with M, 1 sc with S, 3 sc with M, 1 sc with S, 2 sc with M, 1 sc with S, 3 sc with M, 1 sc with S, 5 sc with M, 3 sc with S, 9 sc with M.
28. Ch 1, 1 sc with M, 1 sc with S, 5 sc with M, 5 sc with S, 4 sc with M, 1 sc with S, 6 sc with M, 1 sc with S, 3 sc with M, 1 sc with S, (6 sc with M, 1 sc with S) twice, 2 sc with M.
29. Ch 1, 6 sc with M, 3 sc with S, 4 sc with M, 3 sc with S, 3 sc with M, 1 sc with S, 6 sc with M, 1 sc with S, 3 sc with M, 7 sc with S, 7 sc with M.
30. Ch 1, 5 sc with M, 9 sc with S, 2 sc with M, 1 sc with S, 6 sc with M, 1 sc with S, 3 sc with M, 1 sc with S, 6 sc with M, 1 sc with S, 9 sc with M.
31. Ch 1, 4 sc with M, 1 sc with S, 3 sc with M, 1 sc with S, 2 sc with M, 1 sc with S, (3 sc with M, 1 sc with S) twice, 6 sc with M, 1 sc with S, 2 sc with M, 4 sc with S, 1 sc with M, 4 sc with S, 6 sc with M.
32. Ch 1, 6 sc with M, 2 sc with S, 3 sc with M, 2 sc with S, 2 sc with M, 3 sc with S, 4 sc with M, 3 sc with S, (1 sc with M, 6 sc with S) twice, 5 sc with M.
33. Ch 1, 1 sc with M, 1 sc with S, 39 sc with M, 1 sc with S, 2 sc with M.
34. Ch 1, 5 sc with M, 3 sc with S, 3 sc with M, 2 sc with S, 3 sc with M, 2 sc with S, 1 sc with M, 2 sc with S, 2 sc with M, 2 sc with S, 1 sc with M, 2 sc with S, 5 sc with M, 2 sc with S, 9 sc with M.
35. Ch 1, 9 sc with M, 1 sc with S, 5 sc with M, 1 sc with S, 3 sc with M, 2 sc with S, 1 sc with M, (1 sc with S, 3 sc with M) twice, 1 sc with S, 5 sc with M, 1 sc with S, 7 sc with M.
36. Ch 1, 6 sc with M, 1 sc with S, 5 sc with M, 5 sc with S, 3 sc with M, 3 sc with S, 4 sc with M, 1 sc with S, 5 sc with M, 1 sc with S, 10 sc with M.
37. Ch 1, 9 sc with M, (1 sc with S, 2 sc with M) twice, 1 sc with S, 3 sc with M, 1 sc with S, 2 sc with M, 1 sc with S, (3 sc with M, 1 sc with S) twice, 3 sc with M, 3 sc with S, 7 sc with M.
38. Ch 1, 1 sc with M, 1 sc with S, 4 sc with M, 1 sc with S, 5 sc with M, 1 sc with S, (3 sc with M, 1 sc with S) three times, 2 sc with M, 1 sc with S, (1 sc with M, 1 sc with S) three times, 7 sc with M, 1 sc with S, 2 sc with M.
39. Ch 1, 9 sc with M, 2 sc with S, 3 sc with M, 2 sc with S, 2 sc with M, 1 sc with S, 3 sc with M, 1 sc with S, 4 sc with M, 1 sc with S, 1 sc with M, 1 sc with S, 2 sc with M, 1 sc with S, 3 sc with M, 2 sc with S, 6 sc with M.
40. Ch 1, 4 sc with M, 7 sc with S, 3 sc with M, 1 sc with S, 4 sc with M, 5 sc with S, 3 sc with M, 1 sc with S, 5 sc with M, 1 sc with S, 10 sc with M.
41-42. Ch 1, 44 sc with M.
43. Ch 1, 1 sc with M, (1 sc with S, 4 sc with M) eight times, 1 sc with S, 2 sc with M.
44-45. Ch 1, 44 sc with M.
Crochet Potholder Edging
At the end of row 45, you should have both M and S at the left, top corner of your potholder. To crochet the edging, you are going to stitch two rounds all around the potholder starting with the left side. Remember to keep the right side facing up.
At round 2, once you reach the top, right corner, you’ll make the hanging loop and then finish crocheting the edge along the top side.
Round 1. With S, sc evenly all around the crochet potholder. At the corners, sc one in the last st of the side, ch 1 and sc in the first st of the next side. You should have 45 sts on each side and 1 ch at each one of the corners.
Round 2. Pick up the yarn M in the first st of the left side. *Ch 3, 1 puff into the next st, ch 1, sk the next 2 sts, sl st into the next st, ch 3, sl st into the next st. Repeat from * other 7 times. Ch 3, 1 puff into the next st, ch 1, sk the next 2 sts, sl st into the next st.
In the corner, (sc, ch 1, sc) all in the ch-1 space from the previous round. 45 sc on the bottom side of the potholder. In the corner, (sc, ch 1, sc) all in the ch-1 space from the previous round.
Sl st into the first st of the right side. Repeat the instructions for the side described above. In the corner, (sc, ch 1, sc) all in the ch-1 space from the previous round. 45 sc on the top side of the potholder.
Hanging Loop
Sc into the next corner (left, top corner), ch 20 and sl st back into the same ch-1 corner space. Make 25 sc inside the loop that you just formed and sl st back into the same corner space.
Sl st into the first st of round 2.
Your Farm Life Potholder is now ready!
About the Designer:
My name is Raffaella and I am the crocheter and blogger behind raffamusadesigns.com. I am an Italian expat living in The Netherlands. I arrived in this beautiful country about 7 years ago to pursue a PhD in biochemistry, and now I continue to live here and work as a scientist.
I discovered crochet towards the end of my PhD as a way to relax during the very stressful time of wrapping up lab experiments and writing my dissertation. To be completely honest, when I went to the store to buy craft supplies, I wanted to get threads and needles for cross stitching, which I did a lot back home. However, I somehow ended up buying a crochet hook and a ball of yarn instead. I had never crocheted before and I had no idea where to start. A few YouTube videos and much frogging later, I had made my first scarf and I never stopped crocheting since!
I started raffamusadesigns.com about one year ago to share my crochet creations and hopefully create a stress-free corner on the web. So, please, feel free to stop by, relax a bit and stitch something together!
Isn’t Raffaella’s newest potholder simply fabulous? I absolutely want her entire collection!
I wasn’t raised a farm girl, but the country life and these Farmhouse potholders have really grabbed a hold of my heart!
If you love Raffamusa Design’s farm life potholder as much as I do then be sure to share your make on social media using #raffamusadesigns and #itchinforsomestitchin 😃
Check Out These Other Patterns I LOVE!

- Tunisian Crochet Tresca Potholder by Raffamusa Designs / 2. Spring Gingham Placemats / 3. Danny’s Velvety Dream Pillow
Thank you for coming to my blog! By sharing my content and/or making a purchase you are making it possible for me to continue producing and sharing free content for everyone to enjoy. I sincerely appreciate your support!
Until next time… Happy Crocheting!

Follow Me & Share This Post on Your Favorite Social Media!

scarlett
Tuesday 3rd of December 2024
I am so confused, How did mine turn out mirrored??
Itchin4Stitchin
Sunday 8th of December 2024
Hi Scarlett,
May I ask if you are left handed? Feel free to send me a picture of it via the contact button at the top of the website.
Sincerely,
RaeLynn
J
Sunday 27th of February 2022
Raffa, i so much appreciate you and your crochet designs. Especially the farm house collections. I also want to say thanks for giving out the patterns free. I can't wait to get the patterns done accordingly. Thanks soo much
Itchin4Stitchin
Tuesday 1st of March 2022
Hi J,
You are so very welcome. Thanks for stopping by!
Sincerely,
RaeLynn & Raffa
Raffaella
Tuesday 25th of August 2020
Hi Miriam,
The correct stitch count is 45 sts.
Remember that the initial ch 1 counts as a stitch.
This means that after you ch 1 at the beginning of each row, you need to skip 1 st and sc in the remaining 44 sts. Also, remember to sc in the initial ch 1 at the end of the next row (because the ch-1 counts as 1 st)!
I hope this helped.
Looking forward to seeing your potholder :) Raffaella
Miriam Olsen
Friday 21st of August 2020
I have a question. Before the pattern starts you say that each row, except the border, should always have 45 stitches, but in the pattern rows there are only 44 stitches. #1 of the pattern says to make 45 chainless sc sts, then #2 says to ch 1 then SC in each ch across, that's 45 sts. Then #4-5 says CH 1, 44 SC with M. And #3 only counts out as 44 stitches as well. Which stitch count should it be?
Itchin4Stitchin
Monday 24th of August 2020
Hi Miriam,
I will pass this question on to the pattern designer and either she or I will get back to you.
Thanks,
RaeLynn
Raffaella Tassoni
Sunday 21st of June 2020
Hi Amanda,
I am so excited that you're working on this pattern!
To keep your stitch count correct, all you have to do is to skip the very first st because the ch 1 that you make at the beginning of every row counts as your first st. This means that when you'll be crocheting the next row, you have to make sure to crochet into that one ch otherwise your rows will start getting shorter and shorter.
With tapestry crochet, it is always better to carry the second strand of yarn even in rows where you’re only using one color. This will avoid distortions and uneven tension in your finished piece. Also, when turning your work at the end of one row/beginning of the next row, make sure to pass your unused color on the back of your work when you are crocheting on the right side, and on the front of your work when you are crocheting on the wrong side. Otherwise, you’d see the second color peeking through at the beginning of some rows on the right side, which is what you’re seeing right now if I understood correctly. Also, to avoid seeing the carried yarn in between stitches, pull it gently every now and then, but don’t pull too hard otherwise you’ll shrink your work. And make sure to crochet quite tight so that the second color is well hidden inside your stitches!
I hope all this made sense and answered your question. Don't hesitate to contact me if you have any other questions :) You can drop me an e-mail at [email protected]
Have a nice Sunday, Raffaella
Itchin4Stitchin
Sunday 21st of June 2020
Hi Raffaella,
Thanks so much for answering this question for us. This is such an amazing pattern! I know tons of people will be working it and we appreciate that you are here to help us along. :)
Sincerely,
RaeLynn