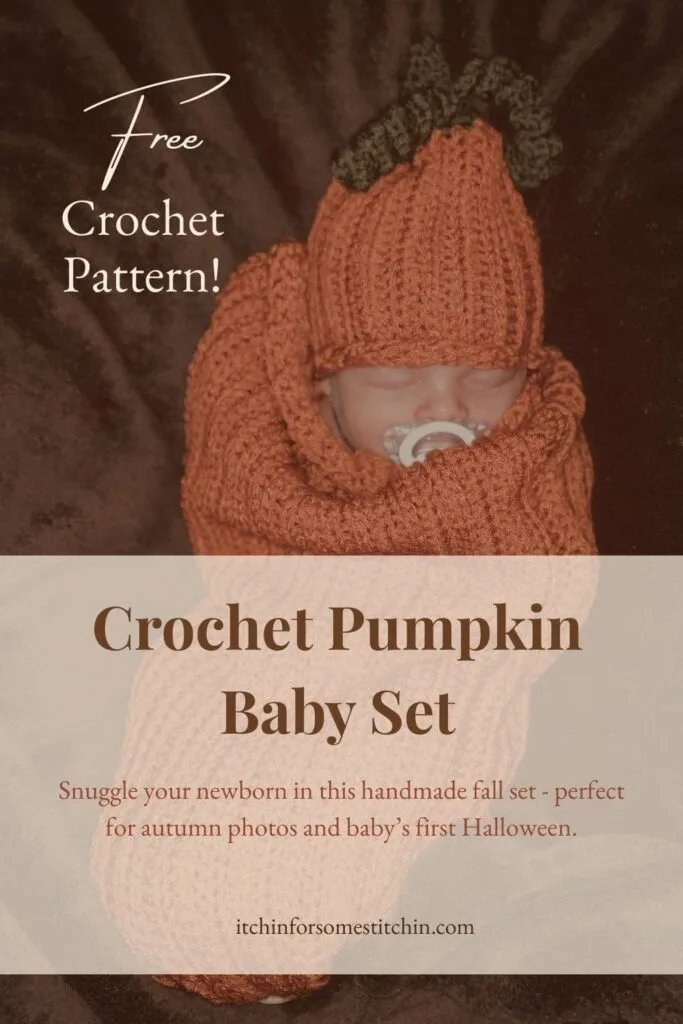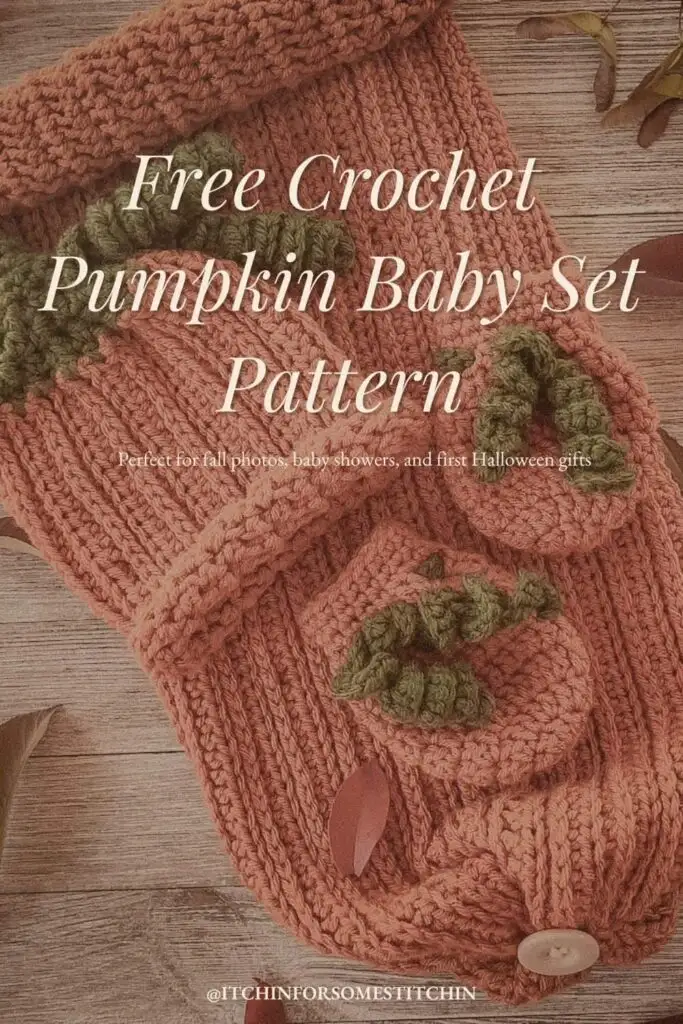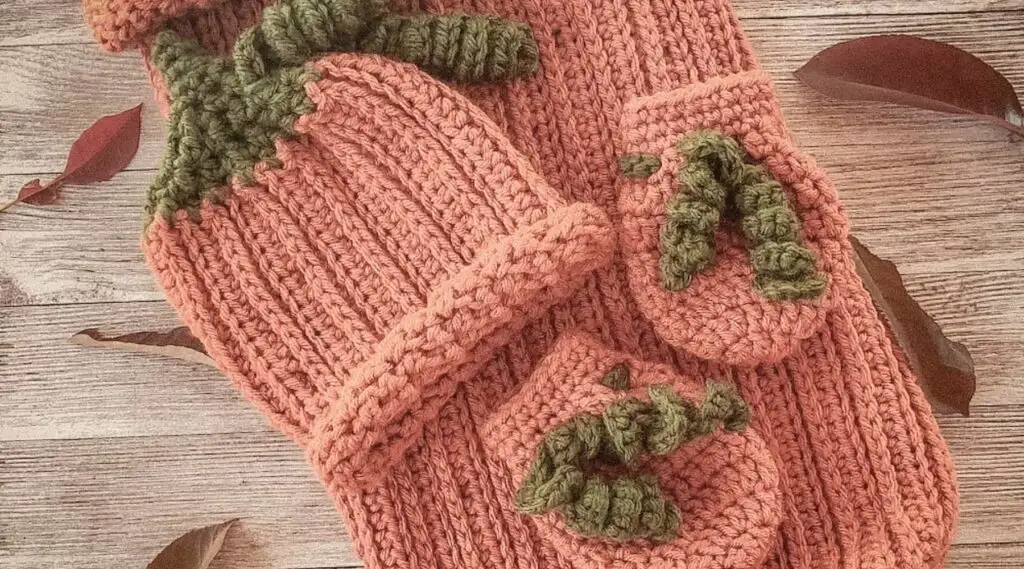
Prepare your little one for fall with this cozy crochet pumpkin baby set — perfect for autumn photos, Halloween, or baby’s first trip to the pumpkin patch. In this post, I’m sharing free crochet patterns for a soft pumpkin sleep sack, a cute pumpkin beanie, and matching mittens. Whether you’re making a seasonal gift or capturing sweet fall memories, this crochet pumpkin baby set brings together warmth, style, and handmade charm.
What You’ll Find Inside this Pattern:
At a Glance
The Sweet Story Behind This Crochet Pumpkin Baby Set
Woo hoo! Autumn has arrived — and with it, a cozy crochet project that’s sure to become a fall favorite!
Today, I’m sharing my crochet pumpkin baby set, which includes a snug little sleep sack (cocoon), a sweet pumpkin beanie, and festive mittens — the perfect fall baby outfit for newborn photos, baby’s first Halloween, or a rustic autumn gift.
This set is extra special because I designed it for my brand-new grandbaby, lil’ Miss Ella Margaret Rose — born just last week! 🧡
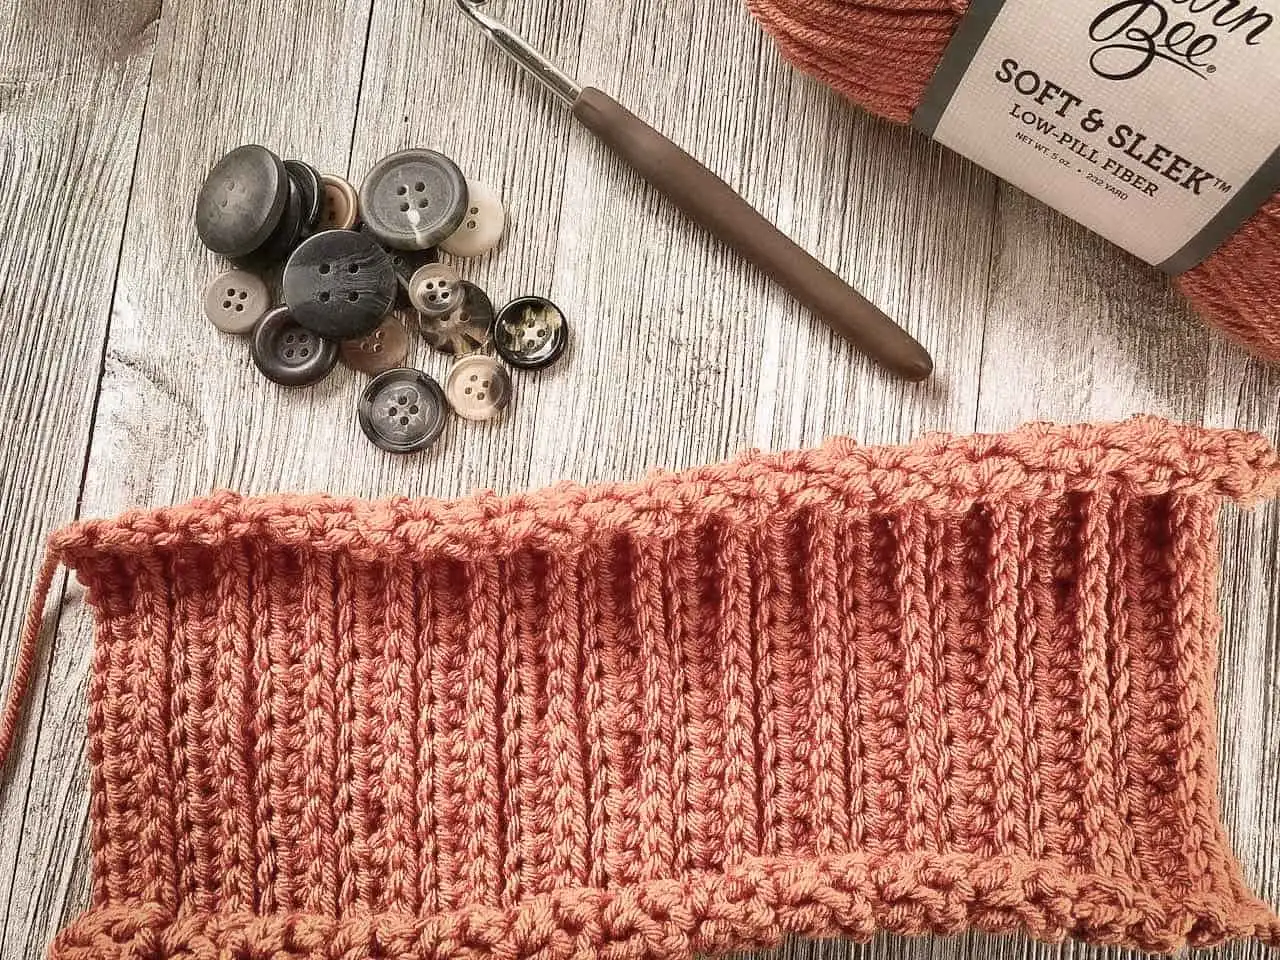
Even more special? I used one of my favorite stitches — the one I call the “knit-like” or “knit-look” stitch (you might know it as the camel stitch). Not only does it resemble a traditional knit stitch, but it creates a beautiful ribbing effect that looks just like the ridges on a pumpkin — which makes it absolutely perfect for this design.
This is a great stash buster too — it only takes one skein of worsted weight yarn for the main color and works up in just a few steady hours.
So break out your hooks and work up a crochet pumpkin baby cocoon that wraps your little one in the enchantment of fall — complete with a cozy hat and sweet little mittens to match.
Choosing the Right Yarn and Colors for Your Crochet Pumpkin Baby Set
For this crochet pumpkin baby set, I chose Yarn Bee Soft & Sleek yarn in Pumpkin Spice for the main parts — and I couldn’t be happier with it! It’s super soft, has a beautiful drape, and is gentle on a newborn’s delicate skin.
It also has just the right amount of stretch, which makes it easy to slip baby into the crochet sleep sack, while still bouncing back into its original snuggly shape.
And let’s be honest… the color is spot-on — it’s the perfect pumpkin orange for any fall baby outfit or Halloween baby crochet look!
For the hat’s “stem” and those adorable curly vines, I dug into my stash and found a rich, earthy green yarn that completed the look — proving that this is also a great stash buster project.
Love Pinterest? I do!
Save this post for Later and follow all my boards.
Helpful Hints for Beautiful Results
Crochet Pumpkin Baby Set Tips for Success
Check your gauge
Making a swatch before you start ensures your sizing is on track. It helps the sleep sack fit snugly but safely and gives your finished set a polished look.
Use a stitch marker
When working in continuous rounds, stitch markers help keep your place with ease. They’re also great for aligning seams, curves, and points — especially useful for the hat and mittens.
Take your time with the 3rd loop
This stitch may feel awkward at first, but it gets easier! Go slowly on the first few rows to get used to the placement — soon it’ll be second nature.
Secure your color changes
When switching to green for the hat stem or vines, fasten your ends cleanly and weave them in neatly to avoid bumps or unraveling.
Choose soft, baby-friendly yarn
Use yarn that’s gentle on delicate skin and has some stretch — like Yarn Bee Soft & Sleek — to make the set extra cozy and wearable.
Shape gently if needed
The ribbed stitch naturally looks great, but if your piece curls a bit, a light steam block or gentle hand shaping can help everything lay just right.
Finish strong
Weave in all ends securely and neatly. A tidy finish helps the set look professional, whether you’re gifting it or saving it as a keepsake.
Practice embellishments on scrap yarn
If you’re new to curly vines or wrist ties, try them once or twice on scrap yarn first. It builds confidence and helps you get the look just right
Whether you’re stitching a heartfelt fall gift or making something special for your own little one, this crochet pumpkin baby set pattern works up beautifully with the right yarn and a few simple techniques. It’s a cozy, seasonal project that’s both thoughtful and handmade — perfect for welcoming autumn in style.
Materials
Recommended Yarn:
- YarnBee Soft & Sleek Low-pill fiber, medium 4 worsted weight, in color Pumpkin Spice
- Red Heart Super Saver, medium 4 worsted weight, in color Medium Thyme
~ Total yardage: 1 skein of YarnBee Soft & Sleek, 232y/212m (5oz/142g) & less than 100 yards of Red Heart = max of 332 yards.
Yarn Alternatives:
Yardage Requirements for the Crochet Pumpkin Baby Set
Each One of the things I love most about this crochet pumpkin baby set is that it’s a low-yardage, stash-friendly project — perfect for quick fall makes or last-minute baby gifts!
To make the full set — including the pumpkin sleep sack, hat, and mittens — you’ll need approximately:
- 1 skein of Yarn Bee Soft & Sleek in Pumpkin Spice (232 yards / 212 meters) for the main color
- Less than 100 yards of Red Heart Super Saver or similar worsted weight yarn in a rich green for the hat stem, curly vines, and mitten ties
So in total, you’re looking at around 330 yards of worsted weight yarn — which makes this a perfect stash buster crochet project that doesn’t sacrifice cuteness or comfort.
And of course, you can always customize the colors to fit your personal palette — from classic autumn tones to soft neutrals or even pastel pumpkins for a unique twist!
Skill level
Level of Difficulty – Advanced Beginner

What does “Advanced Beginner” mean?
You’ve got the basics down — like chaining, single crochet, and double crochet — and you’re ready to try simple stitch variations or patterns that involve shaping, joining pieces, or working in special loops like the 3rd loop. This project will help you grow your skills while still keeping things fun and doable!
Gauge / Tension for the Crochet Pumpkin Baby Set
Getting your gauge just right helps ensure a cozy, well-fitting result — especially for a snug piece like the crochet pumpkin sleep sack. Since this pattern uses the stretchy knit-like (camel) stitch, checking your tension is a good idea before you start.
17 stitches and 12 rows = 4″ (10 cm)
Worked in the knit-like rib stitch (alternating hdc in 3rd loop and hdc in back loop only)
Hook used to obtain gauge: 5.5 mm (US I/9)
Tips for Measuring Gauge:
- Make a swatch using the same stitch pattern used in the set:
Row 1: hdc in 3rd loop, Row 2: hdc in blo — repeat. - Measure your swatch unblocked, as the final baby set isn’t meant to be blocked.
- If your swatch is too small: go up a hook size
- If your swatch is too big: go down a hook size
The fabric should be stretchy but not loose, with a soft ribbed texture — just right for wrapping up your little pumpkin in cozy fall cuteness!
Abbreviations
Pattern is written in Standard US crochet terms.
*Click on abbreviation names for tutorials
Special Stitches and Techniques:
Camel stitch – This crochet pumpkin baby set uses a gorgeous textured stitch I often refer to as the knit-like stitch — but you may know it as the camel stitch. It’s created by working half double crochet (hdc) stitches into the 3rd loop, giving your fabric a ribbed, stretchy texture that looks a lot like knitting!
Sc2tog – single crochet two stitches together -insert hook into the first stitch, yarn over and pull through the stitch, insert hook into the next stitch, yarn over and pull through all loops on the hook (should be 3). This creates a decrease.
back loop only (blo) – This is a stitch placement, not a stitch type. Work the indicated stitch through the back loop only of the previous row/round. This creates a defined ridge or flexible texture.
Pattern Instructions – Crochet Pumpkin Baby Set
Let’s get started!
Ready to crochet the cutest pumpkin baby set for fall? This free pattern includes a cozy sleep sack, a sweet pumpkin beanie, and soft little mittens — perfect for baby’s first autumn, newborn photo shoots, or handmade Halloween gifts.
Designed with soft worsted weight yarn and the knit-like rib stitch, this project is gentle on baby’s skin while showing off a lovely pumpkin-inspired texture.
After you finish the set, don’t miss the Creative Ways to Embellish, Personalize, and Use Your Pumpkin Baby Set section for fun ideas! And if you need help while crocheting, be sure to scroll down to the Helpful Hints & FAQs section for extra guidance.
Construction Overview
Each piece is worked flat or in the round using worsted weight yarn and a 5.5 mm (I/9) hook, except for the details like vines and wrist ties, which use a 3.5 mm hook.
- Mittens: Worked in the round from the top down, with a simple shape that includes optional wrist ties.
- Sleep Sack: Worked flat in a ribbed stitch pattern, then folded and seamed to form the cocoon. The top is cinched closed, and a decorative button is added.
- Hat: Worked flat, seamed, then topped with rounds of decreases to shape the stem. Curly vines are crocheted separately and sewn on.
Need help visualizing construction?
The premium PDF includes detailed schematics and step-by-step photos
Finished Dimensions
All pieces are sized to fit newborns. The mittens may fit up to 6 months.
- Hat: Fits head circumference 13–15″, hat circumference 12″, length 5″
- Sleep Sack: Approx. 17–18″ long (unrolled), 8.5″ wide
- Mittens: Approx. 4″ long, 3″ wide (at widest point)
Provided measurements are as exact as possible but are approximate. Yarn type, crochet tension, and individual technique can all affect your final sizing slightly from one maker to the next.
Notes:
Sleep Sack (Cocoon)
With Pumpkin Spice & using 5.5mm hook — Ch 82
Row 1: Hdc in 3rd ch from hook (counts as your first hdc st) and in each ch across (80 sts).
Row 2: Ch 2 (does not count as a st), turn work, hdc in the 3rd loop (see Reference & photos below) across to last st, hdc in last stitch as normal (ie. under front & back loops) (this should be the first hdc of row 1 that counted as a st) (80 sts).
Reference: How to Work in the 3rd Loop
Row 3: Ch2 (does not count as a st), turn work, hdc in blo across to the last st, hdc (as normal, ie. under both front & back loops) (80 sts.)
Row 4: Ch2 (does not count as a st), turn work, hdc in the 3rd loop across to last st, hdc (as normal, ie. under both front & back loops) (80 sts).
Repeat rows 3 and 4 until fabric measures 18-inches long.
Do not bind off.
NOTE: Due to the nature of the pattern, fabric may look crooked, but as long as you have not lost track of your stitch count, it is not & just requires some reshaping.
- Turn the fabric so that it is now vertical – the ribbing should be up & down and no longer side to side.
- Fold in half along the long edge – you should be folding from left to right & the ribbing should be on the INSIDE.
- Seam edges together using the slp-st.
- Bind off leaving a 12-inch tail.
- Thread the tail into a tapestry needle.
- Slip the needle through the edge of the crochet piece that will become the top (this should be the left edge) – push it all the way around the edge until the needle and thread come out the end back where you originally pushed in the needle. You may need to push the needle out & then back in at various points to make it all the way around the top of the sack.
- Pull the long tail tight so that the top edges of the crochet piece cinch together.
- Use remaining tail to sew the cinched areas together even more. Try to do this in a way so that the bottom looks like that of a pumpkin.
- Bind Off & Weave in ends.
- Turn the sack inside out – the ribbing should now be on the outside and run up & down NOT side to side.
- Sew button to bottom at the center of the join with coordinating yarn.
- Roll the top of the sack down (this may occur naturally due to the nature of the pattern).
Pumpkin Hat
With Pumpkin Spice & using 5.5mm hook — Ch 24
Row 1: Hdc in 3rd ch from hook (counts as your first hdc st) and in each ch across (22 sts).
Row 2: Ch2 (does not count as a st), turn work, hdc in the 3rd loop across to last st, hdc under the top two loops of the last st (this should be the first hdc of row 1 that counted as a st) (22 sts).
Row 3: Ch2 (does not count as a st), turn work, hdc in blo across to the last st, hdc (as normal, ie. under both front & back loops) (22 sts.)
Row 4: Ch2 (does not count as a st), turn work, hdc in the 3rd loop across to last st, hdc (as normal, ie. under both front & back loops) (22 sts).
Repeat rows 3 and 4 until fabric measures 12-inches long.
Do not bind off.
- Fold in half lengthwise & seam edges together using the slp-st.
- Bind Off & Weave in ends.
On the end that will become the top, attach Medium Thyme color yarn using a slip st – starting at the seam.
Round 1: Ch 3 [does not count as a stitch], hdc around the top making a total of 21 sts all the way back to the seam, slp-st into the top ch of the ch 3 to close (21 sts).
Round 2: Ch 3 [does not count as a stitch], hdc into the 1st st, *sc2tog the next 2 sts, hdc in the next st*. Repeat from * to * to end, work 1 hdc into the last st (14 sts).
Round 3: Repeat round 2 (9 sts).
Round 4: Ch 1[does not count as a stitch], sc in each st around, slp-st into the ch 1 to close (9 sts).
Round 5: Switch to 3.5mm hook – Ch 1 [does not count as a stitch], sc into the first st, *sc2tog the next 2 sts, sc in the next st*. Repeat from * to * to the last 2 sts, sc2tog the last 2 sts (6 sts).
Rounds 6-7: Repeat round 4 (6 sts).
Round 8: Repeat round 5 (4 sts).
Round 9: Ch1 [does not count as a stitch], sc2tog the next two sts, sctog the next two sts (2 sts).
Close by slip stitching the last 2 sts together.
Roll up the bottom of the hat (it may roll up on it’s own due to the nature of the pattern)
Curly Vines – Make 2 – 1 long & 1 short
Use 3.5mm hook & Medium Thyme.
Long – Ch 30, Short – Ch 20
Row 1: Turn work, work 3 hdc into the 3rd ch from hook and in each stitch to the end.
Bind Off – use tails to attach to top of hat.
Mittens (Make 2)
With Pumpkin Spice & using 5.5mm hook.
Round 1: Use the magic circle to make a ring, ch 3 (does not count as a st), work 8 dc into the circle, slp-st to the top ch of the ch 3 to close. (8 sts)
Round 2: Ch3, work 2 dc in each st around (16 sts).
Round 3: Ch 3, *work 1 dc in the next st, work 2 dc into the next st*. Repeat from * to * around, slp-st to top ch of ch3 to close (24 sts).
Rounds 4 -7: Ch3, work 1 dc in each st around, slp-st to top ch of the ch 3 to close (24 sts).
Round 8: Ch 2 (counts as a stitch), * work 1 hdc in the next st, skip the next st, work 1 hdc in the next st*. Repeat from * to * around, skip the last stitch & slp-st into the top ch of the ch 2 to close (16 sts).
Rounds 9-13: Ch 1, sc in each st around, slp-st into the ch 1 to close (17 sts).
Wrist Ties – Make 2
Use 3.5mm hook & Medium Thyme.
Ch 60
Row 1: Work 3 sc into the 2nd ch from hook [counts as a stitch] and in each of the next 15 chs, slp-st in the next 27 chs, work 3 sc in each of the next 16 chs (123 sts).
Weave the ties through the holes on the wrist area of the mittens & tie at the front of each mitten.
Safety, Care & Tips
Your baby’s comfort and safety always come first! Here are a few important tips to keep in mind when using your handmade crochet pumpkin baby set:
Safety First
- Ensure the set fits properly — nothing should be too tight or restrictive.
- Do not leave baby unattended while wearing the sleep sack, hat, or mittens.
- Use the sleep sack for supervised photo shoots or snuggle time, not overnight sleeping.
- Avoid using buttons, ties, or decorative elements that could come loose or pose a choking hazard unless baby is fully supervised.
Care Instructions
- Wash items in cold water using a baby-safe detergent
- Lay flat to dry to maintain shape and softness
- Avoid high heat or aggressive agitation, which may cause pilling or distortion
- Check regularly for any signs of wear, loose threads, or stretched areas that may need repair
Extra Tips
- The ribbed texture of the stitch provides natural stretch — but overuse can loosen shape over time. Reshape gently as needed after washing.
- If gifting, include care instructions with the set so new parents know how to wash it safely.
- Consider storing the set flat or rolled rather than hung to maintain its shape.
Creative Ways to Embellish, Personalize & Use Your Crochet Pumpkin Baby Set
Looking to make your crochet pumpkin baby sleep set even more special? Whether you’re gifting it or photographing your little one, here are some fun ways to customize and put it to use:
Embellish It
Personalize It
Use It
Frequently Asked Questions – Crochet Pumpkin Baby Sleep Set
Got questions? You’re not alone! Below are some of the most common things people ask about making and using this crochet pumpkin baby set — from yarn choices to washing tips and everything in between. If you’re unsure about something, chances are the answer’s right here!
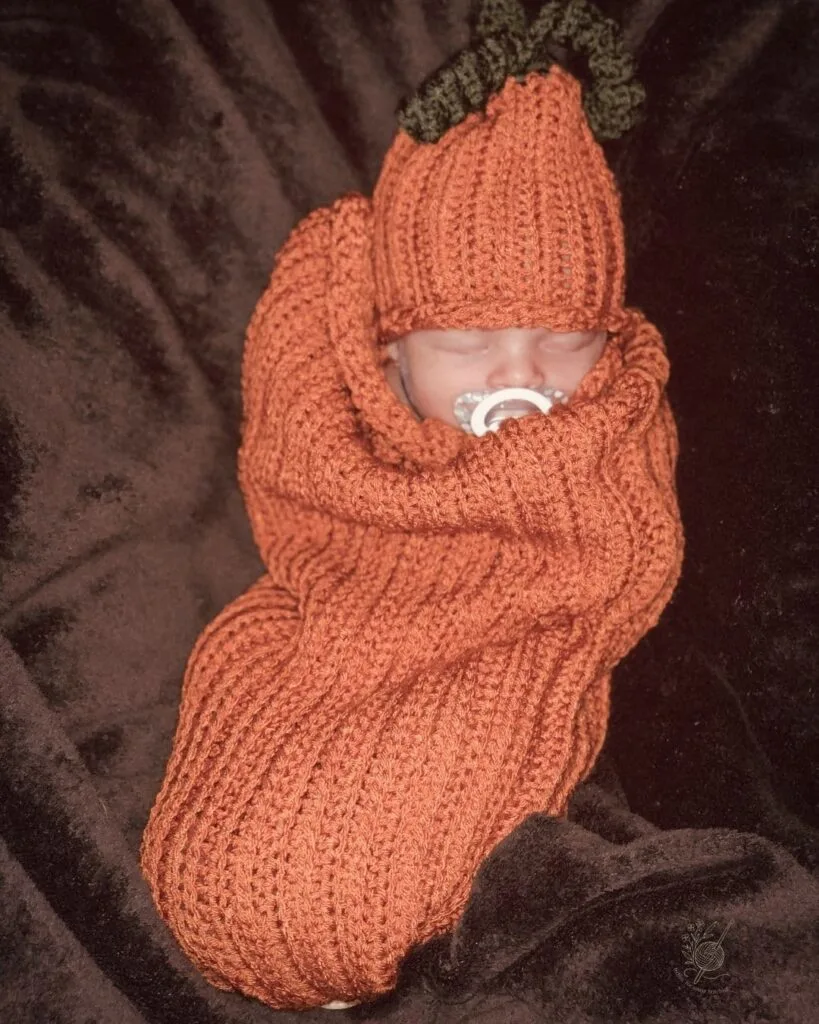
Voilà! Your Lil’ Pumpkin Is Ready for Fall
With this handmade crochet pumpkin baby sleep set, your little one will be both snug and stylish all season long.
You’ve created a cozy cocoon, a cute pumpkin beanie, and a pair of adorable mittens — the perfect fall outfit to wrap your baby in warmth, love, and a touch of autumn magic.
Crocheting this sweet ensemble is more than just a project — it’s a heartfelt way to welcome your little one or surprise a fellow mama with a handmade gift.
Don’t you just love it? I do! 🧡
I’d be thrilled to see your finished Lil’ Pumpkin Pie Sleep Sets —
Tag me @itchinforsomestitchin over on Instagram and/or Facebook and share your photos using #itchinforsomestitchin and #IFSSpumpkinbabyset and #itchinforsomestitchin — and don’t forget to follow along for more cozy makes and crochet inspiration!
More to Love

Thank you
I sincerely appreciate you visiting my blog! By sharing my content and/or making a purchase you are making it possible for me to continue producing and sharing free content for everyone to enjoy. Your support is amazing!
