


Stitch Pattern Overview
Skill Level: Intermediate
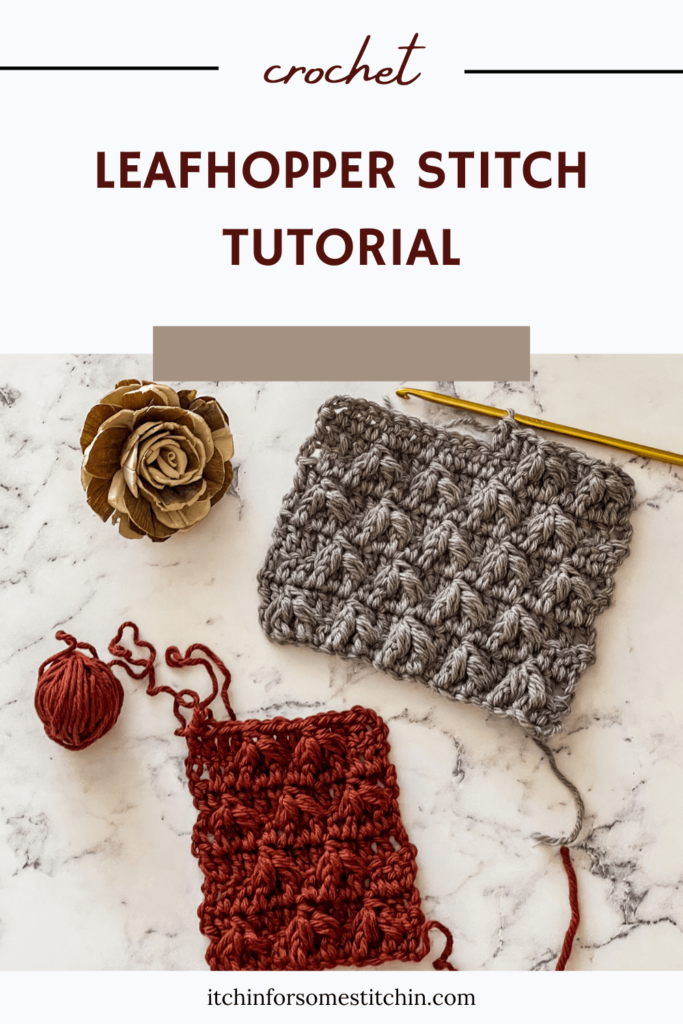
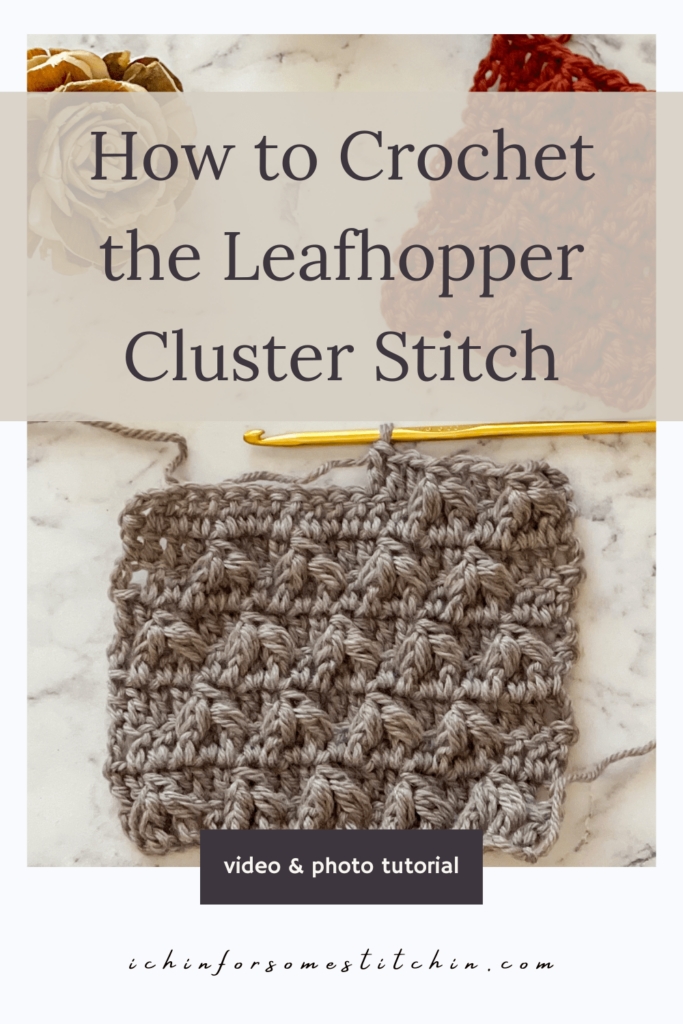
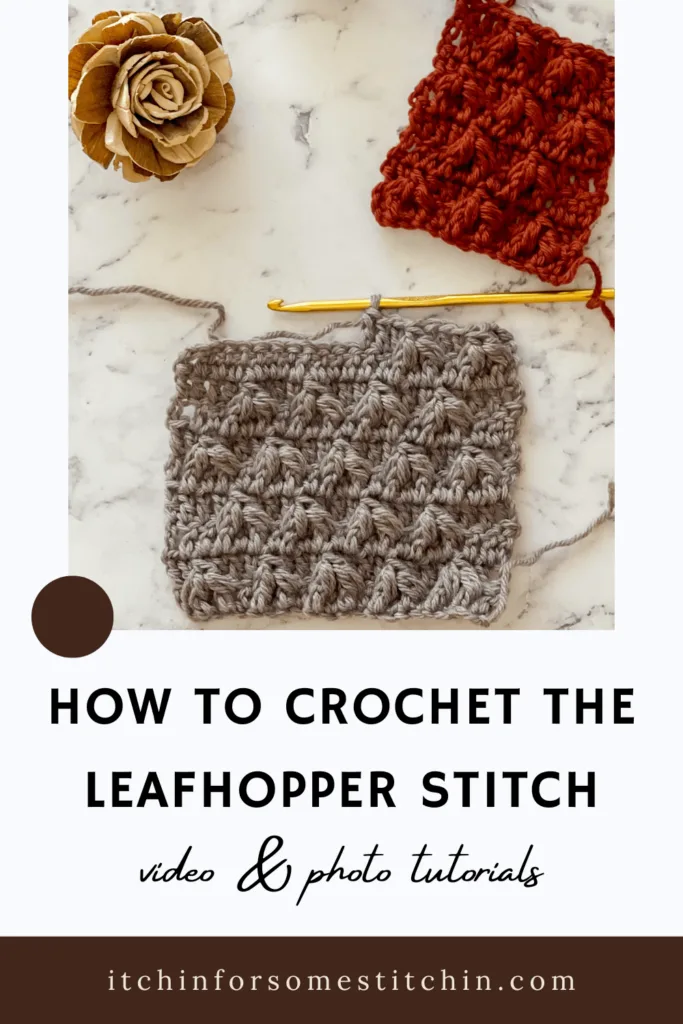
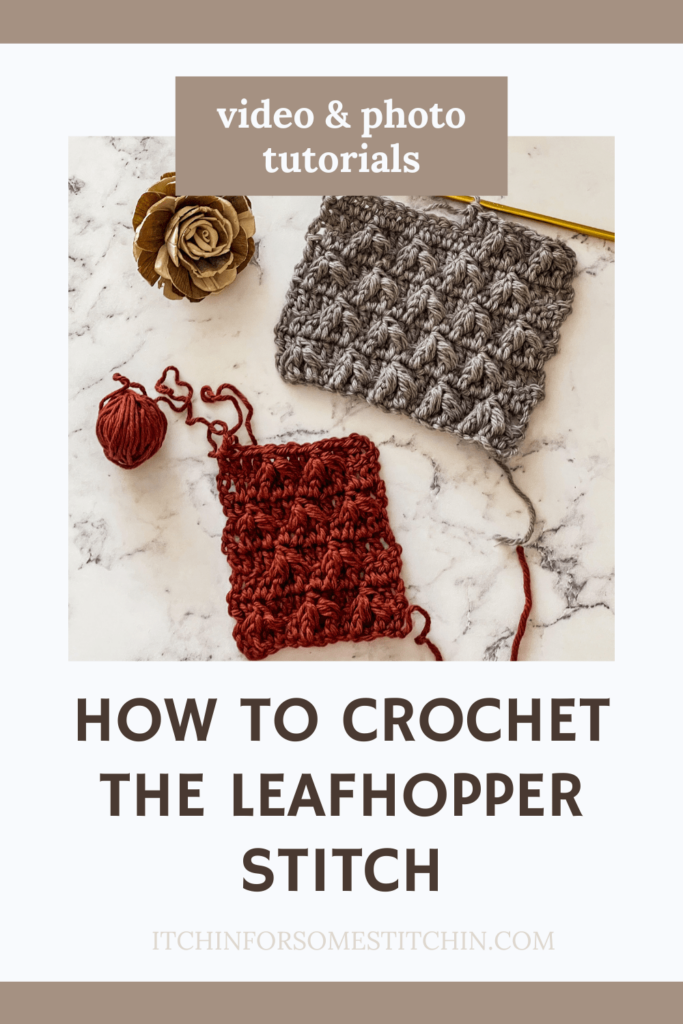
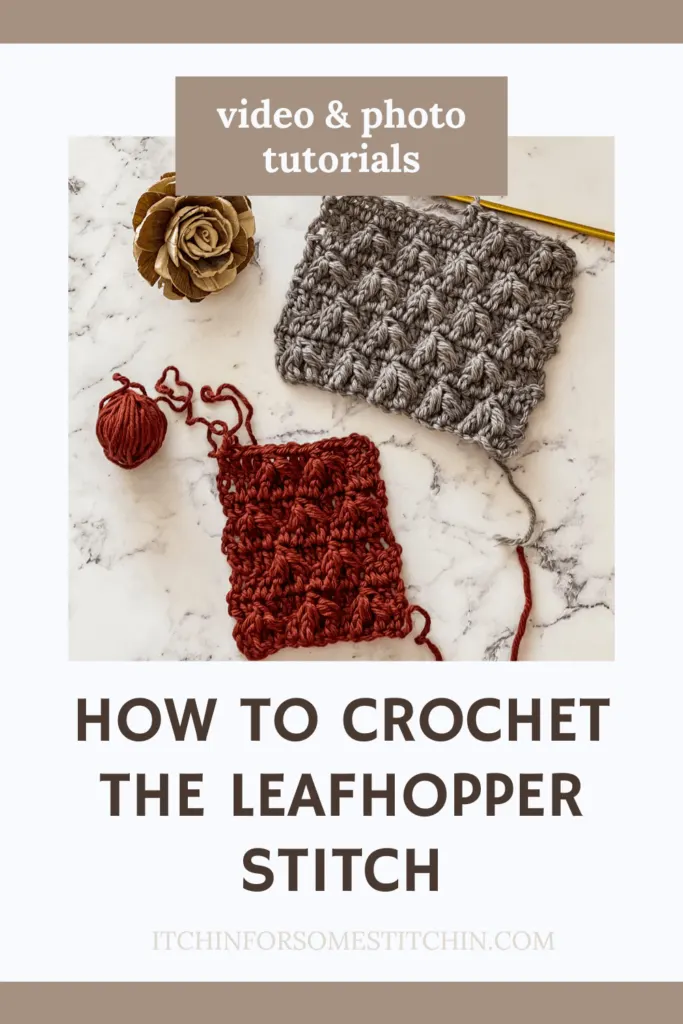
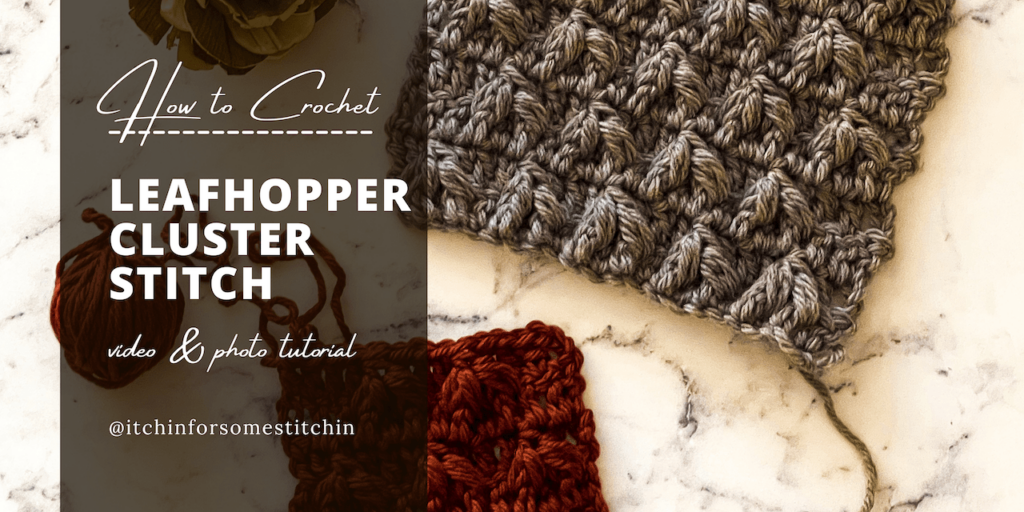
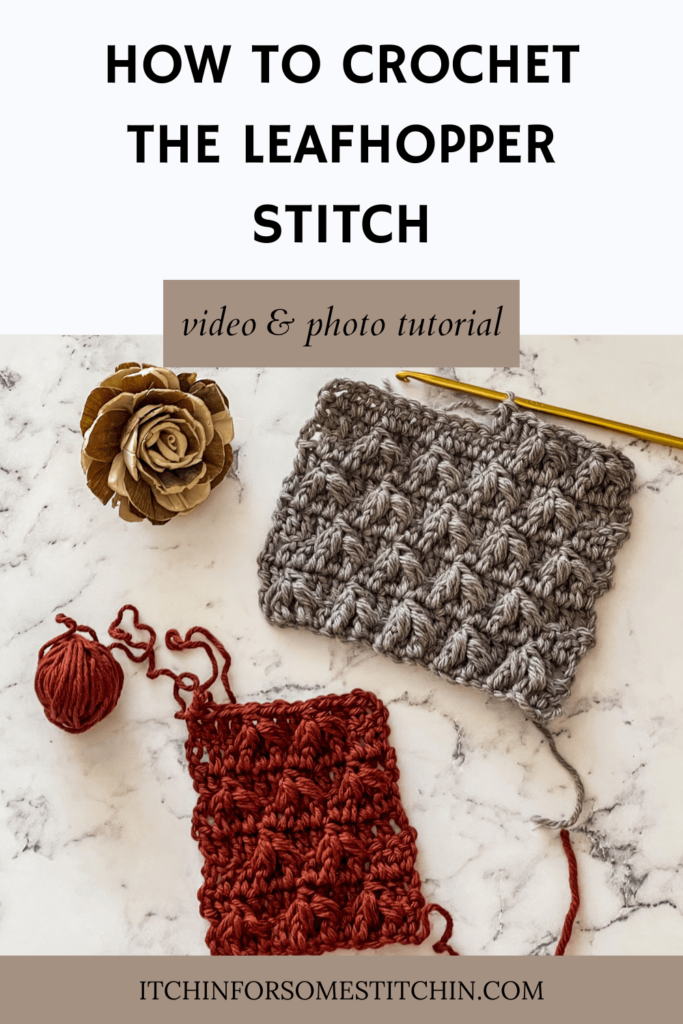
This beautiful leafhopper crochet stitch forms with a foundation of double crochets overlaid by two “wings” of extended stitches that are similar to front post double crochet stitches.
Often called the leafhopper cluster stitch, it’s a great way to learn how to work stitches around stitch posts.
This is a four-row repeat with a striking staggered appearance that ultimately creates a lovely textured crochet piece that’s great for a vast array of crochet projects.
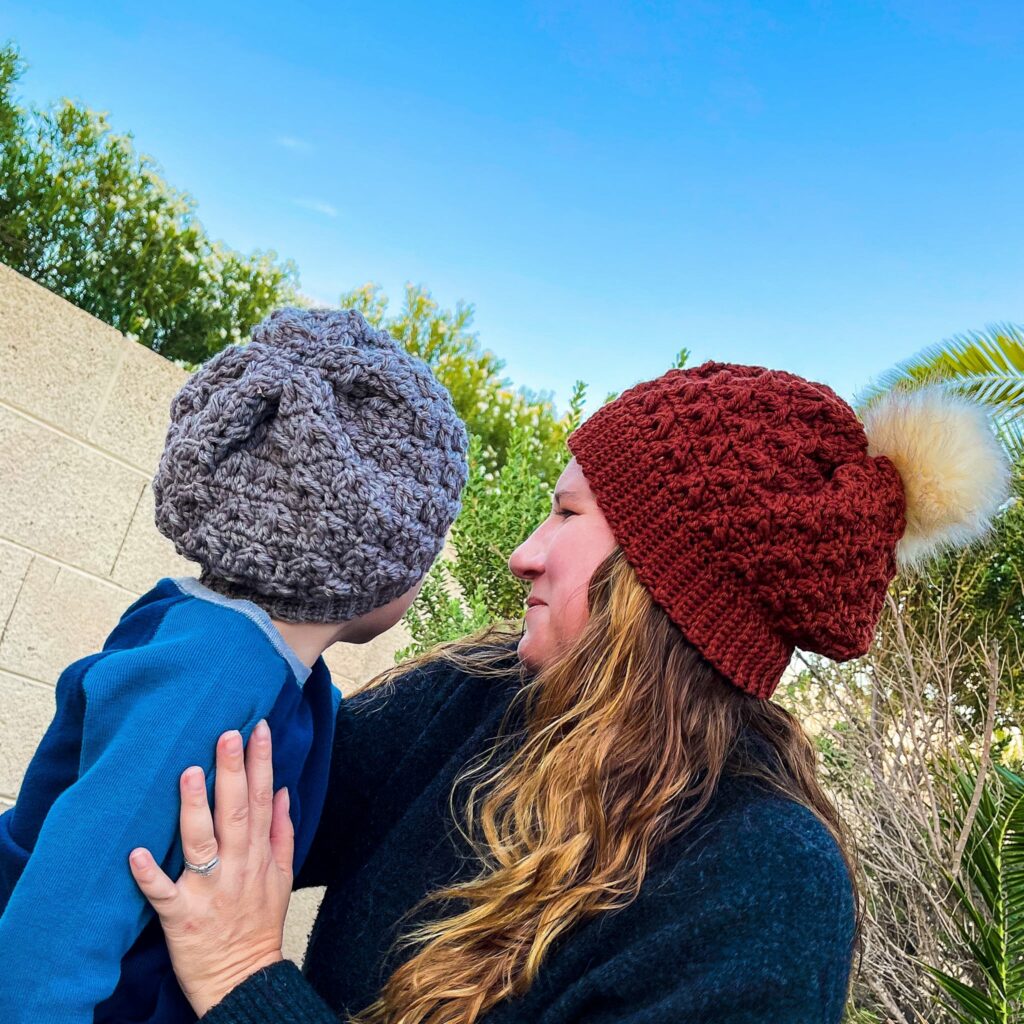
I used this fun stitch to create the Ly Lu Leafhopper Beanie – a simple bottom up crochet beanie with lots of style!
So, grab a skein of your favorite yarn, crochet hook with the right size to match, and give the leafhopper crochet stitch a try.
It’s a stitch pattern that’s easier to work up than you may first think!
This post may contain affiliate links. See my full Disclosure Policy for details.
Let’s Get Crafty!
Looking for lots of crafty inspiration, tips, tutorials, and a great crochet community? Join my Facebook group!
CROCHET
Leafhopper Cluster Stitch Video
See It in Action!
Love Pinterest?
I do!
PIN this pattern to your Pinterest boards for later.
You can also follow all my boards!

Materials:
- Any weight yarn
For this tutorial I am using Knit Picks / We Crochet Swish, medium 4 worsted weight yarn, in color copper.
- Hook of appropriate size for the yarn weight you have chosen
I used an H/8 5.0mm hook for this tutorial
Abbreviations/Stitches Used:
This tutorial is written in US crochet terminology
Chain stitch (ch/s)
Slip stitch (slp-st)
Double crochet (dc)
Yan over (yo)
Additional Notes:
- This stitch is worked in multiples of 4 + 1. Add 2 for the base chain.
- All ch 3 turning chains count as a stitch
For this tutorial: I chained 12 for the multiple of 4; 12 + 1 = 13 + 2 = 15 chains in my foundation chain.

Join the Newsletter!
Subscribe to get our latest content by email & receive a Ravelry coupon code for a FREE crochet PDF pattern of your choice!
Tutorial Instructions
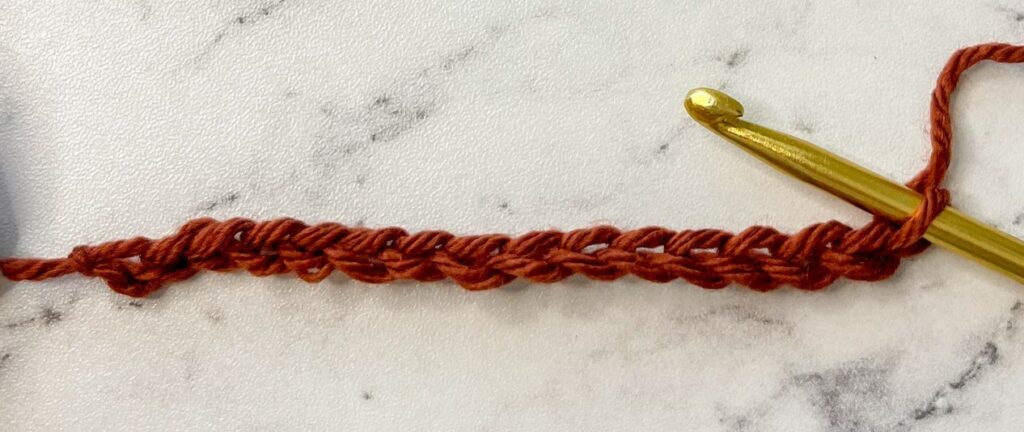
Foundation chain
Step 1.
Make a slip-knot and chain 15 chs for the foundation chain.
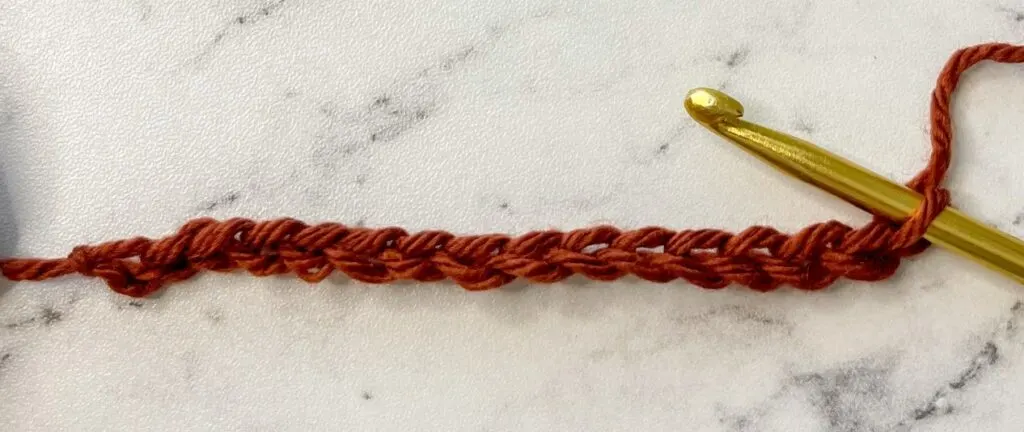
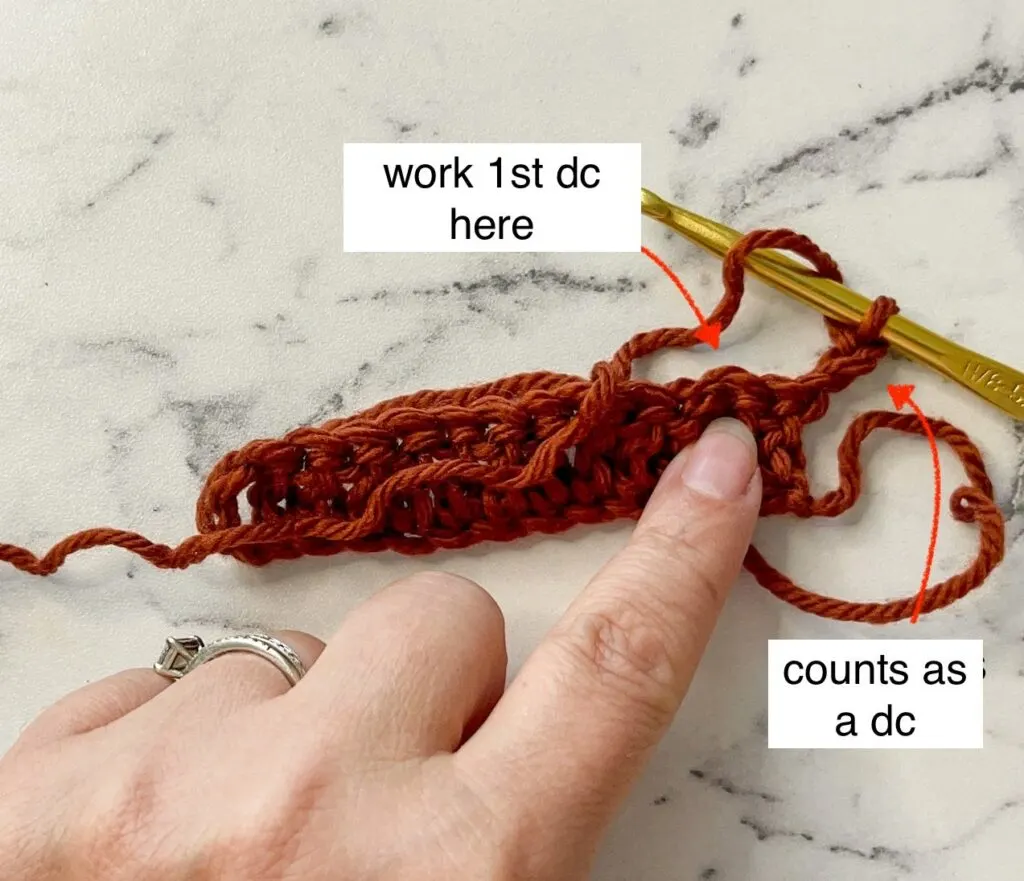
Row 1 – Double crochet row
Step 2.
Work 1 dc into the 4th ch from the hook and into each ch across to the end.
- The first 3 chs count as a dc.
- You should have a total of 13 dc including the first ch 3.

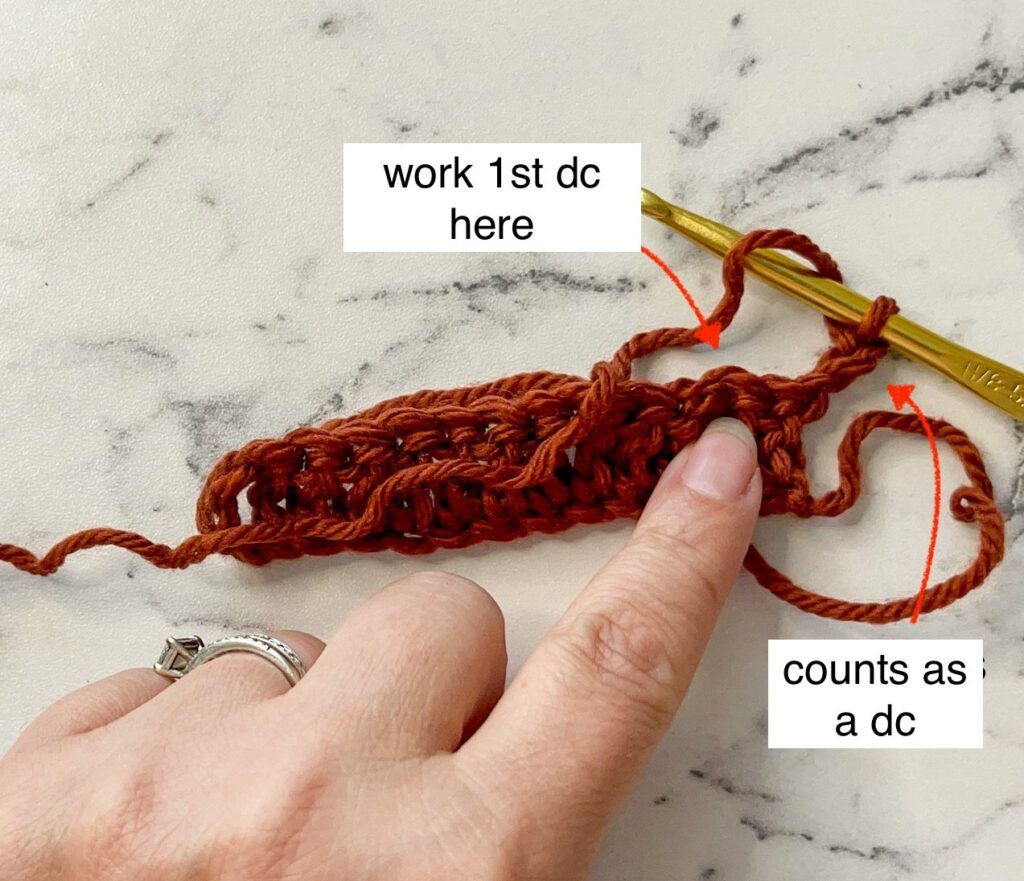
Row 2 – Leafhopper stitch row
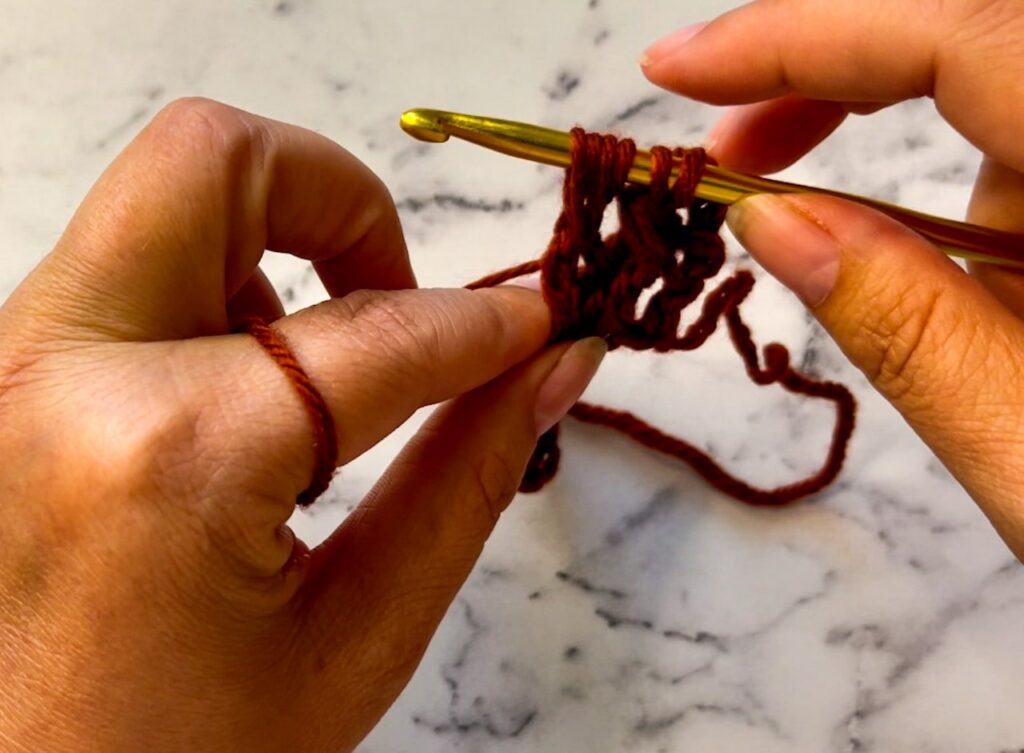
Step 3.
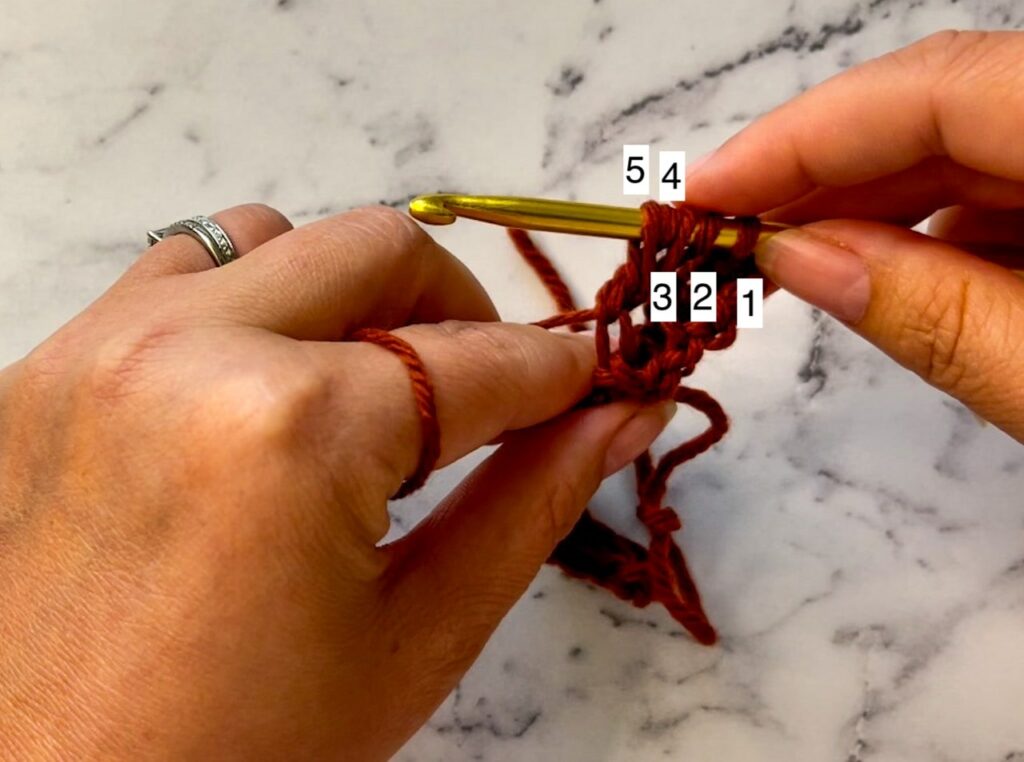
Turn your work, ch 3 (counts as a dc), dc into the first st.
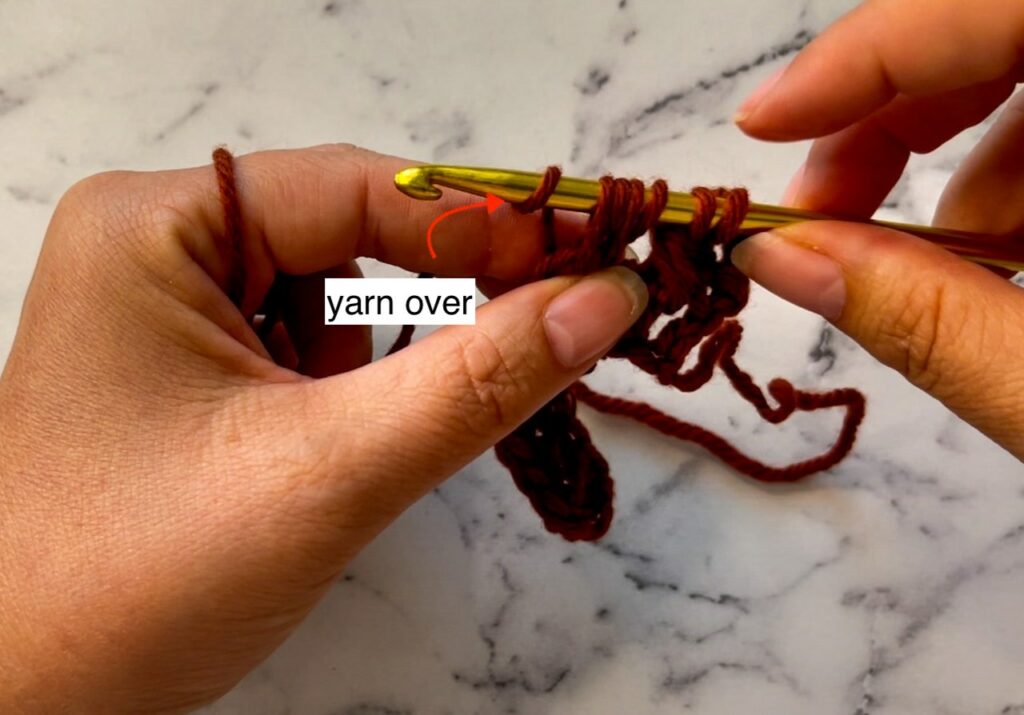
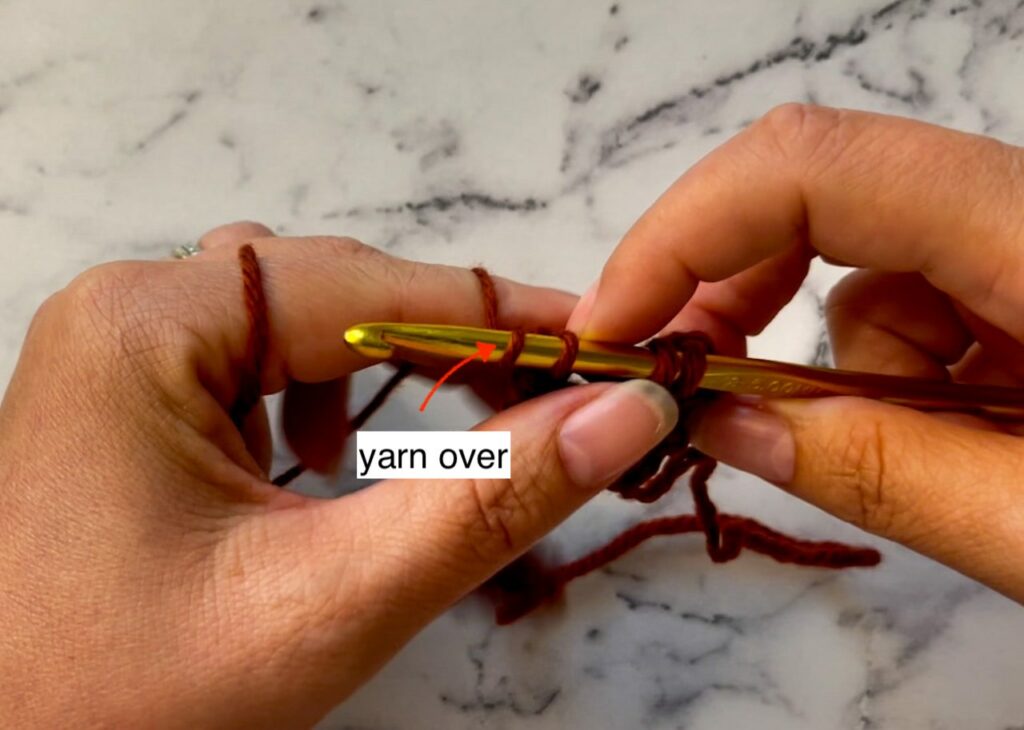
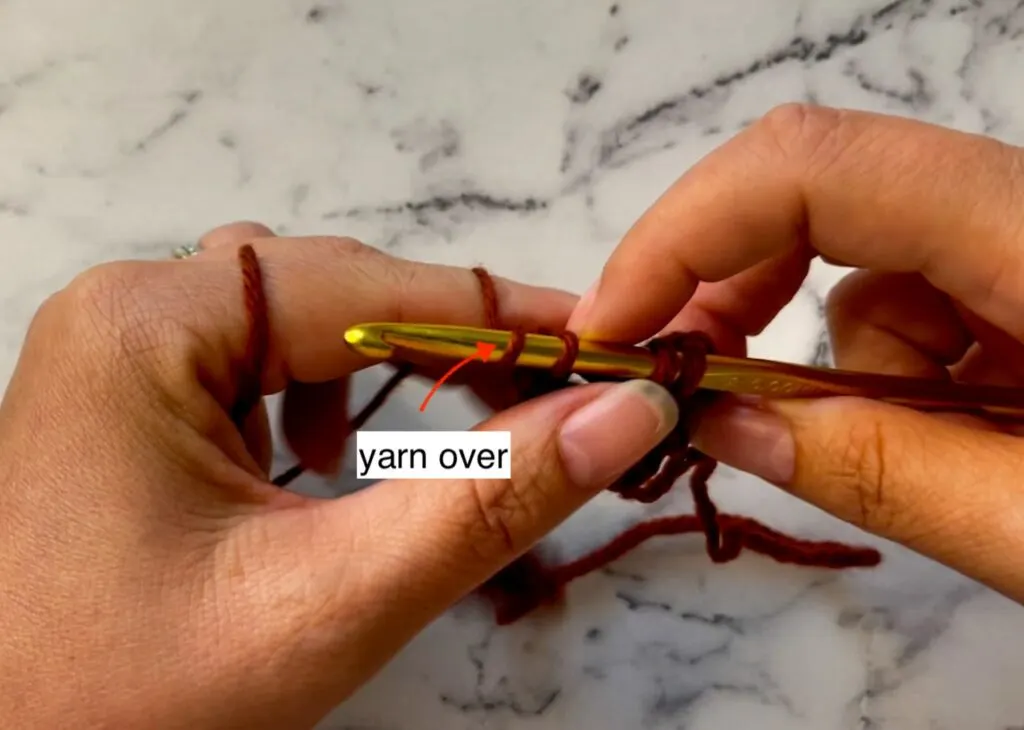
Step 4.
Yarn over
Step 5.
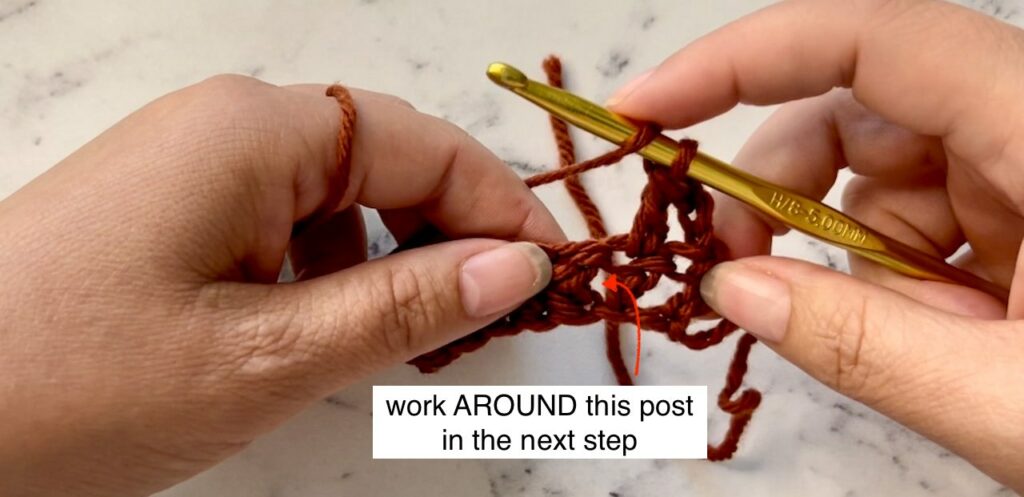
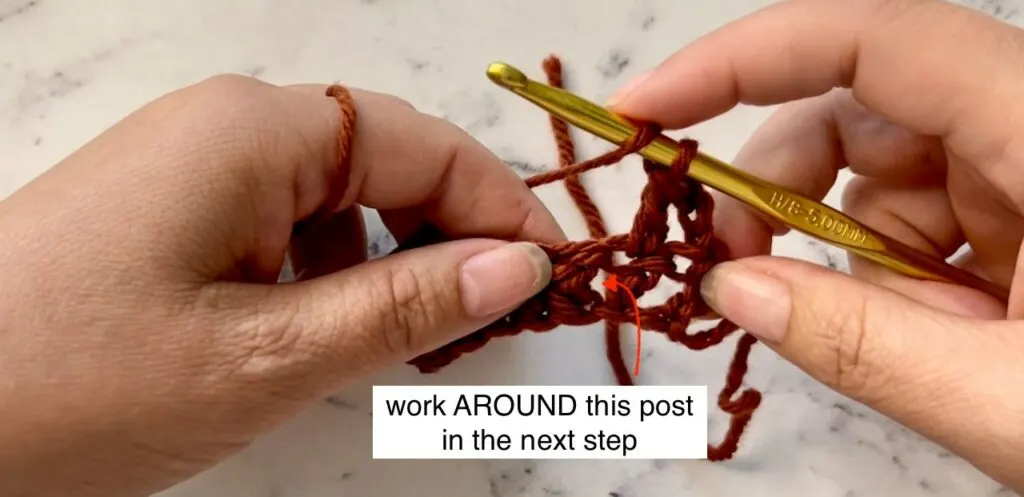
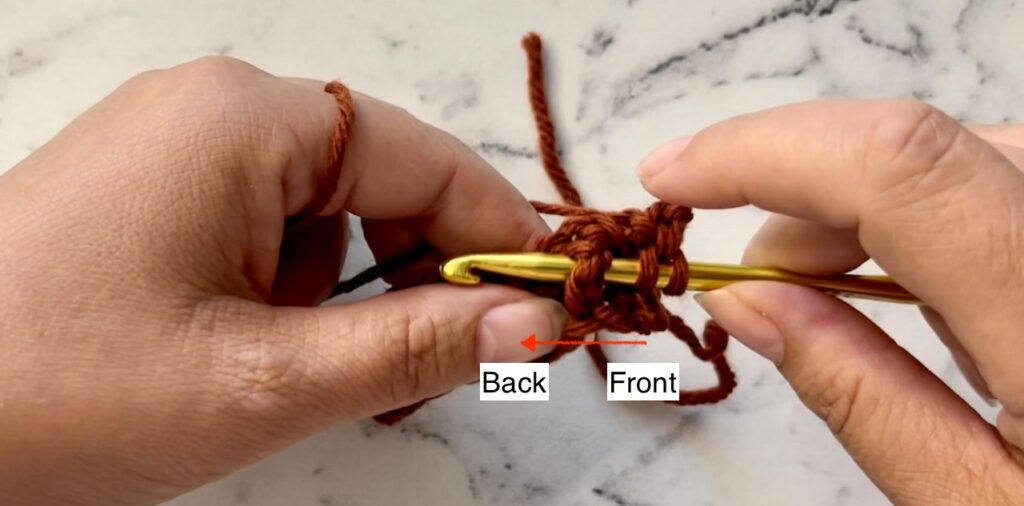
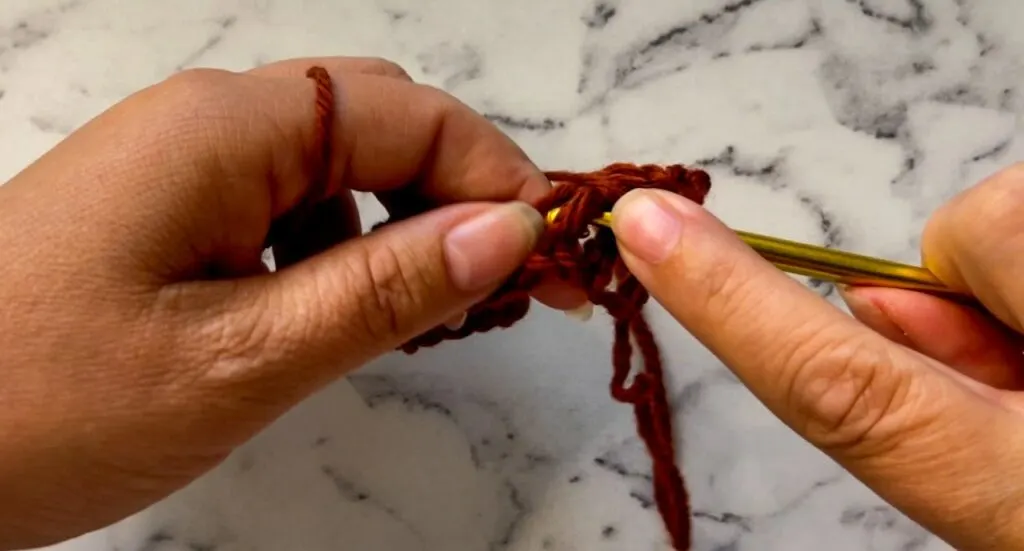
Insert your hook from front to back around the post of the next dc – not into the stitch. Start as if you are working a front post double crochet stitch, but you will not complete it.

Step 6.
Yarn over again and pull through, extending the yarn up as high as a treble crochet stitch.
- There should be 3 loops on the hook

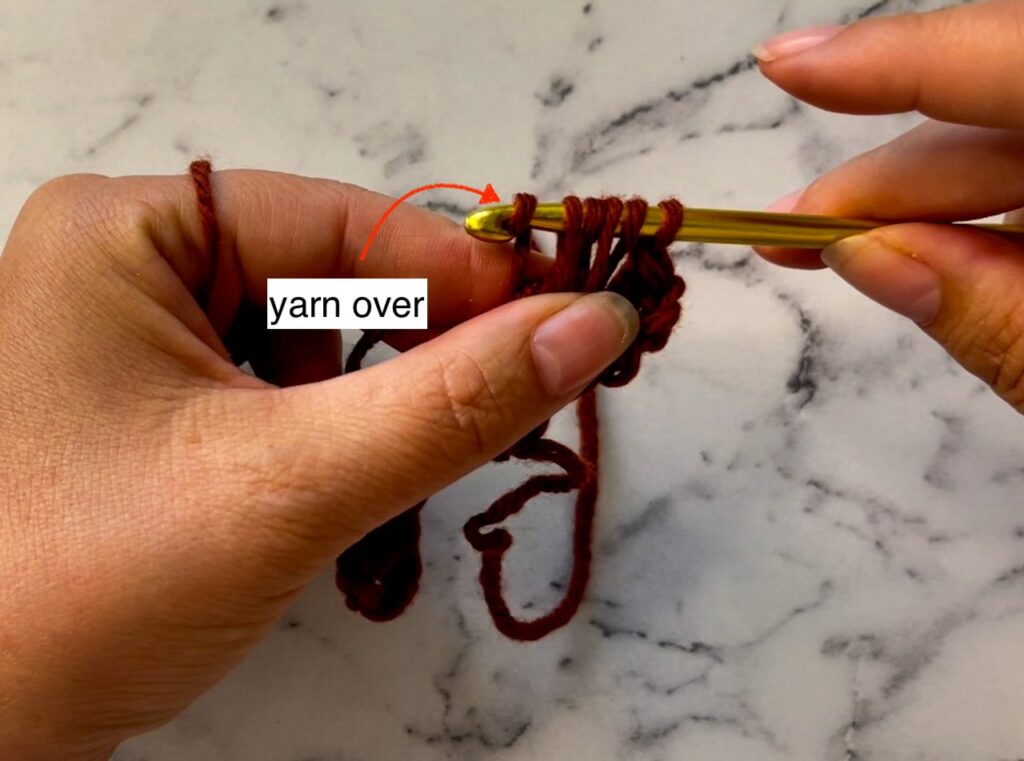
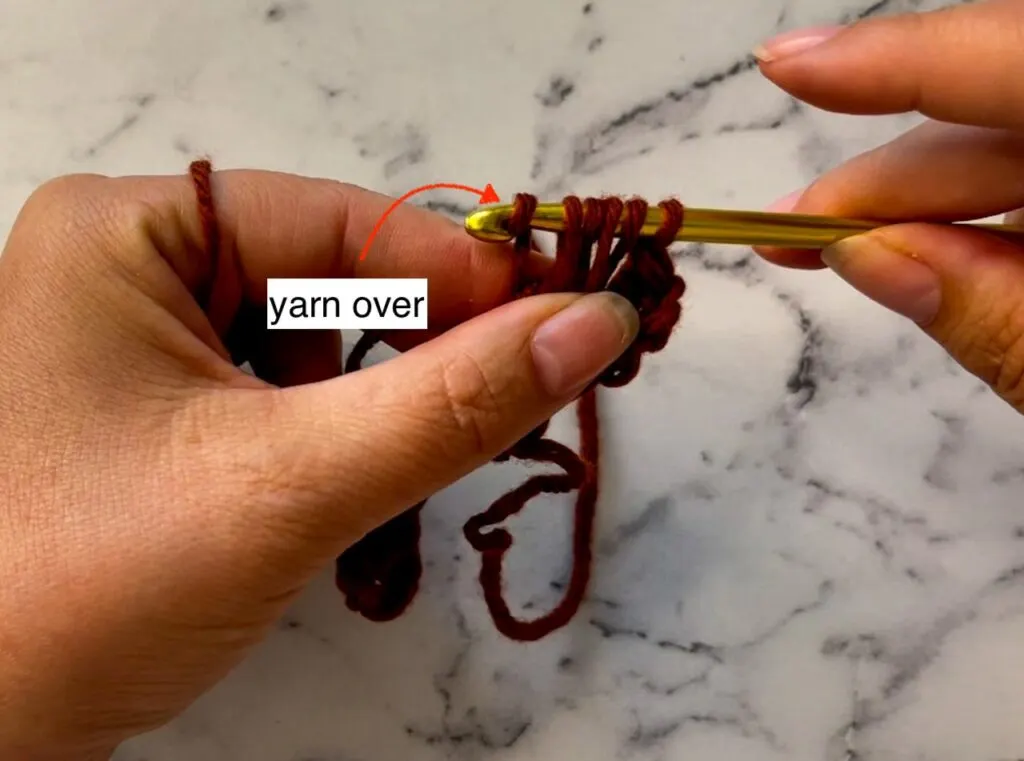
Step 7.
Yarn over again

Step 8.
Insert your hook from front to back around the post of the next dc – not into the stitch. Start as if you are working a front post double crochet stitch, but you will not complete it.

Step 9.
Yarn over and pull through, extending the yarn up as high as a treble crochet stitch.
- There should be 5 loops on the hook


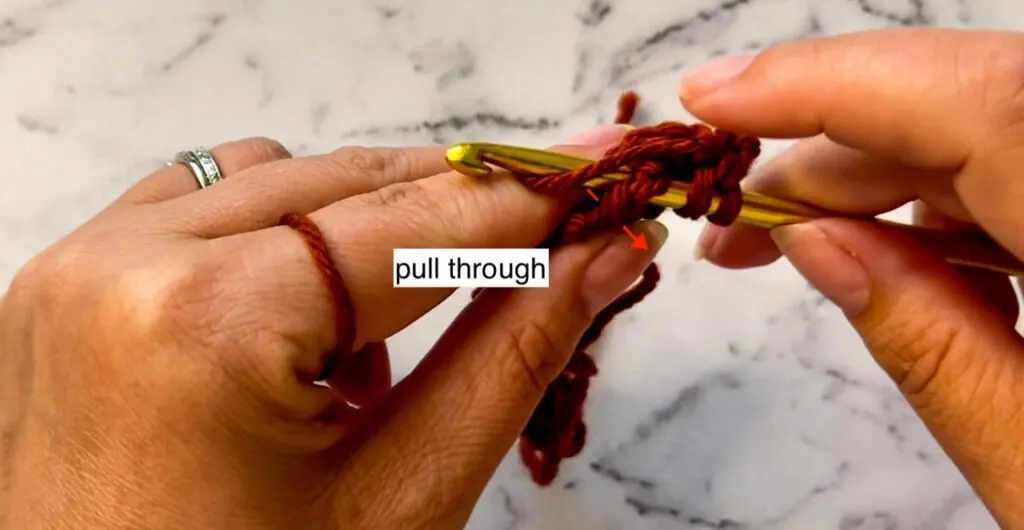
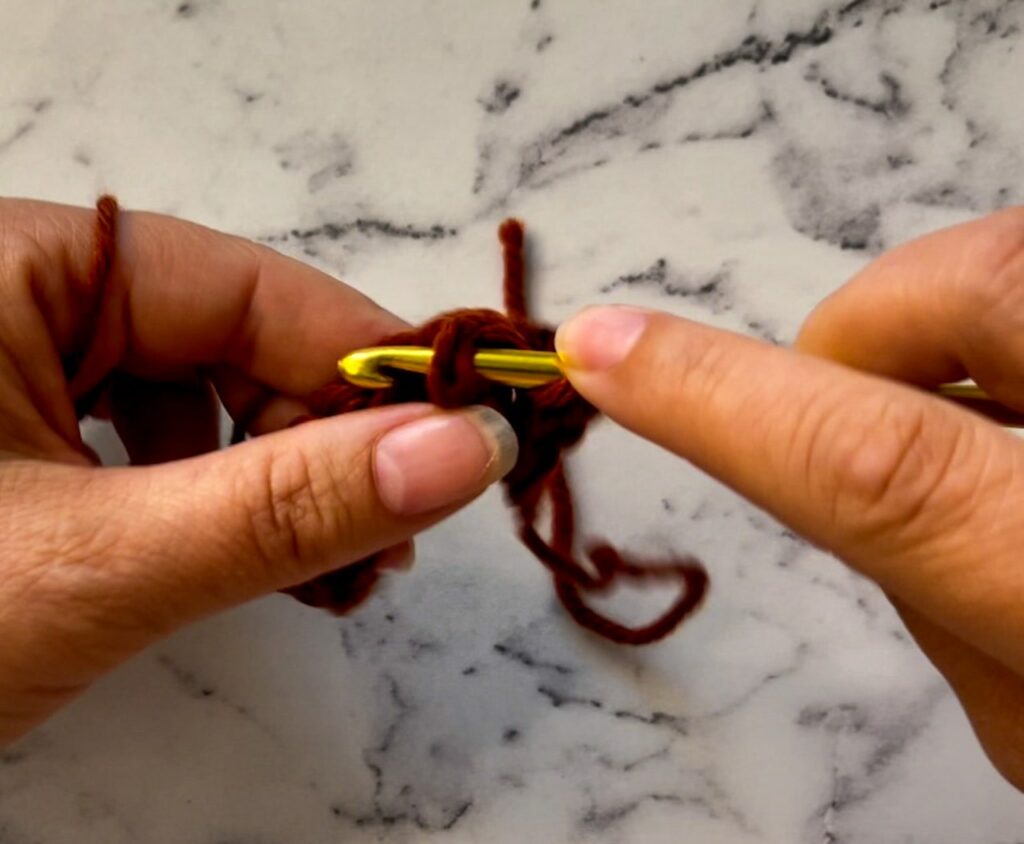
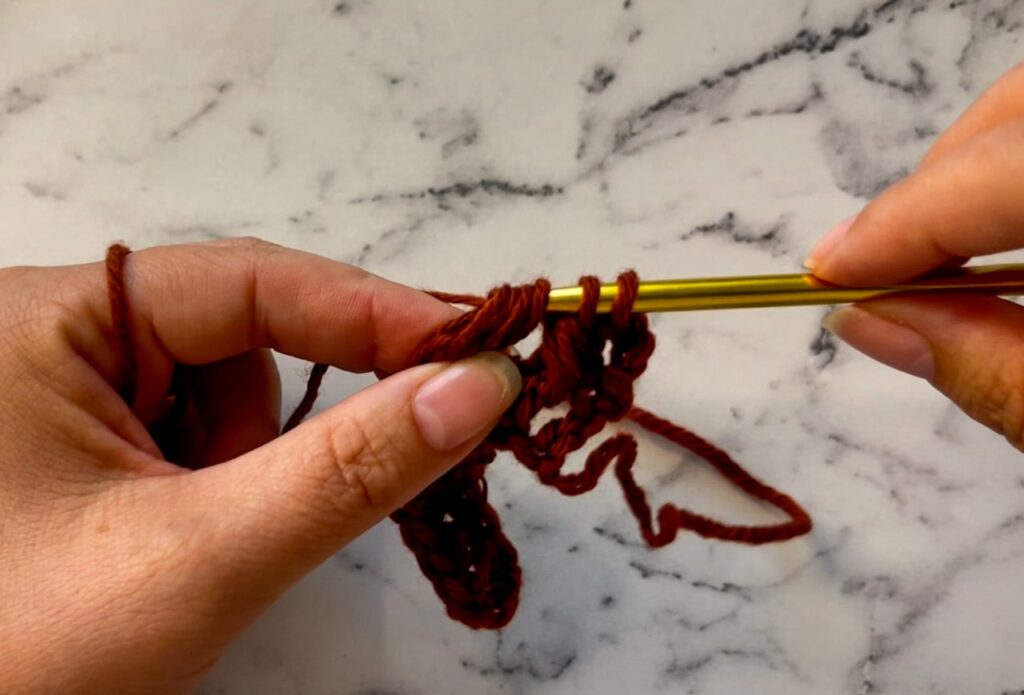
Step 10.
Yarn over again and then pull through the first 4 loops.
- Two loops should be left on the hook

Step 11.
Skip the next dc

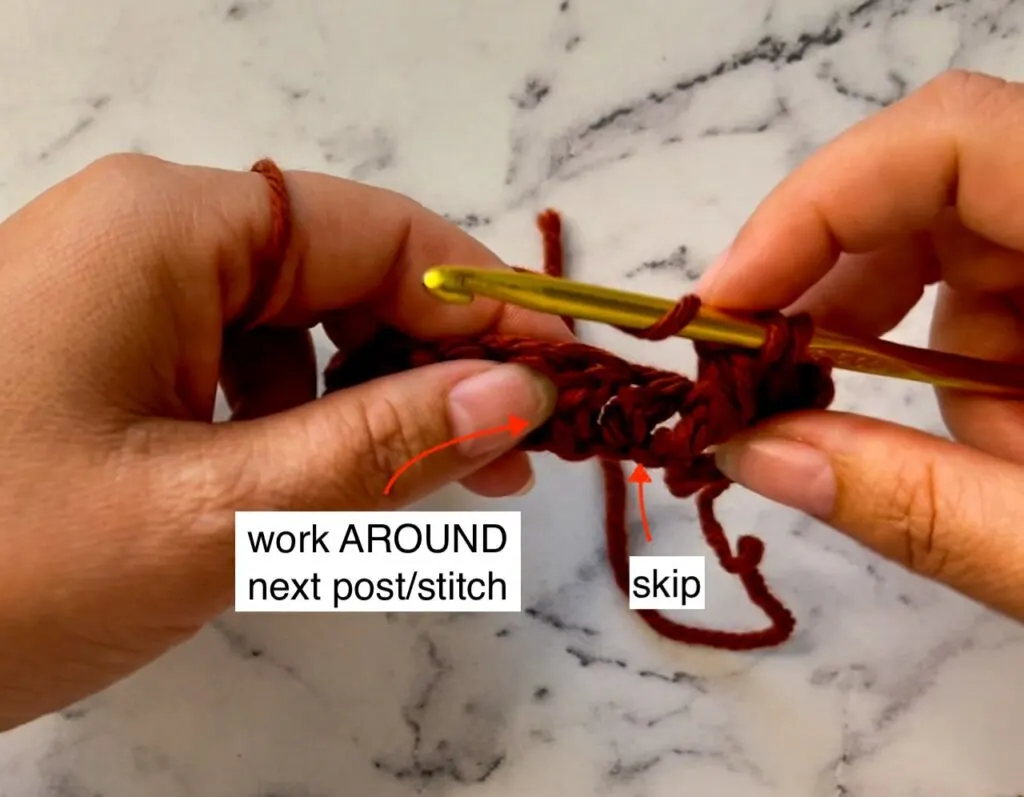
Step 12.
Insert your hook from front to back around the post of the next dc – not into the stitch. Start as if you are working a front post double crochet stitch, but you will not complete it.

Step 13.
Yarn over again and pull through, extending the yarn up as high as a treble crochet stitch.
- There should be 4 loops on the hook


Step 14.
Yarn over again


Step 15.
Insert your hook from front to back around the post of the next dc – not into the stitch. Start as if you are working a front post double crochet stitch, but you will not complete it.

Step 16.
Yarn over and pull through, extending the yarn up as high as a treble crochet stitch.
- There should be 6 loops on the hook

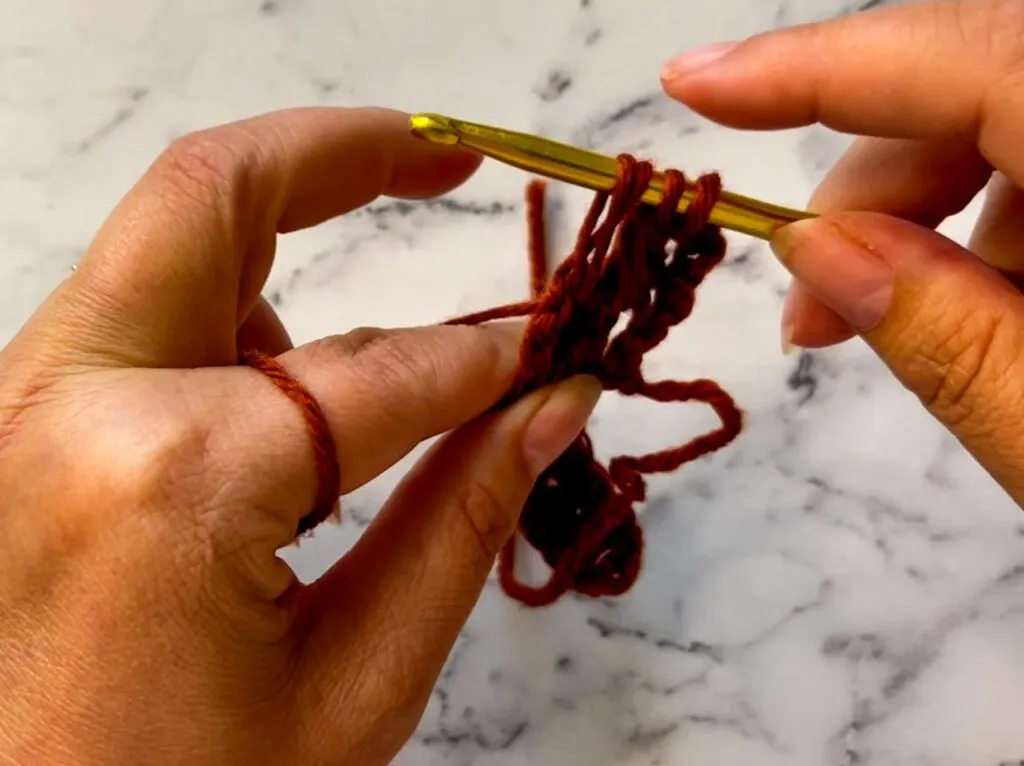
Step 17.
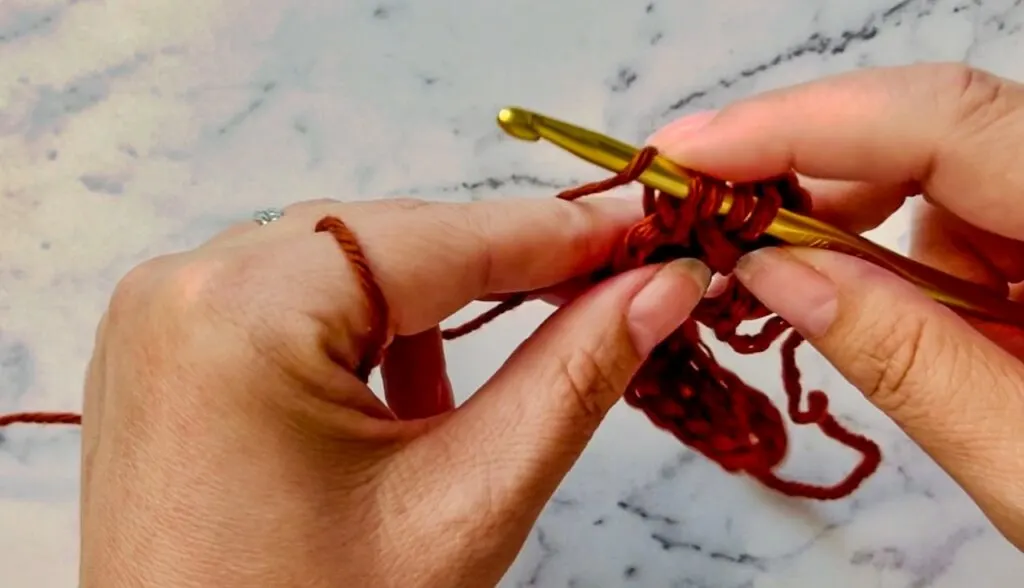
Yarn over and pull through the first 4 loops on the hook
- Three loops should be left on the hook


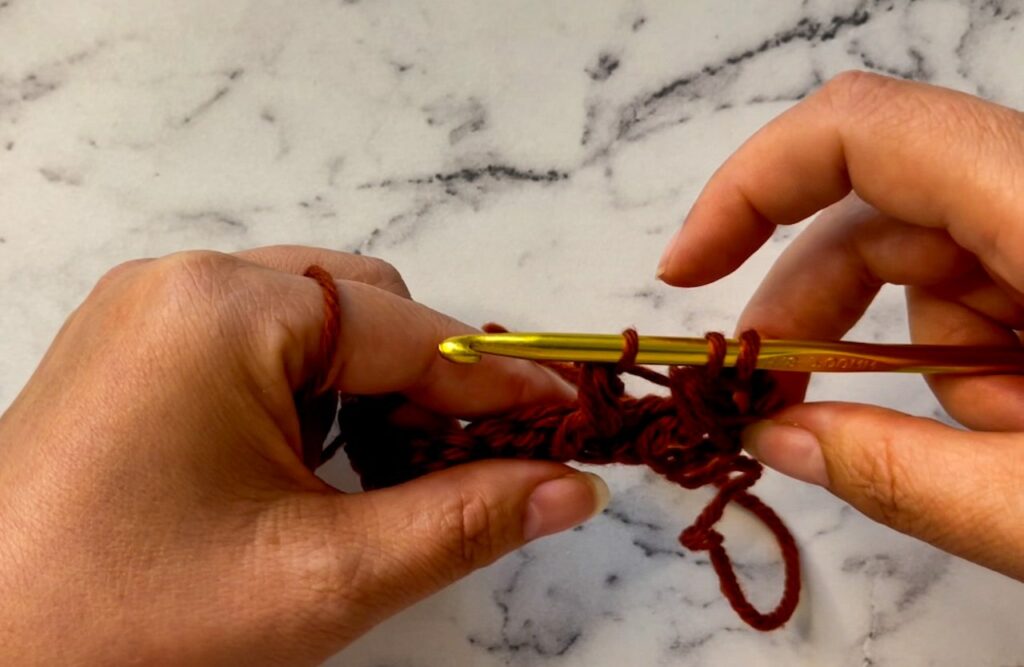

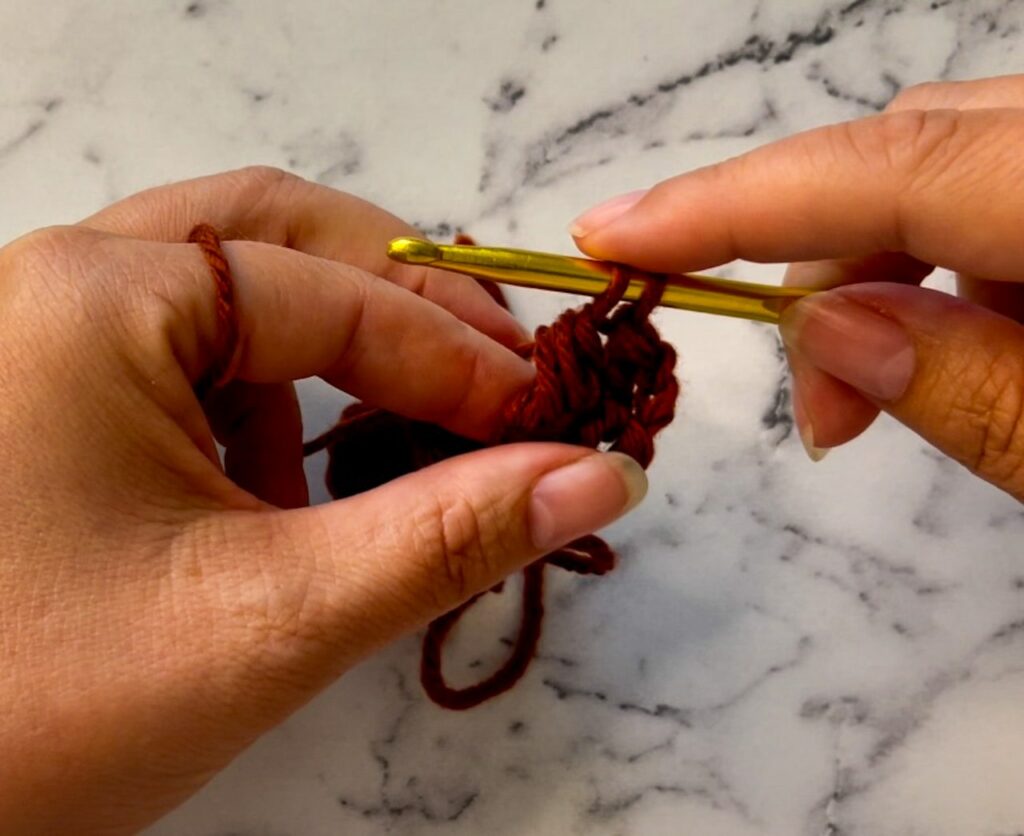
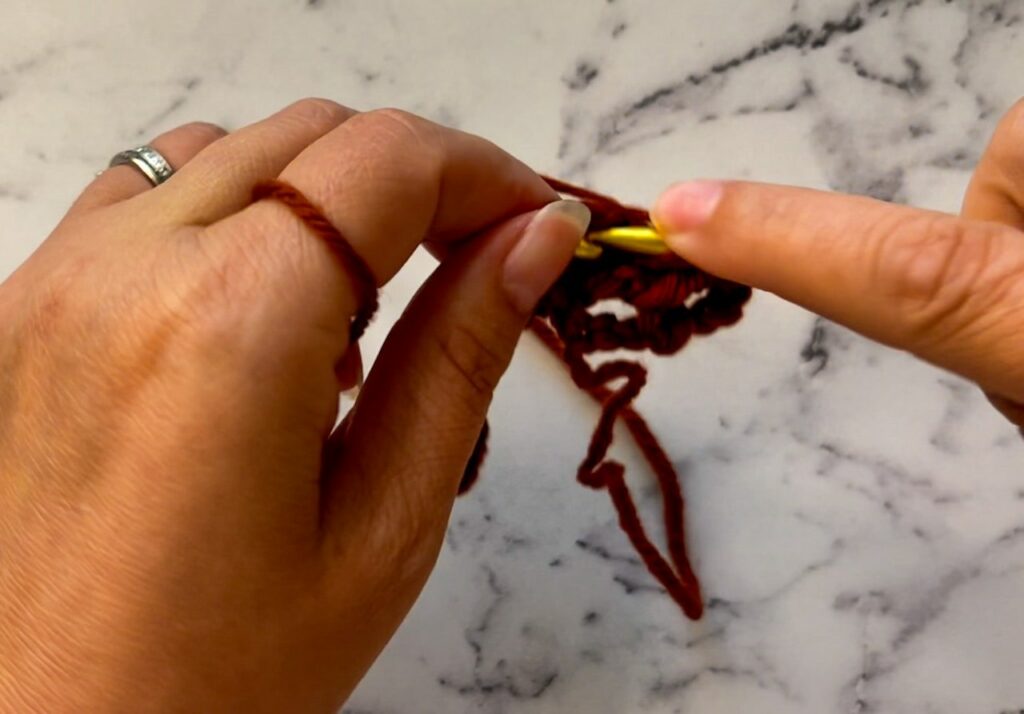
Step 18.
Yarn over and pull through the remaining 3 loops on the hook
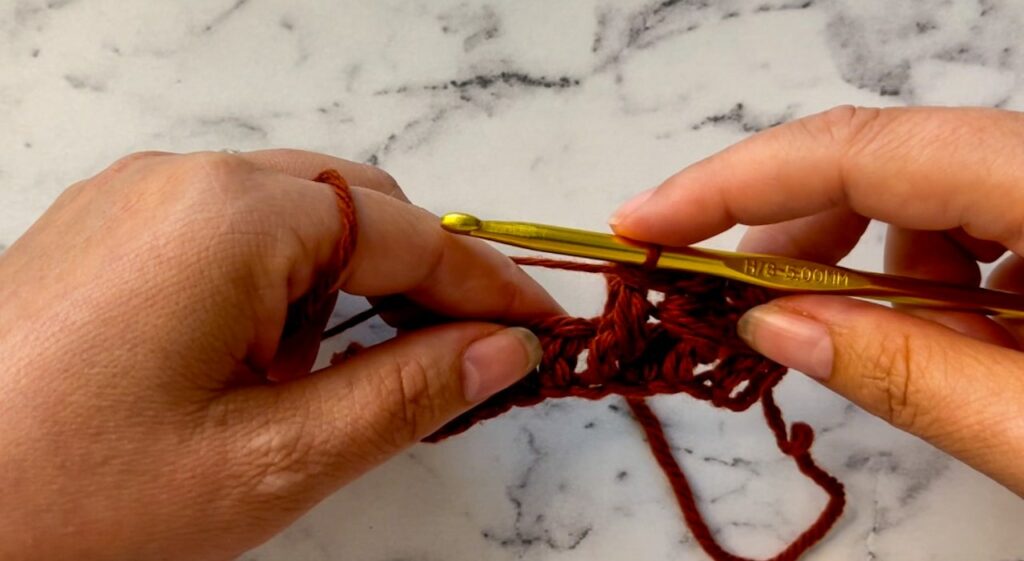

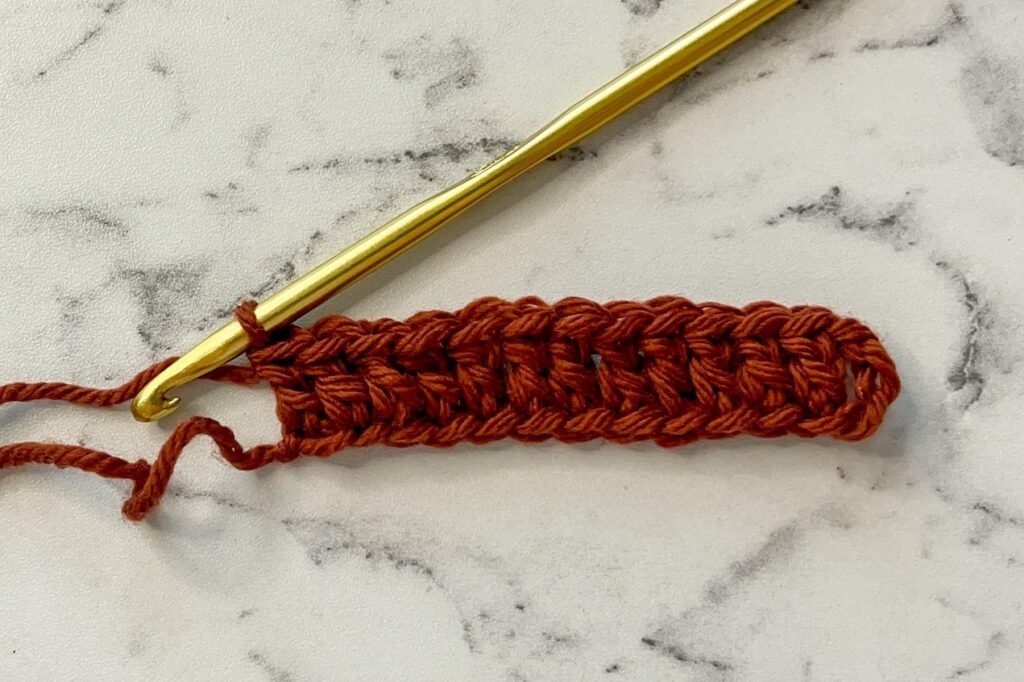
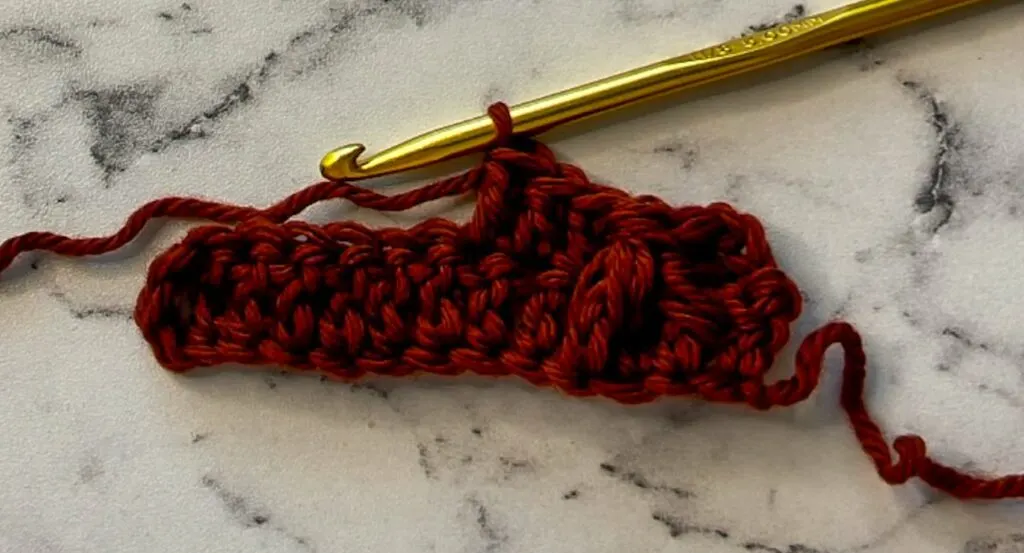
Leafhopper Cluster Stitch Complete!
Even though the leafhopper stitch is technically complete at this point, it doesn’t really come to life until the next step.
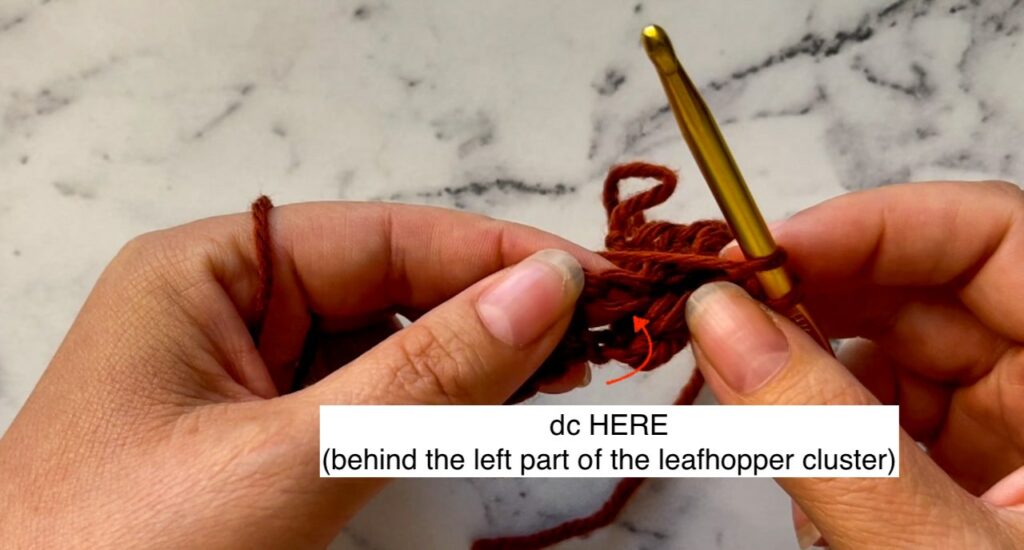
Step 19.
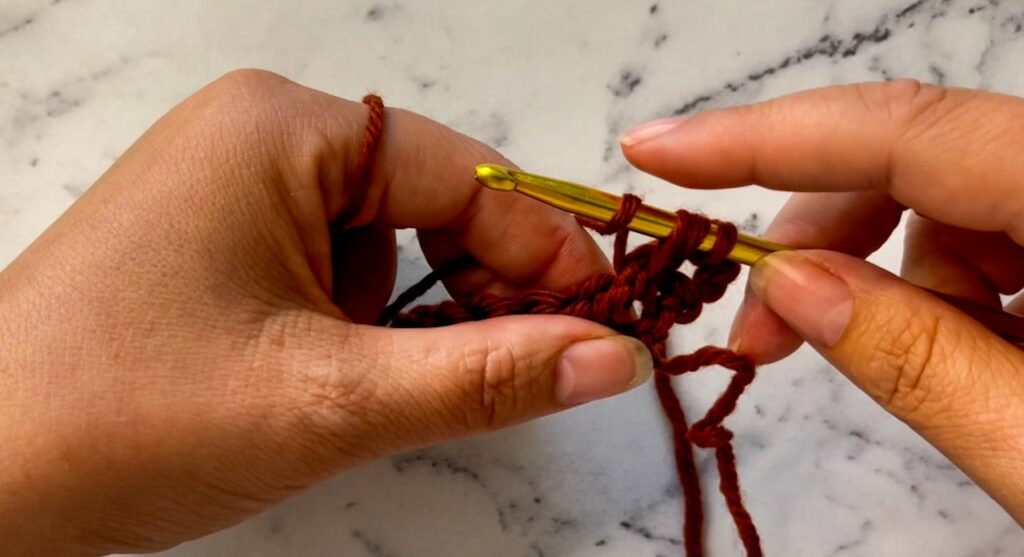
Work one dc into the dc – as usual into the top under both loops – that you worked around in steps 15 – 18.


Step 20.
Work one dc into each of the next 2 dc.
- This puts 3 dc in between each leafhopper stitch created on this row.

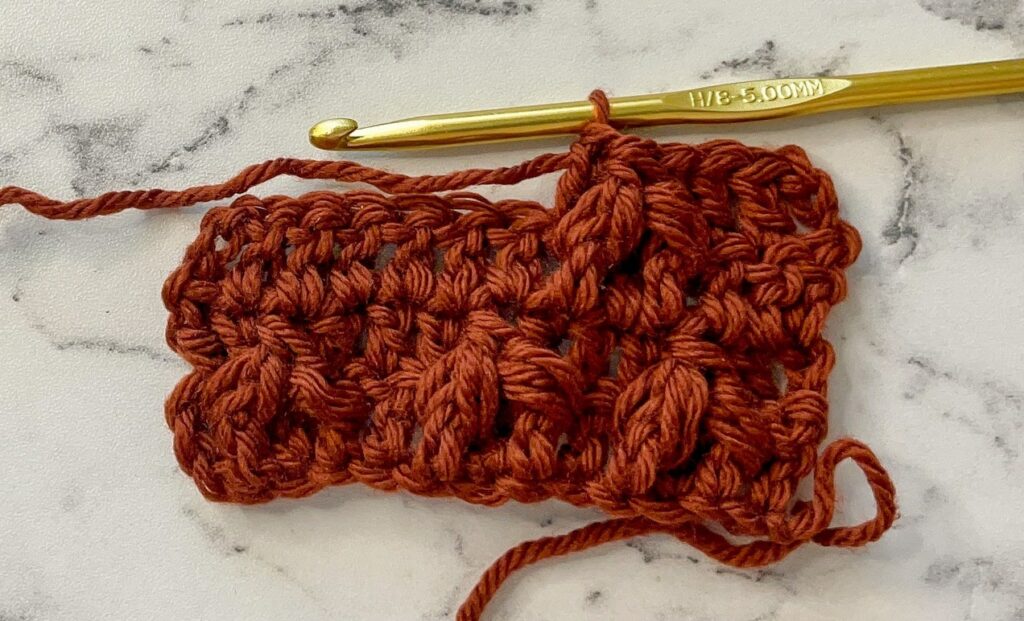
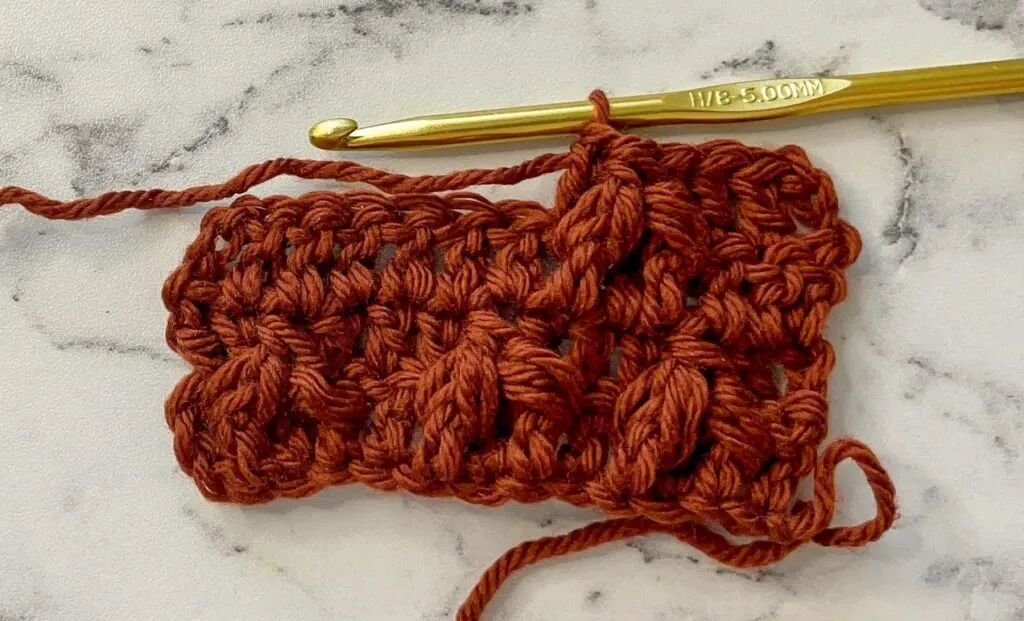
Repeat
To continue creating leafhopper stitches, repeat steps 5 – 20 starting AROUND the post of the dc right beneath the last dc worked in step 20.
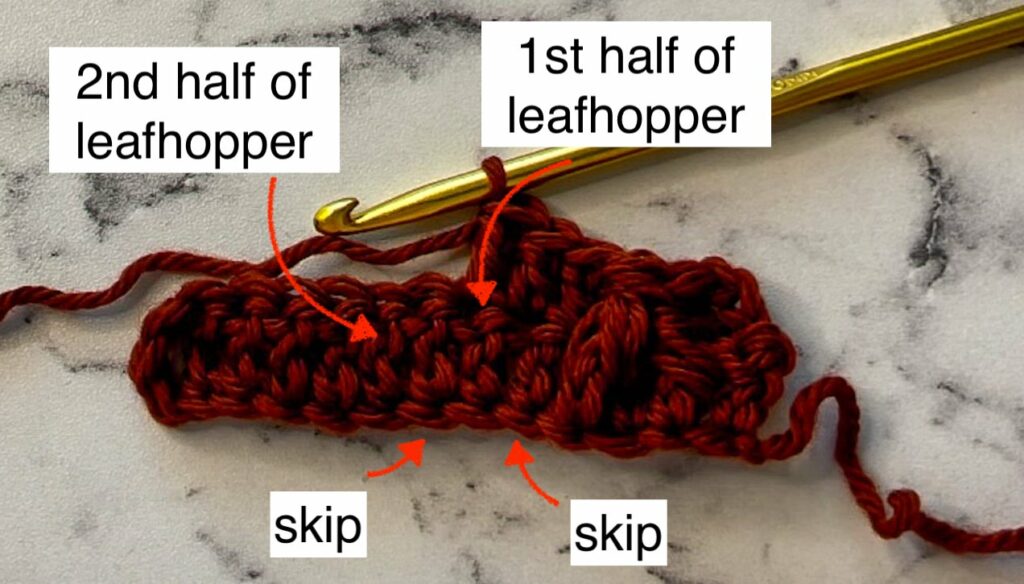

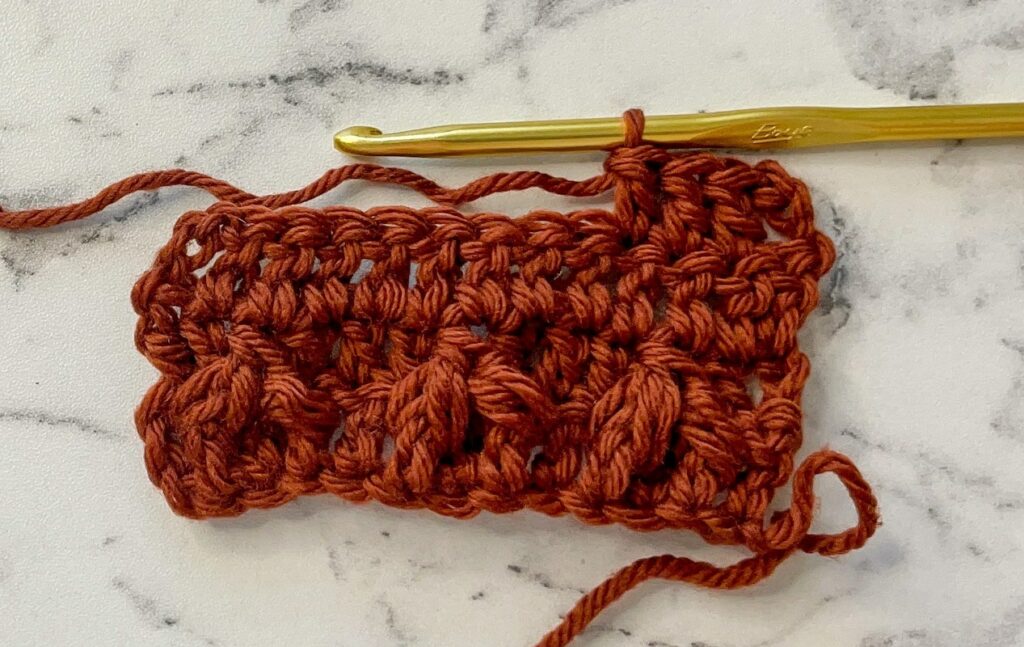
Once at the end of the row, complete step 20 and then work only 1 dc into the top of chain of the ch 3 turning chain to finish the row.
- There should be 3 Leafhopper clusters.
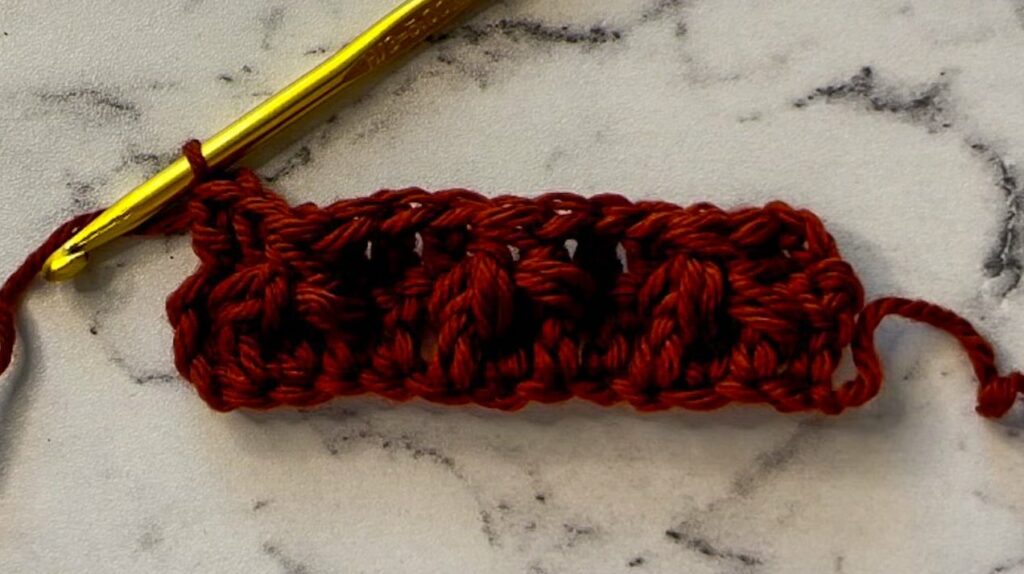
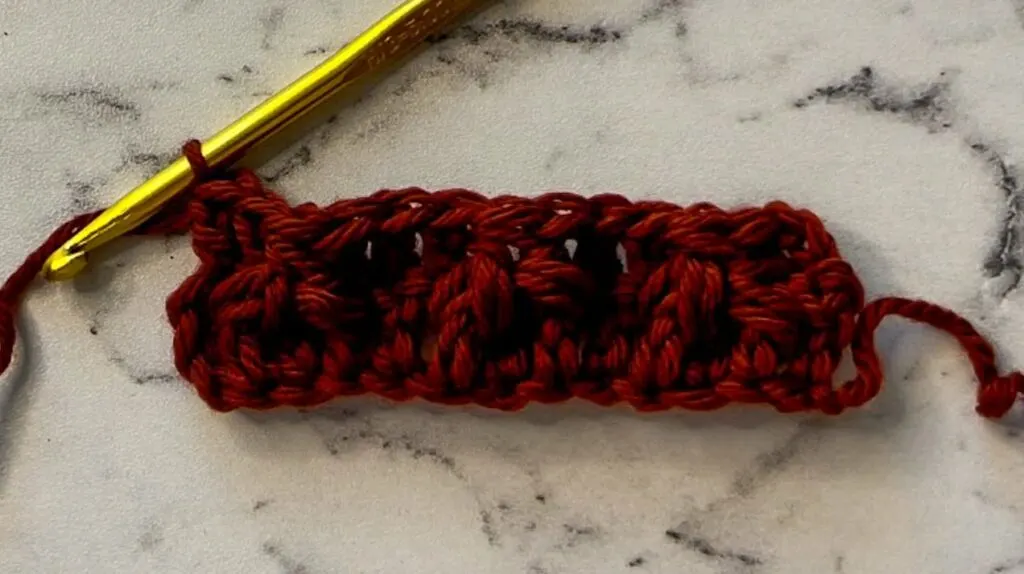
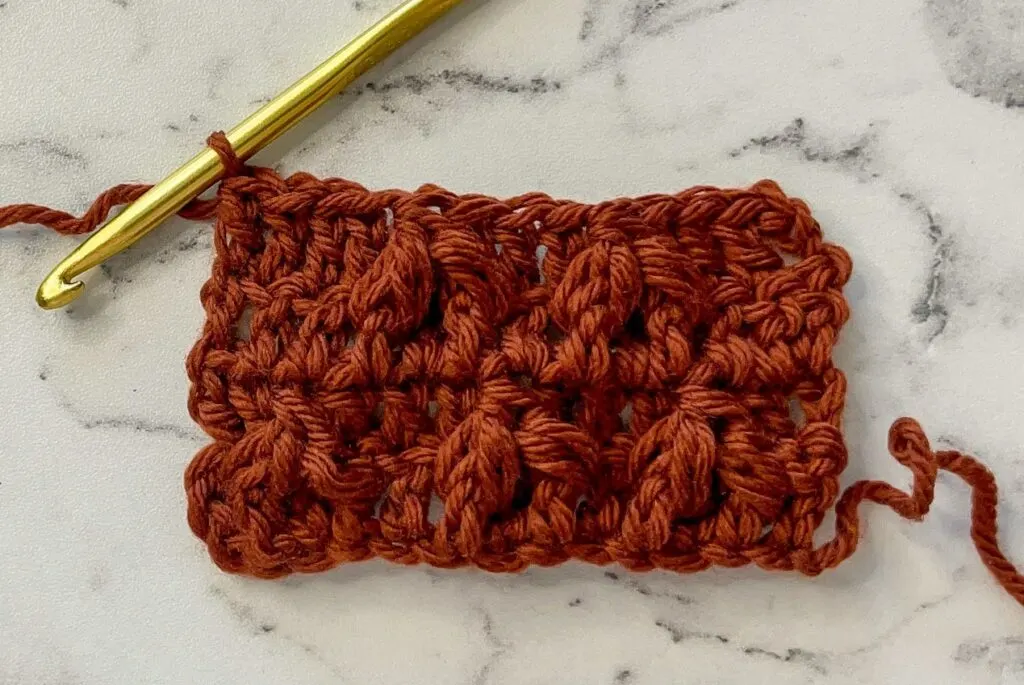
The leafhopper stitch looks best when the clusters are staggered – where clusters on the next row are placed in between cluster on the previous row.
To do this, the steps are essentially the same as outlined above.
- Ch 3 (counts as a dc) and turn work
- Dc in each st across to the end (step 2, except working into row 2 instead of the foundation chain)
- Ch 3 (counts as a dc) and turn work
- Dc in the next 3 sts
- Work a Leafhopper cluster stitch (steps 4 – 18)
- Work one dc in each of the next 3 sts (steps 19 – 20)
- Repeat steps 4 – 20 to the end of the row, ending with 4 dc after the last leafhopper cluster


However the best way to learn how to do this is really to see it in action by watching the video tutorial.
Videos demonstrating the crochet leafhopper cluster stitch are provided both for right-handed AND left-handed crocheters.
I highly suggest checking them out, especially if you are confused about ay of these steps.
This crochet stitch pattern is less complicated than it looks, but it may be easier to understand when you see it action.
You won’t be disappointed!
Would you like a pattern using the Leafhopper Cluster Stitch?
On November 24, 2022 you can get the Ly Lu Leafhopper Beanie pattern in PDF format for FREE as part of the Winter wonders 2022 blog hop!
Click HERE to jump over to the blog hop.
Other Patterns I Love & You Will too!
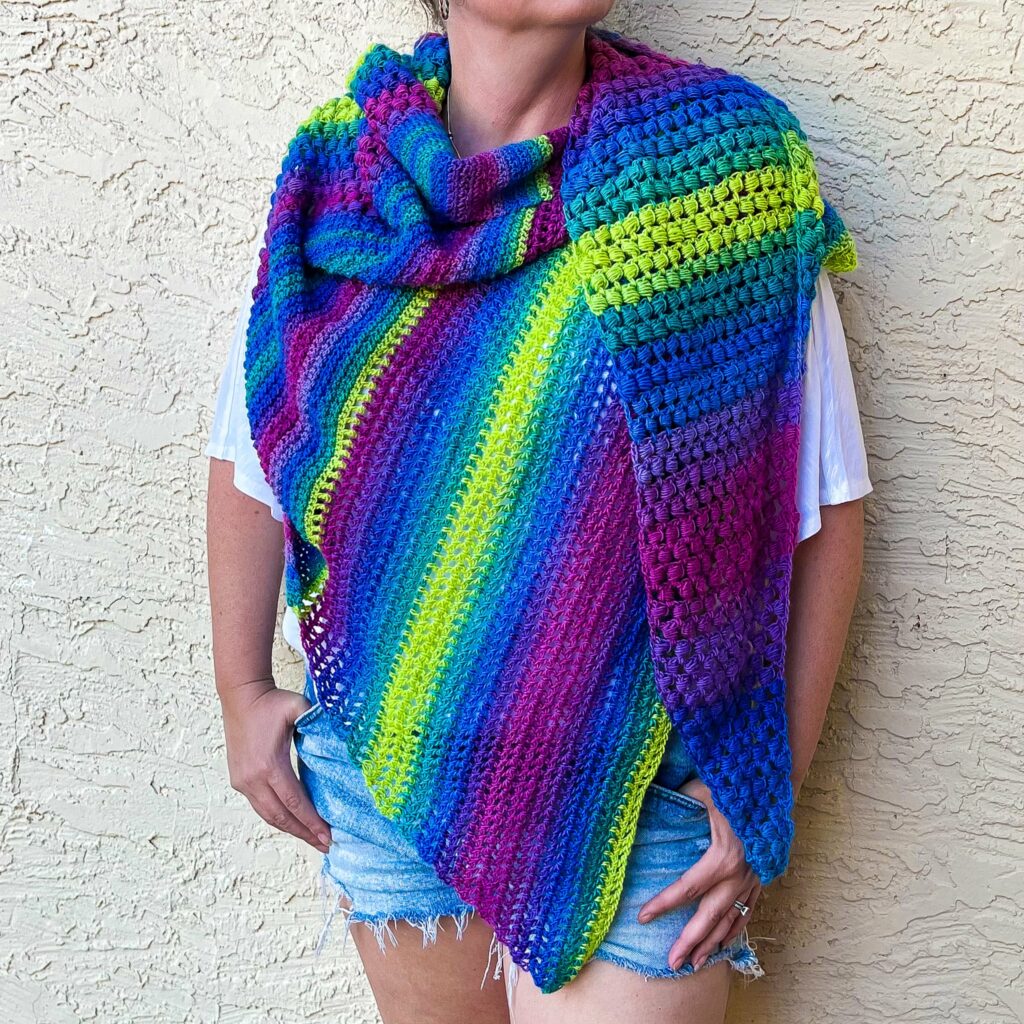
Rainbow Gala Shawl

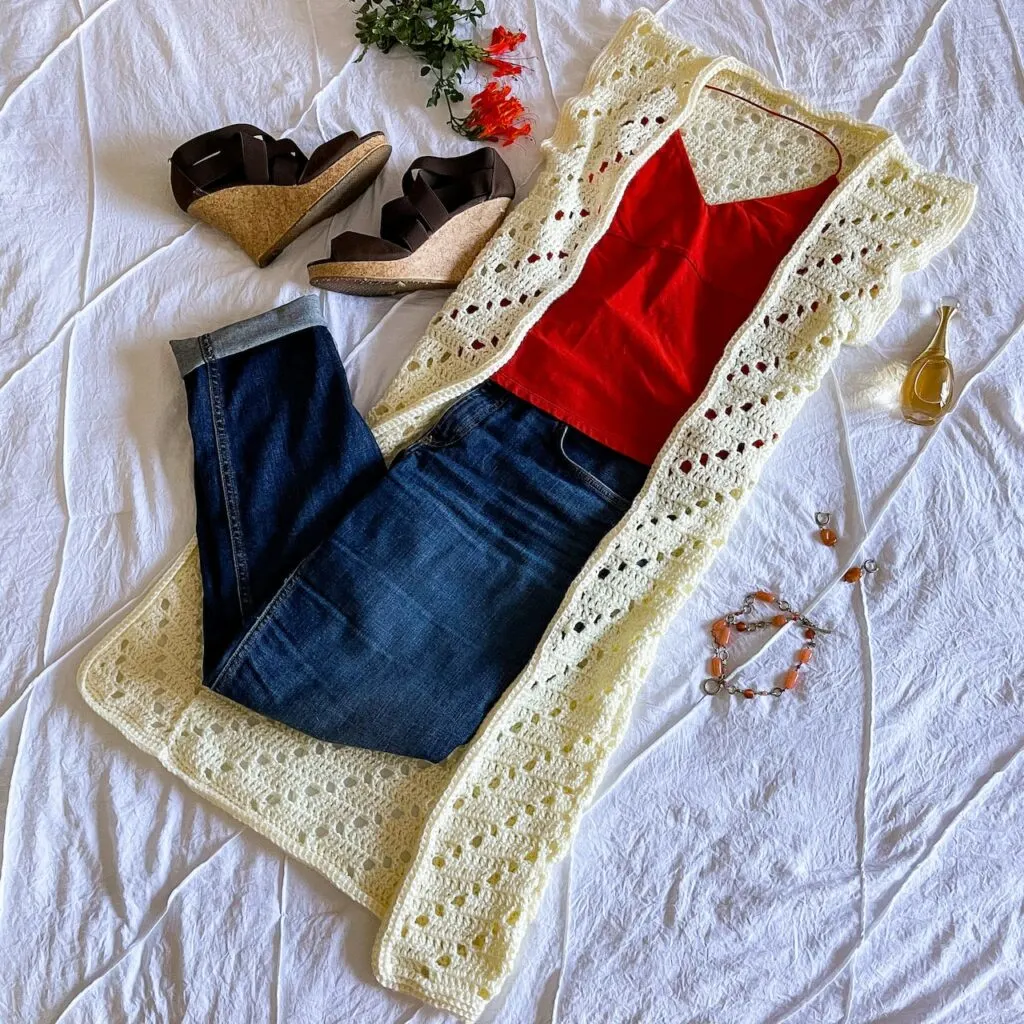
Kalina Duster Cardi

Piper Handbag


Thank you for coming to my blog! By sharing my content and/or making a purchase you are making it possible for me to continue producing and sharing free content for everyone to enjoy. I sincerely appreciate your support!
Until next time… Happy Crocheting!


Please Share!