
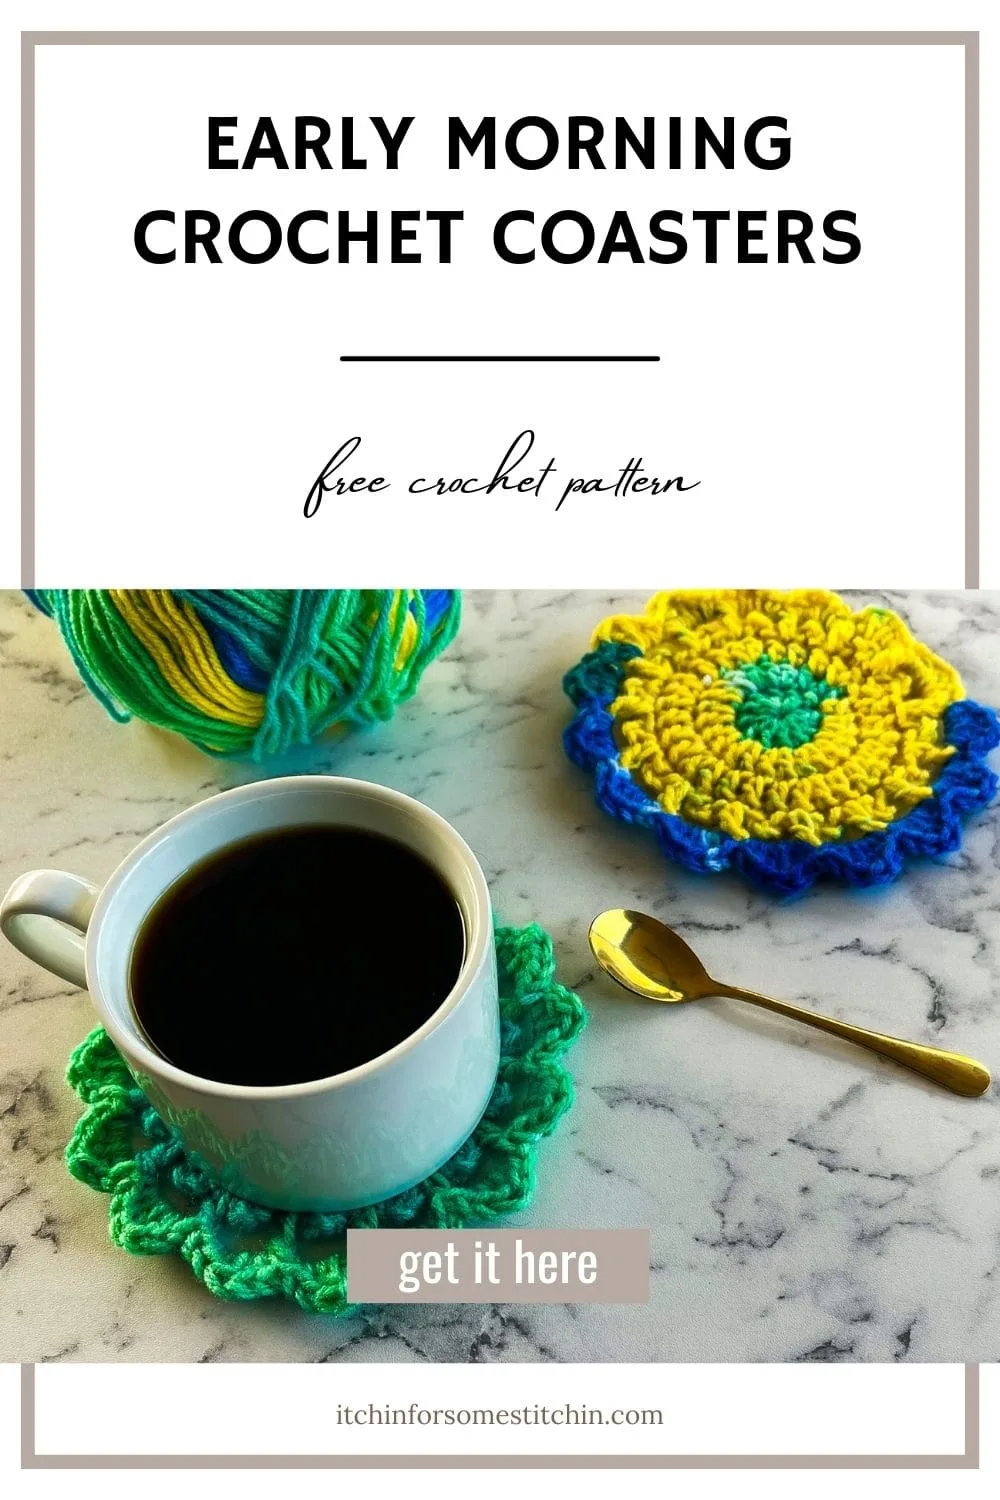
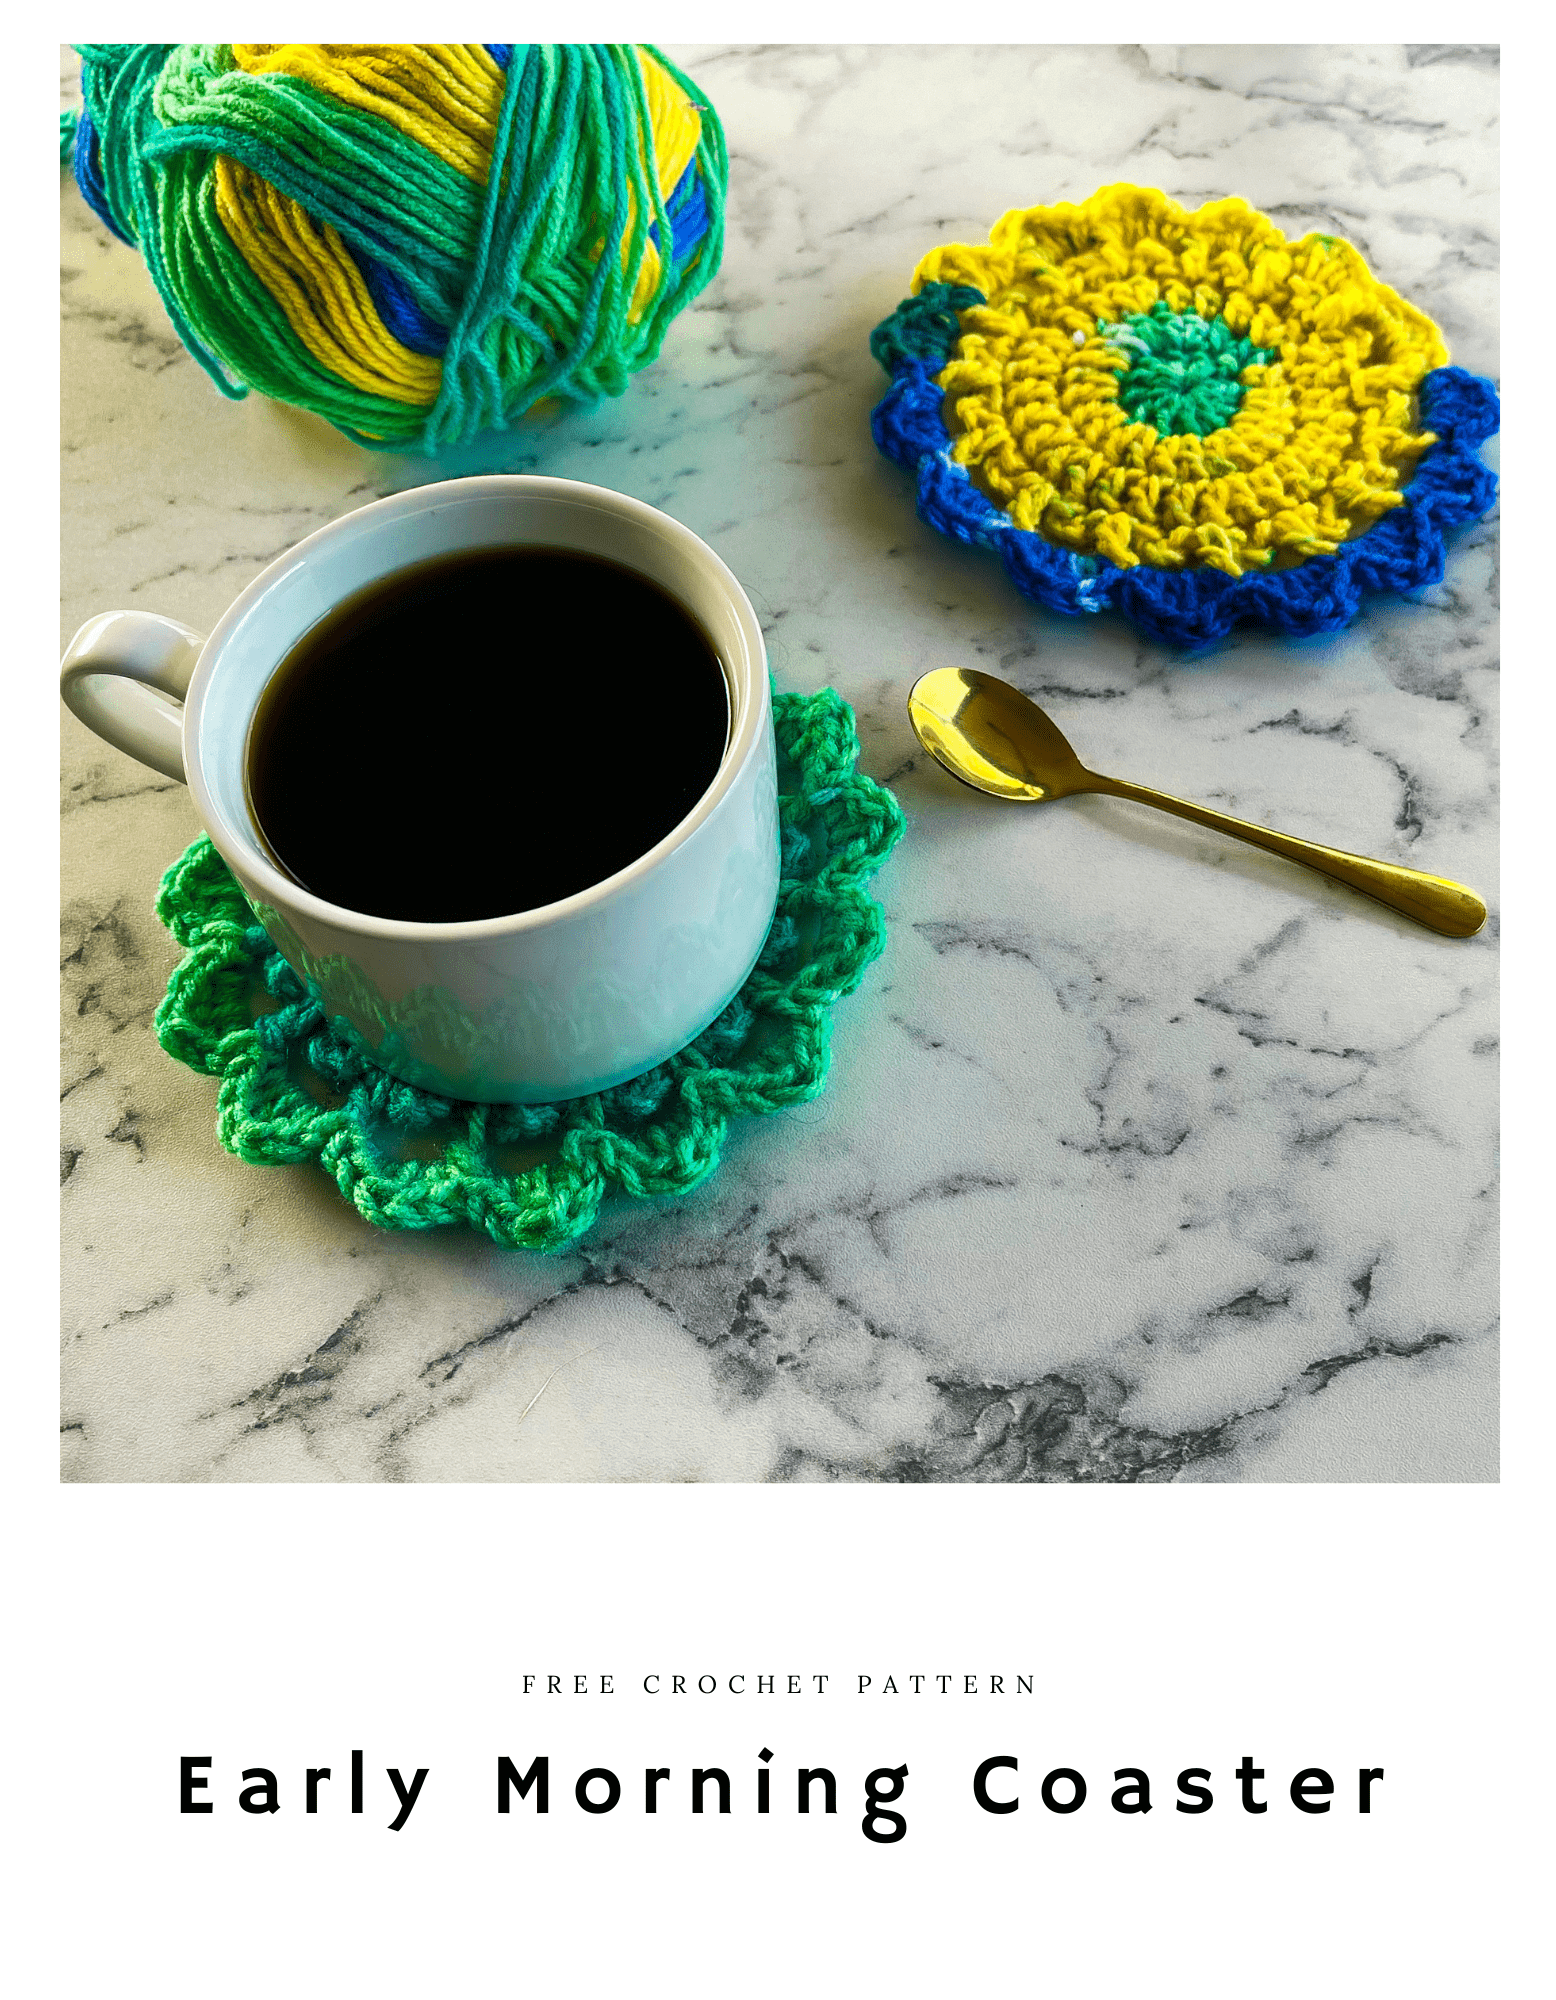
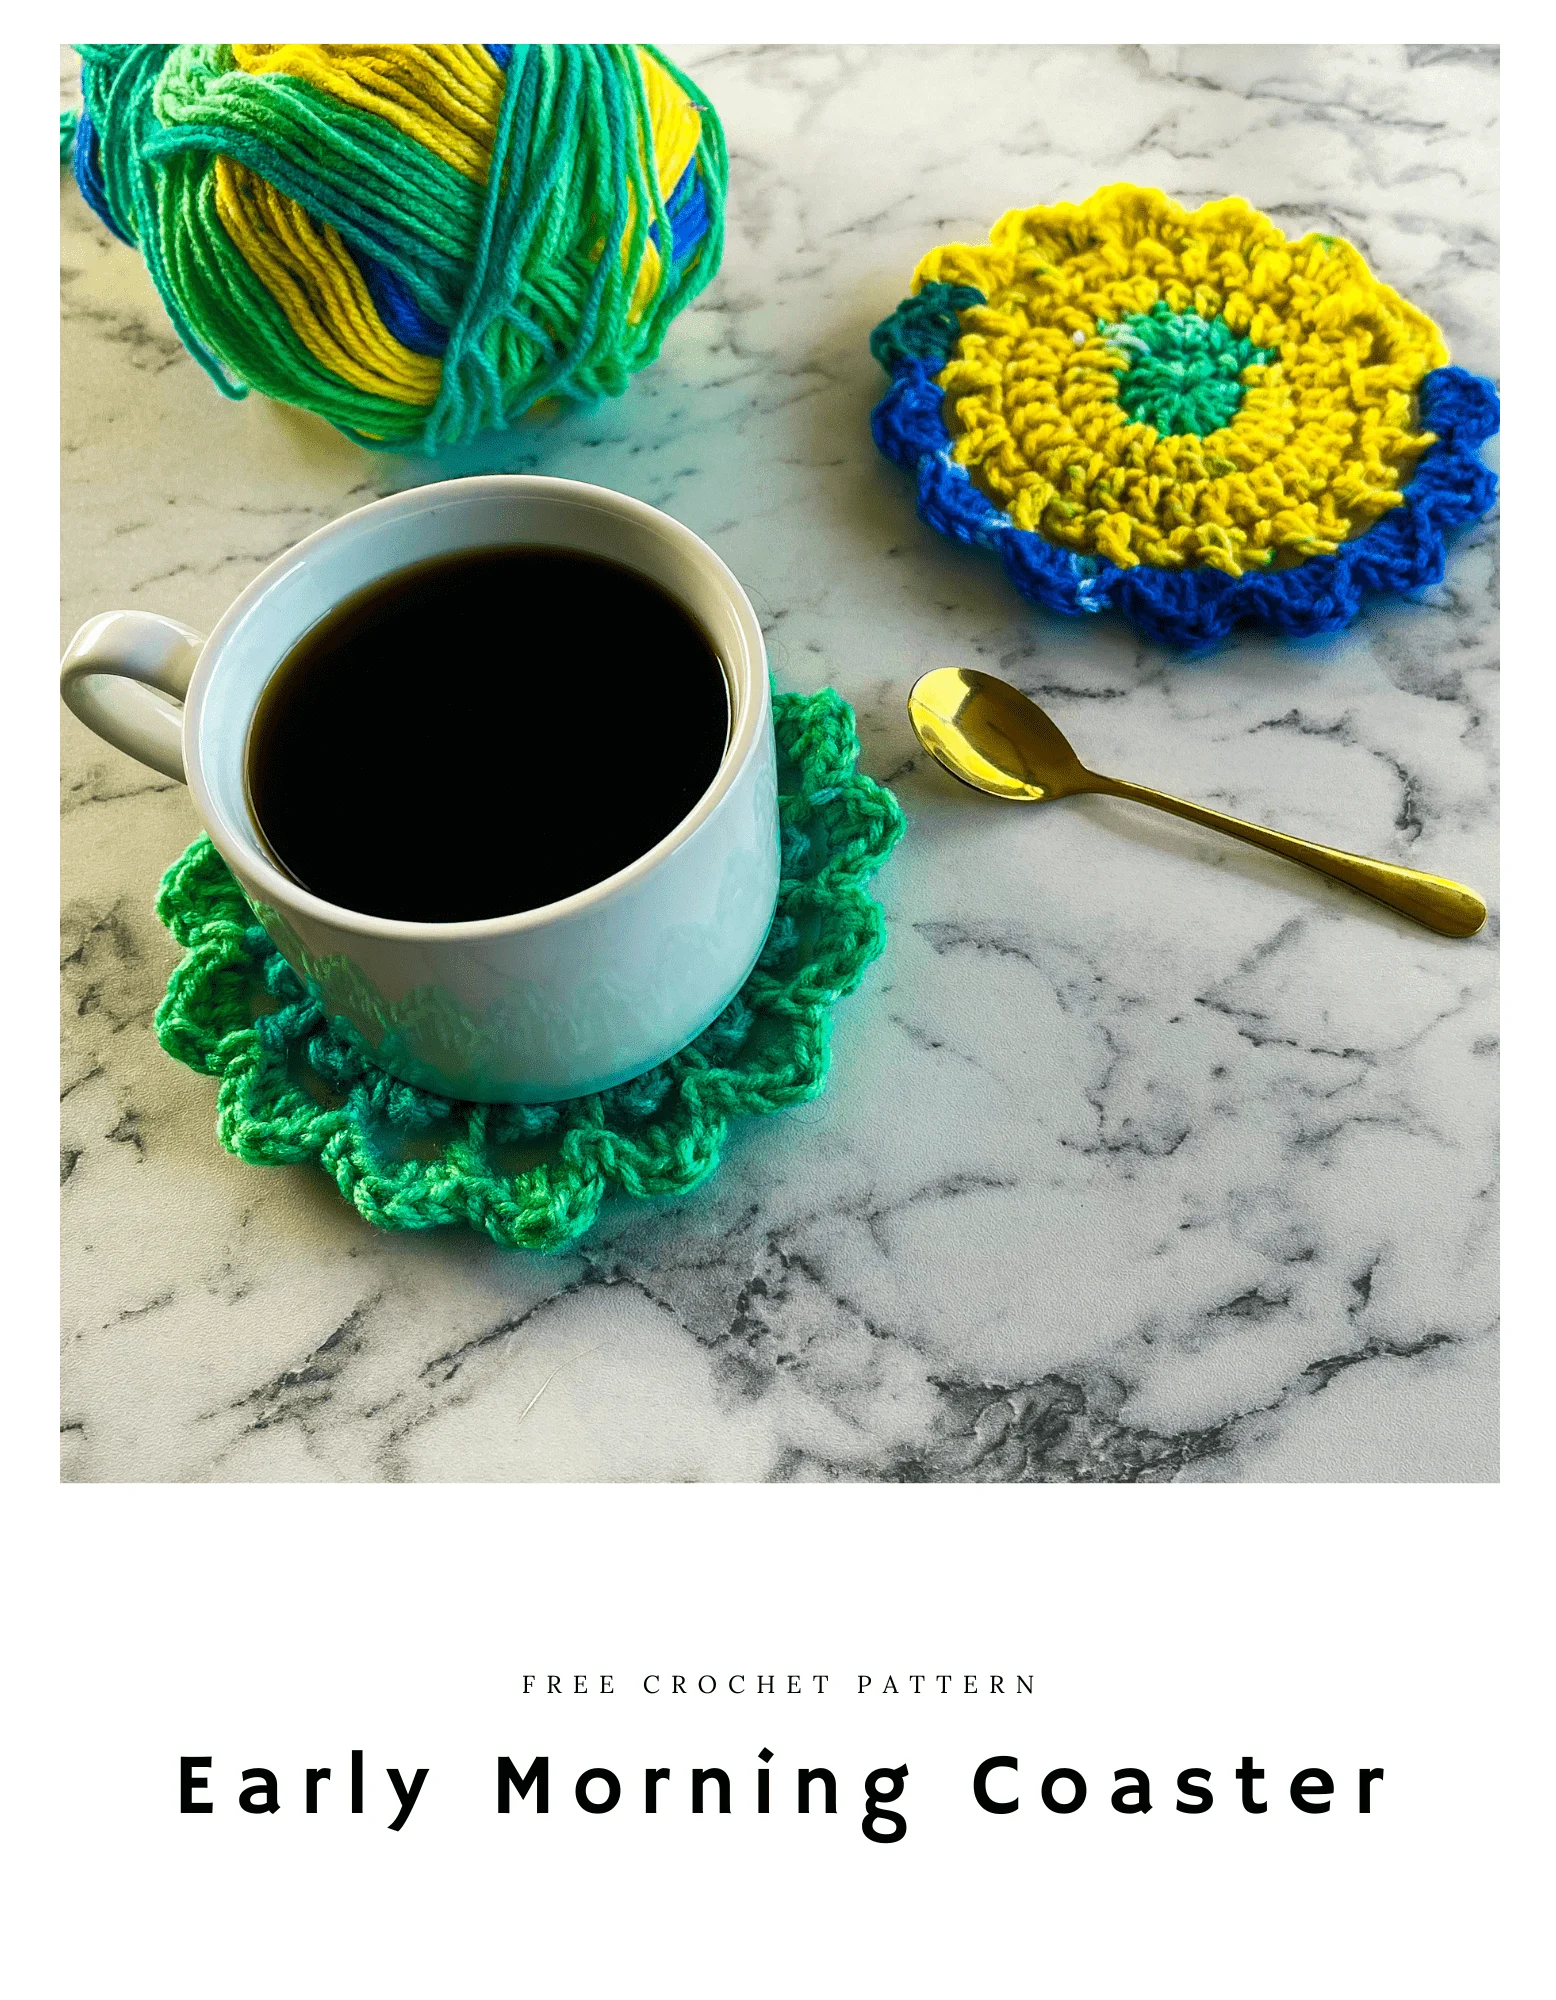
Learn all about crochet coasters; what they are, why you should use them, the best yarn to use when crocheting one, and a free pattern for the Early Morning Crochet Coasters that can be worked up in a matter of minutes!
What is the purpose of a crochet coaster?
From the picnic table to the dining table, the coffee table to the side table, crochet coasters are the perfect way to protect your furniture.
Because the are are absorbent, crochet coasters keep your table surfaces safe from condensation and small spills. Additionally, if you make them thick enough, they’ll even protect them from heat.
Crochet coasters are great for both beginner and advanced crocheters for many reasons.
They are usually quick and easy to whip up. Making them a fantastic and satisfying one-sitting project!
Plus, they use minimal yarn, so they are great for using up scraps and super economical!
There are a ton of stitches and patterns used for crocheting coasters. That makes crochet coasters perfect for trying out new techniques and skills.
Do crochet coasters work?
Absolutely!
My family and I use crochet coasters every day in our home and they really do work well!
They keep our tabletops dry, no matter how wet the glass gets, and they even protect agains minor spill damage (usually done by my 7 year old!). LOL
And, bonus, they don’t stick to the bottom of the glass like many glass or wooden coasters do!
What is the best yarn for crochet coasters?
Cotton yarn is hands down the best type of yarn to use for crochet coasters.
That’s because it is durable, heat-resistant, easy to wash, and absorbent.
Can you use acrylic yarn?
The short answer is, yes you can.
However, crochet coasters designed using acrylic yarn are not as absorbent as those created with cotton yarn.
For this reason, acrylic crochet coasters tend to be more decorative than functional. Plus, acrylic will melt if exposed to heat.
That being said, the heat from a coffee mug is fairly low and is usually okay, but if it comes into contact with something hotter it can melt.
The Early Morning Crochet Coaster pattern provided below uses acrylic yarn as it is what I had in my stash, but it can easily be made in a more absorbent cotton or wool blend yarn.
How to crochet an easy crochet coaster
Crochet coasters are generally simple to make and can be crocheted in lots of shapes from square to round to triangular to even avocado shaped!
If your coaster has a lot of color changes you can even leave those loose ends as fringe
Early Morning Crochet Coaster Pattern
**THIS IS AN ORIGINAL PATTERN. Please see my Copyright Statement for details.
- Pin this pattern to your Pinterest Boards to Save It
This pattern is currently only available as part of the Stash Busting Challenge Pattern Collection.

Some of the content on this website may contain affiliate links. This means if you make a purchase through one of these links, I will receive a small commission at no cost to you! Please see my full Disclosure Policy for details.
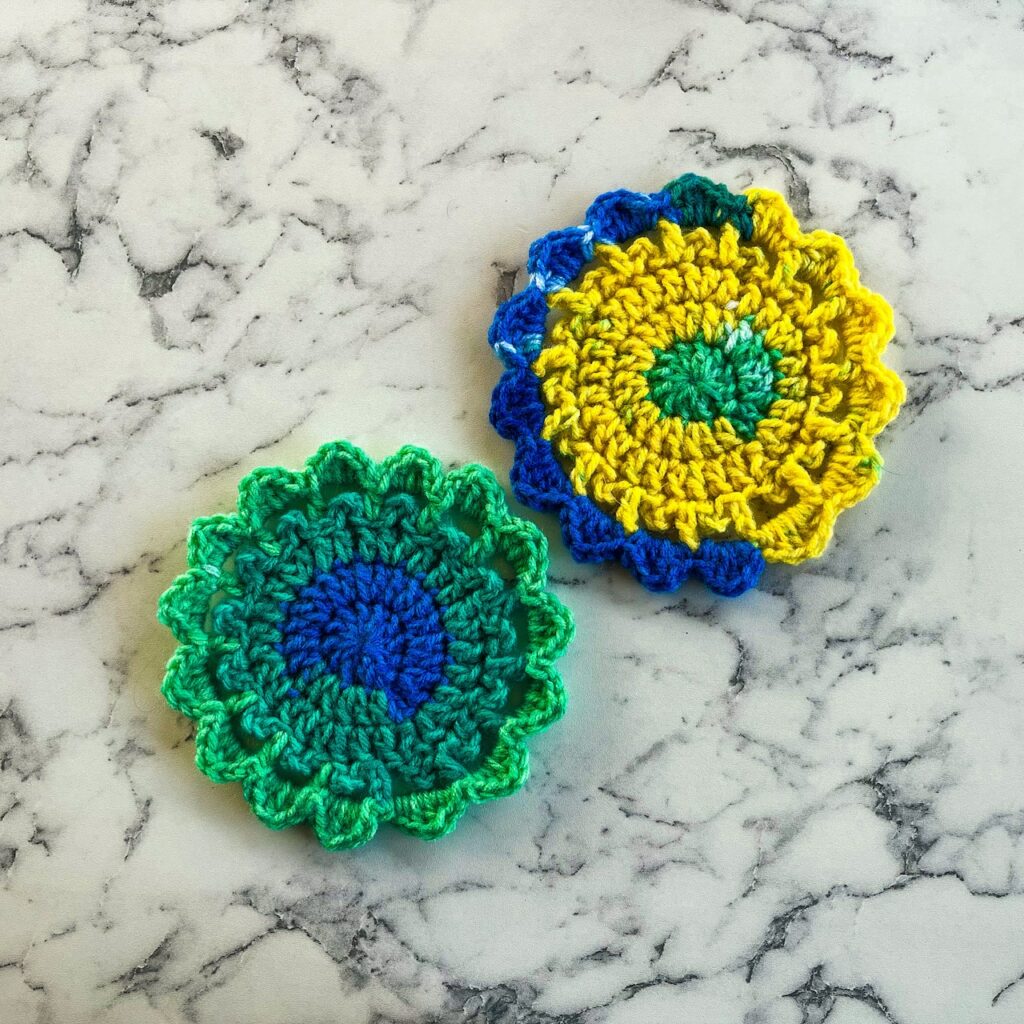
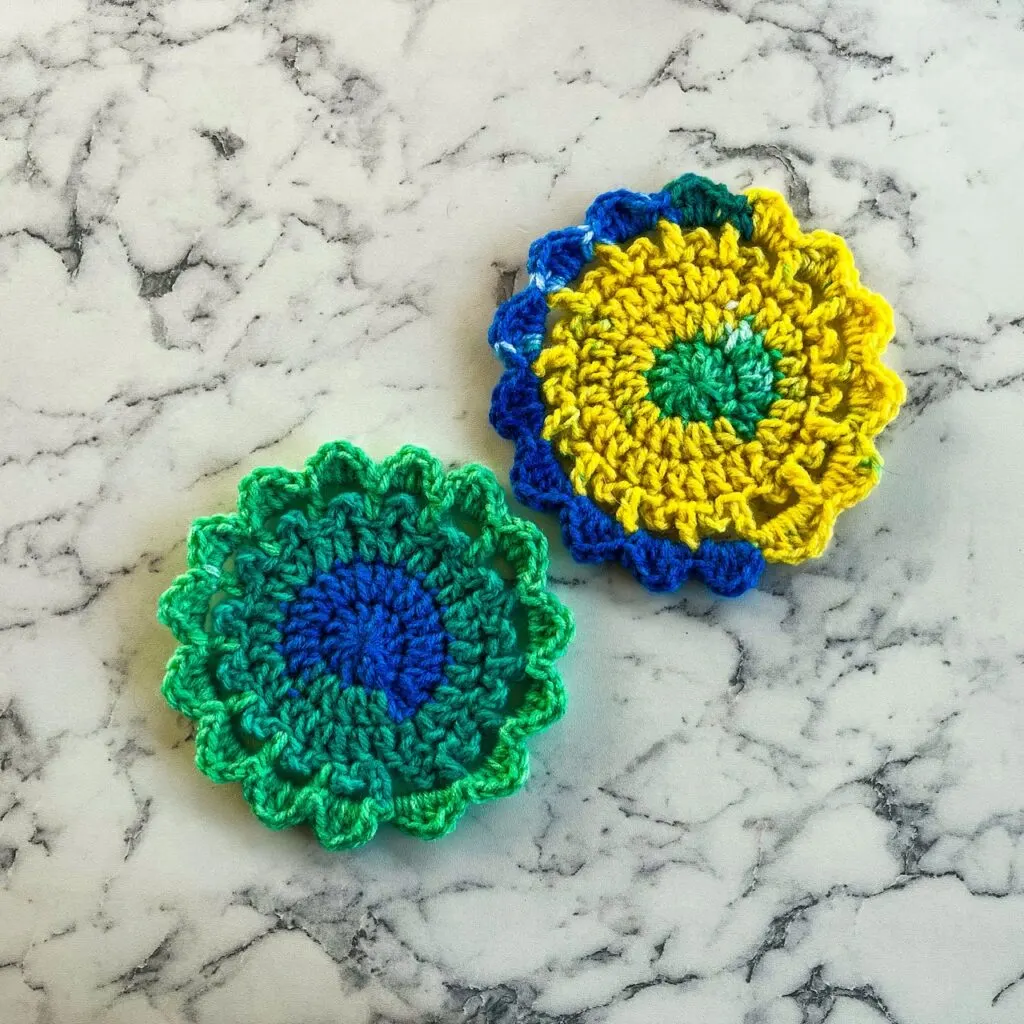
The Early Morning Coasters are super quick to work up! Worked entirely in the round as one piece, it only takes a few minutes to create a lovely set of coasters that’s sure to add a touch of frilly fun to your home decor.
It also makes a great stash buster project!
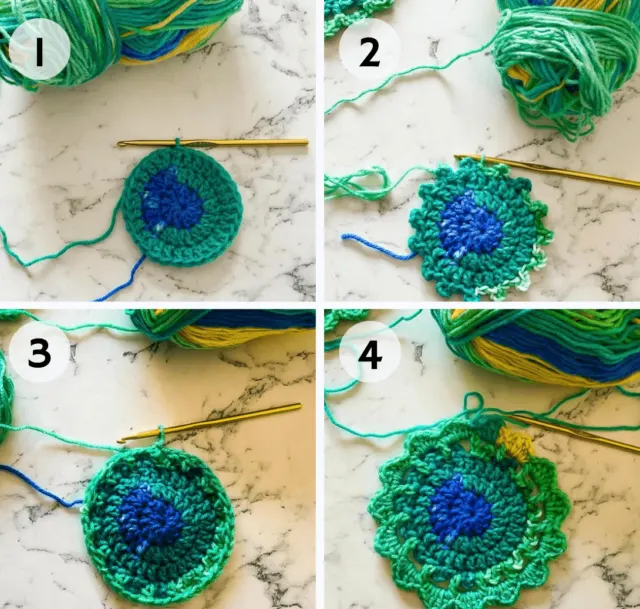
Construction
The Early Morning Crochet Coaster is constructed entirely in the round as one piece.
- First the center is created. See Image 1.
- Then decorative “bumps” are added. See Image 2.
- Then loops are created over the “bumps”. See Image 3.
- Last “peaks” are added into each loop. See Image 4.

Difficulty level
Difficulty level : Advanced Beginner


Gauge/Tension
13 stitches and 8 rows = 4 x 4-inches in double crochet using H/8 5.00mm hook in double crochet (dc)
Recommended yarn
As I said, I used an acrylic yarn for this pattern that typically wouldn’t be my first choice. However, it had the perfect colors for what I wanted and there was plenty of it in my yarn stash!
If you want to go with a more absorbent cotton yarn, I would recommend Lily Sugar N’ Cream or if you like the mercanized look, go with Lion Brand 24/7 cotton yarn.
Yardage requirements
*provided requirements are estimates only
Total yardage: 25yds / 23m to 30 yds / 27m
Yarn alternatives
Any worsted weight yarn, but alternatives for the yarn listed in this pattern are below.
Other Materials
- Crochet Hook size H/8 5.00 mm or whatever hook is necessary to obtain the correct gauge.
- Measuring tape (optional)
- Stitch markers (optional)
- Scissors
- Tapestry needle for weaving in ends
Abbreviations
Pattern is written in US terms.
- Stitch / es (st / sts)
- Yarn over (Yo)
- Skip (sk)
- Slip stitch (slp-st)
- Chain stitch (ch / chs)
- Single crochet (sc)
- Half double crochet (hdc)
- Double crochet (dc)
- Treble crochet (tr)
- * ___ * Repeat indicated instructions
Special Stitches
Magic ring (MR) – make a loop of yarn and work the first round of stitches into that adjustable loop. Pull one end of the loop to tighten it.
Finished Dimensions
All measurements are approximate, measured flat pre-use, and are provided in inches.
- 5.5 inches in diameter
- 17 inches in circumference
Additional Notes
Read all pattern notes, instructions, and other provided details carefully before starting the project to make sure you understand everything. It could save you hours & a lot of headaches!
- The gauge/tension is not critical for this pattern, however, if you want to be sure you meet the gauge for this pattern then make a swatch of each square that measures at least 10 x 10 cm / 4 x 4 inches using the stitch provided under the Gauge Section. If your swatch matches the gauge, then you are all set to start the project. If the gauge is wrong, you might need to change your crochet hook – increase your hook size if your stitches are smaller & decrease your hook size if your stitches are larger.
- All given measurements are unblocked and measured pre-wear and as fabric pieces may stretch during/after blocking, and wearing.
- Provided measurements are as exact as possible, but are given as approximates. This is because yarn variances, crochet tension & individual technique might give variations in the result, which changes from person to person.
- This pattern is worked in joined rounds. There will be no turning at the end of each round, but there will be chaining to move to the next round.
- Stitch counts are given in [ ] at the end of each round. If no stitch count is given, then the count is the same as the previous round.
- Care Instructions: Hand wash & lay flat to dry or follow instructions on the yarn label.
Instructions
Create Center
See Image 1.
Make a magic ring, ch 3 (counts as a dc), work 11 dc into the ring, slp-st to the top of the ch 3 to close. [12]
Round 1: Ch 3 (counts as a dc), work 2 dc in each st all the around, work 1 dc in the same st as the ch 3, slp-st to the top of the ch 3, [24]
Round 2: Ch 3 (counts as a dc), *work 2 dc in the next st, work 1 dc in each of the next 3 sts* Repeat from * to * ending with 1 dc in each of the last 2 sts instead of the last 3, slp-st to the top of the ch 3. [30]
Create “bumps”
See Image 2.
Round 3: Ch 3, slp-st into the top of the ch 3 from rnd 2, *slp-st into the next 2 sts, ch 3, slp-st into the same st*, Repeat from * to * until 3 sts remain, slp-st into the next 2 sts, ch 3, slp-st into the same st, slp-st into the last st. [15 bumps]
NOTE: The instructions within the * * should create decorative “bumps”.
Create Loops
See Image 3.
Round 4: Ch 5 (counts as 1 dc & a ch 2), skip the next “bump”, dc in the next slp-st, *ch 2, skip the next “bump”, dc in the next slp-st*, Repeat from * to * 12 more times, ch 2, slp-st to the 3rd ch of the ch 5 to close. [15 loops over each bump]
Create Peaks
See Image 4.
Round 5: *[Sc, hdc, 2 dc, hdc, sc] in the next ch5-sp*, Repeat from * to * 14 more times. slp-st to the 1st sc of the round to close.
Bind off & weave in ends.
Crochet Coasters FAQs
Let’s answer some of the common questions people have about crochet coasters!
What is the best crochet stitch for a coaster?
Crochet coasters are designed and worked up in tons of different stitch types.
In fact, the Early Morning Crochet Coaster pattern uses 7 different stitches!
That being said, the single crochet is probably one of the most commonly used stitches for crochet coasters.
This is because it is a small and tight stitch, making the crochet coaster not only easy to whip up, but also clean and modern looking.
What diameter should a crochet coaster be?
The size of your crochet coasters is entirely up to you! Make them as small or big as you like.
However, a diameter between 3 and 5 inches wide is a good recommended size for most crochet coasters.
Do crochet coasters need a backing?
In short, no they don’t.
Crochet coasters are perfectly useful without a backing, but if you want an added level of durability, you can add a cork backing.
Cork is a great choice for a crochet coaster backing because it is absorbent and will easily soak up condensation and liquid from small spills.
How do you harden crochet coasters?
Starch is one of the most common ways to stiffen a crochet object. This how some crocheters block crocheted doilies. You can use the kind from a pressurized can or a powder that is mixed with water.
However, I prefer a sugar water solution that I typically use for stiffening crochet snowflakes.
You can find my snowflake stiffening solution in the post How to Stiffen Crochet Snowflakes.
More crochet coaster patterns for beginners coming soon!
Thank you for coming to my blog! By sharing my content and/or making a purchase you are making it possible for me to continue producing and sharing free content for everyone to enjoy. I sincerely appreciate your support!
Until next time… Happy Crocheting!


Please share!