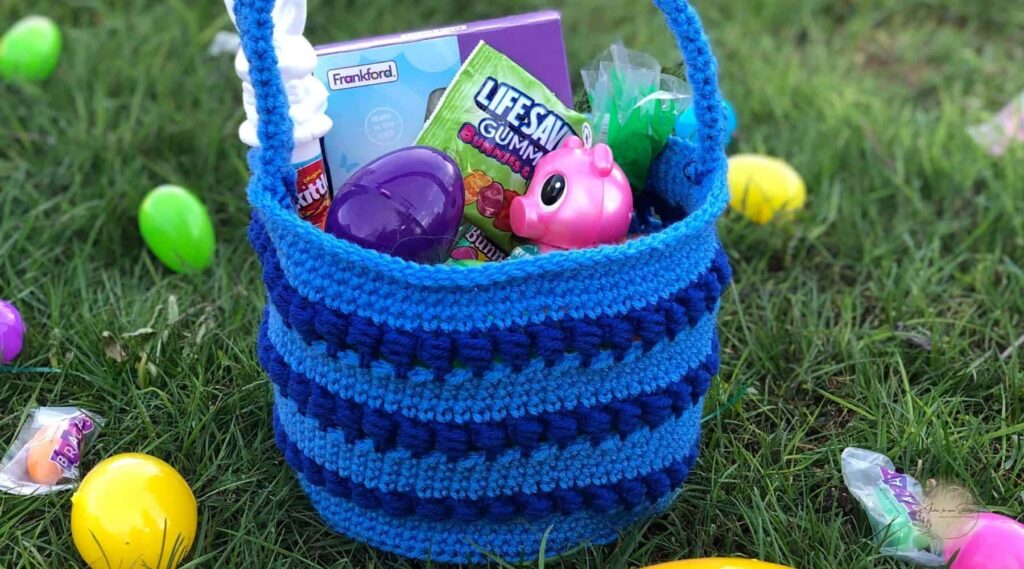
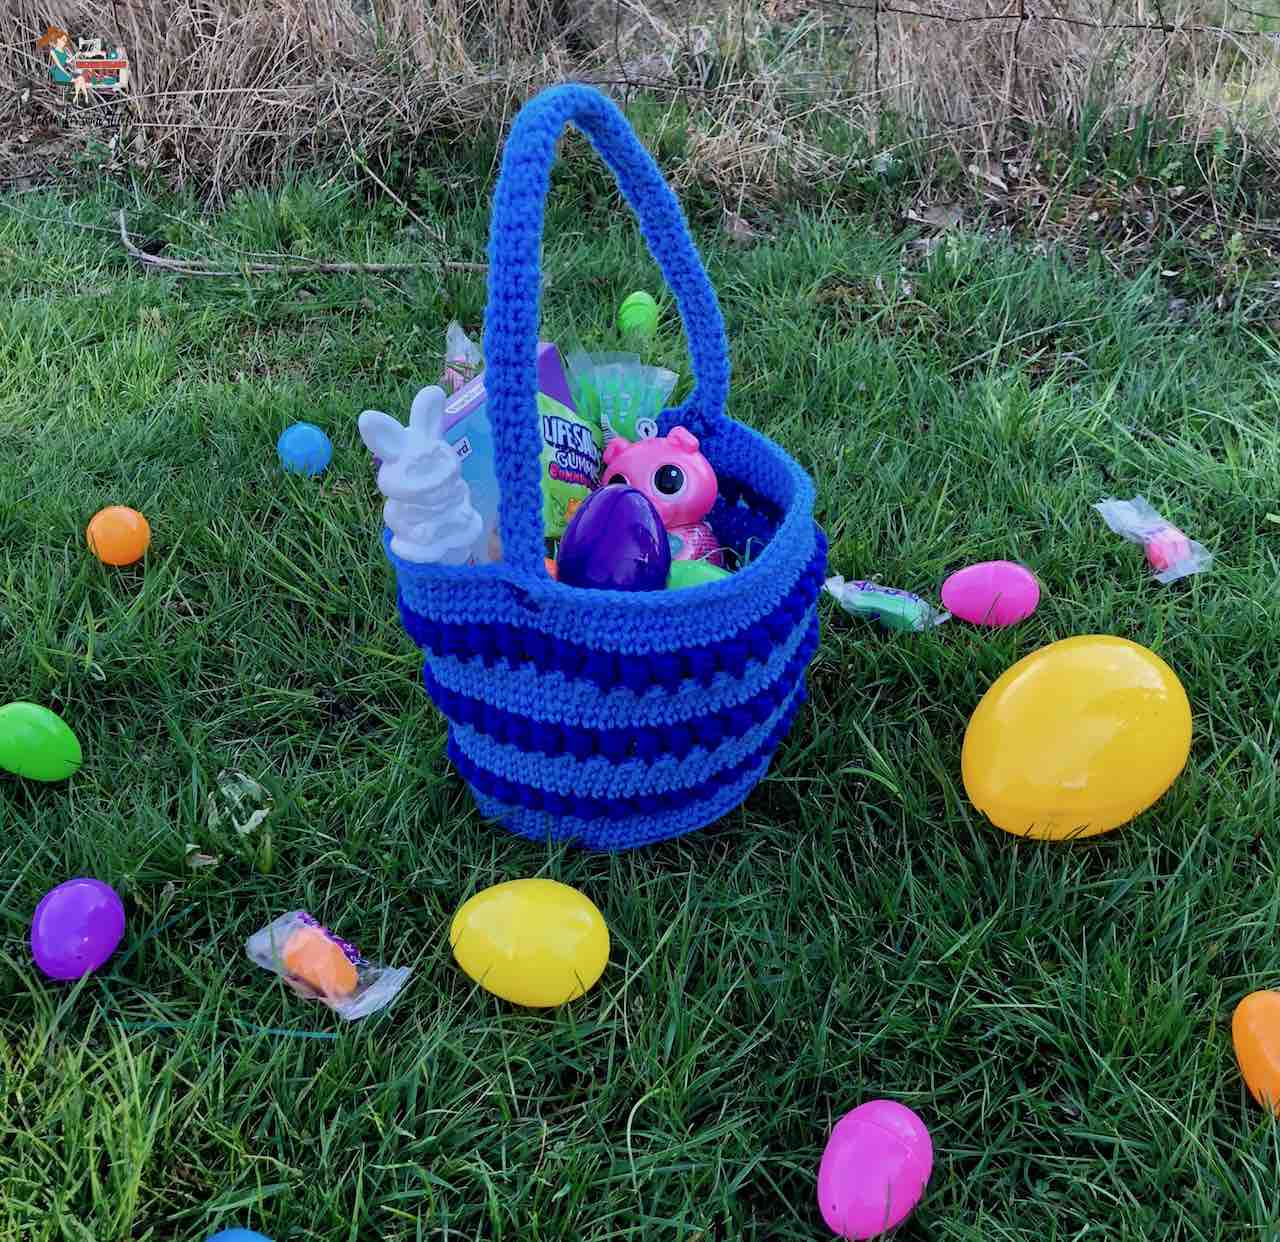
Looking for a simple and reusable basket for Easter egg hunts? This easy crochet Easter basket pattern is a quick project that works up using basic stitches and sturdy yarn.
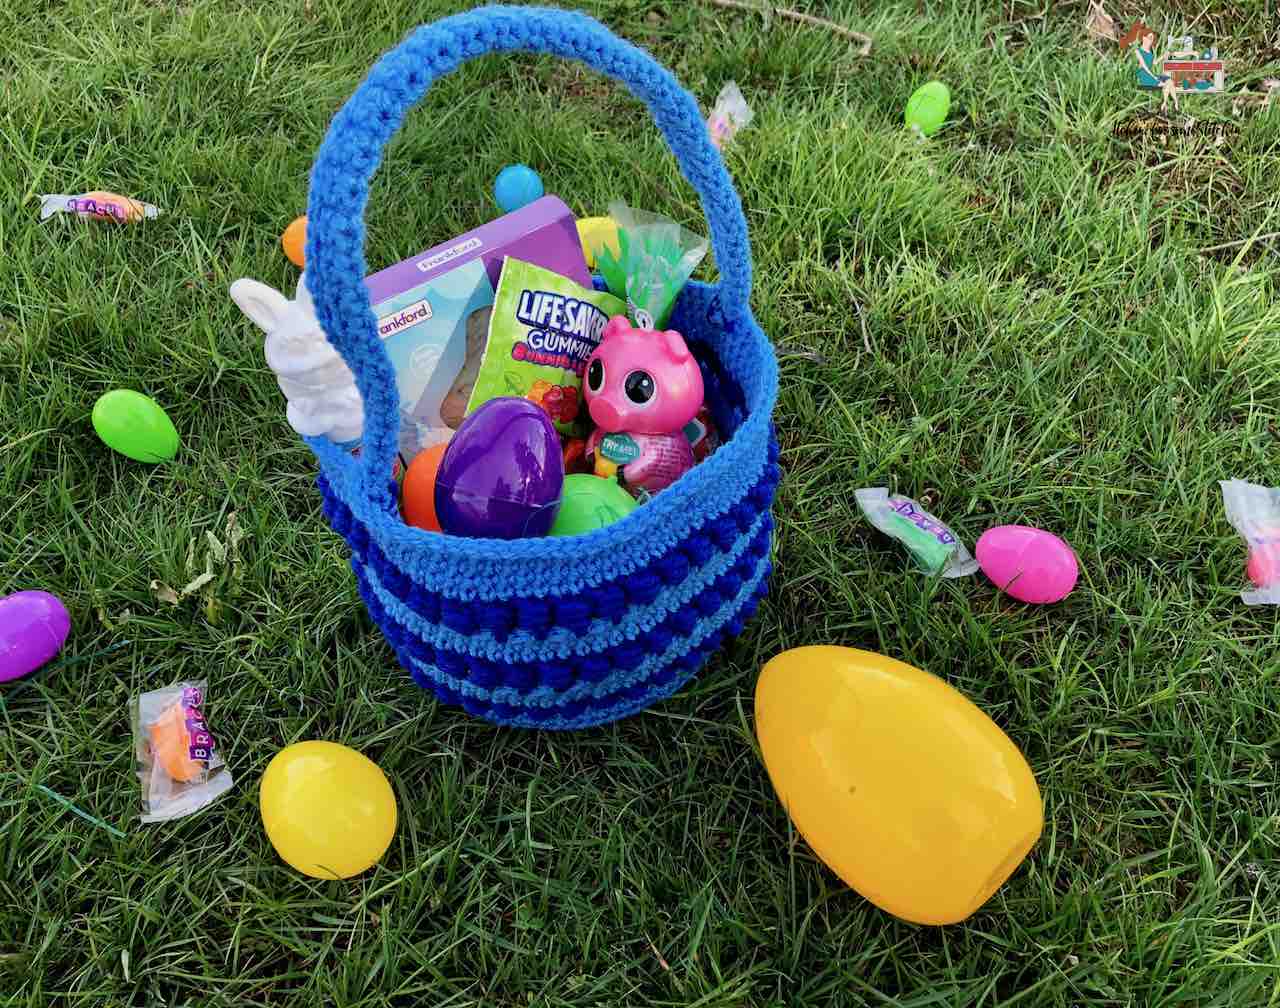
Whether you’re filling it with colorful eggs, candy, or small gifts, this crochet basket is the perfect handmade touch for Easter morning. The simple construction makes it beginner-friendly while still creating a basket that holds its shape well for little hands to carry.
If you enjoy making seasonal crochet projects, this Easter basket is a fun and practical pattern you can bring out year after year.
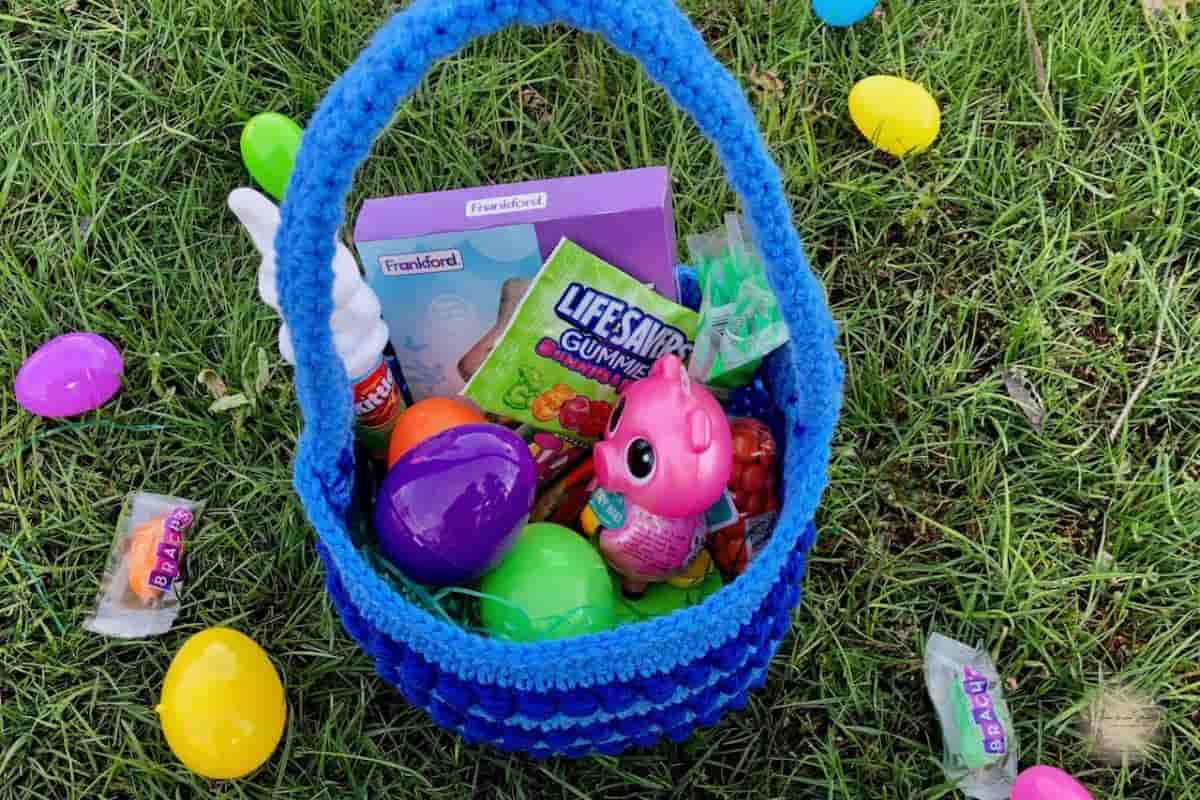
This free crochet Easter basket pattern creates a sturdy, child-sized basket that’s perfect for Easter egg hunts, spring decorating, or handmade gifts.
The basket is crocheted in the round using basic stitches, making it a great project for beginners or anyone looking for a quick seasonal make. The structured sides help the basket stand upright while still remaining soft and flexible.
It’s large enough to hold plenty of Easter eggs but lightweight enough for kids to carry easily while hunting for treasures.
Choose Your Next Easter Crochet Project
If you’re planning an Easter basket for egg hunts or spring decorating, you might also want something special to fill it with.
Crochet the Basket
Follow the free pattern on this page to make a sturdy crochet Easter basket that’s perfect for holding eggs, candy, or small gifts.
Scroll down to start the pattern.
Add Crochet Easter Eggs
Instead of plastic eggs, try making a set of soft reusable crochet eggs. They work up quickly and fit perfectly inside this basket.
Mix different colors to create a full Easter basket that can be used year after year.
Prefer a Printable Pattern?
If you’d rather crochet without scrolling or ads, the printable PDF version of this pattern is available in my shop.
It includes the full basket pattern in a clean, easy-to-print format.
Want All Your Patterns Organized?
Members of the Crochet Conservatory get access to an organized library of patterns in ad-free PDF format, along with additional crochet resources and learning materials.
Behind the Design
Why I Designed This Crochet Easter Basket
I designed this easy crochet Easter basket for my son DJ when he was three years old.
He loved playing with eggs. Plastic ones, real ones — it didn’t matter.
We actually had eggs scattered around the house all year long. Sometimes I’d fill them with little toy cars or surprises and hide them in his sandbox.
He would get so excited every time he dug one up.
Instead of using disposable store-bought baskets every year, I decided to crochet one that we could reuse again and again for our Easter egg hunts.
That’s how this simple crochet Easter basket pattern was born.
If you can single crochet (sc) and double crochet (dc), then you can do this pattern.
Yes, it does have one “advanced” stitch – the bead stitch.
But truly folks, the bead stitch is not really hard at all!
I even have a video and step-by-step photo tutorial to show you how to do it.
Click here for The Bead Stitch Tutorial.
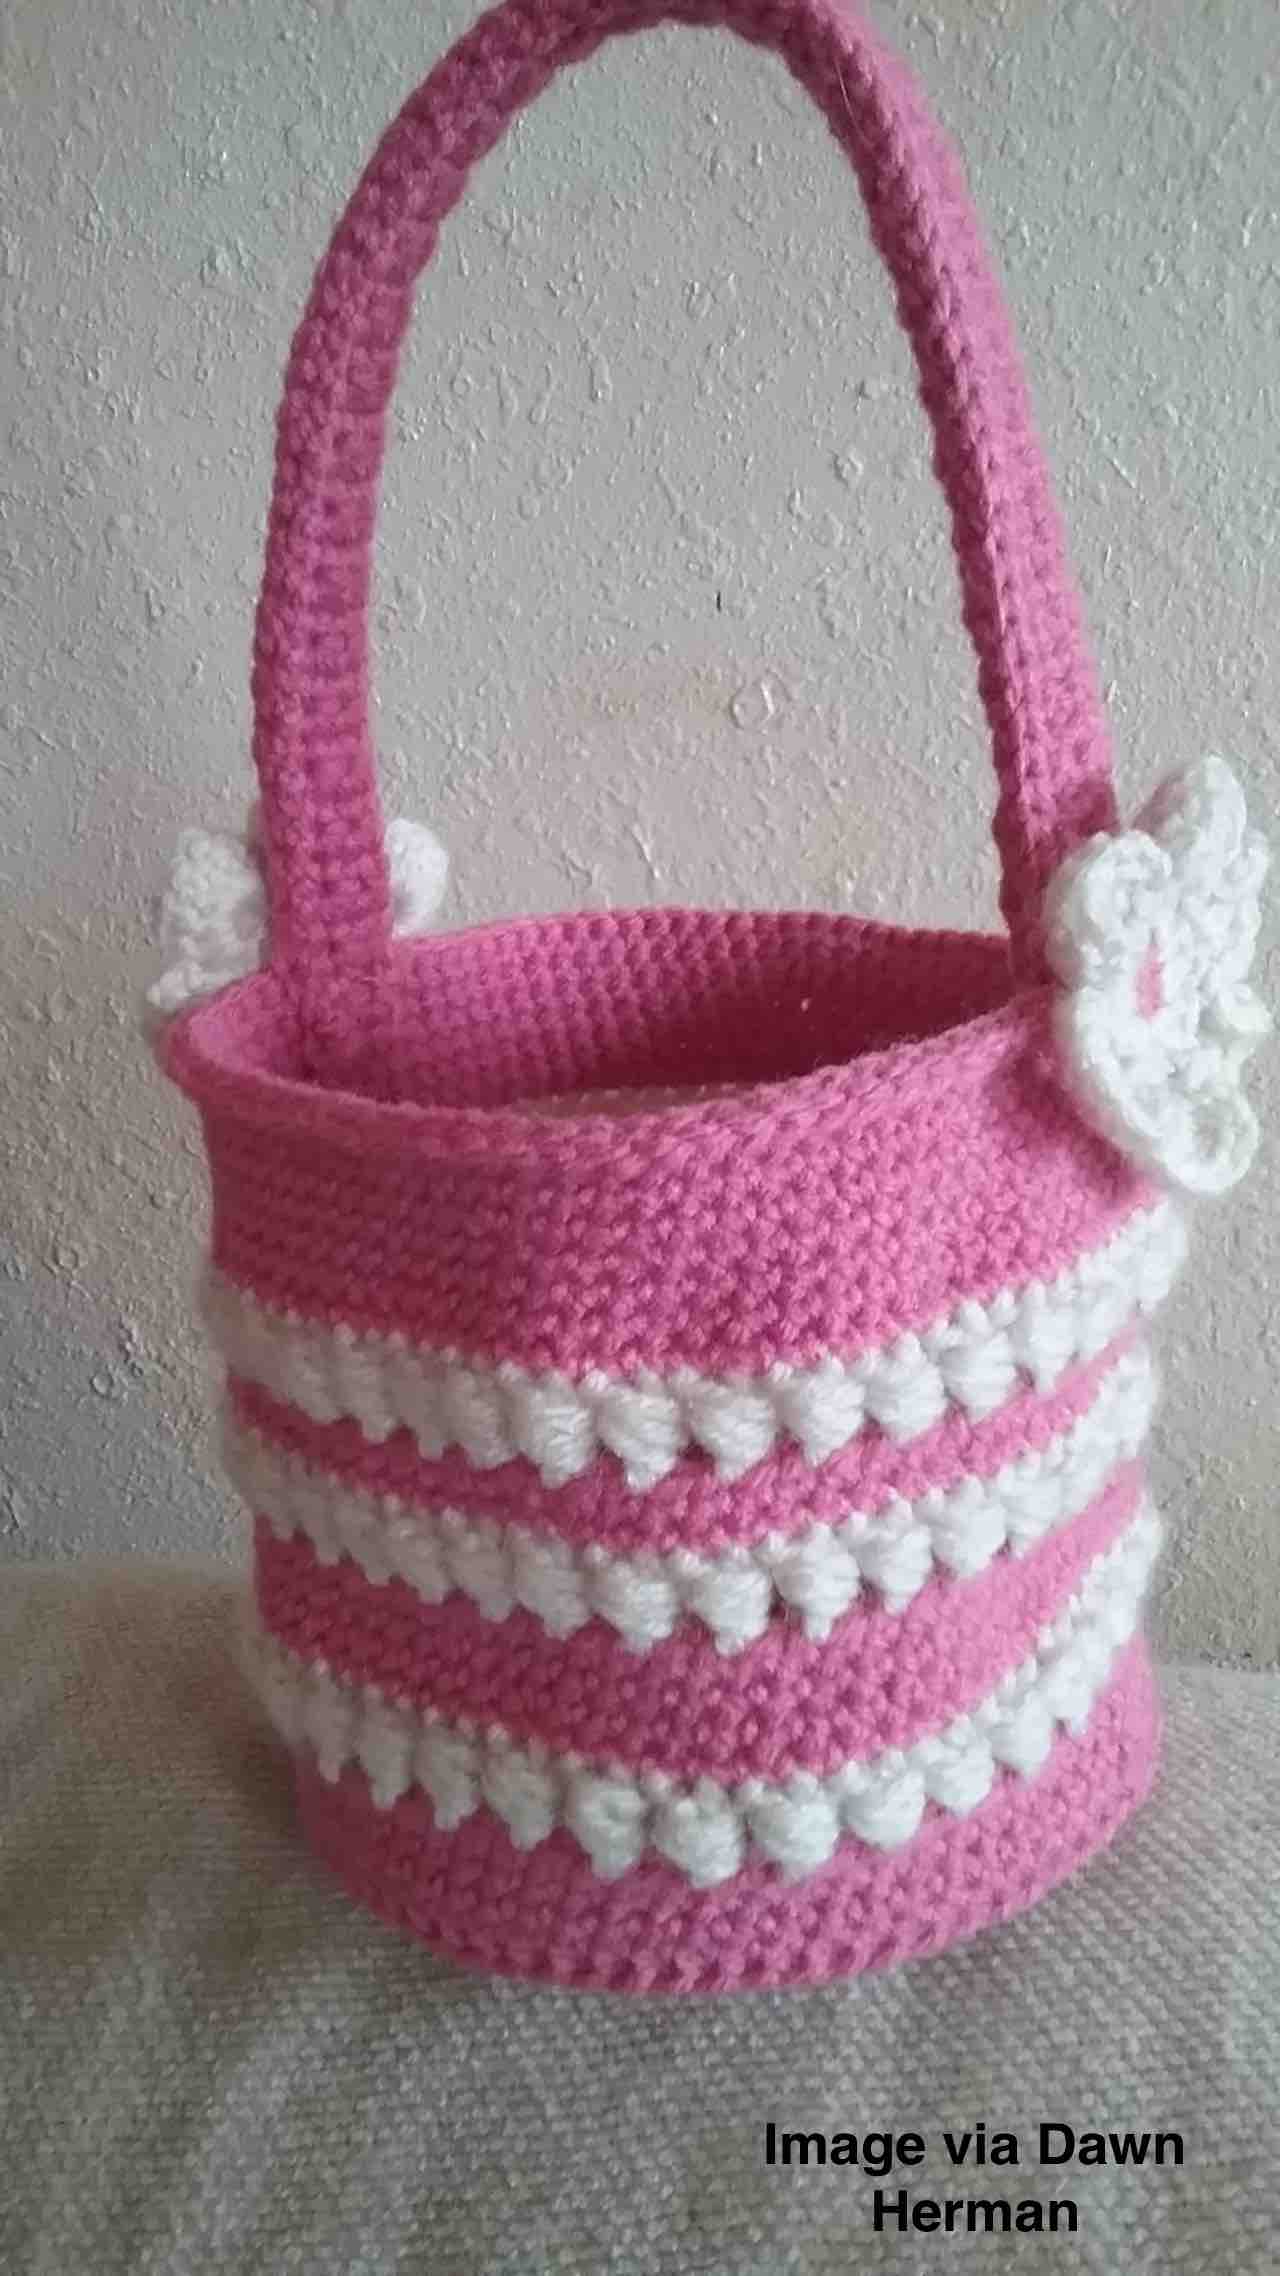
Note: The easy crochet Easter basket pictured above was crocheted by one of my wonderful pattern testers, Dawn Herman.
Check Out These Other Patterns I LOVE!
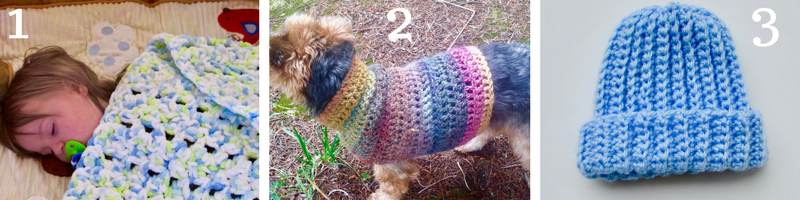
- Crochet Seed Stitch Baby Blanket / 2. Quick & Easy Small Dog Sweater Pattern / 3. Ribbed Baby Beanie Pattern for Beginners
How to Crochet an Easy Easter Basket
**THIS IS AN ORIGINAL PATTERN. Please see my Copyright Statement for details.
Because the bead stitch is considered and advanced stitch (despite how easy it truly is) I would not classify this pattern as a beginner pattern, but definitely a beginner-friendly pattern.
Meaning, that as long as you are not an absolute crochet beginner, you should be able to successfully work this Easter basket pattern.
Prefer a PDF?
Love Pinterest? I do!
PIN this pattern to your Pinterest boards for later HERE. You can also follow all my boards!
Add this pattern to your Raverly que HERE.
Summary:
This super easy crochet Easter basket features the beautifully textured bead stitch combined with basic crochet stitches to create a unique look you’ll absolutely love. It’s the perfect extra special gift for your extra special little one this Easter!
Difficulty level: Level 1 or 2 – Advanced Beginner/Intermediate
Finished Dimensions:
Approximately 6.5 -inches from base to the rim of the
Gauge: 15 stitches and 20 rows = 4-inches in single crochet.
NOTE: Gauge here is measured using a flat piece of crochet. Because construction of flat crochet and in the round patterns is very different, in rounds the gauge would be 17 stitches and 18 rounds in single crochet.
Materials:
- Medium 4 worsted weight yarn – 2 colors, A & B for body.
~ In this pattern I used Red Heart Blue for color A and Royal for color B (affiliate links).
~ Total yardage: 100 to 250 yards
- Crochet Hook size H-5.0mm (or whatever hook to meet gauge)
- Crochet Hook size G-4.25mm (or whatever hook to meet gauge)
- Tapestry needle
- scissors
(Click HERE to find my favorite crochet tools & resources)
Abbreviations:
Pattern is written in US terms.
Stitch/es (st/sts)
Blo – back loop only
*__* – Repeat indicated instructions
Special Stitches:
Bead stitch (
Instructions:
Basket
Base
Use hook size H-5.0mm.
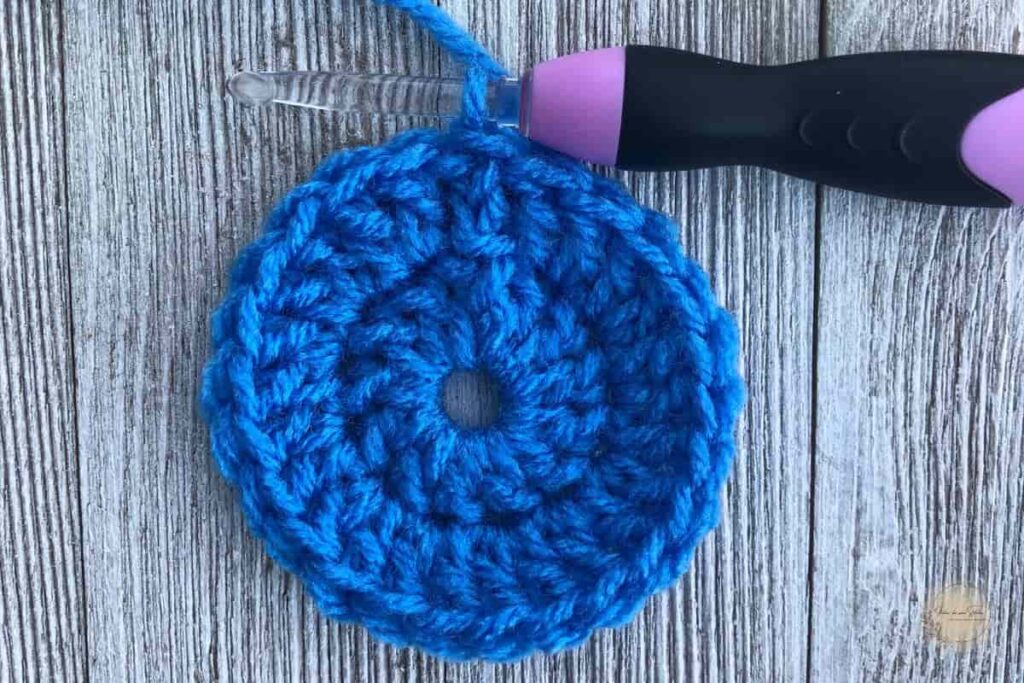
With color A, crochet 12 dc into a magic ring (Click here for tutorial). Then increase, using dc, for 6 rounds using the increase method below. This should give you 72 dc stitches.
The base of the basket should measure 6.75-inches in diameter.
Increase Method

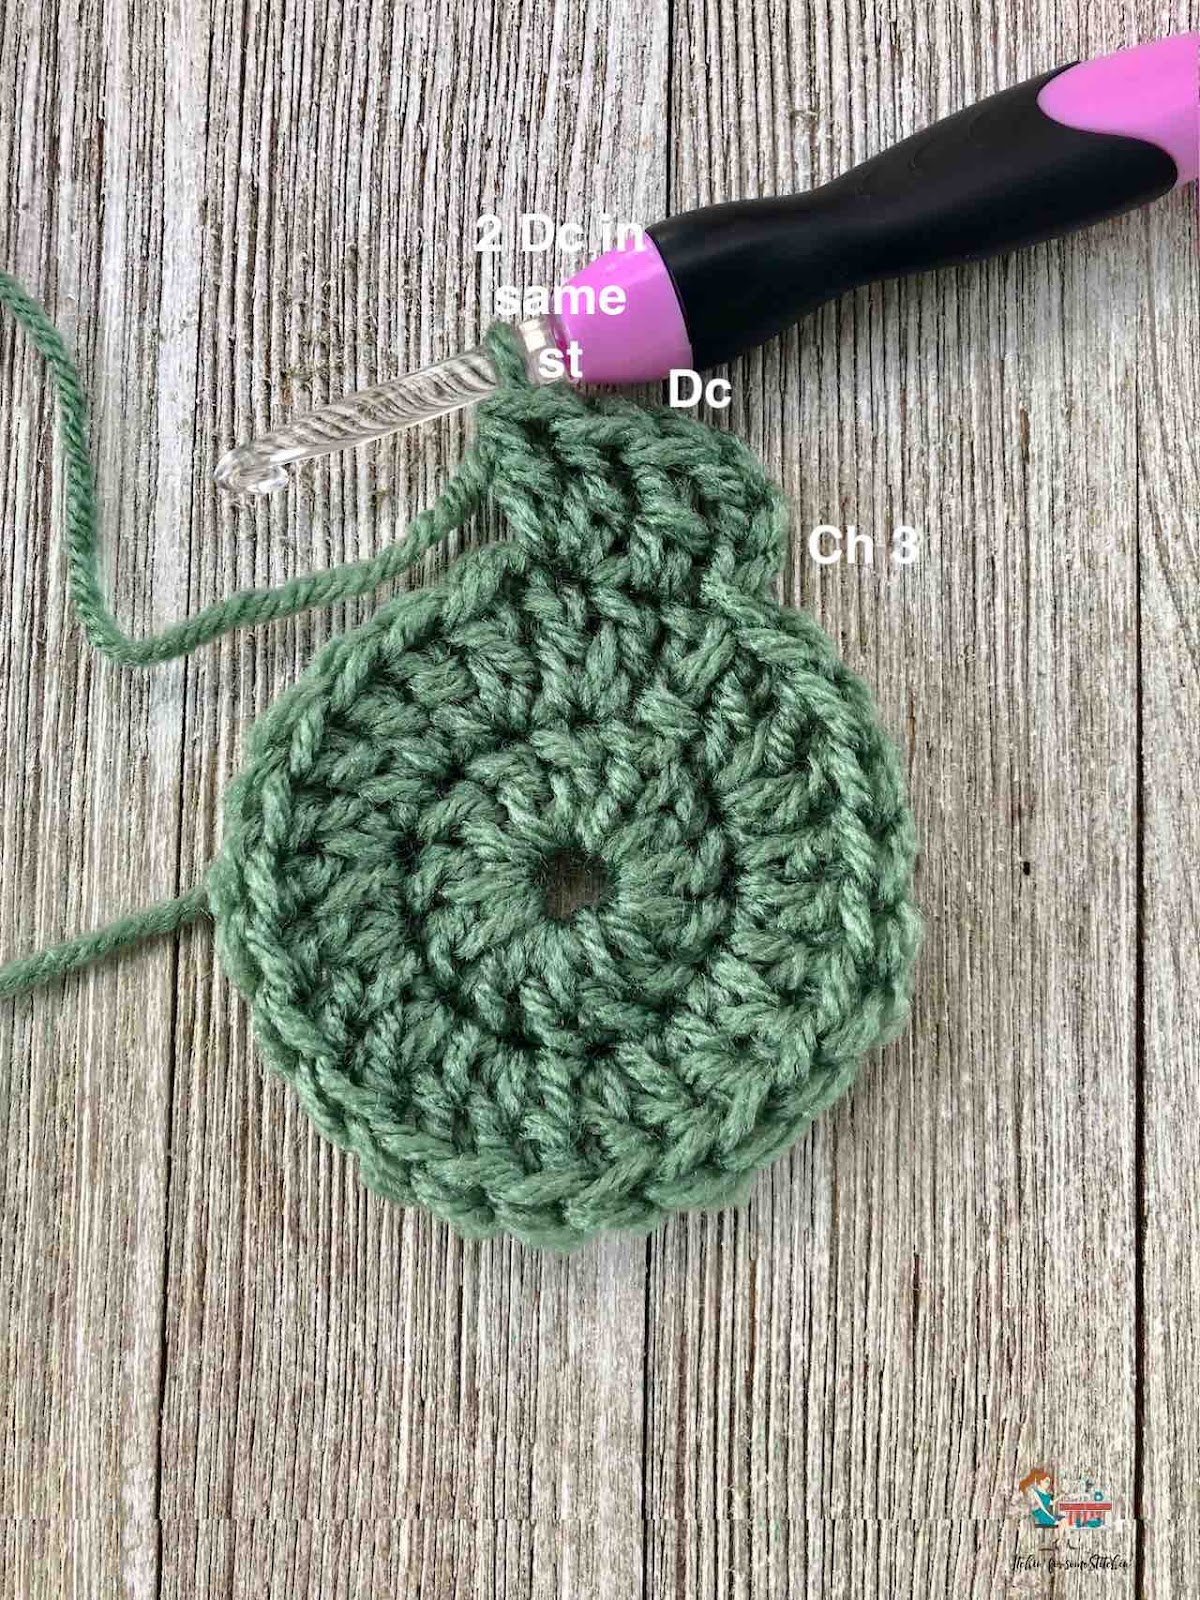
This is what round 1 should look like after making 12 dc sts into a magic ring (alternatively, you could ch 4 and slp-st into the first ch to form a ring and then make 12 dc into that ring).
Round 2: ch 3, work 2 dc sts into each st around, slp-st to close. (24 sts)

Round 3: ch 3, dc in the first st, 2 dc into the next st, *1 dc in the next st, 2 dc in the next st* Repeat from * to * around. Slp-st to close. (36sts)
Round 4: ch 3, dc in the first st, dc in the next st, 2 dc in the next st,* dc in the next st, dc in the next st, 2 dc in the next st* Repeat from * to * around. Slp-st to close. (48 sts)

What you should notice is that you are creating a stitch number set that matches the round number you are doing and each ending with an increase (2dc).
For example, in round 3 you created a set of 3 stitches – 1 dc, then 2dc. In round 4 you created a set of 4 stitches – 1 dc, 1 dc, 2 dc.
Thus, increasing round 5 would be a set of 5 stitches – 1 dc, 1dc, 1 dc, 2 dc.
Continue in this manner to round 6 – a set of 6 stitches – 1dc, 1dc, 1dc, 1dc, 2dc. This will give you a final stitch count of 72 dc sts.
NOTE: The number of beads stitches will be half the number of stitches you have once the base is complete.
** Your counts may be different based on the crochet hook you use (if different from indicated in the pattern) and how many stitches you have once your base reaches the diameter 6.75-inches (if you use a method other than the one outlined above).
Body
Continue with color A.
Round 7: Ch 1 , sc in blo of the first st and in each st around, slp-st to close. (72 sts)
Rounds 8-10: Ch 1, sc in the first st and mark it with a stitch marker, sc in each st around, slp-st to close. (72 sts)
Round 11: Cut color A and change to color B, ch 2, dc in the first sc, bst, *skip the next sc, dc in the next sc, bst*
Repeat from * to * around, slp-st to close. (36 bst sts)
Round 12: Cut color B and change to color A, ch 1, sc in first st and in each st around, slp-st to close. (72 sts)
Round 13: Ch 1, *sc in the next 17 sts, 2 sc in the 18th st*.
Repeat from * to * 3 more times, slp-st to close. (76 sts)
Rounds 14-15: Ch 1, sc in each st around, slp-st to close. (76 sts).
Round 16: Cut color A and change to color B, ch 2, dc in the first sc, bst, *skip the next sc, dc in the next sc, bst*
Repeat from * to * around, slp-st to close. (38 bst sts)
Round 17: Cut color B and change to color A, ch 1, sc in first st and in each st around, slp-st to close. (76 sts)
Round 18: Ch 1, *sc in the next 18 sts, 2 sc in the 19th st*.
Repeat from * to * 3 more times, slp-st to close. (80 sts)
Round 19: Cut color A and change to color B, ch 2, dc in the first sc, bst, *skip the next sc, dc in the next sc, bst*
Repeat from * to * around, slp-st to close. (40 bst sts)
Round 20: Cut color B and change to color A, ch 1, sc in first st and in each st around, slp-st to close. (80 sts)
Rounds 21-23: Ch 1, sc in each st around, slp-st to close. (80 sts)
Round 24: Ch 1, *sc in the next 19 sts, 2 sc in the 20th st*.
Repeat from * to * 3 more times, slp-st to close. (84 sts)
Round 25-26: Ch 1, sc in each st around, slp-st to close. (84 sts)
Round 27: Ch 1, slp-st in the first st and in each st around. (84 sts)
Basket Handle
Use hook size G/4.2.5mm and yarn color A.
Ch 6
Round 1: Ch 1, sc in blo of the second ch from the hook and in each ch across. (5 sts)
Rounds 2-70: Ch 1, sc in each st across. (5 sts)
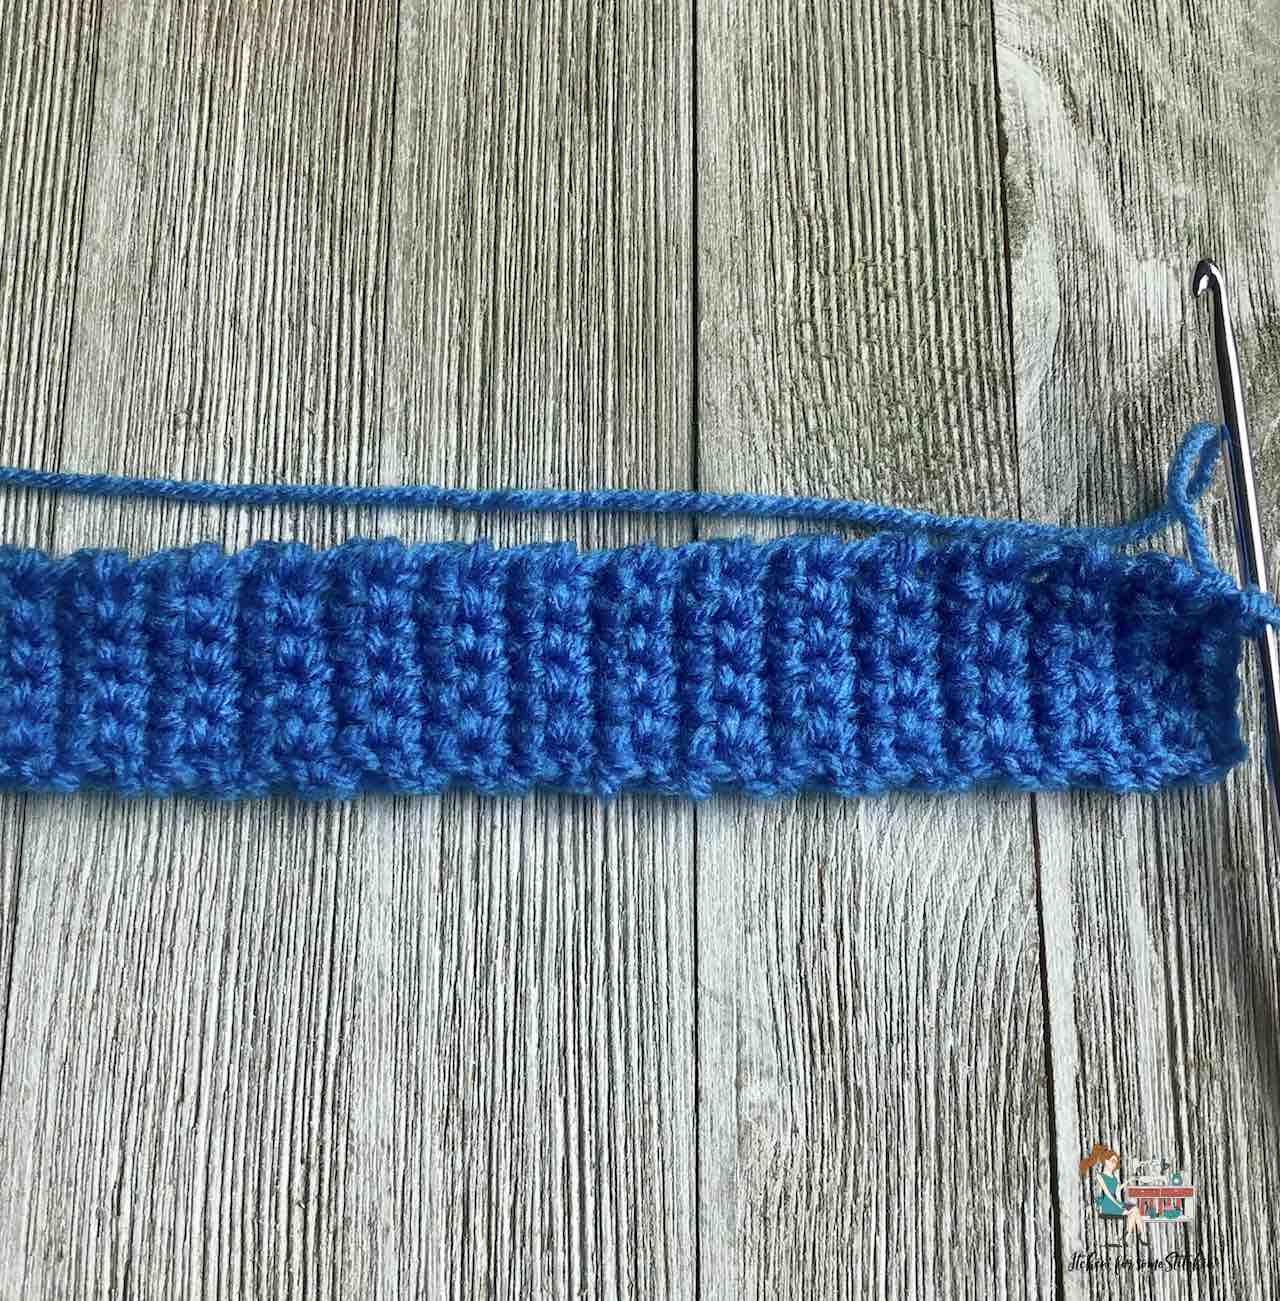
Do NOT bind off. Fold fabric horizontally and slp-st the two edges together all the way across.


Finishing:
Use color A to sew the handle onto the basket.
NOTE: I sewed each side of the handle onto the basket at stitch number 22 when counting from the seam.
Embellishments:
You can leave as is or add a button, crochet flower, or other adornment to each side of the handle.


Thank you
I sincerely appreciate you visiting my blog! By sharing my content and/or making a purchase you are making it possible for me to continue producing and sharing free content for everyone to enjoy. Your support is amazing!