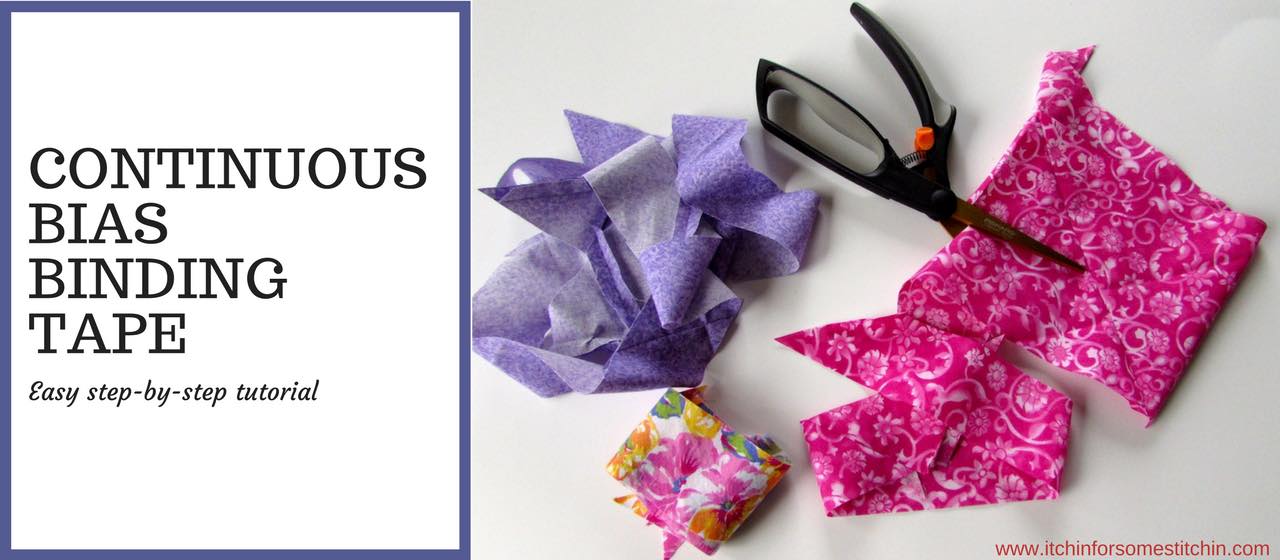
Hi folks. Today I have an awesome sewing tip for you! It’s about how to make your own continuous bias binding tape or just bias tape for short.
I actually learned this technique years ago when I first started sewing, so I know for sure that it’s simple enough for beginners.
My first sewing experience was actually a quilting class at Ben Franklin’s Crafts. Talk about diving in head first! I had never sewn a stitch in my life but managed a beautiful quilt. 🙂
Okay, enough patting myself on the back. 😉
One of the last steps when sewing a quilt is to make and attach bias binding. My instructor taught me a super easy method and to be honest, I thought she had developed it! Little did I know then, that this is actually a common sewing technique.
And today, I am going to share it with you!
* This post may contain affiliate links. Your support is appreciated! See my full Disclosure Policy for details.
What Is Bias Binding Tape?

Before we get started, it’s important to understand what bias binding tape is. But, let’s back up even further and first understand what bias tape is.
Simply put, bias tape is made by sewing strips of fabric together to create a long piece of “tape”. Each fabric strip has been cut on the bias. This means that it has been diagonally cut across the grain of the fabric.
Cutting fabric across the grain makes it more flexible and stretchy. Which, in turn, makes it easier to apply around edges. Thus, bias binding tape can be used around the edges of quilts and other blankets, necklines, pillows, hot pads, and much much more!
Now, you can actually buy bias tape and it’s not horribly expensive, but it is limited because it is usually only found in standard colors. If you want non-traditional colors or a pattern, it’s best to make it yourself. Plus, it’s so easy to do!
And, if you’re like me and have a ton of fabric on the shelf… in baskets… in drawers… lying around the house…. um… I guess just about everywhere…
Anyway, if you’re like me, and have extra fabric, making your own bias binding tape can actually be cheaper than purchasing it.
Granted, if you had to cut every single strip and then sew each one together, it would be so time-consuming that the lack of a price tag wouldn’t make up for it. Fortunately, you don’t have to!
There is actually a way to turn one square of fabric into one continuous strip of bias tape. And it only requires sewing two seams!
Let me show you how to do it.
How to Cut Continuous Bias Binding.
Now, one thing you have to understand is that the length of resulting bias tape depends on the size of the square you start with. And yes, there are formulas, calculators and cheat sheets to help you do this.
Here are my favorites:
So Sew Easy–Continuous Bias Binding Calculator
The Sewing Loft–Continuous Bias Binding Cheatsheet
The Sewing Loft–Formula for Continuous Bias
For this tutorial, I am going to start with a 12-inch square, which will produce about 60-inches of 2-inch wide bias tape. Bias tape can vary in width. I have used 1/2-inch, 1-inch, and 2-inch, but if you are making your own, you can really make it the size you want or the size you need.
SUPPLIES:
[list style=”style6″]
[li]woven cotton fabric[/li] ~If you don’t know what a woven fabric is, please click HERE for a review
[li]straight pins/li]
[li]fabric scissors and/or rotary cutter[/li]
~If you need good fabric scissors, have limited hand strength, or arthritis, I would highly recommend Fiskars Easy Action Fabric Scissors. They are the only fabric scissors I will use. You can read my review HERE.
[li]large clear ruler[/li] ~I like to use a quilting ruler
[li]fine tipped marker or pen[/li] ~I like to use a fabric marker with vanishing ink
[li]sewing machine[/li]
[/list]
Procedure:
Step One
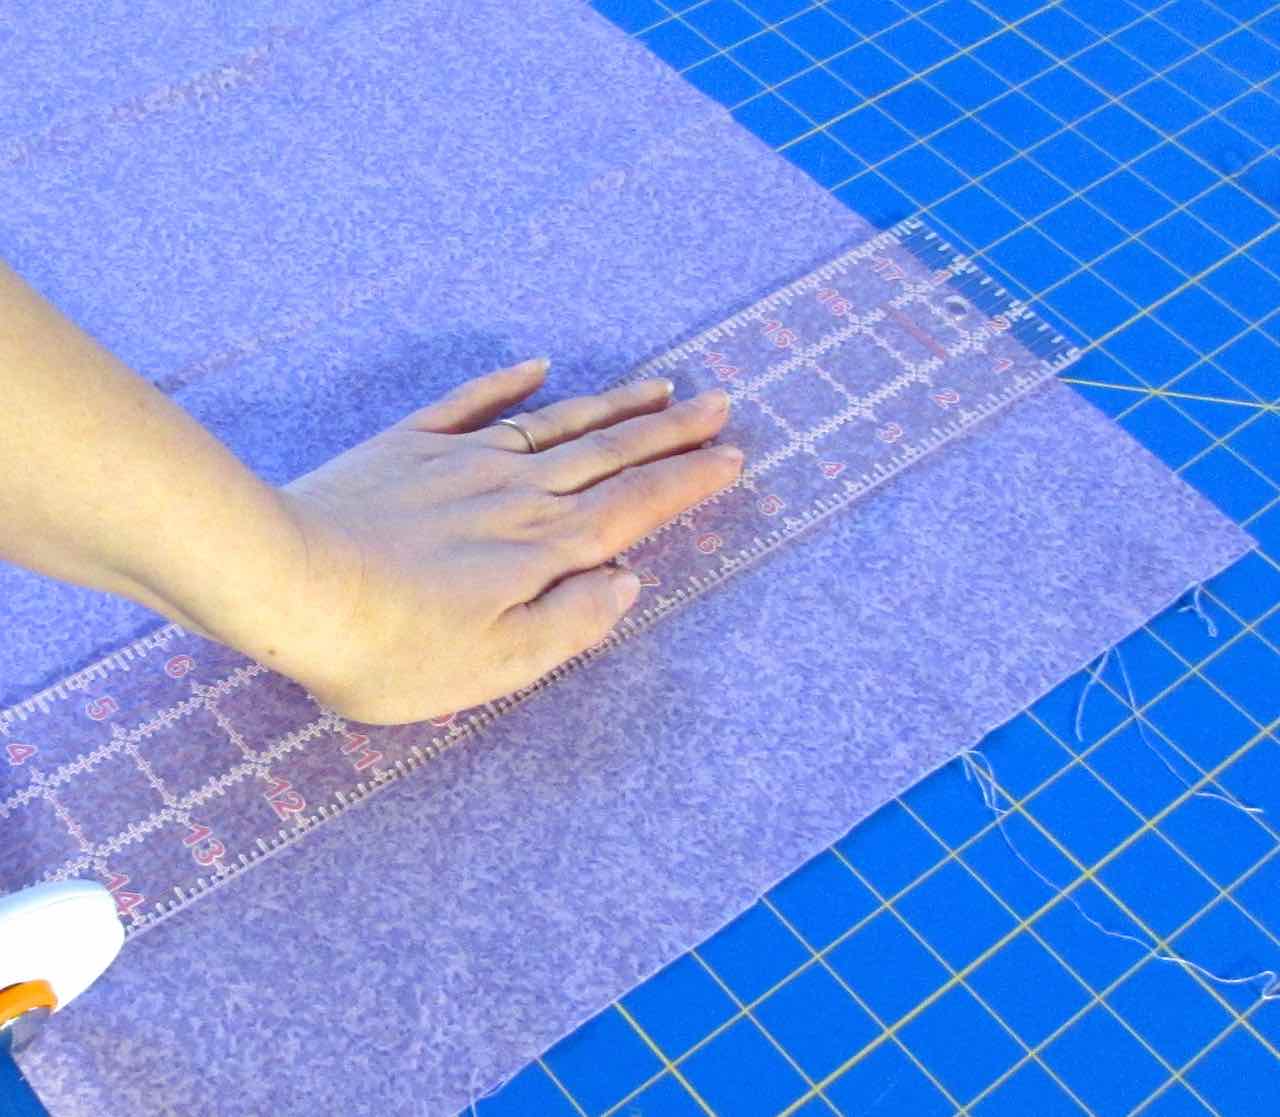
Cut at 12-inch your fabric square (or whatever size you choose to make). Make sure that it is a perfect square, with 90-degree corners.
Step Two
Using your ruler as a guide, draw a diagonal line across your square from one corner to the opposite corner. It doesn’t matter if you do this on the front or back of the fabric.
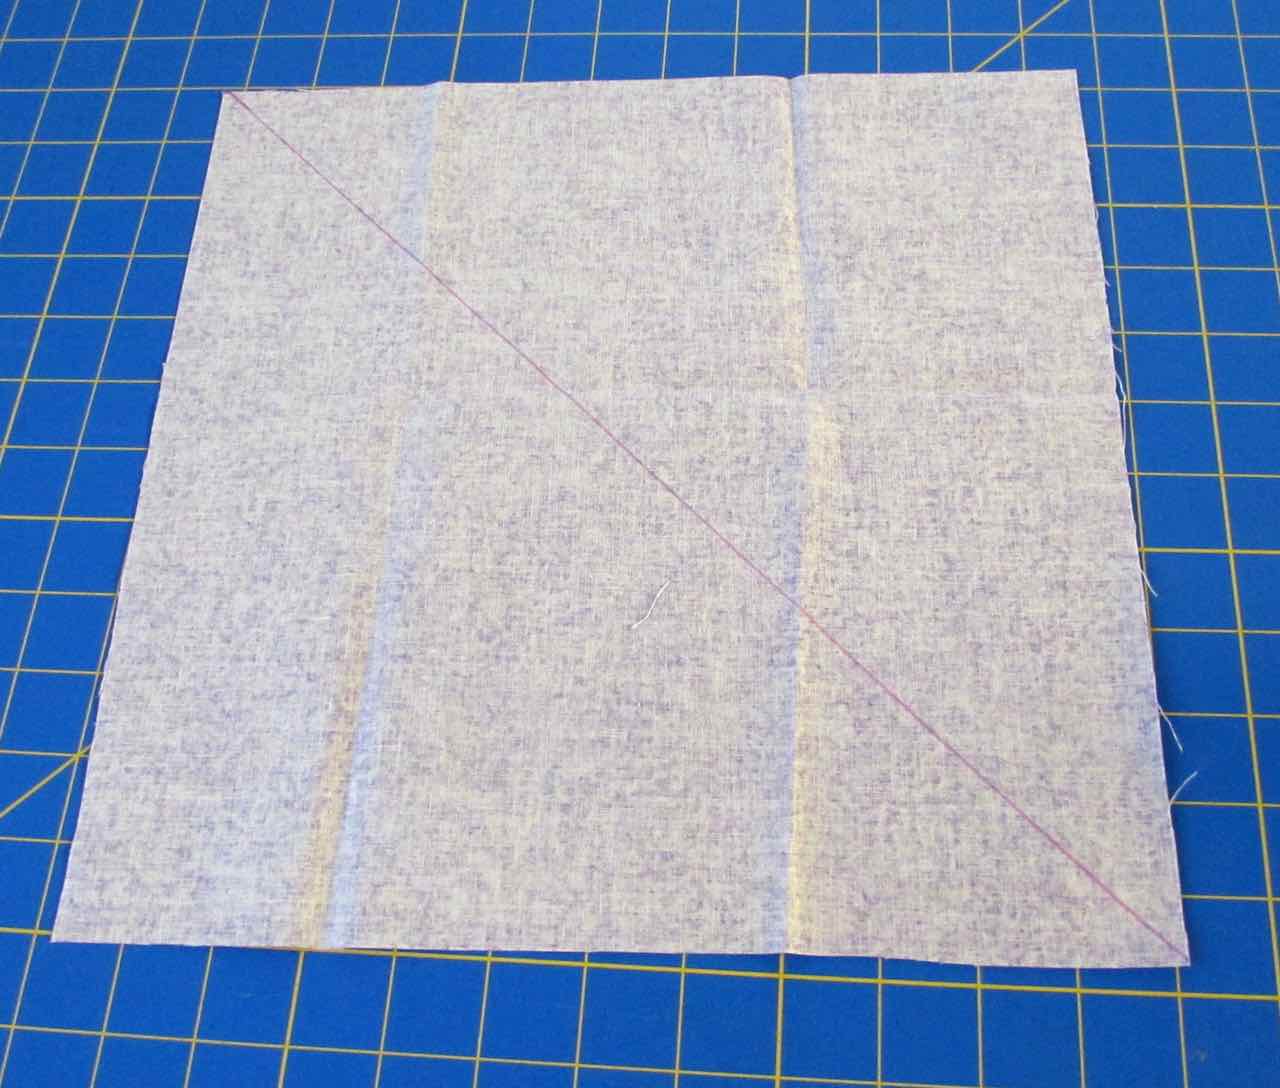
NOTE: If you use a fabric marker with vanishing ink, you must make sure to finish the entire tutorial within the life of your marked lines. For instance, the ink in my fabric marker vanishes within 12-24 hours, so I have to complete this craft project within that time frame.
Step Three
Cut the square along the diagonal line from corner to corner making 2 triangles. If you can do this with the fabric shears, then more power to you! I take the easy way out and use a rotary cutter.
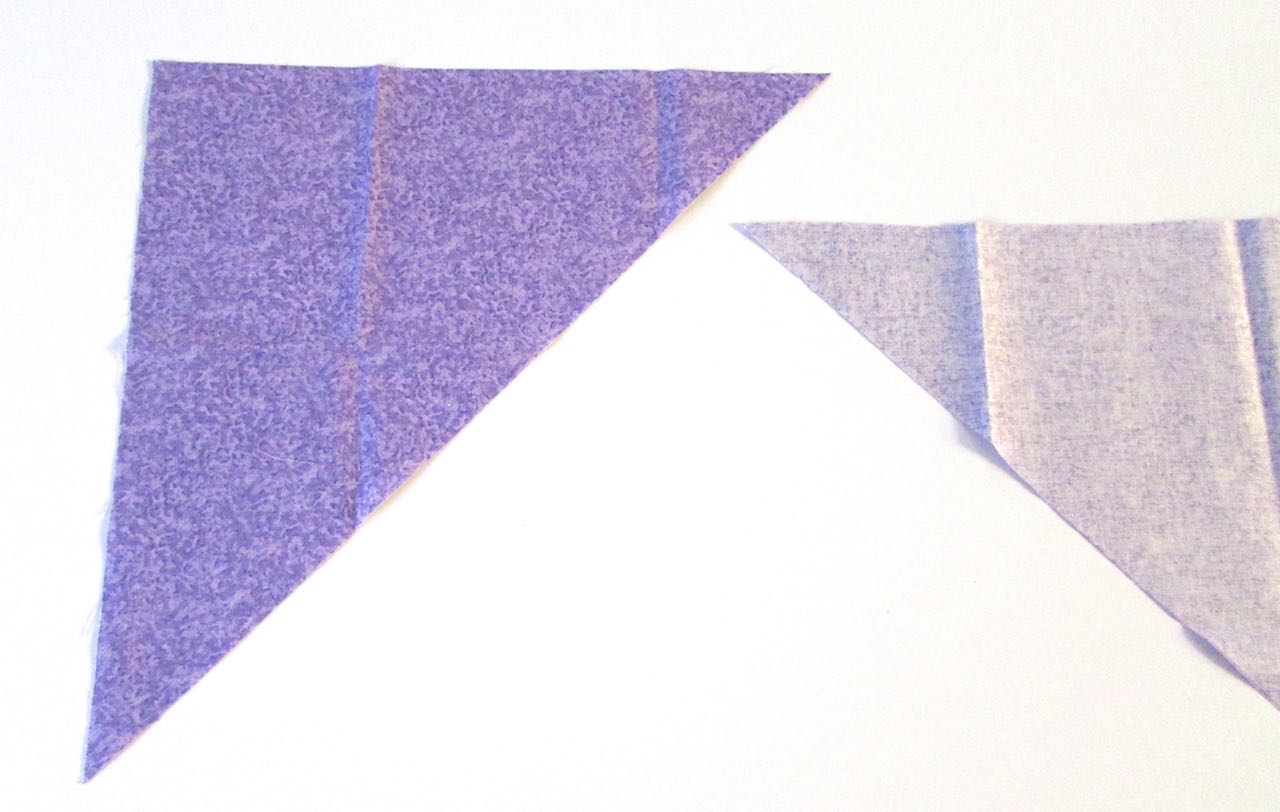
Step Four
Turn your triangles so they look like those in the picture in step 3. The one on the left is cut off in the picture, but it is placed exactly like the one on the right, except instead of having the RIGHT side up, it has the WRONG side up.
Then, place the RIGHT sides together as pictured below.
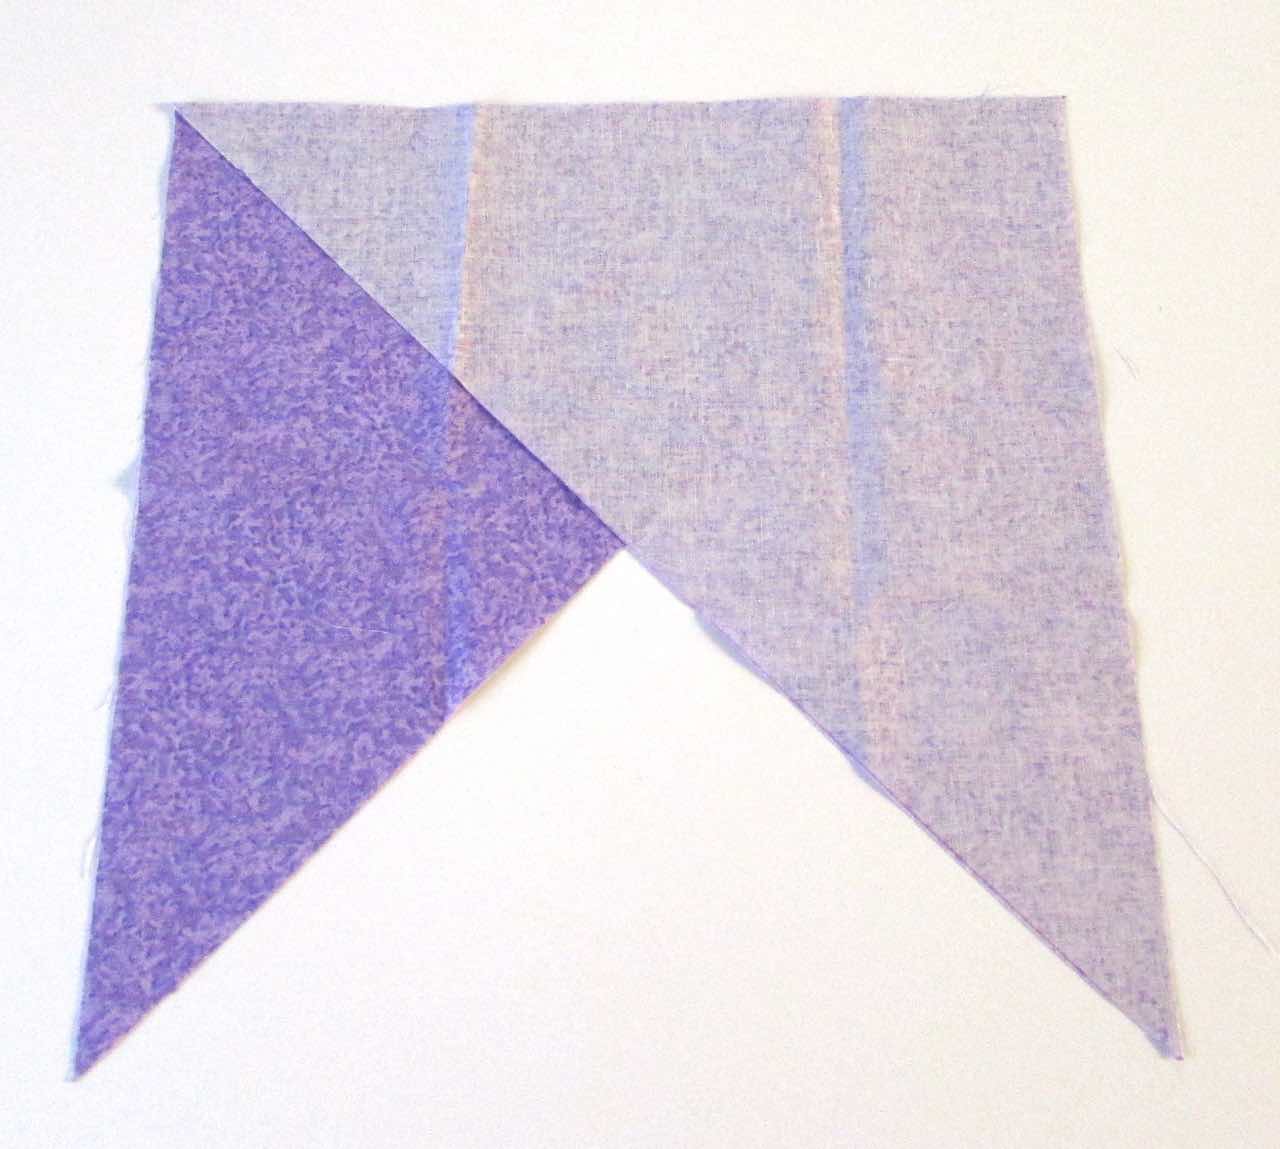
A small part of the bottom piece may hangover on the left side and a small part of the top piece may hangover on the right side. This is not a problem, but if this happens, make sure that both the parts that are hanging over are equal. In other words, the “hangover” over amount on each side should be the same.
Step Five
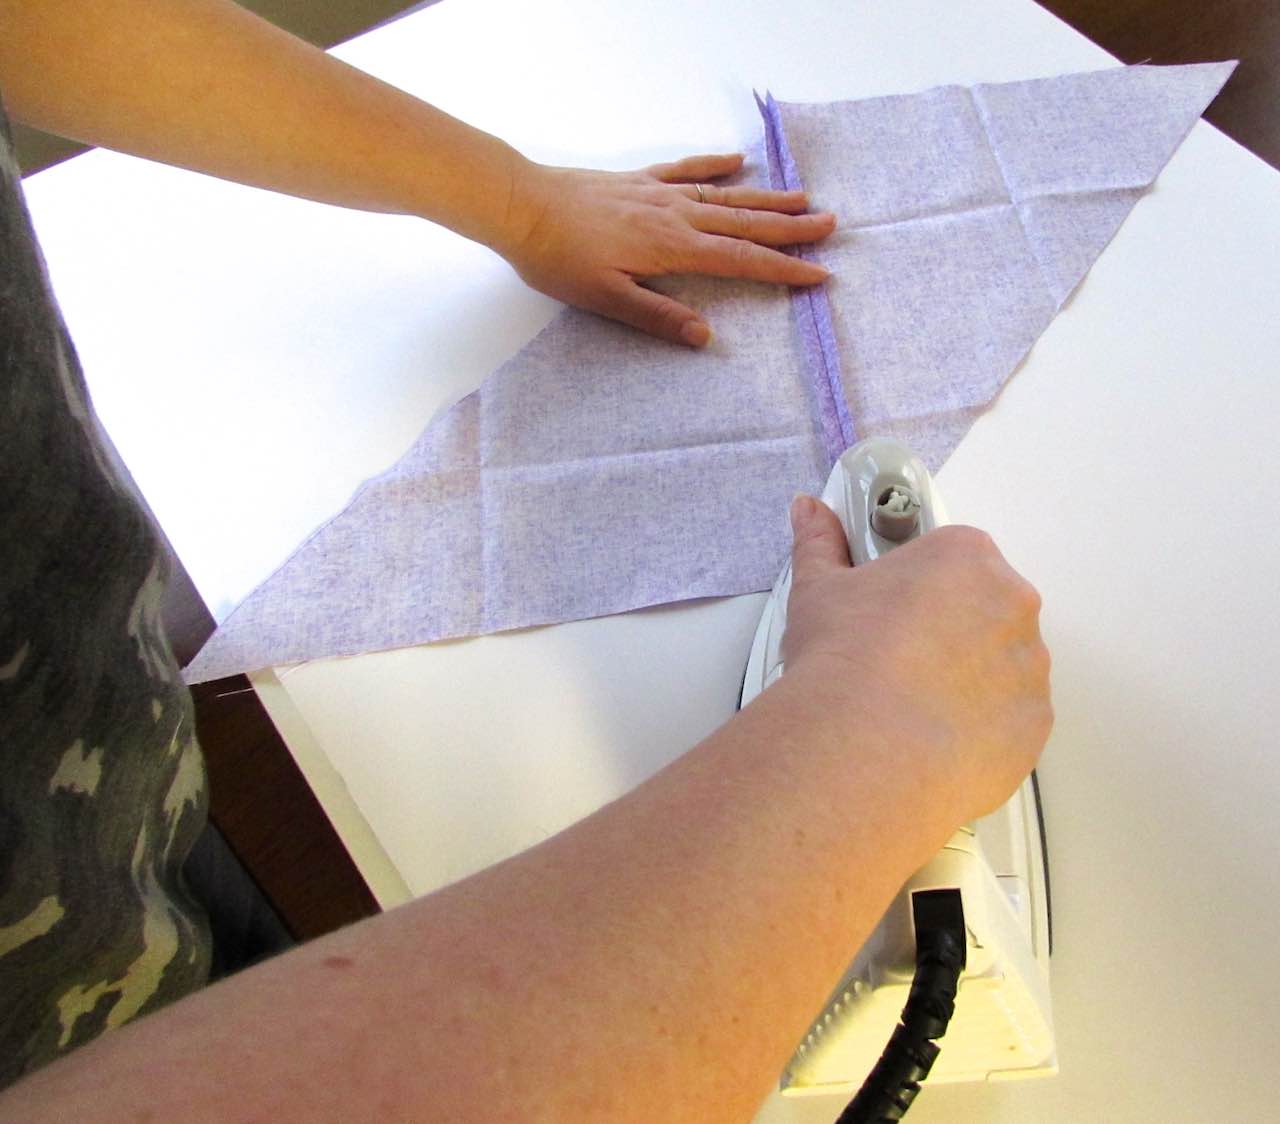
Using straight pins, pin the two layers together along the top edge. Then sew the two layers together leaving a 1/4-inch seam allowance.

Step Six
Open the fabric and iron the seam along the back so that the seam is open. You can see that it creates a parallelogram.
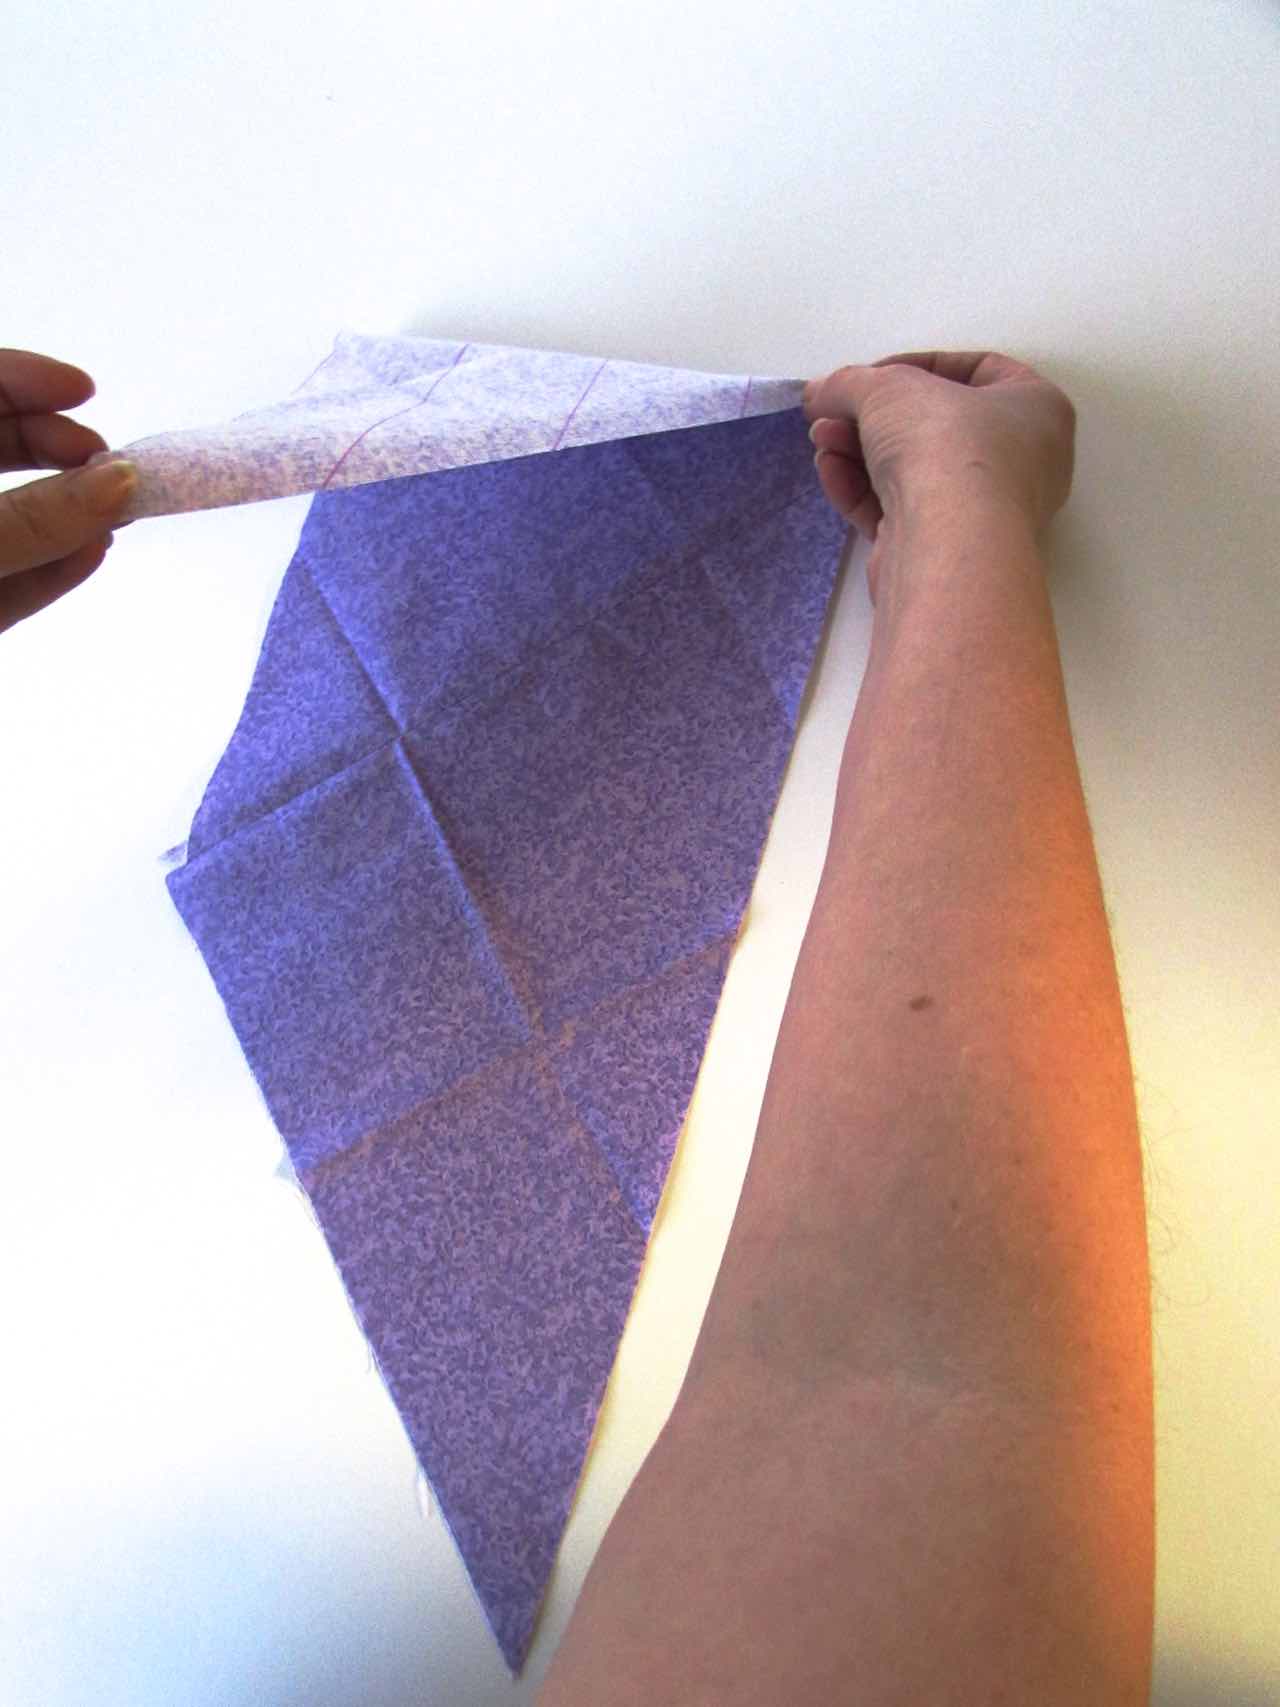
Step Seven
Starting along the longest edge of the parallelogram, use a quilters ruler and fabric pen to mark lines of 2-inch apart. These lines will be PARALLEL to the long edges of the parallelogram
This is typically done on the WRONG side of the fabric because it’s easier to see the lines. However, don’t panic if you accidentally mark them on the RIGHT side, it may be a little tricker, but it can still be easily done.

Continue in this manner until the lines are all the way across the fabric. Trim any excess material.

Step Eight
Place the fabric in front of you with the RIGHT side FACING UP. The tips of the parallelogram should point UP and DOWN.
Next, fold the two longer tips back in, towards the center. When you fold the top (as pictured above) the fabric will naturally fold down and to the left.
When you fold the bottom (as pictured above) the fabric will fold naturally up and to the right.
Once the top and bottom are folded it should create a square shape. If you keep the sides even, the drawn lines should line up with each other.
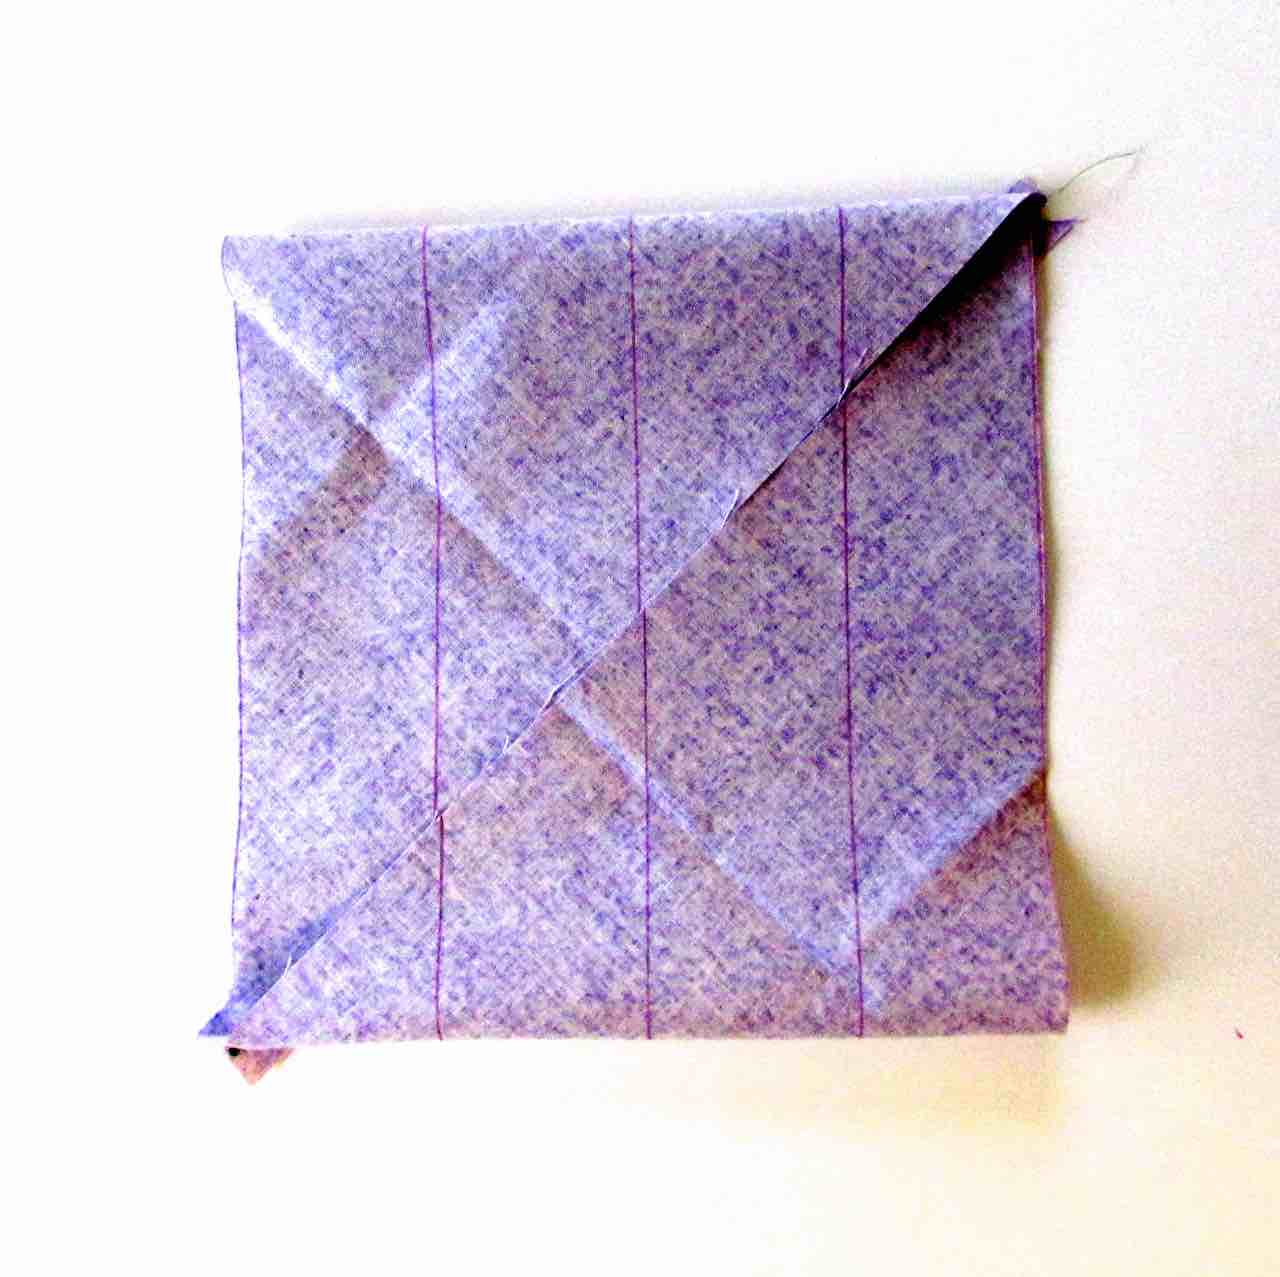
Awesome, right? Ha ha… got you. You don’t actually want this. If you keep it like this, you will end up with a ring of fabric instead of a strip.
What you really want is for one 2-inch strip on each side to overhang, while the lines in the middle match up. This will OFFSET the lines by one.
You do this by pulling the upper left triangle tip slightly to the left and pulling the right lower triangle tip slightly to the right. You pull each side until all the lines have shifted over one line and have re-aligned with the next line.
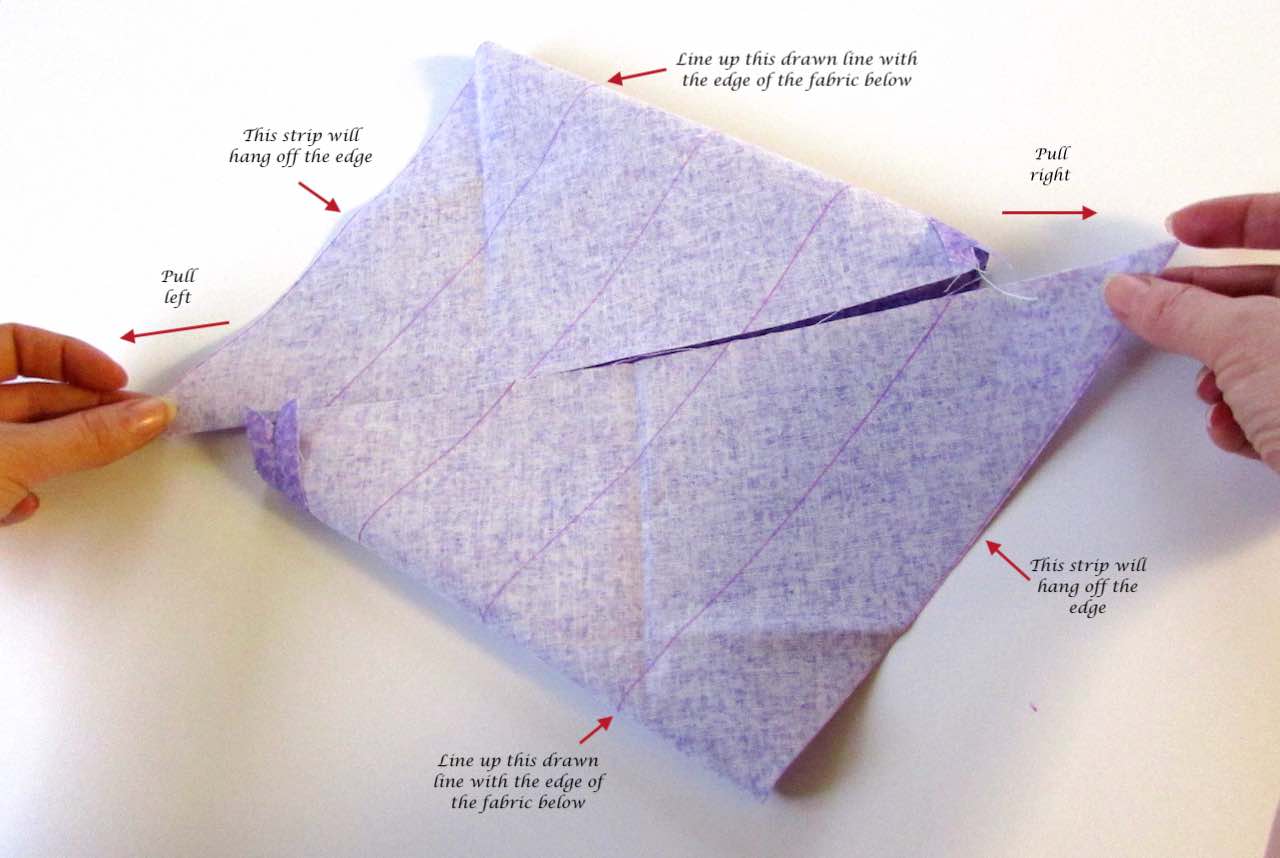
The very last line on both sides should line up along the fabric edge below it. This should leave the two end strips hanging off the edge.
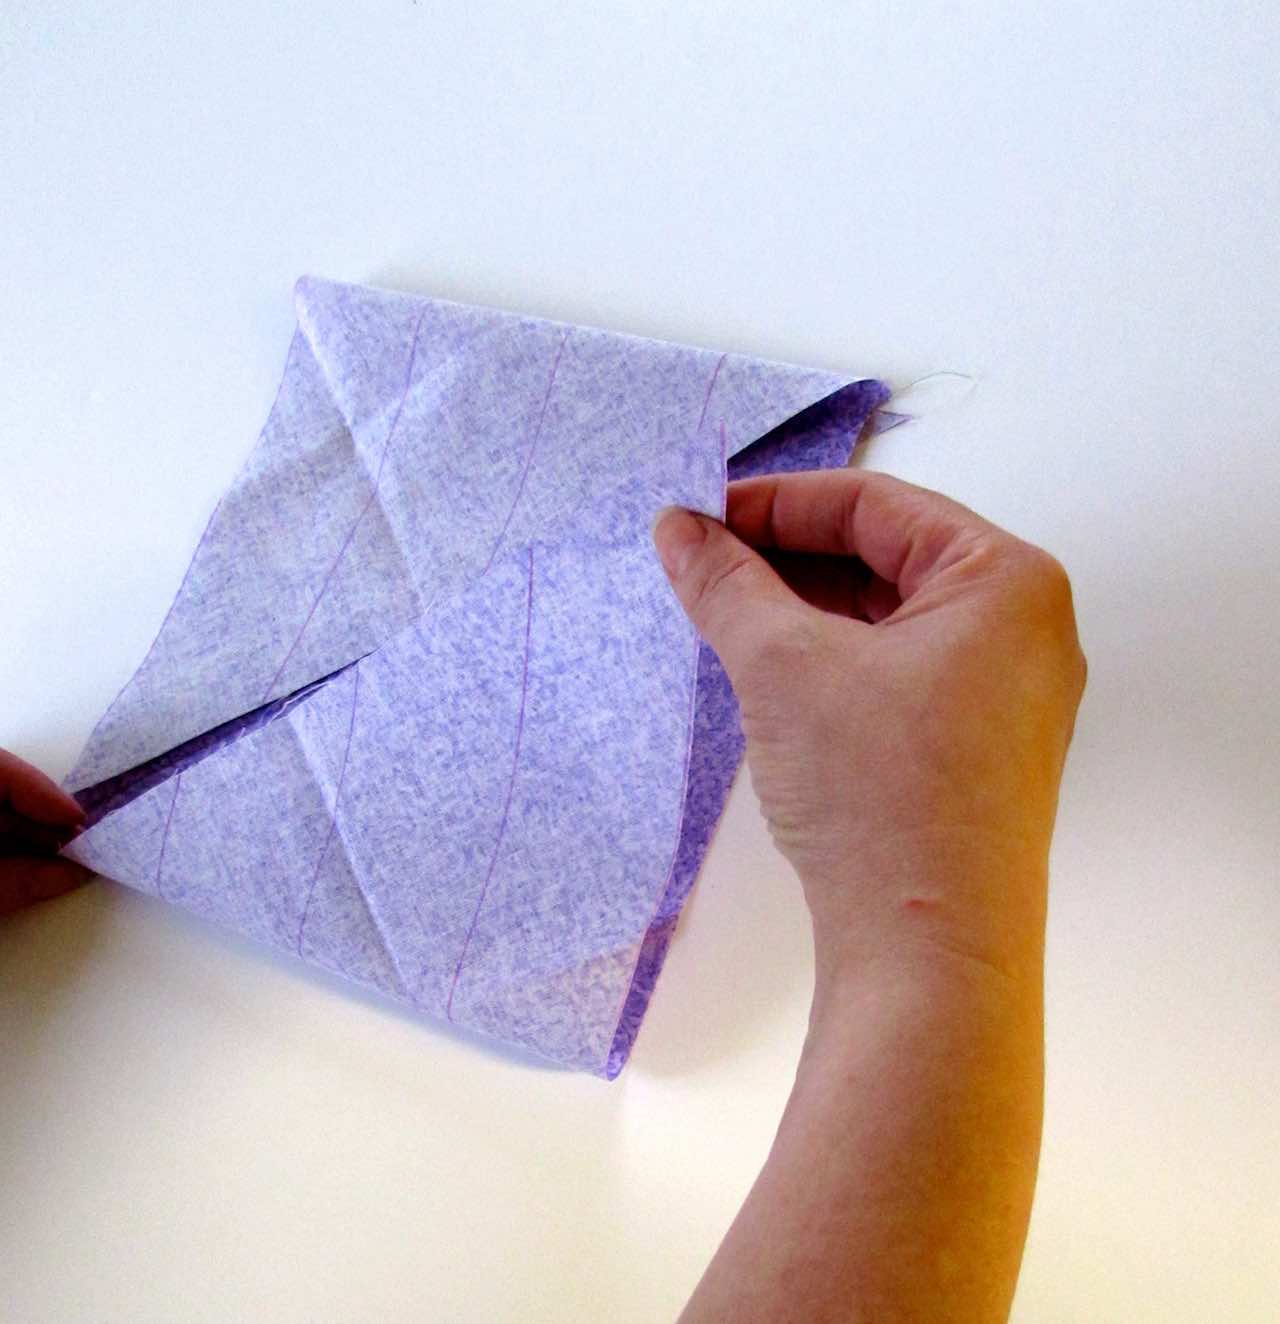
Step Nine
Now, this is the tricky part.
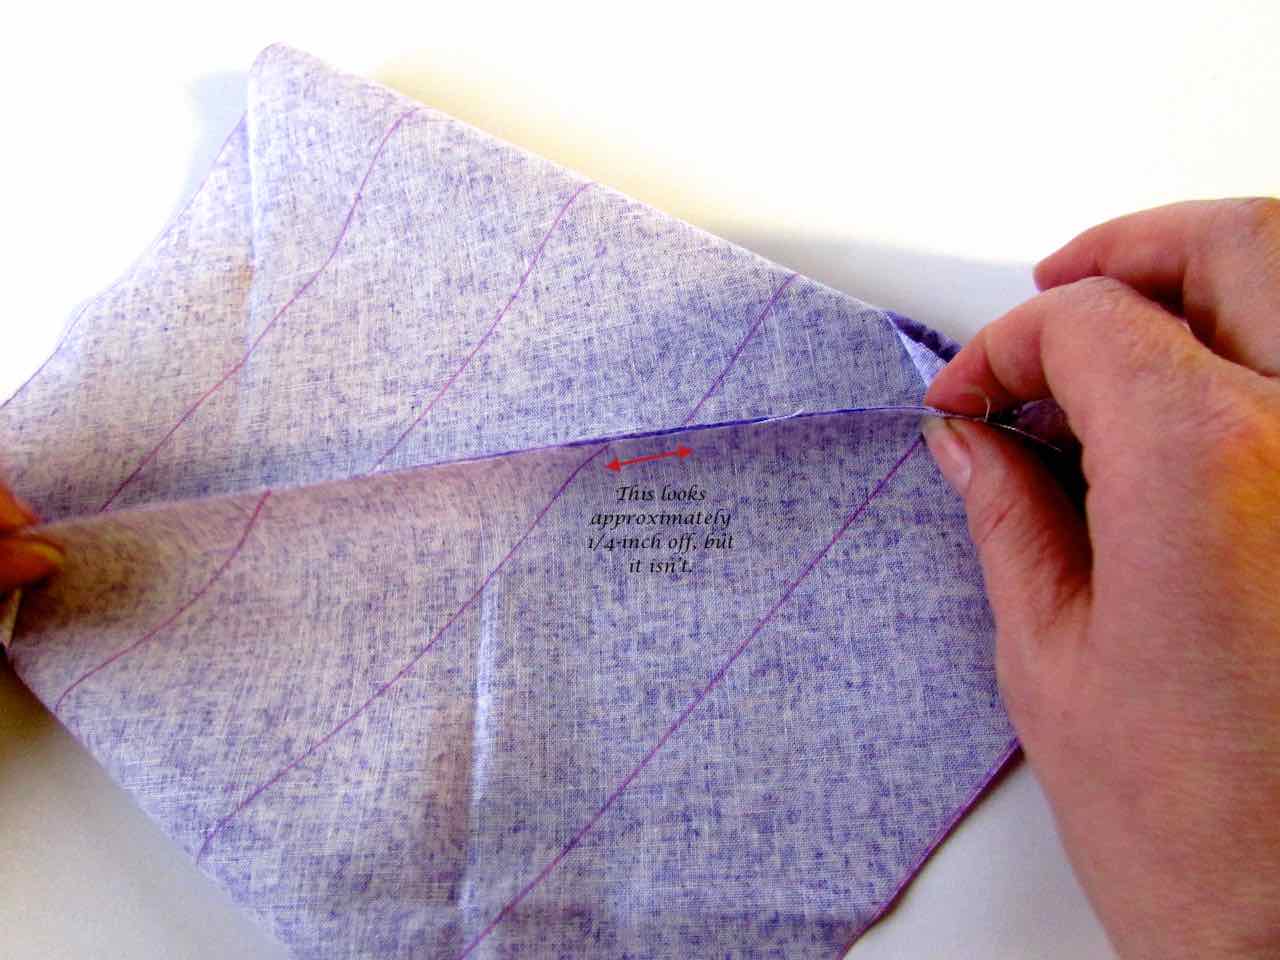
Keeping the lines shifted over one line, but still lined up, grab the two edges of the fabric (which are at the center of the project). Pull up gently, trying to force the edges to face each other, with right sides together.
This can feel awkward as the fabric has been shifted and cut at angles, but try your best to line up those edges.
You’ll notice that once you have those edges pulled up and together, the drawn lines will appear as if they no longer match up. They can look about 1/4-inch off from each other, but they actually are not. If you do not see this space between the drawn lines in this step then you have not done it correctly.
Then pin those edges together with straight pins. There will be a strip on each end that will not be pinned together.
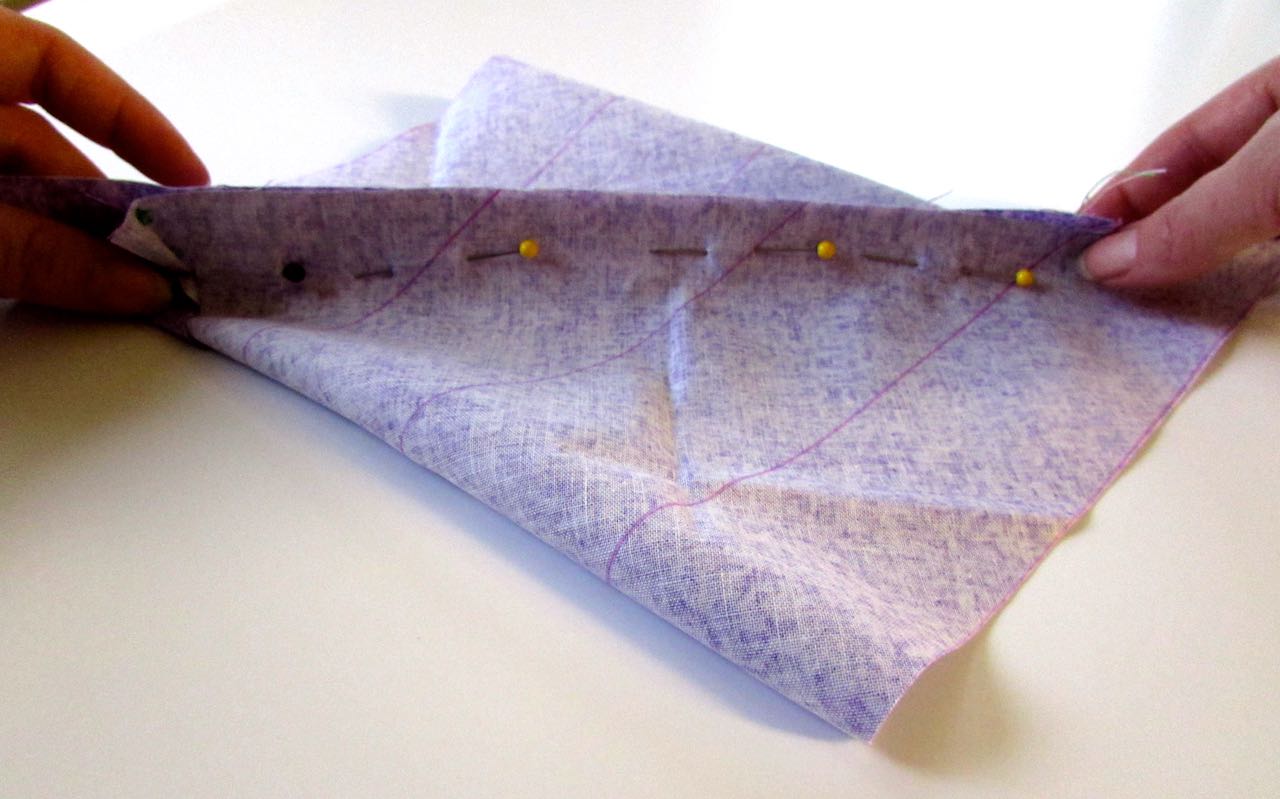
Step Ten
Sew along the pinned edges leaving a 1/4-inch seam allowance. When you do this, make sure that you start and stop your stitching just before the drawn lines on the strips that hang off of each edge.
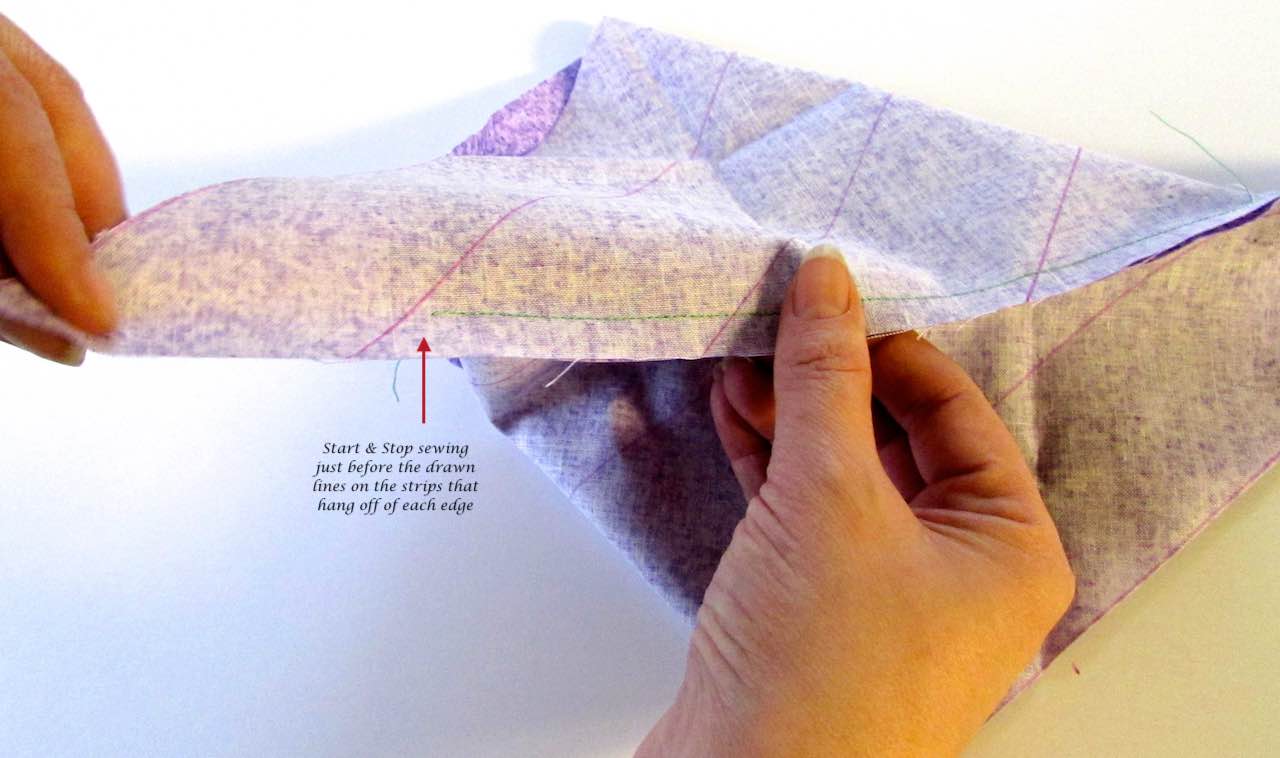
Then iron it open. You will have now created a ‘tube’ of fabric.
Step Eleven
Starting with one strip that was not pinned or sewn in the last seam, use fabric scissors to cut along the lines you marked earlier. As you continue to cut, you will see that you are cutting in a spiral around the tube.
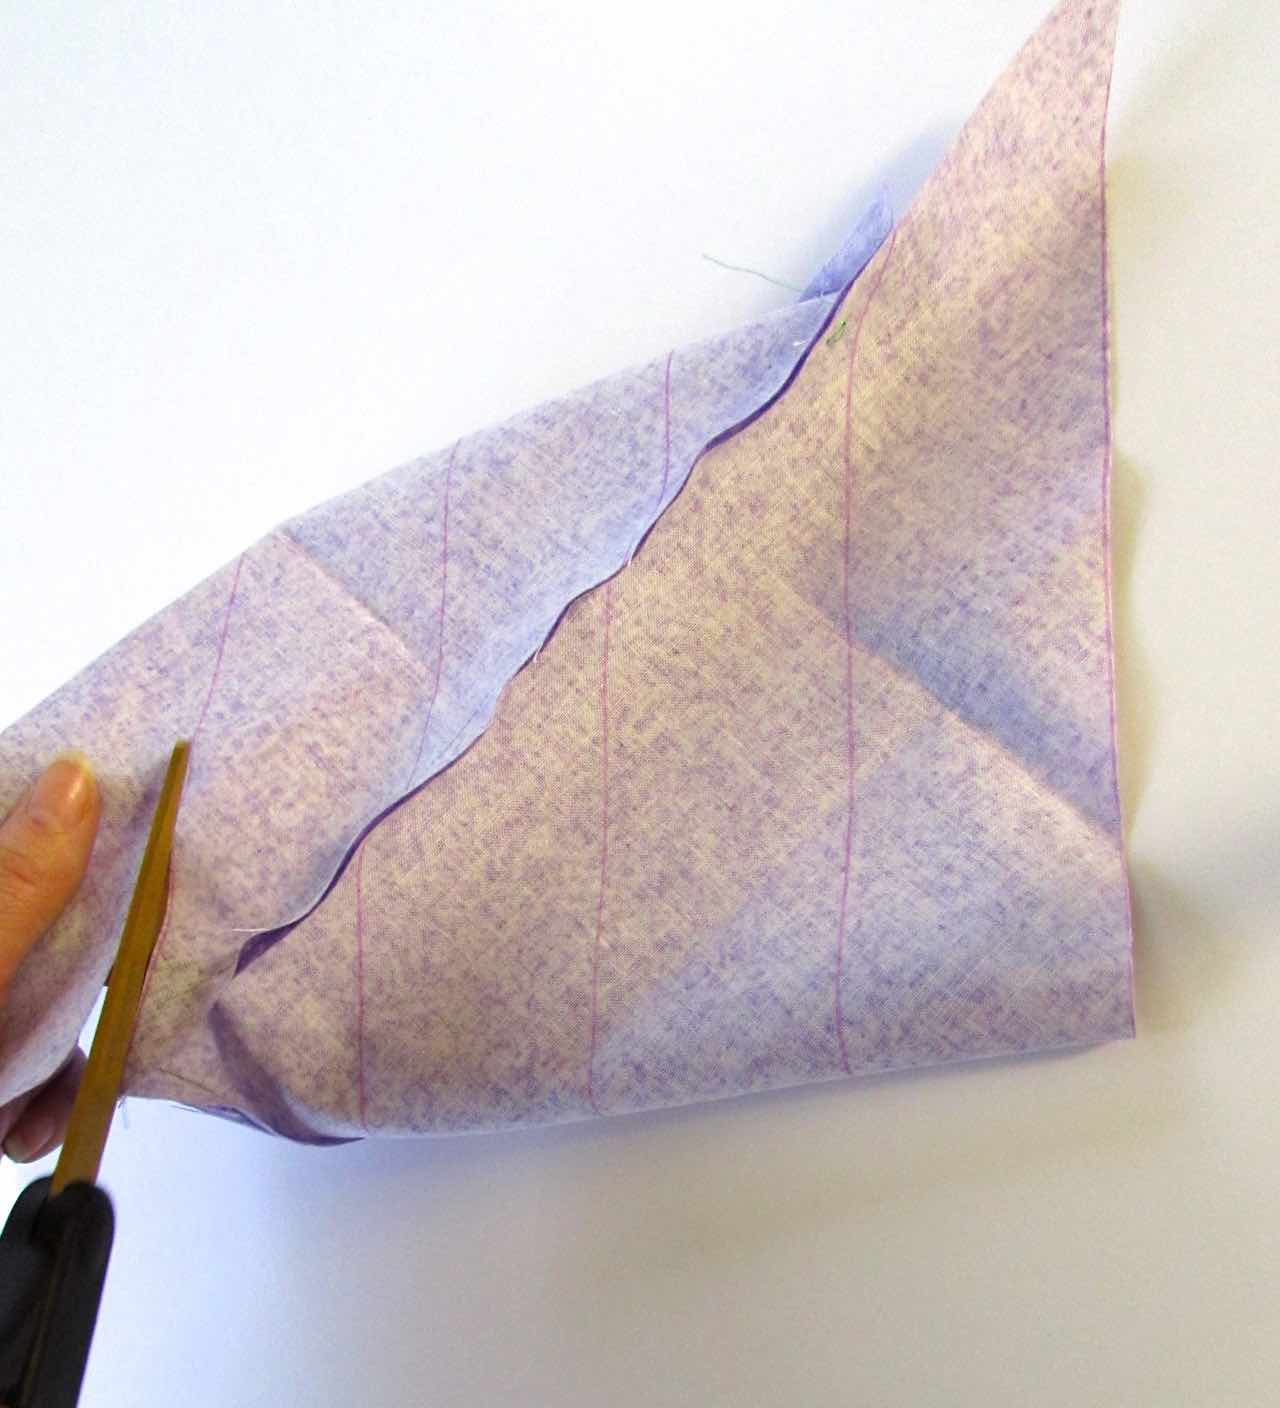
NOTE: As you can see in the picture above, I actually forgot to iron open the seam before I started cutting. Luckily I had not cut much. If this happens to you, don’t stress. Simply stop cutting, iron open the seam, and then finish the cutting. This is what I did and it worked out just fine!
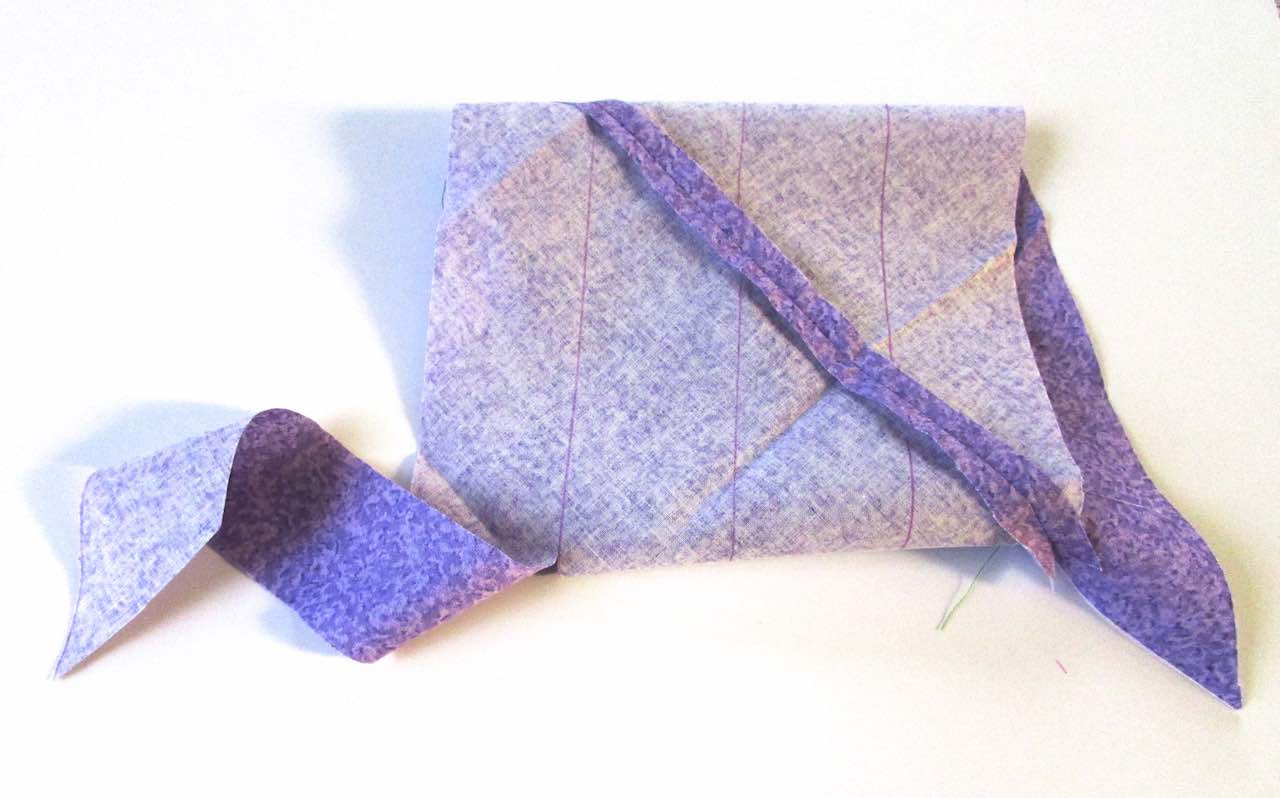
Eventually, you end up with one continuous strip of fabric and voilà you’ve just created continuous bias binding tape!
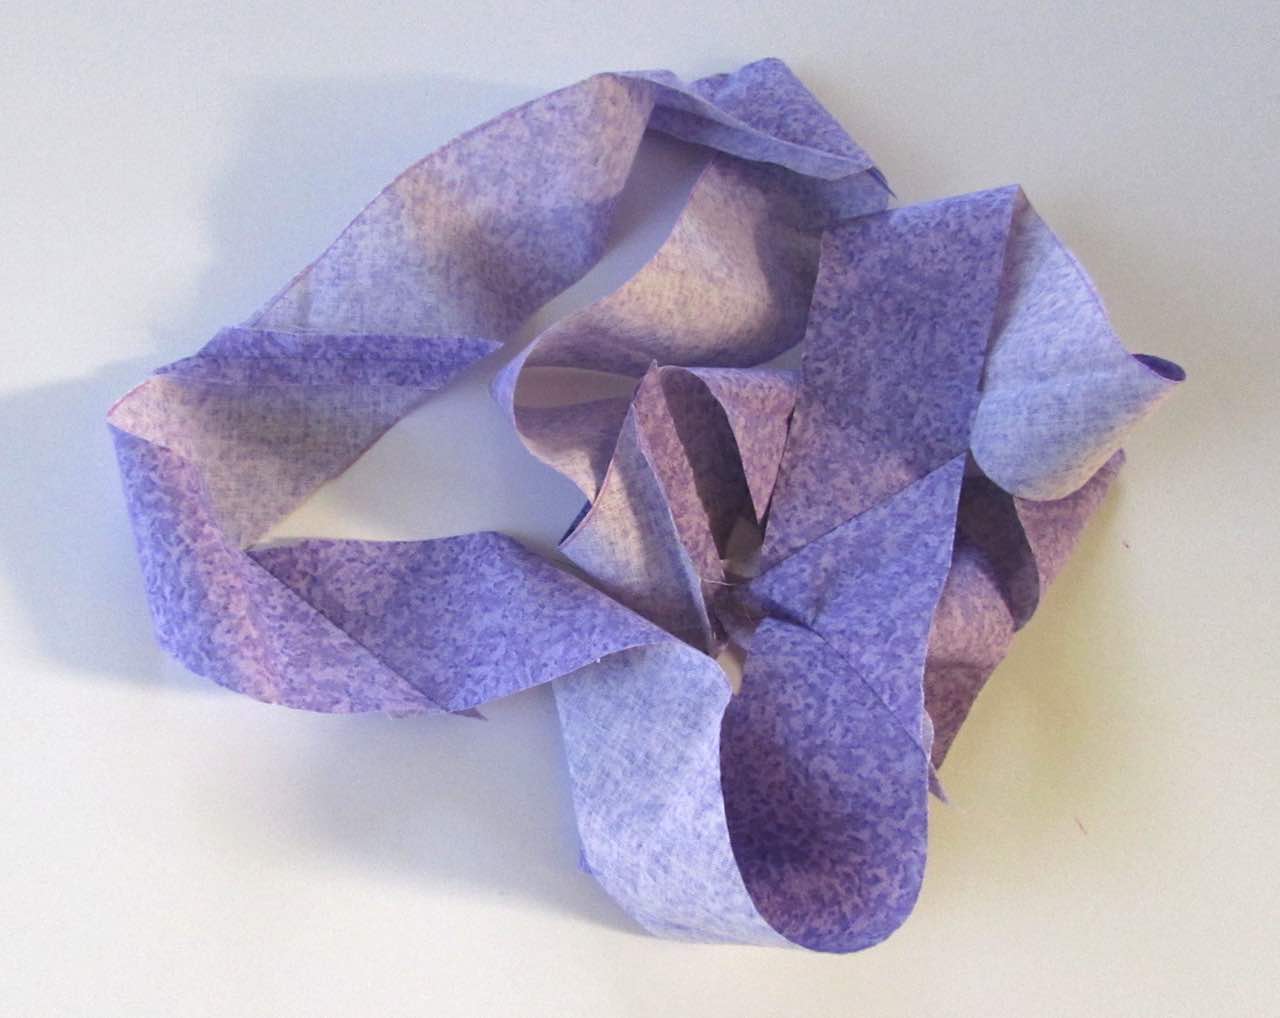
Now that you have your bias tape, all you have to do is decide how many times you want to fold it, iron it, and then sew it to the edge of your project. If you don’t know how to do any of that, don’t worry. I will be putting out a tutorial to help you soon.
By the way, I think I forgot to mention one of my favorite things about this tutorial. It came from a subscriber request! I just love it when I can provide a tutorial or tip to help out my loyal followers. 🙂
Please share this post so it can help as many people as possible!
Until next time… Happy Sewing!


Maureen Leffler
Monday 10th of May 2021
This is by far the easiest tutorial for making your ownbias binding . I agree with the other comments that the other tutorials have to be reread each time. Beautifully written and illustrated!
Itchin4Stitchin
Monday 10th of May 2021
Hi Maureen,
Thank you so much! I am so glad I could help. :)
Best wishes,
RaeLynn
Susan
Sunday 15th of December 2019
I absolutely have loved this technique for quite awhile, but always have to reread the steps. This tutorial is by far the best I have seen yet! Thank you so much!
Itchin4Stitchin
Sunday 15th of December 2019
Hi Susan,
Thank you so much for the lovely compliment! I am so glad to hear it! :)
Best wishes,
RaeLynn
Sureen Mitchell
Friday 15th of November 2019
Thank you ever so much for explaining this technique beautifully. Even I, who can be directionally challenged, understand what to do & avoid the pitfalls! Now to try it out....
Itchin4Stitchin
Thursday 21st of November 2019
Hi Sureen,
I am so glad you liked the tutorial! It is actually very easy once you get the hang of it! Plus, it's way cheaper than buying bias tape all the time - and more fun too. :)
Best wishes,
RaeLynn
Sureen
Friday 15th of November 2019
Thank you ever so much for explaining this technique beautifully. Even I, who can be sometimes directionally challenged, understand what is happening! Now to try it out!
Joanne
Monday 14th of October 2019
This is the best picture instruction I have viewed for making your own bias. Now I can complete my projects! Thank you , thank you !!
Itchin4Stitchin
Monday 14th of October 2019
Hi Joanne,
Wow, what a compliment! Thank you so much! I am so glad my tutorial has helped you. ?
I’d love to see your project! Feel free to email me photos at [email protected]
Best wishes,
RaeLynn