Ya’ll, winter is here!
That’s why I am so excited to bring you my latest pattern.
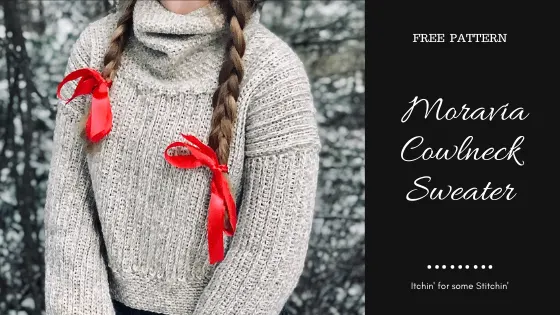
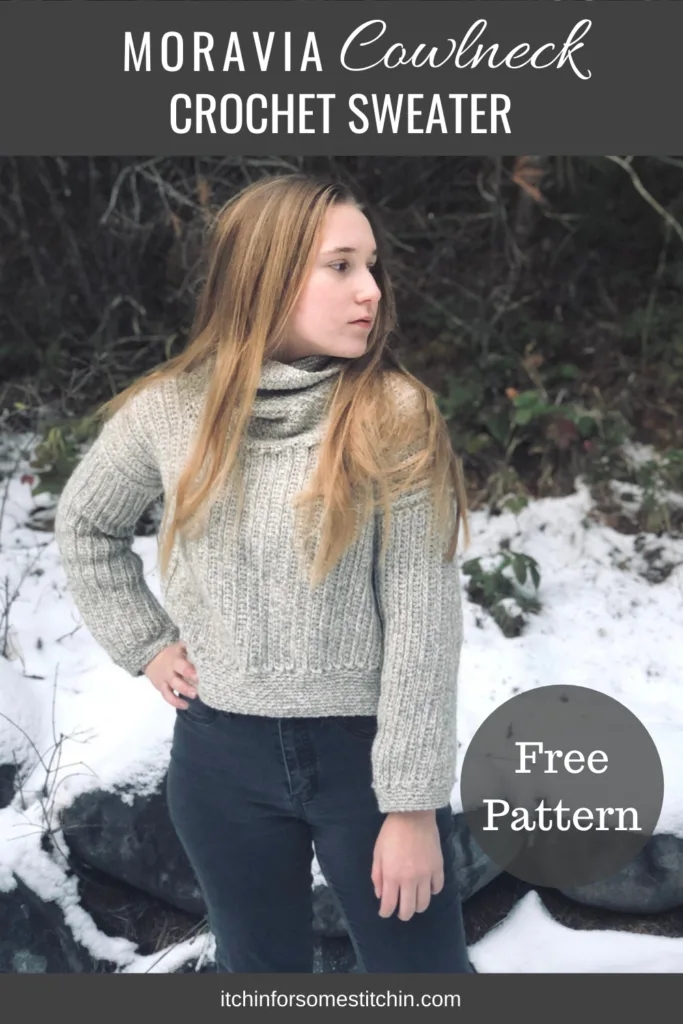
It’s a crochet turtleneck sweater pattern and it’s my first one ever!
You see, ever since my family and I moved to the mountains last year, we’ve been expecting a very cold winter.
It started snowing here in early October and has been off and on since.
Now, it turns out this is actually an unseasonably warm winter here, but to us – it’s cold.
We are not used to so much snow!
So, of course, I had to design a super warm sweater for this winter and why not make it a turtleneck?
They are, after all, my faves!
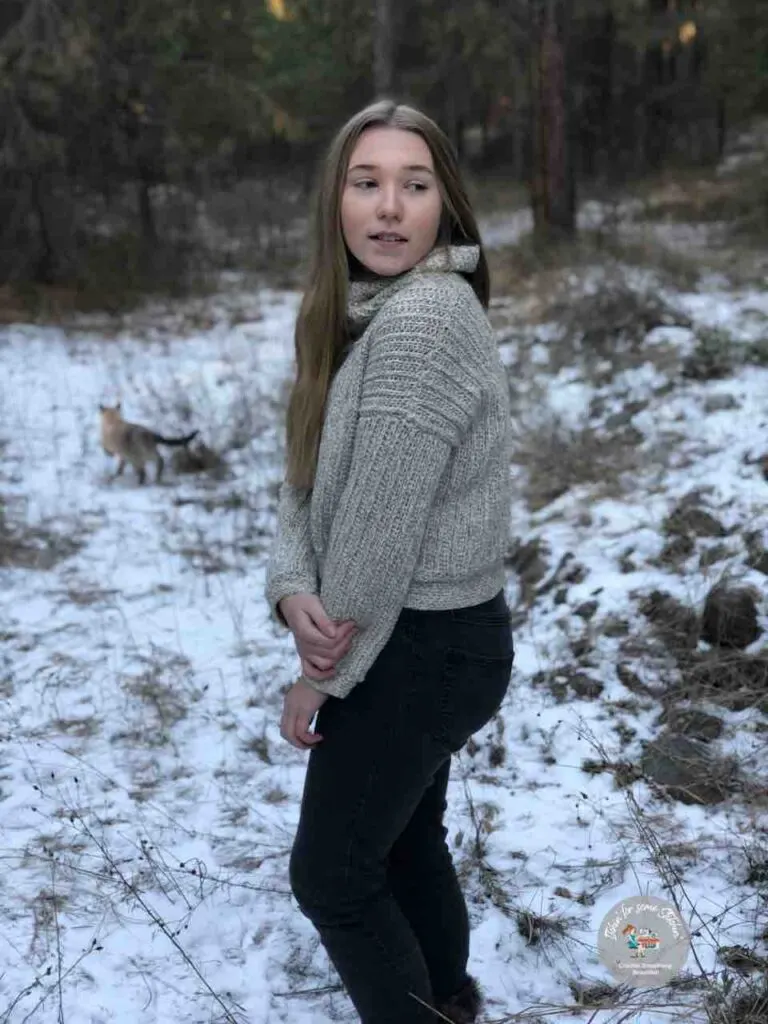
And, believe it or not, designing my first turtleneck didn’t turn out to be as complicated as I first thought.
You’ll seriously be shocked at how easy it is to whip up! 😃
Looking for lots of crafty inspiration, tips, tutorials, and a great crochet community? Join my Facebook group!
Yarn Details: It’s all about the yarn baby!
I chose Knit Picks Simply Wool Twist from We Crochet for this project because I wanted something warm, but still soft.
This yarn did not disappoint.
It’s hands down one of my favorites to work with for winter wear!
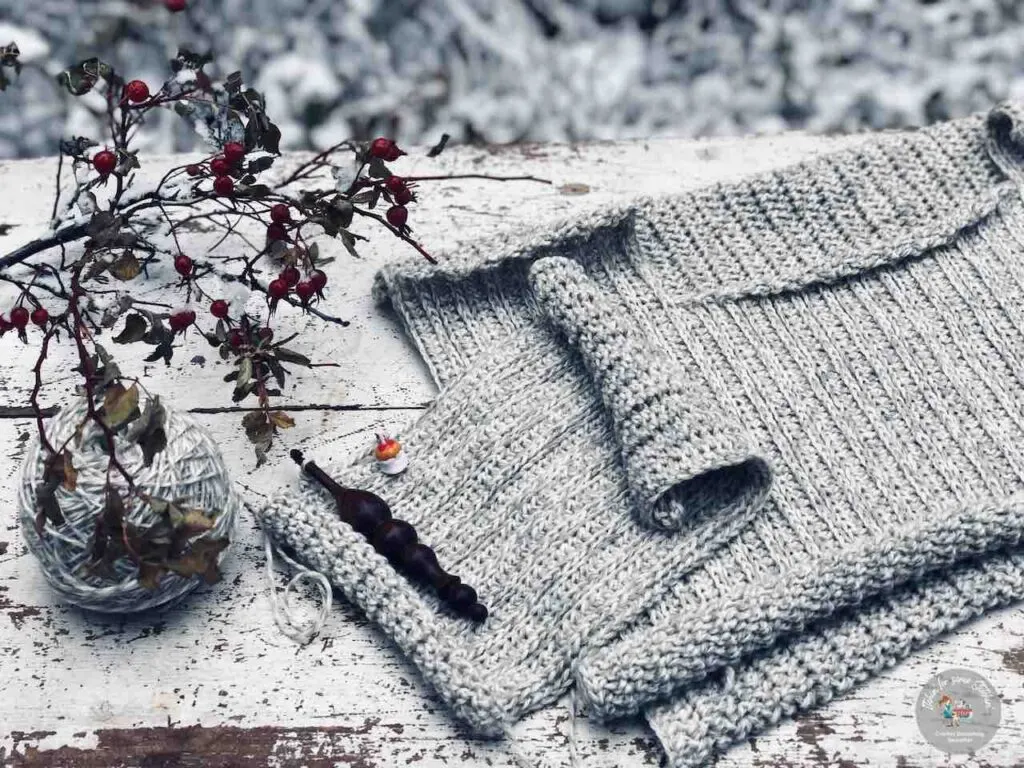
I also wanted a very natural, classic look and every color in the Simply Wool Twist would have done beautifully, but I am a little partial to gray so I decided on Winkle & Wanda.
I couldn’t be happier with my choice. It is EXACTLy the look I was going for!
Want to test out this fabulous yarn yourself?
You can purchase it via my affiliate link below.
Check Out These Other Patterns I LOVE!

1. Winter Wonderland Triangle Shawl / 2. Alpine Ridges Comfort Scarf / 3. Simply Chic Buffalo Plaid Fingerless Gloves
How to Crochet the Moravia Cowlneck Sweater
**THIS IS AN ORIGINAL PATTERN. Please see my Copyright Statement for details.
Prefer a PDF?
This pattern is available as a large print, ad-free, printable PDF pattern. It includes sizes XS – 5X.
Get it in these places:
Love Pinterest? I do!
PIN this pattern to your Pinterest boards for later HERE.
You can also follow all my boards!
Summary:
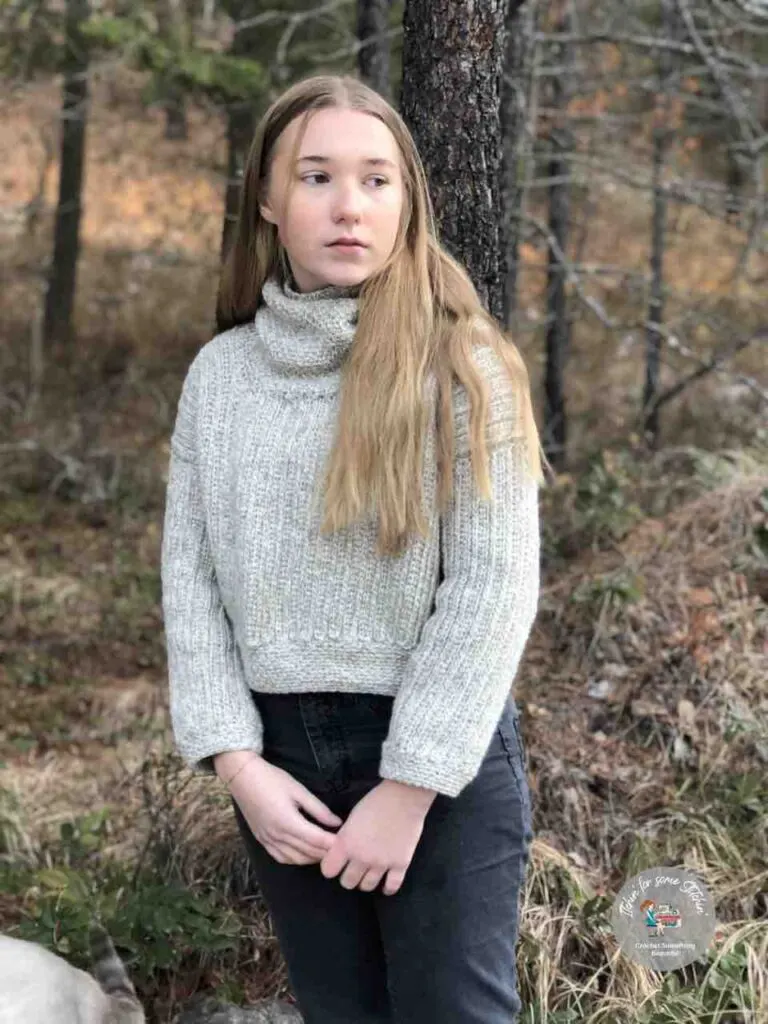
Elegance, comfort, warmth. That’s what the Moravia Cowl Neck Sweater is all about! Easy to put together and absolutely perfect for those colder days of the year. Designed using a super soft wool blend, you’ll stay toasty and cozy while flaunting your fabulous sense of style!
Difficulty level: Level 2 – Advanced Beginner
Finished Dimensions:
Small (S): 32-34 chest fit / 17 total length / 14.5-15 width (shoulder to shoulder) / 9 neck opening / 17 sleeve length (underarm to cuff)
Sizes XS-5X are available in the PDF version available for purchase HERE.
Gauge:
18 stitches and 13 rows = 4-inches in knit-like stitch (See description below under INSTRUCTIONS) OR 11-14 sc = 4-inches.
Materials:
- Knit Picks Simply Wool Twist worsted-weight (4) yarn from We Crochet, 100% Eco Wool, colorway Winkle & Wanda.
~Yarn alternatives: Caron Simply Soft (use G/4.0mm hook), Bernat Super Value, I Love This Yarn, Lion brand Jeans.
- Crochet Hook size I/9 5.5mm or whatever hook is necessary to obtain the correct gauge.
~ Total yardage: 218 yards / 100 grams per skein. S = 6 skeins, approx. 1308 yards.
- Measuring tape
- Stitch markers (optional)
- Scissors
- Tapestry needle for weaving in ends
(Click HERE to find my favorite crochet tools & resources)
Abbreviations:
Pattern is written in US terms. *Click on abbreviation names for tutorials
Stitch/es (st/sts)
3rd loop (aka. diagonal loop or front loop)
*____* Repeat indicated instructions
Additional Notes:
- Read all pattern notes, instructions, and other provided details carefully before starting the project to make sure you understand everything. It could save you hours & a lot of headaches!
- Make a swatch that measures at least 10 x 10 cm / 4 x 4 inches using the stitch provided under the Gauge Section. If your swatch matches the gauge, then you are all set to start the project. If the gauge is wrong, you might need to change your crochet hook – increase your hook size if your stitches are smaller & decrease your hook size if your stitches are larger.
- All measurements given are unblocked and measured flat pre-wear and pre-seaming as fabric pieces may stretch during after blocking, wearing, and seaming.
- Provided measurements are as exact as possible, but are given as approximates. This is because yarn variances, crochet tension, & individual technique might give variations in the result, which changes from person to person.
- This pattern works best with soft pliable yarn.
- Pattern is worked from side to side rather than top down or bottom up.
- Because the pattern is worked from left to right, it is easily adjustable. Please be sure to take your own body measurements and let those measurements serve as your guide. The Craft Yarn Council has a Standard Body Measurement guide you can use as reference for taking your own body measurements.
- Edges of each piece will curl substantially and appear misshapen, however, as long as you maintain proper stitch count throughout your project will be successful.
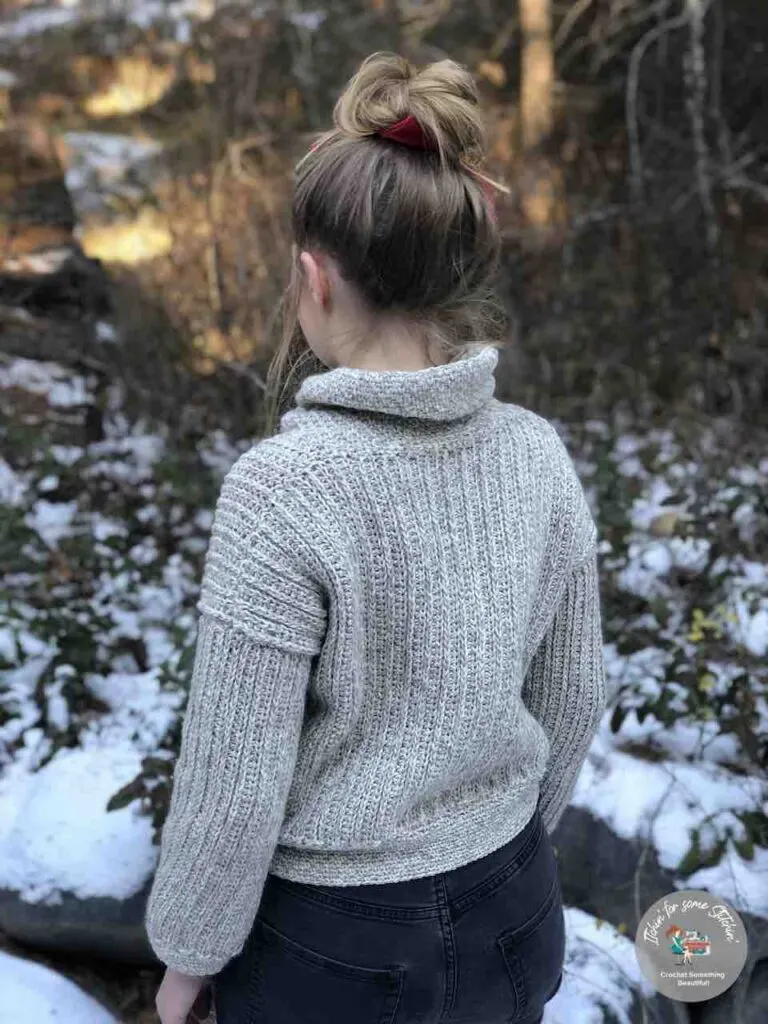
- Photographs are depicted with the model wearing size small.
- Some photos in the pattern are depicted using Lion Brand Jeans yarn.
- Care Instructions: Hand wash & lay flat to dry.
Instructions:
This pattern uses the “knit-like” stitch – a two row repeat in which one row you hdc in the 3rd loop and in the other row you hdc into the blo. This creates a ribbing effect.
Back of Sweater
Ch 64
Row 1: Hdc in 3rd ch from hook (counts as your first hdc st) and in each ch across (62 sts)
Row 2: Ch 2 (does not count as a st), turn work, hdc in the 3rd loop across to last st, hdc under the top two loops of the last st (this should be the first hdc of row 1 that counted as a st) (62 sts)
Reference: How to Work in the 3rd Loop
Row 3: Ch 2 (does not count as a st), turn work, hdc in blo across to the last st, hdc (as normal, ie. under both front & back loops) (62 sts)
Row 4: Ch 2 (does not count as a st), turn work, hdc in the 3rd loop across to last st, hdc (as normal, ie. under both front & back loops) (62 sts)
Repeat rows 3 and 4 until fabric measures the fabric width provided below (in inches). ***The number of rows may vary based on choice of yarn, tension, and hook size. If you are using the yarn and hook indicated in this pattern AND you have met gauge properly, the approximate number of rows is provided in ( ).
FABRIC WIDTH / (APPROX. # OF ROWS) / FABRIC LENGTH
S: 18.5 / (59) / 14.75
NOTE: Fabric length of the BACK panel is the total length for your size from the “Final Dimensions” section above minus the approximate 2.25-inch hem measurement. Please be sure to take your own body measurement and adjust the pattern to your individual needs/taste by adding or removing stitches to make your sweater length longer or shorter as needed/desired.
Front of Sweater
The front piece of the sweater is worked as one piece, but in three sections – left shoulder, neck area, and right shoulder.
Front of Sweater – left shoulder
Ch 64
Row 1: Hdc in 3rd ch from hook (counts as your first hdc st) and in each ch across (62 sts)
Row 2: Ch 2 (does not count as a st), turn work, hdc in the 3rd loop across to last st, hdc under the top two loops of the last st (this should be the first hdc of row 1 that counted as a st) (62 sts)
Row 3: Ch 2 (does not count as a st), turn work, hdc in blo across to the last st, hdc (as normal, ie. under both front & back loops) (62 sts)
Row 4: Ch 2 (does not count as a st), turn work, hdc in the 3rd loop across to last st, hdc (as normal, ie. under both front & back loops) (62 sts)
Repeat rows 3 and 4 until fabric measures the fabric section width provided below (in inches). ***The number of rows may vary based on choice of yarn, tension, and hook size. If you are using the yarn and hook indicated in this pattern AND you have met gauge properly, the approximate number of rows is provided in ( ).
FABRIC SECTION WIDTH / (APPROX. # OF ROWS)
S: 4.75 / (15)
NOTE: Make sure you end on a row 4 repeat even if it is slightly different from the approx. # of rows.
Front of Sweater – neck area
Row 16: Ch 2 (does not count as a st), turn work, hdc in blo in the next (47 sts).
Row 17: Ch 2 (does not count as a st), turn work, hdc in the 3rd loop of the next (47 sts).
NOTE: This should create an approximate 4” shoulder rise.
Repeat rows 16 and 17 until fabric measures the fabric section width provided below (in inches). ***The number of rows may vary based on choice of yarn, tension, and hook size. If you are using the yarn and hook indicated in this pattern AND you have met gauge properly, the approximate number of rows is provided in ( ).
FABRIC SECTION WIDTH / (APPROX. # OF ROWS)
S: 9 / (29) (This should put you around row 45)
- Do NOT cut your yarn, simply continue on to the next row.
Front of Sweater – right shoulder
Row 45: Ch 18 (this will hang off the main fabric – what you are doing here is extending your fabric to make the right shoulder the same length as the left shoulder), turn work, hdc in the 4th ch from hook and in each ch across (15 sts) until you meet back up with the main fabric, hdc in the the 3rd loop of the next (47 sts).
NOTE: 47 sts on the main fabric plus 15 sts extending from the main fabric should create your original stitch counts of 62 sts.
Row 46: Ch 2 (does not count as a st), turn work, hdc in blo across to the last st, hdc (as normal, ie. under both front & back loops) (62 sts)
Row 47: Ch 2 (does not count as a st), turn work, hdc in the 3rd loop across to last st, hdc (as normal, ie. under both front & back loops) (62 sts)
Repeat rows 46 and 47 until fabric measures the fabric section width provided below (in inches). ***The number of rows may vary based on choice of yarn, tension, and hook size. If you are using the yarn and hook indicated in this pattern AND you have met gauge properly, the approximate number of rows is provided in ( ).
FABRIC SECTION WIDTH / (APPROX. # OF ROWS)
S: 4.75 / (15)
NOTE: The combined fabric section widths and number of rows of the 3 sections of the FRONT panel should equal the total width and number of rows of the BACK panel.
FABRIC LENGTH = S: 14.75
NOTE: Fabric length of the entire FRONT panel is the total length for your size from the “Final Dimensions” section above minus the approximate 2.25-inch hem measurement. This measurement should be EXACTLY the same as the measurement you have for the length of the BACK panel. Please be sure to take your own body measurement and adjust the pattern to your individual needs/taste by adding or removing stitches to make your sweater length longer or shorter as needed/desired.
Sleeves (Make 2)
Ch 65
Row 1: Hdc in 3rd ch from hook (counts as your first hdc st) and in each ch across (63).
Row 2: Ch 2 (does not count as a st), turn work, hdc in the 3rd loop across to last st, hdc under the top two loops of the last st (this should be the first hdc of row 1 that counted as a st) (63).
Row 3: Ch 2 (does not count as a st), turn work, hdc in blo across to the last st, hdc (as normal, ie. under both front & back loops) (63).
Row 4: Ch 2 (does not count as a st), turn work, hdc in the 3rd loop across to last st, hdc (as normal, ie. under both front & back loops) (63).
Repeat rows 3 and 4 until fabric measures the width provided below (in inches). ***The number of rows may vary based on choice of yarn, tension, and hook size. If you are using the yarn and hook indicated in this pattern AND you have met gauge properly, the approximate number of rows is provided in ( ).
FABRIC WIDTH / (APPROX. # OF ROWS)
S: 11 / (36)
NOTE: Sleeve length is listed in the “Final Dimensions” section above, however, please be sure to take your own arm measurement and adjust accordingly by adding or reducing the number of stitches to create longer or shorter sleeves as needed.
Assembly:
Step 1: Attach front & back pieces at the shoulder.
- Place the back piece on a table top with the RIGHT side UP
- Place the front on top of the back piece with the WRONG side facing UP and the shoulder edges lined up with the edge of the back piece
- Using your preferred sewing method, seam the two shoulder edges of the front piece to the edge of the back piece.
Step 2: (Sleeve placement) – Open the sweater and place it on the table-top with the RIGHT side facing UP.
- S: Place the 5.5 – inch mark of a measuring tape right at the shoulder seam of the sweater. Inches 0 to 5.5 should extend to the left of the seam. Inches 5.5 to 11 should extend to the right of the seam. Place stitch markers at 0-inch and 11-inches. Do this on both sides of the sweater.
Step 3: Place the edge of the sleeves with WRONG sides facing UP along the edge of the sweater between your two markers.
- Seam the sleeves to the sweater along these edges.
Step 4: Fold sweater so that RIGHT sides are together and sleeves are folded lengthwise in half.
- Seam together the sides of the body of the sweater and along the lengthwise edges of the sleeves.
Finishing:
- Turn the sweater so that the RIGHT sides are now on the outside.
- The collar, hem, and cuffs will be worked around the raw edges. Place your stitches where they are easiest to work and get as close as you can to the stitch count provided in ( ) – NOTE: these stitch counts are only estimates.
Cowl Neck collar
~ Sweater should be right side out
Attach yarn at the right shoulder seam using a slp-st.
Round 1: Sc around the back of the sweater and the neckline, making a total of 102 sts. Slp-st into the slp-st where you attached the yarn.
Round 2: Do not turn work, instead worked continuously around – *Ch 1 (counts as a st; mark with a st marker), skip the next st, sc in the next st*; Repeat from * to * around ending with a sc in the ch 1 from the start of the round. (102 sts)
Round 3: Do not turn work, instead worked continuously around – Ch 1 (counts as a st; mark with a st marker), Sc into the next chain space (where you chained 1 in the previous round), ch 1, *sc in next chain space, ch 1*; Repeat from * to * around (102) sts.
Rounds 4 – 41: Repeat round 3 (approximately 8.25-inches) or until the turtleneck reaches your desired length, slp-st to close. (102 sts).
Cuffs
~ Sweater should be right side out
Attach yarn at the bottom seam using a slp-st.
Round 1: Sc around the sleeve, making a total of 46 sts.
Round 2: Do not turn work, instead worked continuously around – *Ch 1 (counts as a st; mark with a st marker), skip the next st, sc in the next st*; Repeat from * to * around ending with a sc in the ch 1 from the start of the round. (46 sts).
Round 3: Do not turn work, instead worked continuously around – Ch 1 (counts as a st; mark with a st marker), Sc into the next chain space (where you chained 1 in the previous round), ch 1, *sc in next chain space, ch 1*; Repeat from * to * around 46 sts.
Rounds 4-5: Repeat round 3 (approximately 1.25-inches) or until the cuff reaches your desired length, slp-st to close. (46 sts)
Bottom (hem) of sweater
~ Sweater should be right side out
Attach yarn at the left sweater seam using a slp-st.
Round 1: Sc around the hem, making a total of 156 sts.
Round 2: Do not turn work, instead worked continuously around – *Ch 1 (counts as a st; mark with a st marker), skip the next st, sc in the next st*; Repeat from * to * around ending with a sc in the ch 1 from the start of the round. (156 sts)
Round 3: Do not turn work, instead worked continuously around – Ch 1 (counts as a st; mark with a st marker), Sc into the next chain space (where you chained 1 in the previous round), ch 1, *sc in next chain space, ch 1*; Repeat from * to * around. (156 sts)
Rounds 4-5: Repeat round 3 (approximately 2.25-inches) or until the hem reaches your desired length, slp-st to close. (156 sts).
That’s it!
I told you it was easier than it looks, didn’t I?
In fact, I think the hardest part about this pattern is the assembly part, which isn’t hard at all.
If you are an at least an advanced beginner or even an absolute beginner with some sewing skills – you can do this pattern!
Please be sure to share your makes with me on social media with #itchinforsomestitchin and #moraviasweater.
Thank you for coming to my blog! By sharing my content and/or making a purchase you are making it possible for me to continue producing and sharing free content for everyone to enjoy. I sincerely appreciate your support!
Until next time… Happy Crocheting!

Please Share!


Lori H
Tuesday 17th of August 2021
Thank you so much the lovely pattern. Also thank you or hosting this Blog Hop and all the other ones you have hosted and participated in.
Itchin4Stitchin
Tuesday 17th of August 2021
Hi Lori,
You are so very welcome! I am so glad you appreciate them and are hoping gathering a collection of patterns that you love. :)
Bet wishes,
RaeLynn
KD
Tuesday 17th of August 2021
Hi RaeLynn! I love the Moravia sweater and I can't seem to add the coupon code on Ravelry. When I click 'add the coupon' button a small box pops up without the usual words and place to type the code.
Itchin4Stitchin
Tuesday 17th of August 2021
Hi KD,
If I had to guess, I think that's happening because you may not be logged into Ravelry. Believe it or not, that happened to me when I was testing my own code! LOL. Logging into Ravelry fixed it. If you are logged in and it is happening, please email me at [email protected] and I will make sure you get the pattern.
Sincere thanks,
RaeLynn
Linda H
Tuesday 17th of August 2021
This sweater is so cute!! I love it!! Thank you!!
Linda H
Itchin4Stitchin
Tuesday 17th of August 2021
Hi Linda,
You are so welcome! I am glad you like it. Please enjoy! :)
Sincerely,
Raelynn
Daniele Ruiter
Tuesday 17th of August 2021
Hi Raelyn, Racerly is doing the same to me. It says the coupon code has expired. Thank you for the month of free patterns. I've been really enjoying them. Dani
Itchin4Stitchin
Tuesday 17th of August 2021
Hi Dani,
You are quite welcome for the patterns! I hope you are enjoying them. As for my coupon code it should not be saying expired - I actually have it running through the evening of the 18th just to be sure everyone gets it - so if you are getting that it is a definite error at this point. Please feel free to email me at [email protected] and I will be sure to get the pattern to you.
Best wishes,
RaeLynn
Christy
Sunday 14th of February 2021
Thank you for the beautiful pattern
Itchin4Stitchin
Tuesday 16th of February 2021
Hi Christy,
You are so very welcome!
Best wishes,
RaeLynn