Summer has arrived!
Time to share my newest summer pattern!
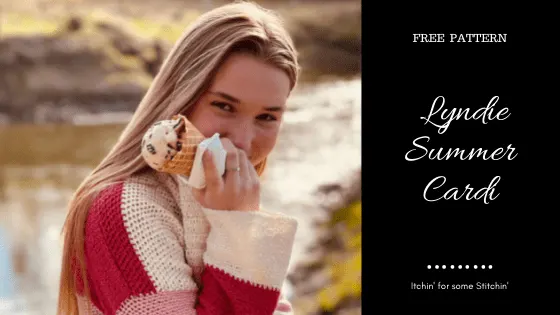
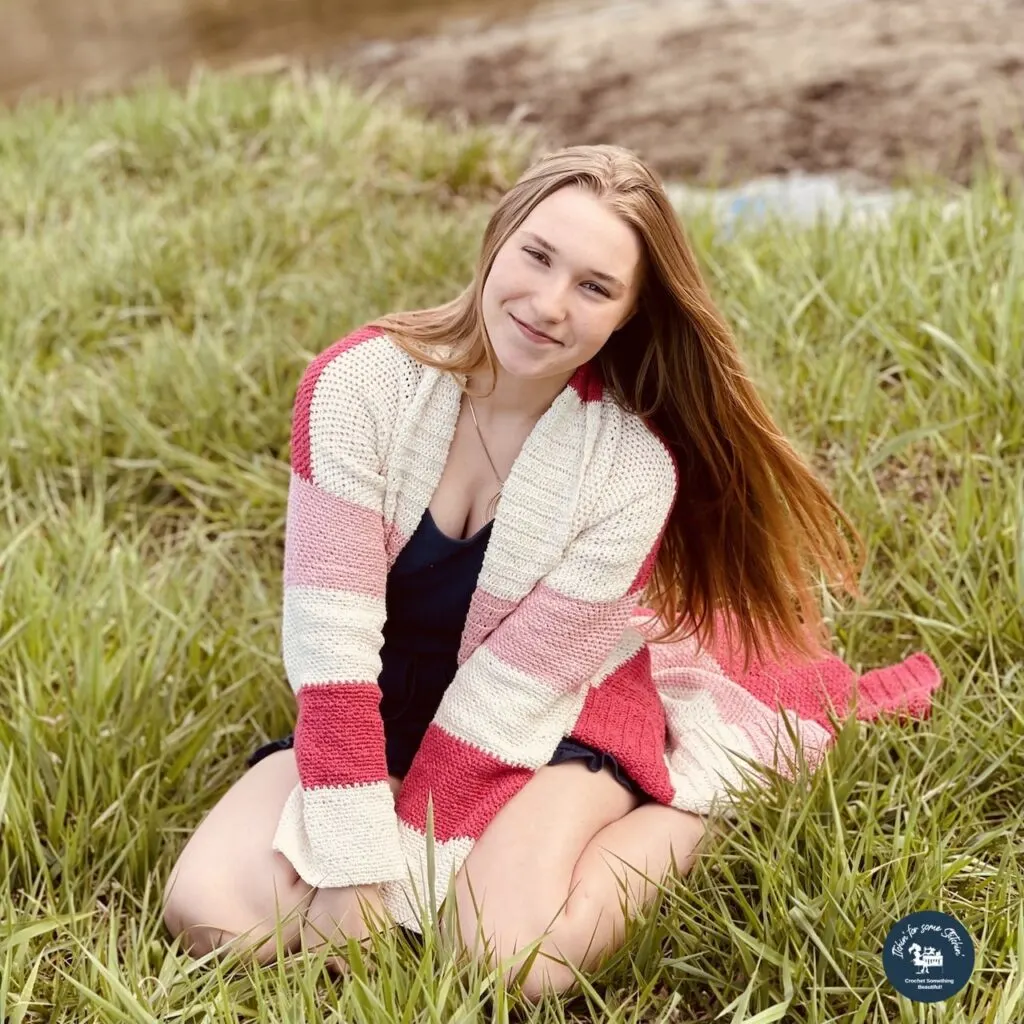
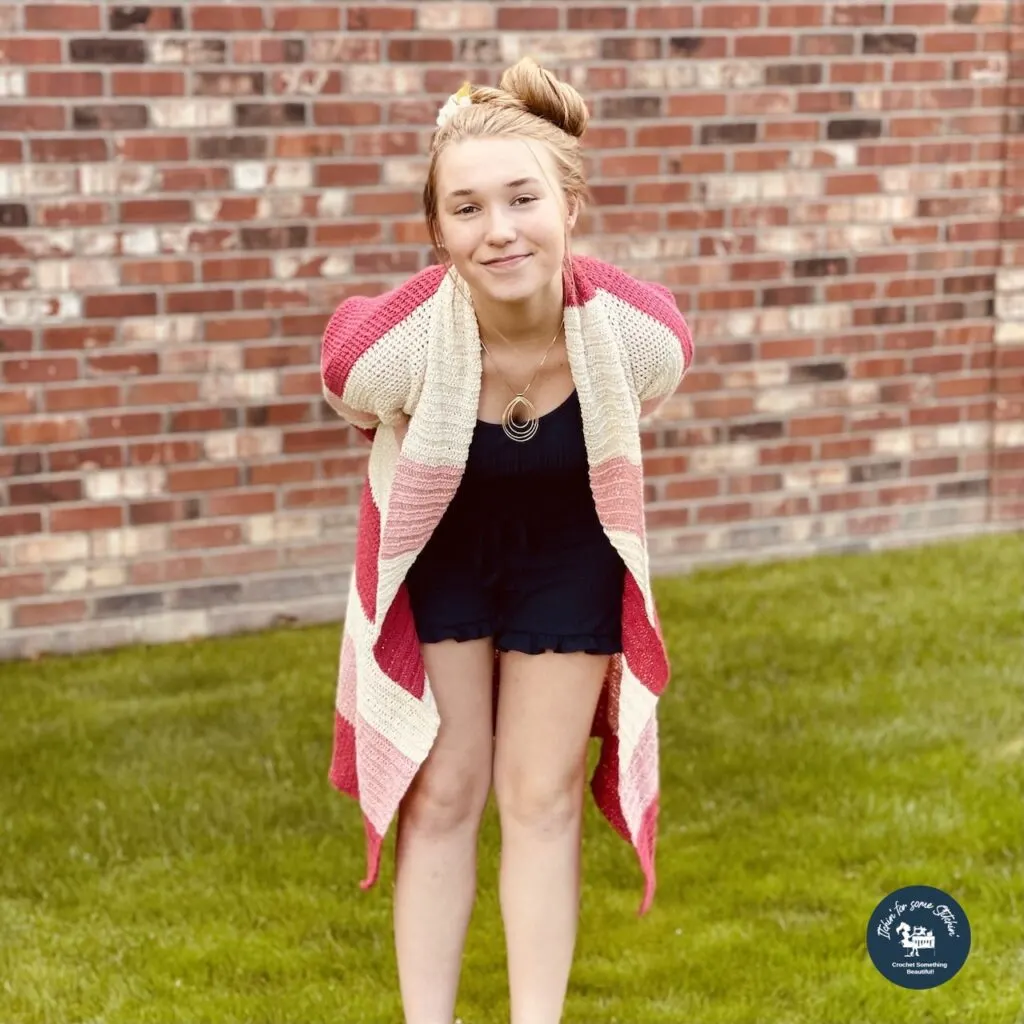
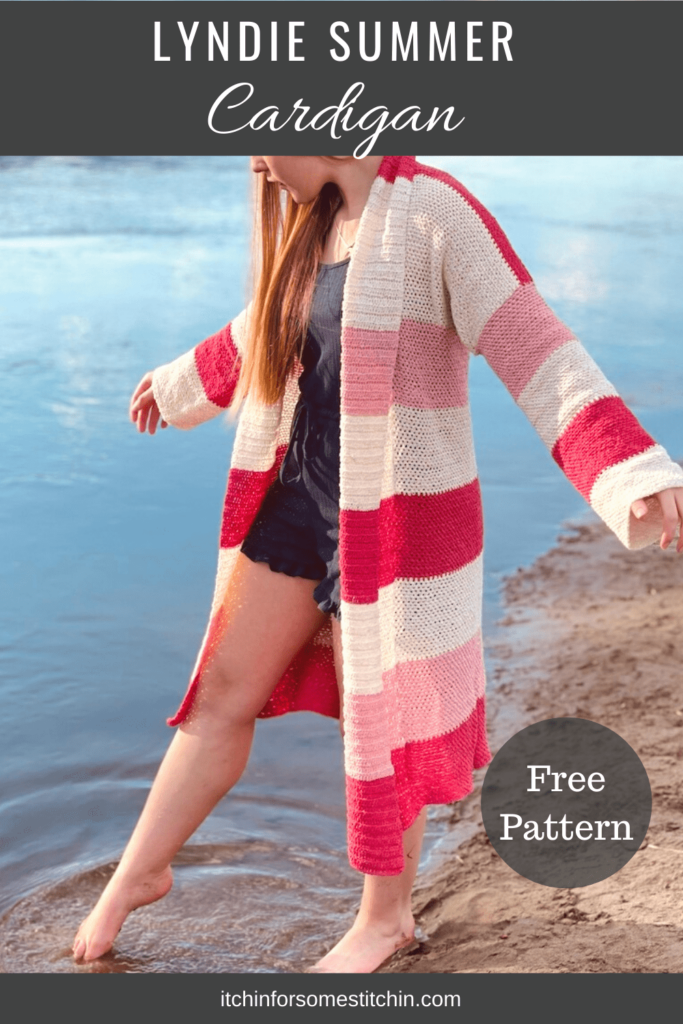
I am so pleased to share with you a long crochet striped cardigan dubbed the Lyndie Cardi.

Cardigans are not just for fall and winter folks. I wear them year round!
Sure cold weather cardigans are snuggly, but warm weather cardigans can add that special pop of color to your casual wardrobe.
The key is to pick a cardi that’s lightweight and full of fun and this summer cardigan totally fits the bill!
I mean seriously, it’s striped ya’ll and stripes are fun!

Plus, it’s actually easier than you might think to whip up because it only requires a few basic stitches and there is virtually no seaming (it’s actually optional!).
Love texture? This cardi has some light texture that’s absolutely beautiful!
Looking for lots of crafty inspiration, tips, tutorials, and a great crochet community? Join my Facebook group!
Yarn Details: It’s all about the yarn baby!
When I decided to design a long summer cardigan I went hunting for the perfect yarn. It had to be very lightweight and made from material known to keep you cool because no one wants a warm heavy sweater in the heat, right?
I also wanted my cardigan to have a lot of drape and I was worried I wouldn’t find exactly what I was looking for.
Believe it or not, I did!
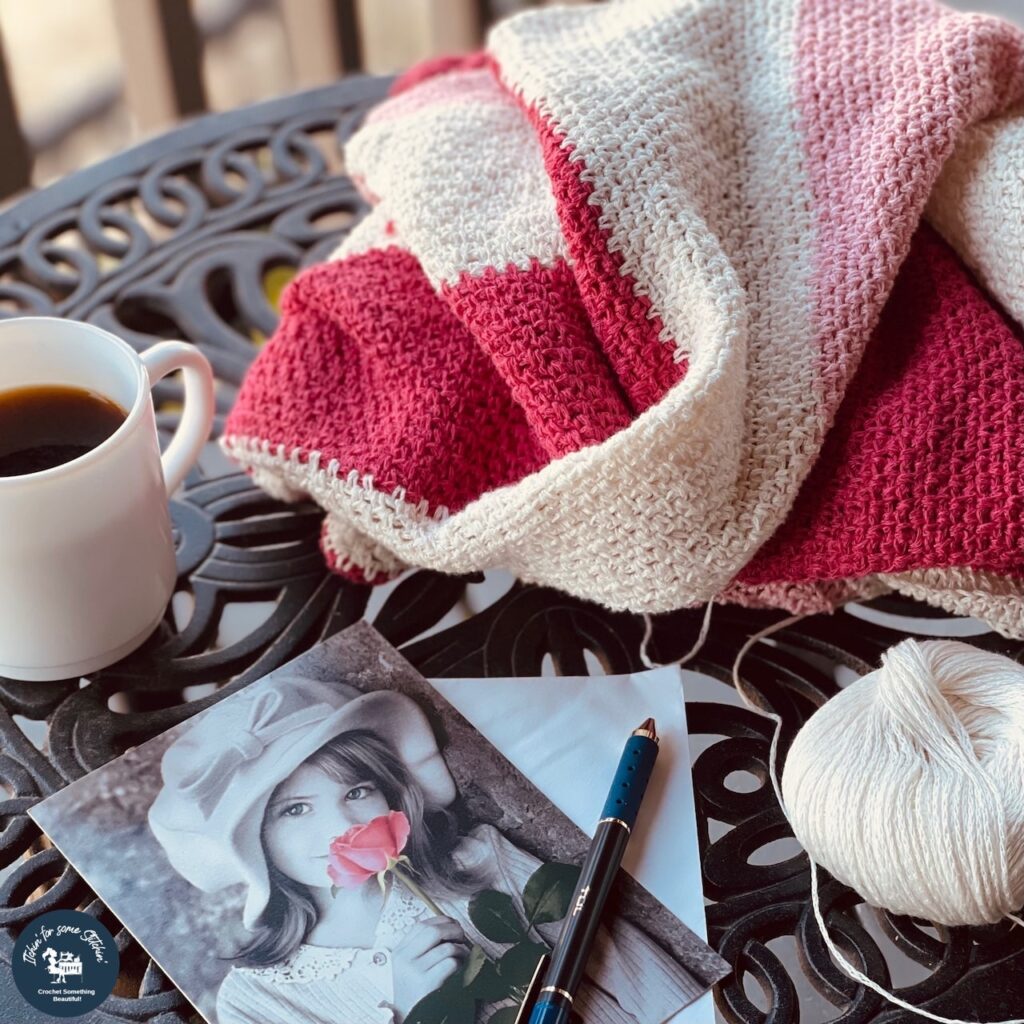
It is a Pima cotton/linen blend called Lindy Chain from KnitPicks/We Crochet in a fingering weight and I honestly don’t think I could have picked a better yarn for this project!

That being said, I’ll admit that I was actually unsure of the yarn when it arrived.
It felt differently than I had expected. I thought it would have a super soft feel like KnitPicks Comfy (affiliate link), but it doesn’t.
My initial reaction was that it feels like a softer version of the yarn used to make kitchen scrubbies and honestly, I wasn’t sure I liked it at first.
But I decided to plow on and use it. And… truth? It took me an entire stripe to get used to it! 😂
I kept snagging the yarn on my hook and eventually learned that with this yarn, I need to crochet more loosely than usual.
I am a tight stitcher by nature, so this took a bit of practice for me, but by the end of the first stripe I had nailed it and I was really starting to love my yarn choice.
By stripe number three, I knew I had chosen wisely. This yarn produced exactly what a I wanted!
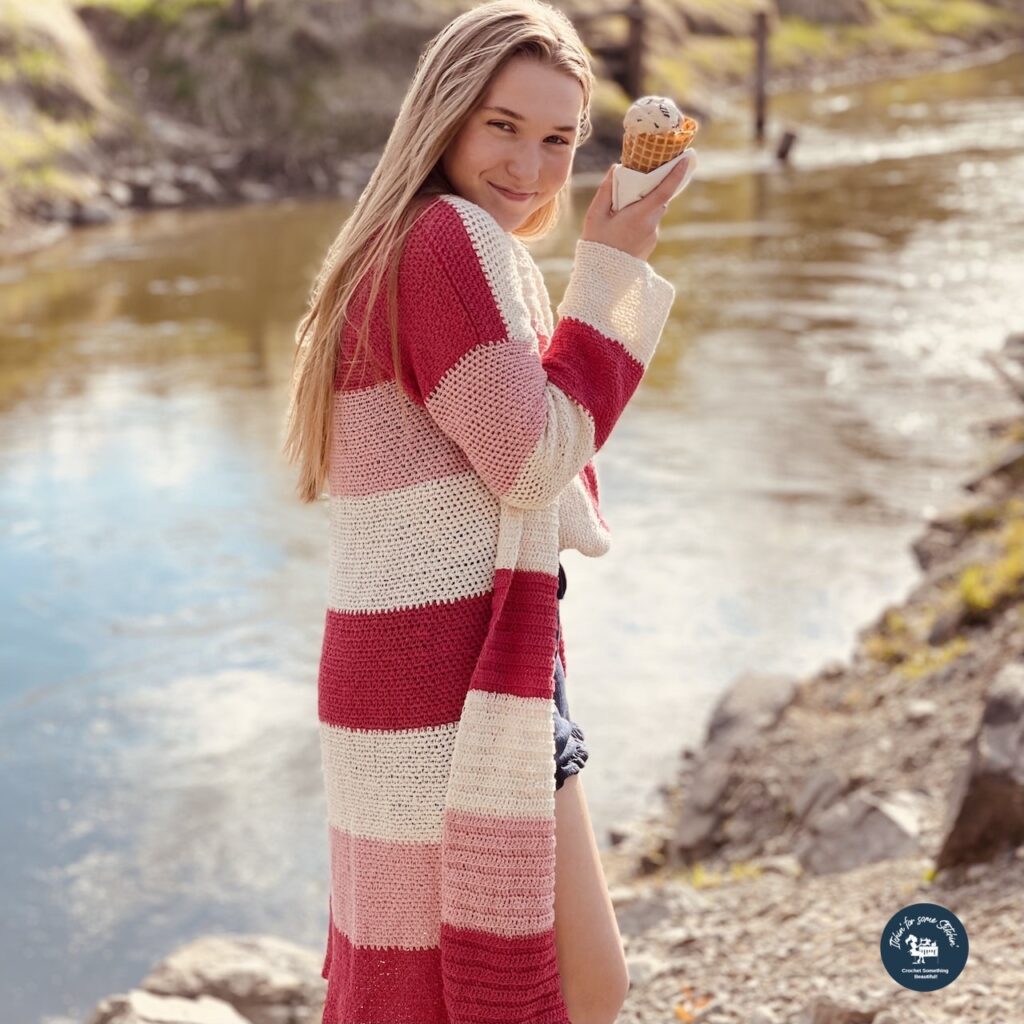
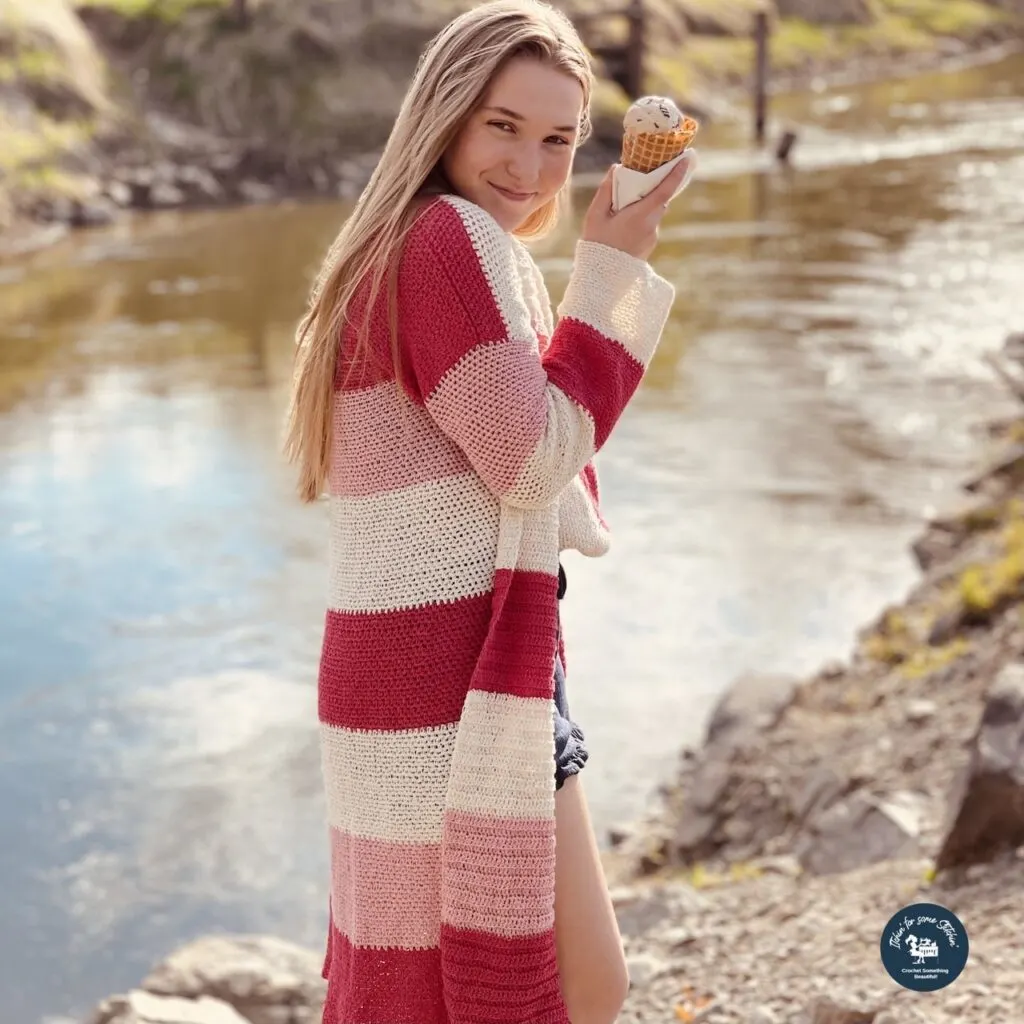
My cardigan ended up being cool, lightweight, with the perfect amount of drape and absolutely beautiful!
Now that I know how to best work with this yarn, it’s going on my list of favorite yarns for summer projects. 😃
You can purchase it via my affiliate link below.
Check Out These Other Patterns I LOVE!

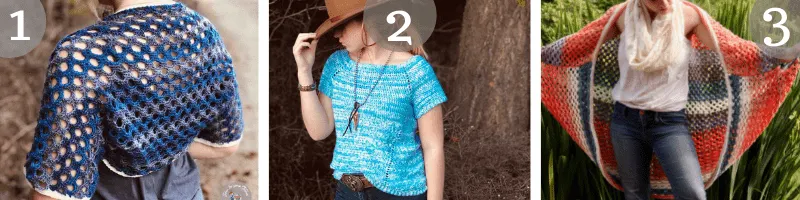
1. Victoria Honeycomb Bolero (coming soon!) / 2. Penelope Raglan Tee / 3. Boho Goddess Kimono Cardigan
Why a Summer Cardigan?
**THIS IS AN ORIGINAL PATTERN. Please see my Copyright Statement for details.

Folks, there are nearly a million projects I could have designed for summer, but this cardigan is special – for multiple reasons.
One, cardigans are my favorite. Winter/fall cardigans add style and keep you warm in the cold weather, but cardigans for spring/summer are just plain fun and fashionable!
You can use them as a stylish beach cover up, a way to dress up shorts/jeans and a tee shirt, or as an elegant touch to a summer dress.
In my eyes, they are the perfect summer accessory!
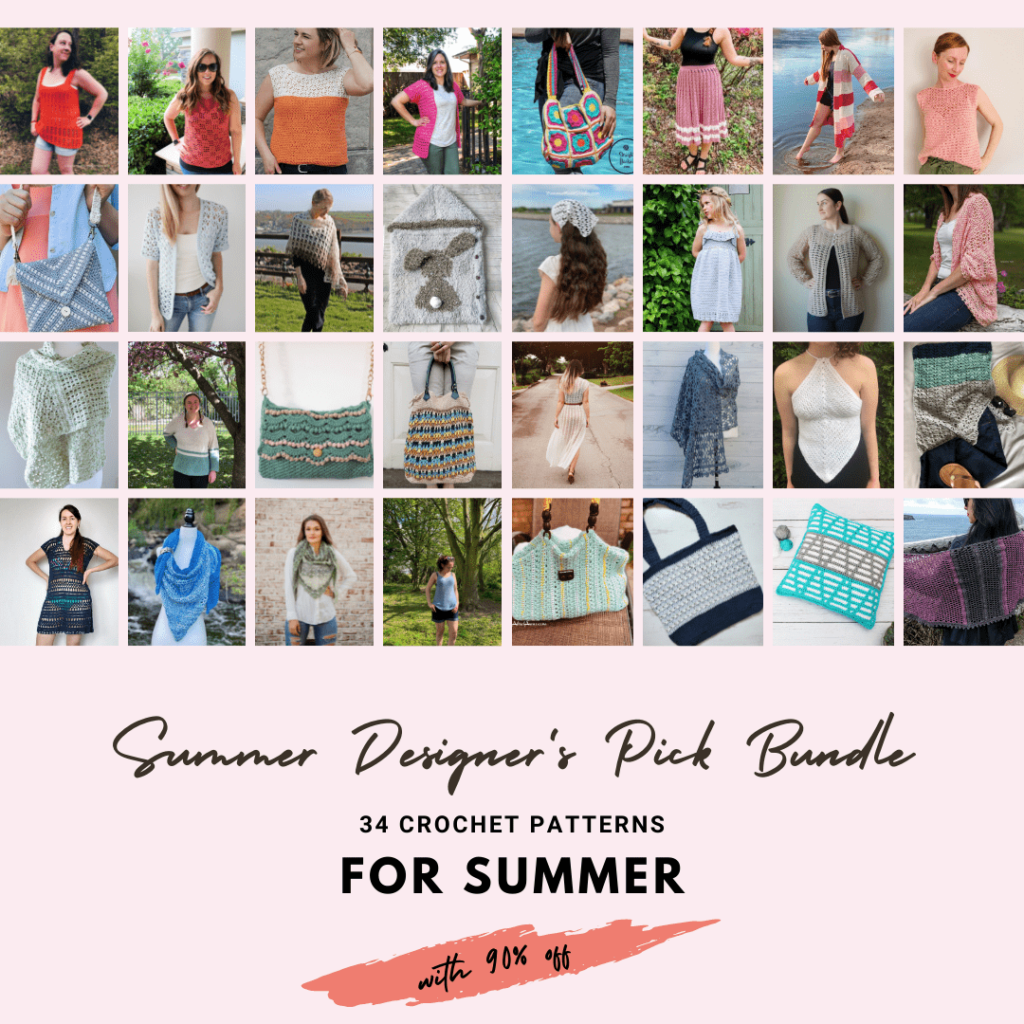
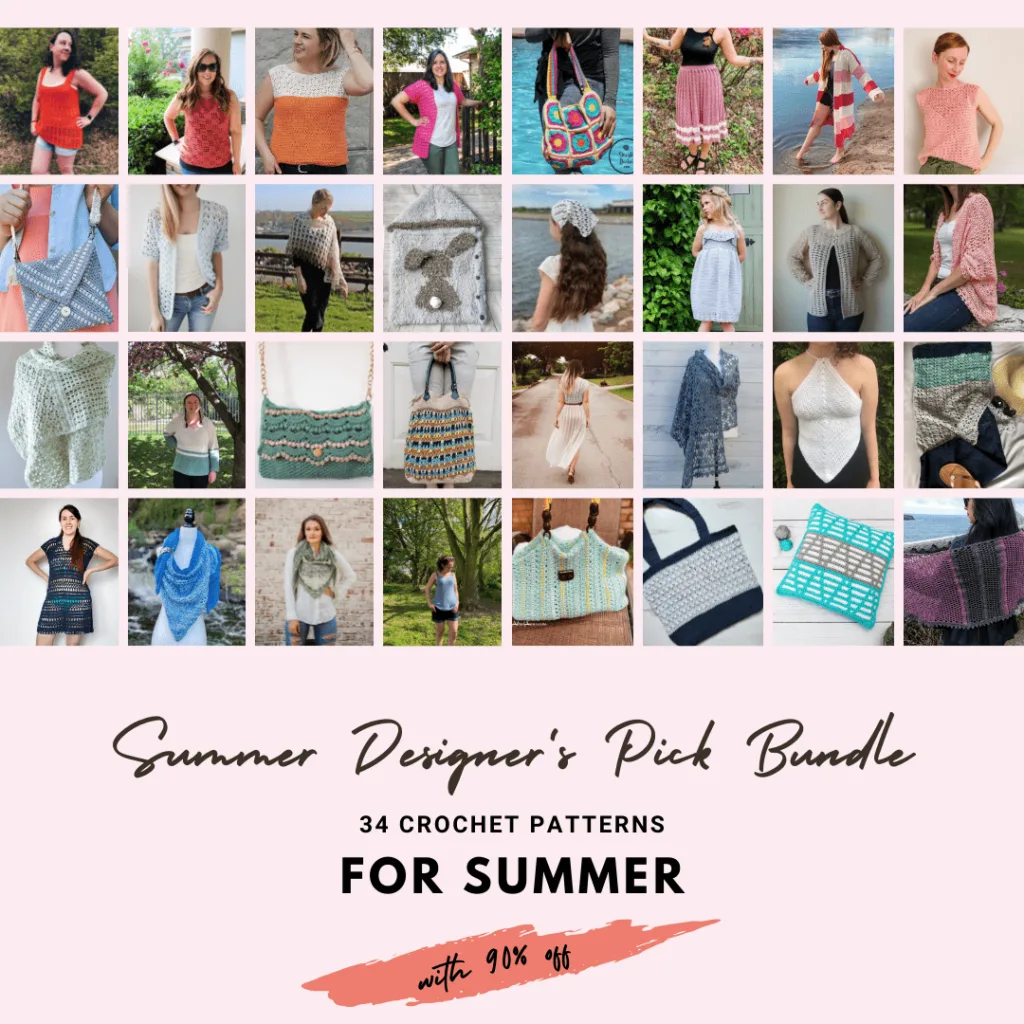
The second reason this cardigan is so special is because I designed it especially for the Designer’s Favorite Pick for Summer blog hop, which I co-hosted with Hanjan Crochet in June 2021.
The blog hop featured 32 amazing summer crochet patterns that you are absolutely sure to love!
You can still check them out and get many of them for free on the designers’ websites by clicking on the roundup button below!
Prefer a PDF?
This pattern is available as a large print, ad-free, printable PDF pattern. It includes sizes XS – 5X.
Get it in these places:
Love Pinterest? I do!
PIN this pattern to your Pinterest boards for later HERE.
You can also follow all my boards!

Summary:
Who says comfort can’t have flair? Have it all with the Lyndie Cardi! A simple pattern designed using only basic crochet stitches, this fashionable summer cardigan is a must make. Perfect for those hot beach days or those warm midsummer nights. Wrap yourself in luxurious style with this fun and easy cardigan pattern!
Difficulty level: Level 2 – Advanced Beginner
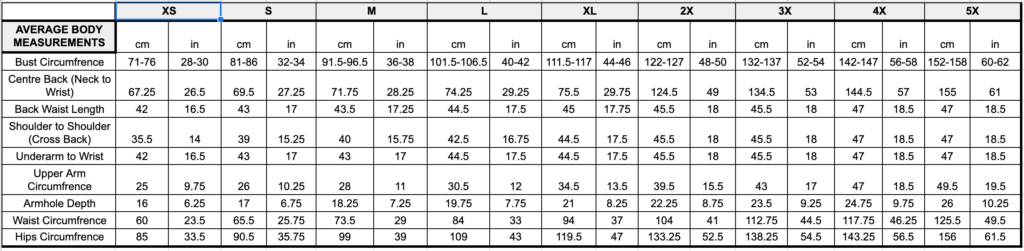
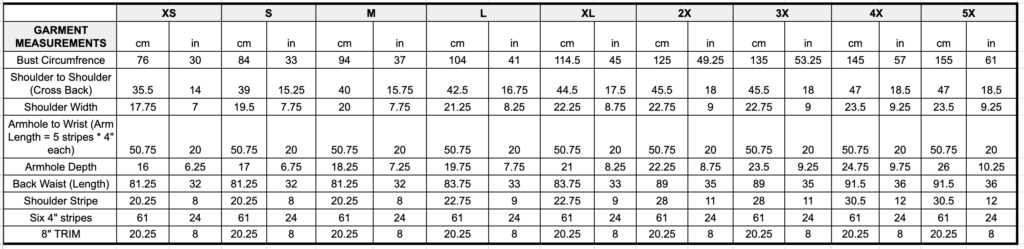
Finished Dimensions:
All measurements are approximate, measured flat pre-wear, and are provided in centimeters (cm) and (in) inches.
Pattern is made according to the Crafty Yarn Council’s women size standards for each size listed in the charts below:


Gauge:
24 stitches and 24 rows = 4-inches in moss stitch. See the “Special Stitches” section below
Materials:
- Crochet hook size: E/4 3.50mm or whatever hook is necessary to obtain gauge.
- KnitPicks Lindy Chain, Fingering weight, 70% Linen/30% Pima Cotton, 180 yds/50 grams per ball.
- Color A = Rouge
- Color B = Blush
- Color C = Swan
- Scissors
- Measuring tape
- Stitch Markers
- Tapestry needle
Total yardardage: 2700 yards / 2469 meters to 5940 yards/5433 meters.
XS-S: Color A = 5 balls = approx. 900 yards/ 823 meters; Color B = 4 balls = approx. 720 yards/658 meters; Color C = 6 balls = approx. 1080 yards/996 meters; TOTAL = approx. 2700 yards/2469 meters.
M: Color A = 6 balls = approx. 1080 yards/ 996 meters; Color B = 4 balls = approx. 720 yards/658 meters; Color C = 6 balls = approx. 1080 yards/996 meters; TOTAL = approx. 2880 yards/2650 meters.
L: Color A = 7 balls = approx. 1260 yards/ 1132 meters; Color B = 5 balls = approx. 1080 yards/ 996 meters; Color C = 7 balls = approx. 1260 yards/ 1152 meters; TOTAL = approx. 3600 yards/3300 meters.
XL: Color A = 8 balls = approx. 1440 yards/ 1317 meters; Color B = 5 balls = approx. 1080 yards/ 996 meters; Color C = 7 balls = approx. 1260 yards/ 1152 meters; TOTAL = approx. 3780 yards/3456 meters.
2X: Color A = 8 balls = approx. 1440 yards/ 1317 meters; Color B = 7 balls = approx. 1260 yards/ 1132 meters; Color C = 9 balls = approx. 1620 yards/ 1481 meters; TOTAL = approx. 4320 yards/3930 meters.
3X: Color A = 9 balls = approx. 1620 yards/ 1481 meters; Color B = 8 balls = approx. 1440 yards/ 1317 meters; Color C = 10 balls = approx. 1800 yards/ 1646 meters; TOTAL = approx. 4860 yards/4443 meters.
4X: Color A = 10 balls = 1800 yards/ 1646 meters; Color B = 9 balls = approx. 1620 yards/ 1481 meters; Color C = 11 balls = approx. 1980 yards/ 1811 meters; TOTAL = approx. 5400 yards/4938 meters.
5X: Color A = 11 balls = 1980 yards/ 1811 meters; Color B = 10 balls = approx. 1800 yards/ 1646 meters; Color C = 12 balls = approx. 2160 yards/ 1975 meters; TOTAL = approx. 5940 yards/5433 meters.
Abbreviations:
Pattern is written in US terms. *Click on abbreviation names for tutorials
Stitch/es (st/sts)
Turning chain (tc)
Slip stitch (slp-st)
Double crochet (dc)
Back loop only (blo)
Chain #-space (ch#-sp)
*____* Repeat indicated instructions
Special Stitches:
Moss stitch – a combination of stitches made by switching between single crochets and chains. In this pattern it is made by working a single crochet then a chain stitch in one row and then working a single crochet in each chain space and chaining over each single crochet in the following rows.
Additional Notes:
- Read all pattern notes, instructions, and other provided details carefully before starting the project to make sure you understand everything. It could save you hours & a lot of headaches!
- Make a swatch that measures at least 10 x 10 cm / 4 x 4 inches using the stitch provided under the Gauge Section. If your swatch matches the gauge, then you are all set to start the project. If the gauge is wrong, you might need to change your crochet hook – increase your hook size if your stitches are smaller & decrease your hook size if your stitches are larger.
- All measurements given are unblocked and measured flat pre-wear and pre-seaming as fabric pieces may stretch during/after blocking, wearing, and seaming.
- Provided measurements are as exact as possible, but are given as approximates. This is because yarn variances, crochet tension, & individual technique might give variations in the result, which changes from person to person.
- Stitch counts/rows/rounds are provided in the following order: [XS, (S), (M), (L), (XL), (2X), (3X), (4X), (5X).]
- Care Instructions: Hand wash & lay flat to dry.
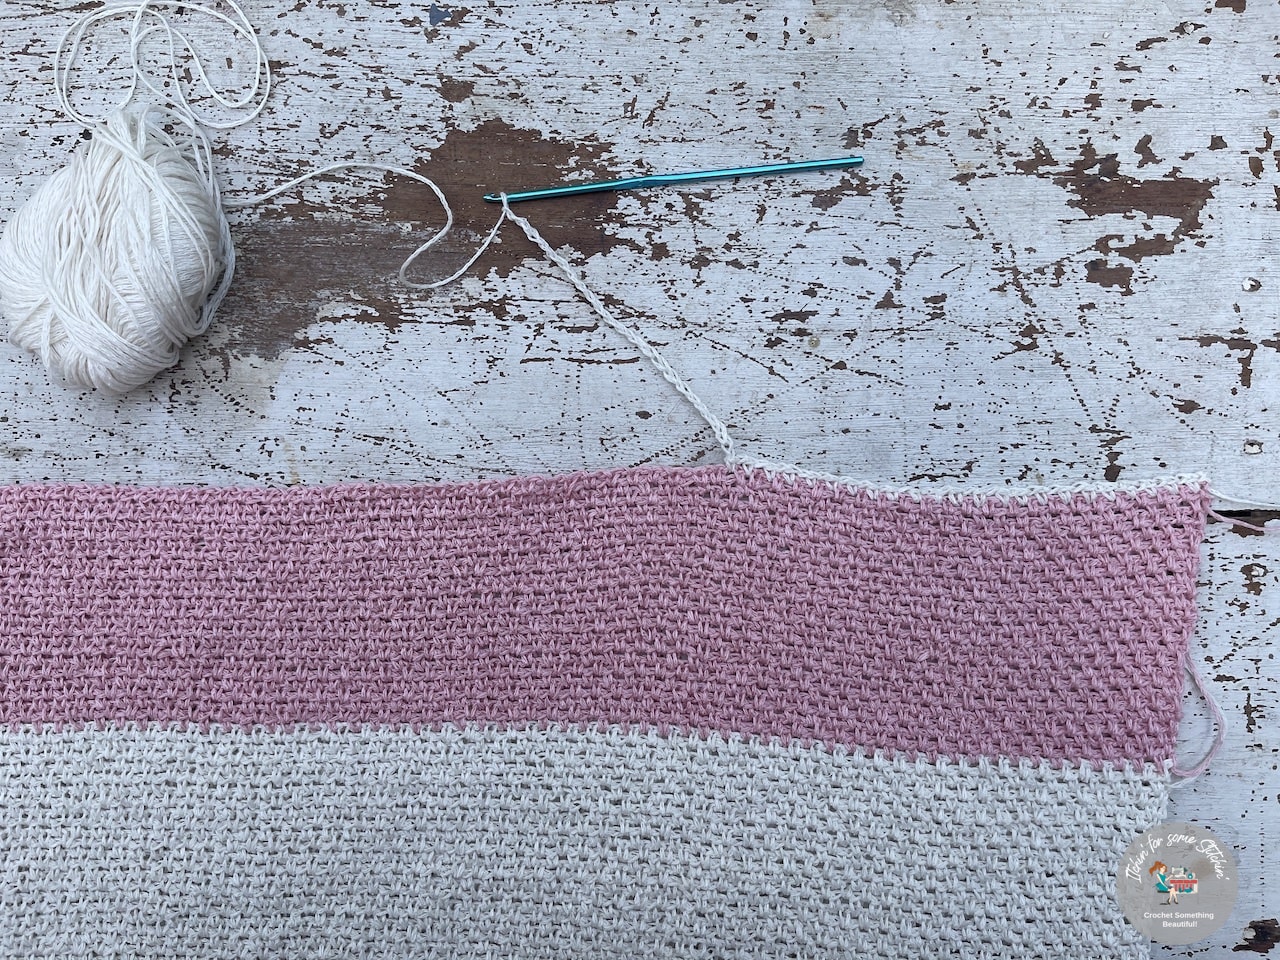
INSTRUCTIONS:
With Color A – Ch 181, (199), (223), (247), (271), (297), (321), (343), (367)
NOTE: Foundation sc can also be used. Work the number of sc indicated in row 1 and move to row 2
Row 1: Sc in the 2nd ch from the hook and in each ch across. [180, (198), (222), (246), (270), (296), (320), (342), (366)]
Row 2: Ch 2 (counts tc & ch 1), turn work, *skip next sc, sc in the next sc, ch 1*; Repeat from * to * to end. Sc in the final st. [180, (198), (222), (246), (270), (296), (320), (342), (366)]
NOTE: Stitch counts from row 2 on includes both sc and ch sts.
Row 3: Ch 2 (counts as a tc + 1 ch), turn work, *skip the next sc, sc in the next ch1-sp, ch 1*; Repeat from * to * to end. Sc in the final st. [180, (198), (222), (246), (270), (296), (320), (342), (366)]
Rows 4 – 24: Repeat row 3.
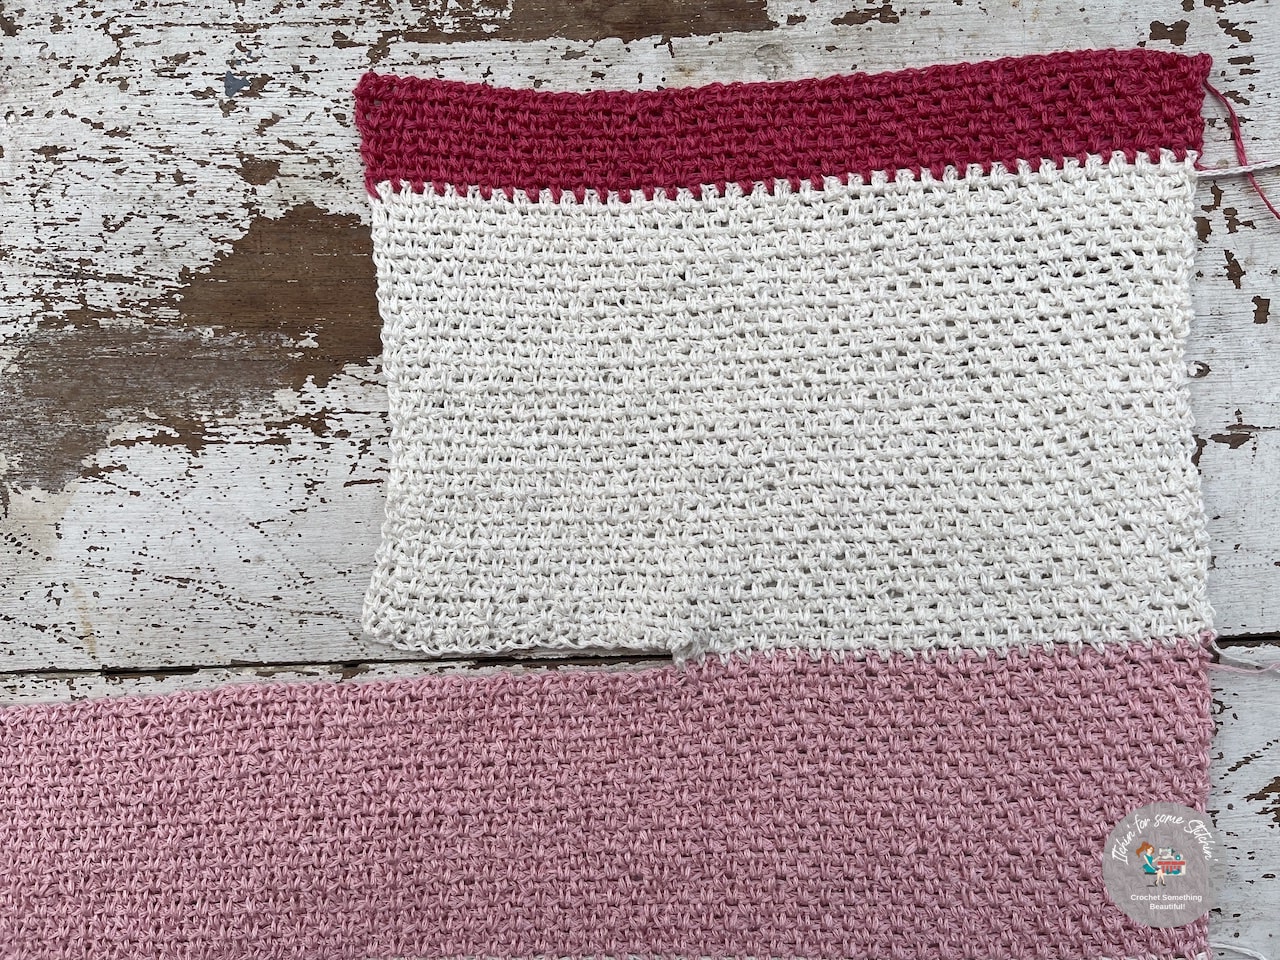
Rows 25 – 48: With Color B. Repeat row 3.
Rows 49 – 72: With Color C. Repeat row 3.
Rows 73 – 96: With Color A. Repeat row 3.
Rows 97 – 120: With Color C. Repeat row 3.
Rows 121 – 144: With Color B. Repeat row 3.
RIGHT SHOULDER
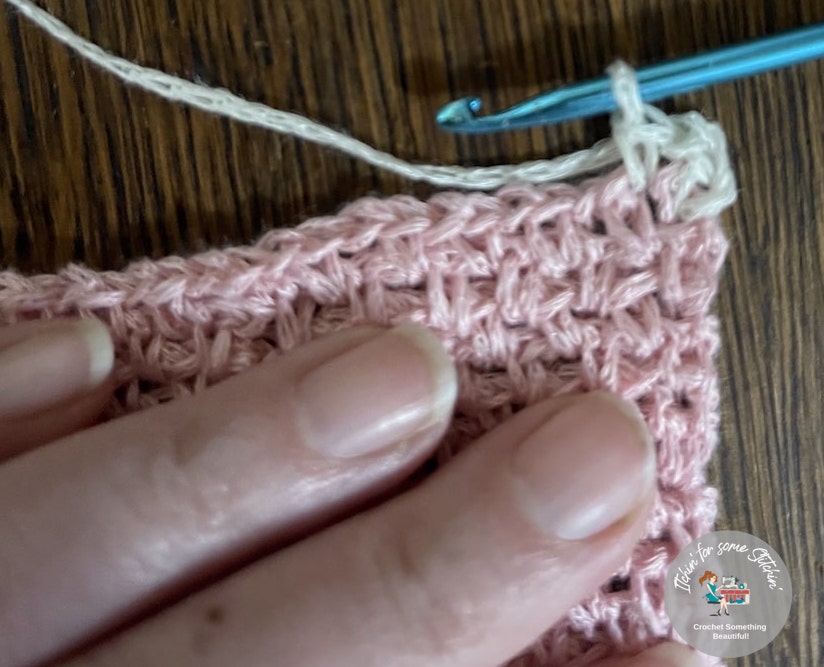
Row 145: With Color C, Ch 2 (counts as a tc + 1 ch), turn work, *sc in the next ch 1-sp, ch 1, skp the next sc*; Repeat from * to * 17, (22), (22), (23), (29), (34), (40), (45), (50) more times. Sc in the next ch 1-sp. Ch 25. [38, (48), (48), (50), (62), (72), (84), (94), (104) sts.]
Row 146: Turn work, sc in the 3rd ch from the hook (counts as tc + 1 ch + 1 sc), *ch 1, skip the next ch, sc in the next ch*; Repeat from * to * 10 more times. (12 sc + 12 ch)
This should get you to the main body where the first st you come to is a sc, *ch 1, skip the next sc, sc in the next ch 1- sp*; Repeat from * to * to end. Sc in the final st. [62, (72), (72), (74), (86), (96), (108), (118), (128) sts.]
Rows 147 – 186, (186), (186), (192), (192), (204), (204), (211), (211): Ch 2 (counts as a tc + 1 ch), turn work, *sc in the next ch 1-sp, ch 1, skip the next sc*; Repeat from * to * to end. Sc in the final st. [62, (72), (72), (74), (86), (96), (108), (118), (128) sts.]
Rows 187, (187), (187), (193), (193), (205), (205), (212), (212) – 195, (195), (195), (201), (201), (213), (213), (219), (219): With color A. Repeat row 147.
Bind Off leaving a long tail for seaming.
LEFT SHOULDER
Attach Color C to the last stitch in row 144 (opposite side of right shoulder) with a slp-st.

Row 145: Ch 2 (counts as a tc + 1 ch), turn work, *sc in the next ch 1-sp, ch 1, skp the next sc*; Repeat from * to * 17, (22), (22), (23), (29), (34), (40), (45), (50) more times. Sc in the next ch 1-sp. Ch 25. [38, (48), (48), (50), (62), (72), (84), (94), (104) sts.]

Row 146: Turn work, sc in the 3rd ch from the hook (counts as tc + 1 ch + 1 sc), *ch 1, skip the next ch, sc in the next ch*; Repeat from * to * 10 more times. (12 sc + 12 ch)
This should get you to the main body where the first st you come to is a sc, *ch 1, skip the next sc, sc in the next ch 1- sp*; Repeat from * to * to end. Sc in the final st. [62, (72), (72), (74), (86), (96), (108), (118), (128) sts.]
Rows 147 – 186, (186), (186), (192), (192), (204), (204), (211), (211): Ch 2 (counts as a tc + 1 ch), turn work, *sc in the next ch 1-sp, ch 1, skip the next sc*; Repeat from * to * to end. Sc in the final st. [62, (72), (72), (74), (86), (96), (108), (118), (128) sts.]
Rows 187, (187), (187), (193), (193), (205), (205), (212), (212) – 195, (195), (195), (201), (201), (213), (213), (219), (219): With Color A. Repeat row 147.
Bind Off leaving a long tail for seaming.

BACK (BETWEEN SHOULDER SECTIONS)
Attach Color A with a slp-st to row 145 as shown in the photo below.
NOTE: Photo shows the starting slip-st at the end of the ch 25 of the right shoulder, but you can actually start at either shoulder and get the same result.
Row 145: Ch 2 (counts as a tc + 1 ch), *sc in the next ch 1-sp, ch 1, skip the next sc*; Repeat from * to * all the way to the corner of the left shoulder as pictured above. Sc in the final st. [154, (154), (178), (184), (198), (204), (204), (206), (210)]
NOTE: You may need to create a few extra or less stitches when switching from the right shoulder to the back, and back to left shoulder, in order to keep the stitch pattern and get the correct number of stitches. When switching from shoulder to back and back to shoulder you will be placing a sc in the same stitch as the last sc from the shoulder row.
Row 146: Ch 2 (counts as a tc + 1 ch), turn work, *sc in the next ch 1-sp, ch 1, skip the next sc*; Repeat from * to * to end. Sc in the final st. [154, (154), (178), (184), (198), (204), (204), (206), (210)]
Rows 147 – 195, (195), (195), (201), (201), (213), (213), (219), (219): Repeat row 146.
FORM FRONT PANELS
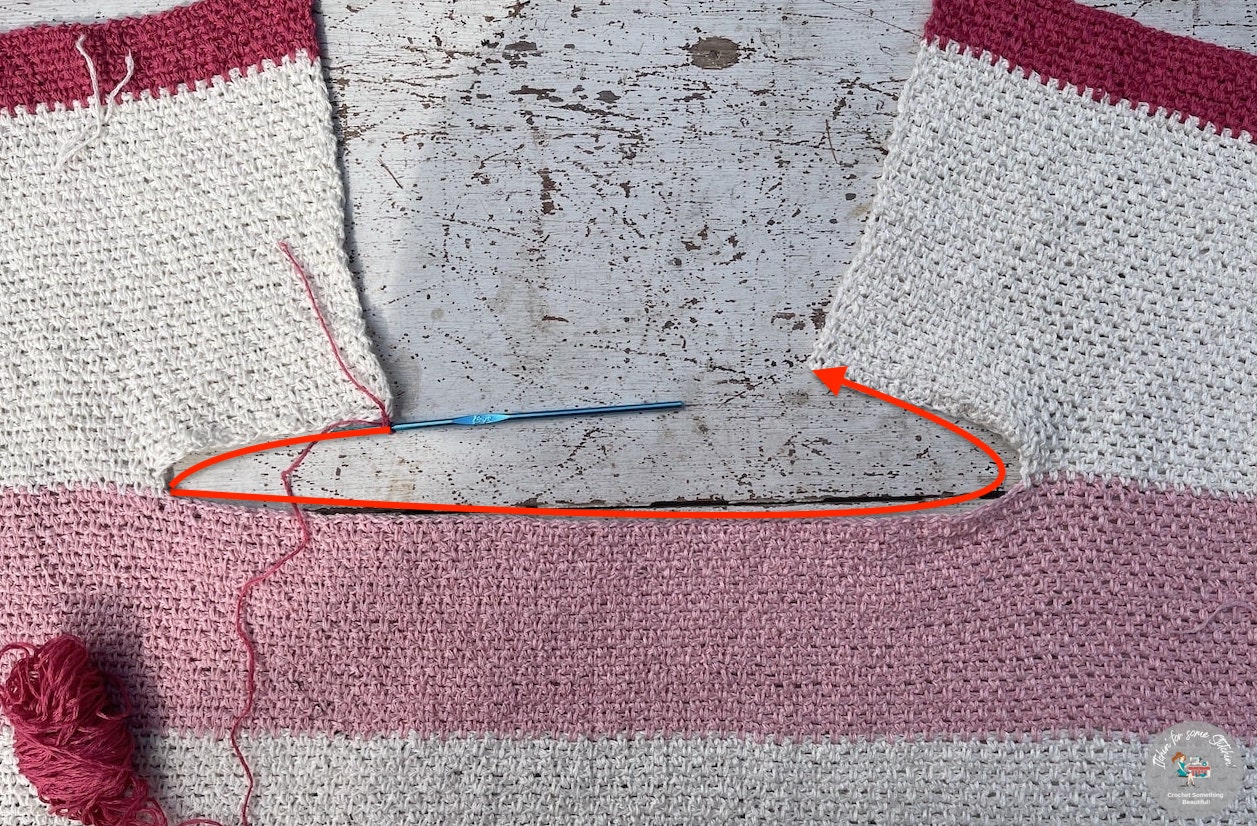
Step 1: Fold cardigan as shown in photo below. There will be a space between the two front panels. For each side, on the BACK piece, count from the outer edge into the center the same number of stitches as you have on the front panels. Mark those inner stitches on the BACK piece so you can match up the stitches on the front and the back. [62, (72), (72), (74), (86), (96), (108), (118), (128) sts.]
NOTE: For sizes 3X – 5X. Leave about 40-45 stitches unseamed between the two shoulder panels. This unseamed section will be the back of the neck. There will be some overhang of the front panels on the inner side (middle) of the cardigan and you will attach your trim to this overhang when you get to the collar section below. Depending on the amount of overhang, you may wish to do a 2 – 6” collar rather than an 8” collar.
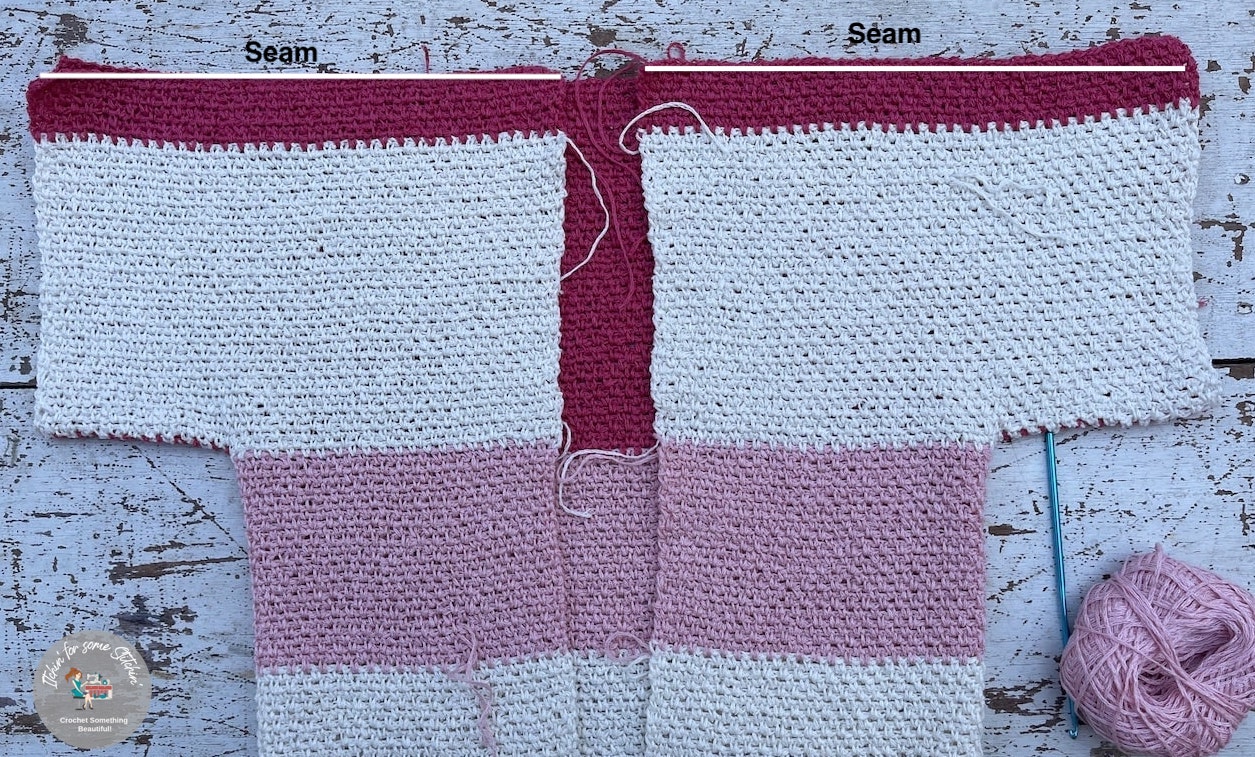
Step 2: Seam along the top of the shoulders using your desired method – whip stitch, mattress stitch, slip stitch, etc. Bind Off & Weave in ends.
Once both shoulder seams are done, look at both sides and decide if the inside or outside looks better. Turn work inside out if the inside seam has a cleaner finish.
ARMS/SLEEVES (X2)
Rnd 1: Attach Color B at the edge of the underarm where colors change from A to C using a slp-st, mark with a stitch marker (optional), sc in the same st as the slp-st, *ch 1, skip an equivalent space of 1 sc, sc*; Repeat from * to * around the edge of the arm creating a total of [83, (83), (83), (89), (89), (101), (101), (107), (107) sts.] Be sure to space your stitches out evenly, placing half of the stitches before the top seam and half after. There may be some places where the equivalent of 2 stitches need to be skipped under the ch 1 for the correct stitch count to be achieved. Try to space these out evenly.
NOTE: Stitch total includes both sc and chs.
NOTE: The sleeves are worked in continuous rounds. There will be NO joining at the end of each round, or turning and chaining. A stitch marker is useful to keep track of your rounds and when to change color.

Rnd 2: When you get back to the first stitch (marked with a stitch marker), ch 1, skip the first sc, sc in the next ch1-sp, *ch 1, skip the next sc, sc in the next ch1-sp*; Repeat from * to * around the sleeve crocheting continuously. [84, (84), (84), (90), (90), (102), (102), (108), (108) sts.]
Rnds 3 – 24: Repeat rnd 2.
Rnds 25 – 48: With Color C. Repeat rnd 2.
Rnds 49 – 72: With Color A. Repeat rnd 2.
Rnds 73 – 96: With Color C. Repeat rnd 2.
Slp-st to next st. Bind Off & Weave in ends.
COLLAR
The instructions are written out below for the 8” collar which is the standard collar for this cardigan. If you want to change the width of your collar, the stitch counts are listed here, just switch these numbers with those written in the instructions.
2” Collar – ch 14, 12 sts each row
3” Collar – ch 20, 18 sts each row
4” Collar – ch 26, 24 sts each row
5” Collar – ch 32, 30 sts each row
6” Collar – ch 38, 36 sts each row
7” Collar – ch 44, 42 sts each row
8” COLLAR
Attach Color A with a slp-st to the bottom corner of the first Color A stripe on the main body and ch 50.
Row 1: Dc in the 4th ch from the hook (counts as 2 dc) and in each ch to end, slp-st to the 2nd row of the main body. [48 sts]
NOTE: There will be a gap between rows 1 & 2 along the edge of the main body.
Row 2: Slp-st into the 3rd and 4th row of the main body. Turn work, dc in the BLO of each dc to end. [48 sts]
Row 3: Ch 3 (counts as a dc – NOTE: a ch 2, stacked sc’s or standing dc can be substituted if desired for the ch 3 to create a clean, even edge), turn work, dc in BLO of each st to end, slp-st to main body (2 body rows up from last slp-st.).
Row 4: Slp-st into the next 2 rows of the main body. Turn work, dc in the BLO of each dc to end. [48 sts]
NOTE: There will be a gap between rows 3 & 4 along the edge of the main body.
Rows 3 and 4 will be repeated up the side, across the back and down the other side to the bottom edge. Each BLO dc row equals two rows of moss stitch on the body. Change colours as needed to match the collar colour to the body colour. For the body stripes, there will be 12 BLO dc rows. When you get to the Front shoulder and Back section, you may have an odd number of rows, work over 3 rows as needed. Always change colours on the outside edge of the collar that is not connected to the body.
The slp-st at the end of row 3 is to connect the BLO dc row just worked to the body of the sweater. The 2 slp-sts at the beginning of row 4 are to move up the sweater 2 rows to create the height needed to start the next row of BLO dc. Altogether there will be 3 slp-sts in a row.
Bind Off & Weave in any remaining ends.
(Optional): Seam gaps along the edge where the trim meets the main body.
I’d love to see your Lyndie Cardigans!
Please be sure to share your makes with me on social media with #itchinforsomestitchin and #lyndiecardi.
Thank you for coming to my blog! By sharing my content and/or making a purchase you are making it possible for me to continue producing and sharing free content for everyone to enjoy. I sincerely appreciate your support!
Until next time… Happy Crocheting!


Please Share!
Lisa
Sunday 3rd of October 2021
I need help with the Cardi. I don’t understand the right shoulder directions regarding number stitches. Thanks
Itchin4Stitchin
Wednesday 6th of October 2021
Hi Lisa,
No problem, please email me at [email protected] and we'll see what I can do to help you. :)
Best wishes,
RaeLynn