* This post contains affiliate links. See my full Disclosure Policy for details.
If you’ve followed along on the blog then you might remember that when my fiancé bought my first sewing machine about four years ago I was terrified of it. After allowing it to collect dust for several months, I eventually drummed up the courage to open the user manual. Hey, don’t judge! Sewing can be intimidating, especially if you are new at it and you’ve never even touched a sewing machine before.
I first studied the sewing machine parts and their functions. Once I felt comfortable with the sewing machine and the basics of how it worked, I then turned my attention to all the bits and pieces that came with my machine. There were wires, dusters, clips, caps, plates, bobbins, and about 15 things called presser feet.
I stared at each foot. I twirled them in my hands. I studied their markings. I had no clue what they were or what on earth I was supposed to do with them. I’m not going to lie, even after four years I still haven’t used them all, but I have learned what they are, what to do with them, and what each one is used for.
So, if you haven’t figured it out, that’s what today’s tutorial is all about. Presser feet and their uses.
What Is a Presser Foot?
First, it’s important to understand what a presser foot is. A presser foot is the footplate attachment of a sewing machine that holds the fabric down on the part that feeds it under the needle. It keeps the fabric flat so that it does not rise and fall with the needle and pucker as it is stitched.
Generally presser feet are made of clear plastic or steel, but there are presser feet made of teflon or other non-stick material, which are used for sewing with leather, plastic, vinyl and oilcloth.
How Many Types of Presser Feet Are There?
By None provided (http://www.sewinginsight.com/presser-feet-guide/) [Public domain], via Wikimedia Commons
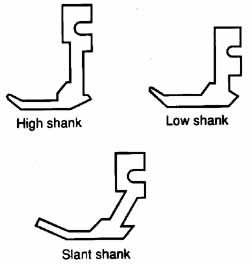
The type of presser feet used by different sewing machines is not interchangeable. High shank presser feet can only be used on high shank sewing machines and low shank presser feet can only be used on low shank sewing machines. Slanted shanks can only be used with a specific sewing machine, the Singer slant needle machine.
The presser feet are removed and attached to the sewing machine by using a screwdriver to screw and unscrew the thumbscrew. However, this is typically only true for presser feet with attached shanks.
Many modern sewing machines have presser feet without an attached shank. This is the case with my sewing machine, a Viking Husqvarna Designer Diamond Royale. The presser feet for my machine simply snap on and off the bottom of the shank, which remains attached to the sewing machine. Other sewing machines use a button to release the presser feet from the shank. Allbrands.com has a great video demonstrating the different types of presser feet, plus how to attach and remove them.
It is worth noting what type of presser feet shank/sewing machine you own. Although the presser feet for my sewing machine snap on and off, if I choose to use generic presser feet, instead of Husqvarna Viking brand presser feet, I must also buy a low shank adaptor. This tells me that my sewing machine is a low shank sewing machine and any generic presser feet I use must also be low shank.
What Does Each Presser Foot Do?
The all-purpose foot and the zipper foot are the most commonly used presser feet and come standard with most household sewing machines. However, an array of specialized feet have also been designed for a number of purposes. Here is a list of presser feet and their uses:
Note: You may or may not have all of these presser feet and not all presser feet used for a particular purpose are exactly alike. For instance, buttonhole feet may vary, but they are all used for making buttonholes.
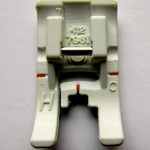
All-purpose/Utility foot
- The most versatile foot and the one you will use for general sewing. Typically, you can leave this foot on your sewing machine and be ready for most sewing projects.
- Its shape makes it ideal for straight-stitching and zigzag stitching with a stitch length longer than 1.0-mm.
Decorative Stitch/Satin Stitch foot
- Used for sewing close zigzag stitches (satin stitches) with less than 1.0-mm stitch length and decorative stitches.
- Has a tunnel on the underside of the foot that is designed to feed smoothly over the stitches.
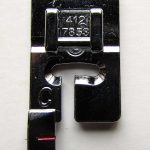
Buttonhole foot
- Used for making manual buttonholes–plain or corded, it has guide lines to determine buttonhole length.
- It has 2 tunnels on the underside to ensure a smooth feed over the buttonhole columns and the finger on the back holds cording for corded buttonholes.
Blind hem foot
- Used for making blind hem stitches. Using this foot ensures your blind hem is always neat and gives your garment that tailored-finish.
- Has a large groove to enable a larger stitch to anchor and catch itself on the garment.
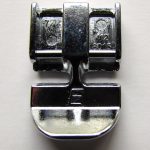
Zipper foot
- Can be adjusted so that it is on the left or the right side of the needle. This makes it easy to sew both sides of the zipper.
Non-stick Glide foot
- Used for sewing up and over heavy seams and uneven surfaces, such as foam, vinyl, plastic, velvet, denim, or leather.
- Has a non-stick coating underneath to keep these material from stitching to the foot.
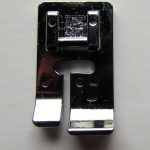
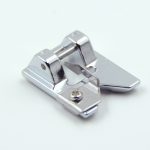
Edging/Overedge/Overcast Foot
- Used for overcasting and seam/overcasting, with stitches that have a stitch width of 5.0-mm and 5.5-mm.
Quilter’s 1/4″ Piecing foot
- Similar to the 1/4″, Quarter-inch, or Patchwork foot. It has a distance guideline marking 1/4″ (6.3-mm), which is perfect in dressmaking because a 1/4″ seam allowance is necessary for curved edges like armholes and collars. It is also useful in French Seams because it is easy to achieve neat and accurate results each time.
- The quilter’s 1/4″ piecing foot has an additional 1/8″ (3-mm) guideline. The two guidelines make this foot perfect for piecing quilt blocks.
Embroidery/Darning foot
- Also known as a “Stippling Foot” or “Free-Motion Embroidery Foot”, it is used for free motion embroidery, quilting, stitching, and darning.
- It is designed specifically to NOT use the feed dog by dropping it or covering it. Since there is no contact between your fabric and the machine between stitches, it gives you the freedom to quilt or embroider any kind of curved line.
- If you are a quilter, then you will need to use this foot for free-hand machine quilting or “stippling”.
Side Motion foot
- Used for side-motion/omnimotion stitches.
Sensor One-Step Buttonhole foot
- Automatically makes buttonholes. Plug it into the machine and enter the desired buttonhole length and the presser foot does the rest!
Sensor Q-foot
- Used for embroidery, free motion sewing, quilting, and embroidering on especially thick or spongy fabric.
Interchangeable Dual Feed/Walking foot
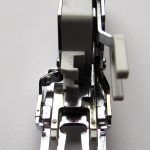
- Designed specifically for sewing multiple layers of fabric and/or batting evenly (this is what you are doing when making a quilt).
- Perfect for quilting, sewing velvet, stretch fabrics, imitation leathers, and fabrics that need precise pattern matching, such as checks, stripes, and plaids.
- Using a walking food provides smoother results when you sew anything on the bias, or use ‘fluid’ kinds of fabrics like silks and satins.
These are the presser feet that came standard with my Husqvarna Viking Diamond Royale. However, there are many other presser feet and I am seriously considering purchasing some of them. Some other interesting presser feet include:
Button Attaching Foot
- Used to sew buttons onto garments. (This presser foot is not needed on my sewing machine).
Fringe foot
- Used to make beautiful fringed flowers, appliqués or rows of fringe with just a simple zig zag stitch and decorative threads.
Gathering/Shirring foot
- Automatically gathers and pleates the fabric. The volume of your gathers depend mostly on your tension. A higher tension creates fuller gathers than a lower tension. Also, a shorter stitch length creates a little more volume than a longer stitch length.
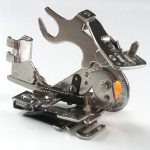
Ruffler foot
- Like the gathering/shirring presser foot, it automatically gathers and pleates the fabric, but does it in a slightly different way. It pleates the fabric at 3 different stitch intervals and you can even adjust the depth of the stitch.
NOTE: Sewingpartsonline.com gives a nice comparison of the gathering/shirring foot versus the ruffler foot.
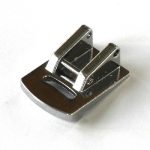
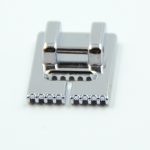
Pintuck foot
- Effortlessly creates small tucks in your fabric. Use a pintuck foot with a twin needle to create beautiful, evenly spaced fabric tucks.
- They come in several different sizes, most commonly 3, 5, 7 and 9 grooves. Those with a few grooves are best for heavier weight fabrics, and those with 7 or 9 grooves are best for very lightweight fabrics.
Roller foot
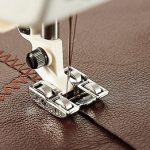
Image courtesy of Husqvarna Viking.
- Like a non-stick presser foot, it used for sewing up and over heavy seams and uneven surfaces, such as foam, vinyl, plastic, velvet, denim, or leather.
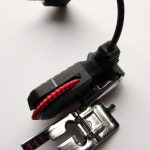
- Has rollers that roll on top of the fabric to keep fabrics from slipping, puckering, and jamming under the foot because the presser foot rotates to feed the upper layer together with the lower layer.
Open toe appliqué foot
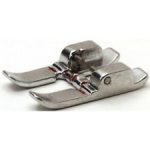
- Also called an “Open Toe Embroidery Foot”. Has an open front for greater visibility while sewing and it has a stitching area wide enough for maximum stitch width.
- The bottom of the foot has a rectangular shaped indentation to allow even satin/blanket stitching to glide under the foot without dragging.
Adjustable binding foot
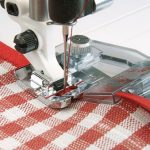
Image courtesy of Husqvarna Viking.
- A specialized tool used to put bindings around the cut edge of fabric.
- Use the dials and adjust the foot to suit various width of bindings.
- Creates neat and professional binding without hand tacking or excessive pinning.
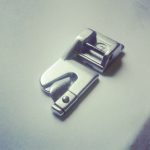
Narrow hem/rolled hem foot
- Allows you to turn the fabric under twice to produce a neat hem. It comes in multiple sizes that can handle both delicate and heavier weight fabrics.
And believe it or not folks, there is even more than this! Just make sure that any presser feet you want are compatible with your sewing machine before you buy it. I found a candlewicking presser foot that helps you sew a lovely candlewicking heirloom stitch, but, alas, it was not compatible with my sewing machine. 🙁 Ah… such is life.
Hey, are you a sewing newbie? This FREE ebook will help prepare you and give you the confidence to take your first steps towards sewing success! Use it in combination with today’s presser feet guide and you’ll be sewing fabulous projects in no time. 🙂
What Presser Foot Do You Use/Like the Most?
Until next time… Happy Sewing!

This post has attended the following link parties:

susan smith
Thursday 25th of January 2018
Still does not tell me what stitch length to use or what stitch to use
Itchin4Stitchin
Thursday 25th of January 2018
Hi Susan,
This post was about presser feet, but if you tell me what you are working on I may be able to help you determine what stitch & what stitch length you should be using.
Sincerely,
RaeLynn
Rebecca Langford
Friday 7th of April 2017
What are the feet with three wires labeled M or two wires with a small brush labeled C also With a screw and labeled G?
Itchin4Stitchin
Friday 7th of April 2017
Hi Rebecca,
I think the foot with the 3 wires labeled M is an overcasting foot. The wires on the foot keep the fabric from puckering. The C foot you described sounds like an overedge foot. The brush prevents skipped stitches on the edge of the fabric. The final foot labeled G may a blind hem foot, but I can't be entirely sure. I am simply going off your descriptions.
Although in general presser feet tend to be the same from machine to machine, that is not always true nor are they always labeled the same. My overcasting foot is labeled J, my C foot is a buttonhole presser foot, and I don't have a G presser foot. I do blind hems with a D foot.
The best advice I can give you is to try and locate the user manual for your sewing machine. It should have a list of all the presser feet and their specific uses for your machine.
I hope that helps. I appreciate you stopping by!
Sincerely,
RaeLynn