
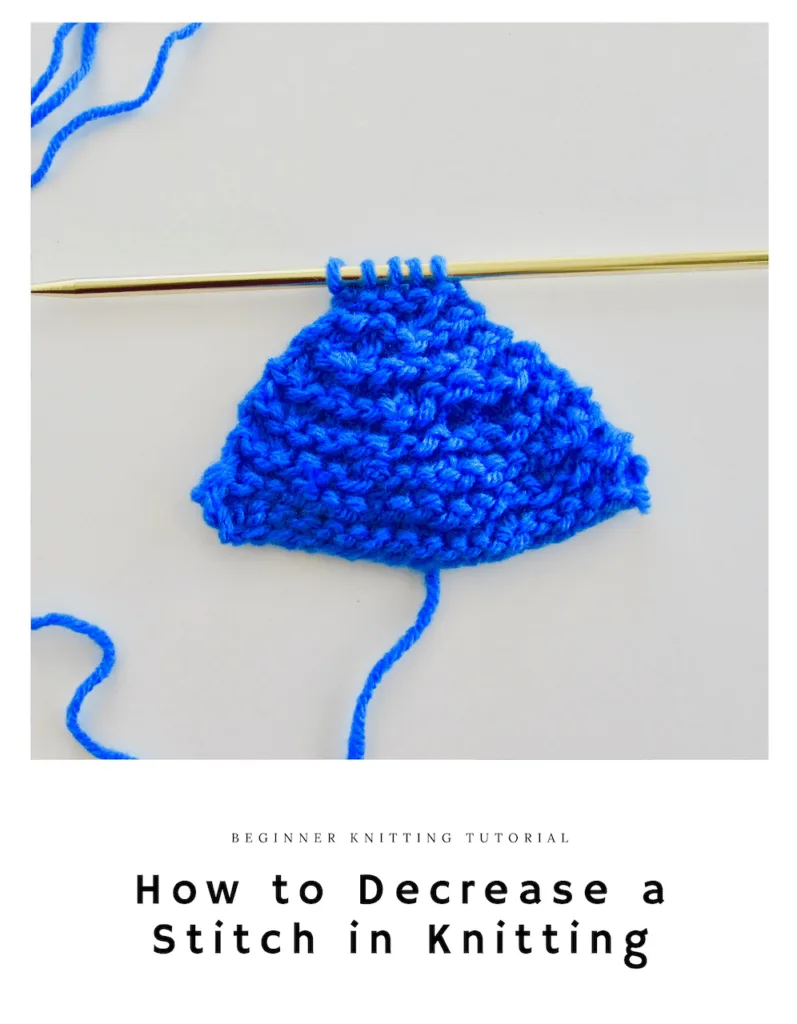
This resource provides clear instructions, helpful tips, and visual aids for knitters looking to decrease stitches in their projects. Whether you’re a beginner or an experienced knitter, this guide will assist you in mastering the technique of reducing stitch count, allowing you to create various knitting patterns with precision and confidence using an easy technique called the “Knit 2 Together” (K2tog).
Hey, there beginning knitters!
I am back today to share with you a tutorial on how to decrease in knitting.
This is the follow up to my previous post, How to Increase a Stitch in Knitting.
Now, before we move on, let’s refresh on what increasing and decreasing mean in knitting and why they are important.
Simply put, making an increase in knitting means adding a stitch. Whereas, making a decrease means removing or subtracting a stitch from your project as you knit.
Why Are Knitting Increases and Decreases Important?
Okay, so you are probably at the point in your knitting journey where you have mastered the knit and purl stitches.
You can make scarves, blankets, and rectangular shawls.
That’s awesome!
But what if you are ready to start knitting bags, sweaters, mittens, or even socks?
That’s where increasing and decreasing come into play!
These techniques allow you to change the shape of your projects – to go from flat to contoured.
How to Decrease in Knitting
Since I addressed the easiest way to add a stitch in knitting in my last post.
Today I want to focus on the easiest way to remove a stitch in knitting.
And just like it’s counterpart, it takes only a few simple steps.
In fact, in this case, it’s only three steps total. Yes, you read that right. Only three steps!
Granted, there are actually lots of methods used to make knitting decreases, but I want to share with you the one known as the “knit two together”.
This is because, well, like I said, I think it’s the easiest way and that makes it perfect for beginners!
The “Knit Two Together” Tutorial
The “knit two together” technique is abbreviated k2tog in patterns and it basically involves treating two stitches like they are one.
This is very similar to the bar increase method for adding a stitch in knitting, where one stitch is used to make two stitches, thereby increasing the stitch count.
Except, in this case, you are removing a stitch (or loop) from your needle. Thereby reducing the number of stitches in a row by one stitch.
This decreases the width of the project, thus altering its shape.
NOTE: It is best to perform the k2tog with stitches in the middle of your knitting project. This is because the stitches at the edges of your knitting can get a little smushed and become a bit “wonky”. However, for ease of demonstration, this tutorial shows the steps of the “knit two together” method using the first stitch of the project.
The steps required are exactly the same whether you perform them in the middle of your project or at the end.
It just so happens that the stitches in the middle tend to be nicer and prettier so it is often better to increase using those stitches.
Instructions:
Please note that I am starting this tutorial with six stitches in the top row of my knitting needle. See photo below.
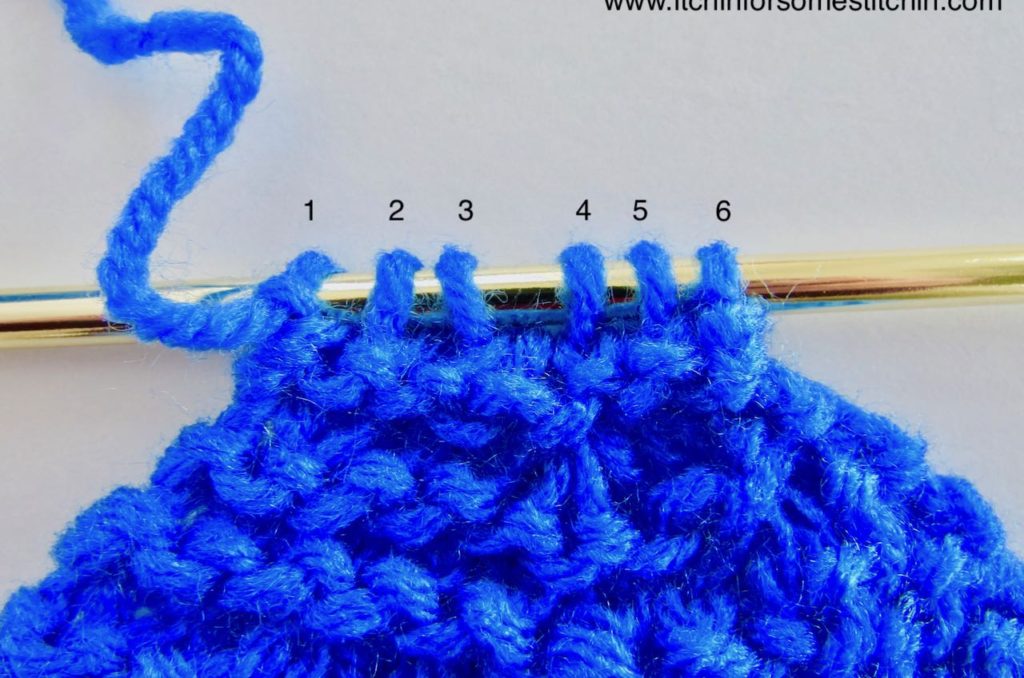

Now I will decrease those stitches by one.
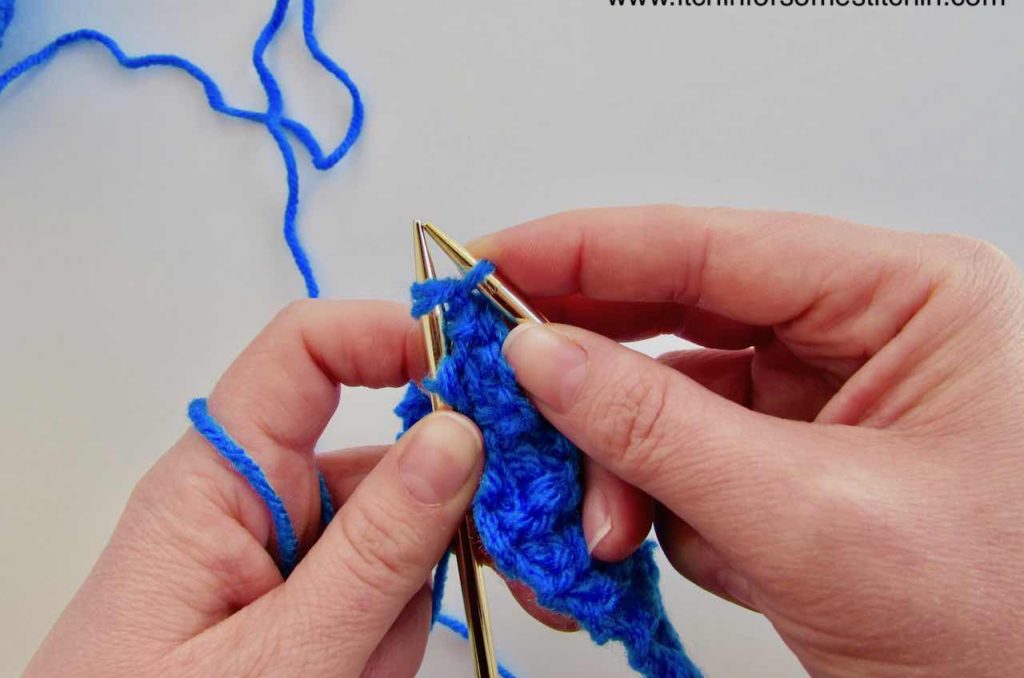
Step One
Insert the right-handed needle into the first two stitches just like you would if you were going to make the knit stitch.

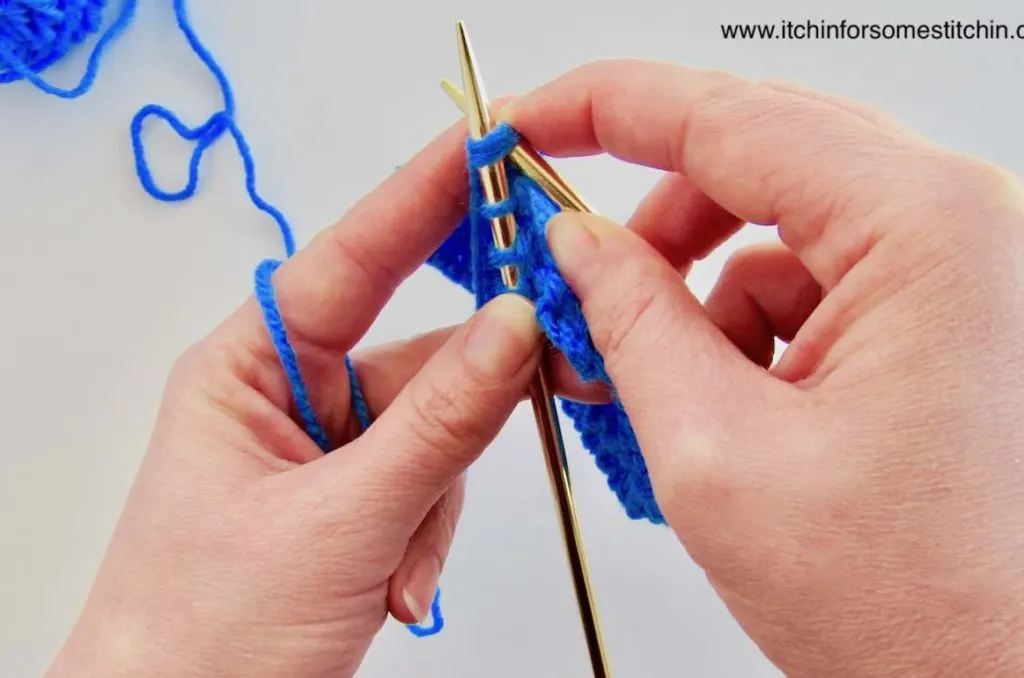
Step Two
Wrap the yarn around the needle as usual.
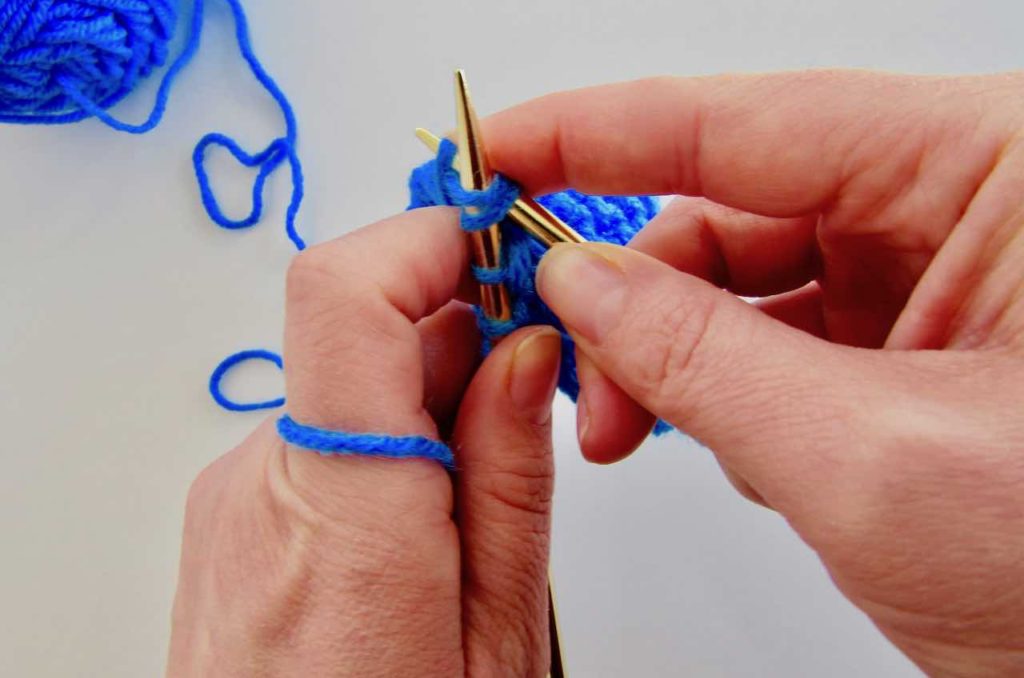

Step Three
Pull the Yarn through both stitches and slip both stitches off the needle together, letting them drop.

You have now completed one knitting decrease.


As you can see, there are now only 5 stitches in the top row of my knitting project.
K2tog Tips & Important Information
Now, remember earlier when I told you that there are actually numerous methods for making a decrease in knitting?
Well, it’s important to know that each type of knitting decrease creates its own “look”.
In the case of “knit two together”, a tight, right slanting decrease gets created.
This means that you need to pay attention to whether you are decreasing on a purl stitch or a knit stitch.
This is because you want to make sure that you are using a decrease method that creates the correct stitch to blend in with your pattern or the overall stitching in your project.
For instance, if you are decreasing on a purl stitch instead of a knit stitch, you may want to p2tog (“purl two together”).
This creates a left slanting decrease.
The p2tog is done exactly like the k2tog, except you purl the two top stitches as one instead of knit.
Common FAQs
What does “K2tog” mean in knitting?
“K2tog” is an abbreviation for “knit two together.”
It is a common knitting decrease technique used to reduce two stitches into one.
As outlined with photographs above, insert the right needle into the next two stitches on the left needle, then knit them as if they were a single stitch.
When should I use the K2tog decrease?
The K2tog decrease is often used in knitting patterns to shape garments or create textured patterns.
It produces a right-leaning decrease and is commonly used in ribbing, lace, or shaping sleeves, necklines, and waistlines.
Can I use K2tog on any type of stitch?
While K2tog is most commonly used with knit stitches, you can also use it with purl stitches to decrease and create various stitch patterns.
Remember, for purl stitches, it is known as “P2tog” or “purl two together.”
What if I accidentally knit through the back loops instead of using K2tog?
If you accidentally knit through the back loops (ktbl) instead of performing the K2tog decrease, it will twist the stitch.
To correct it, simply undo the stitch and rework the decrease correctly by inserting the needle through the front loops.
Are there any tips for achieving neat K2tog decreases?
Here are a few tips:
Pay attention to your tension to ensure an even and consistent stitch.
Insert the needle smoothly through both stitches to avoid splitting the yarn.
Practice on a swatch before using K2tog in your main project to familiarize yourself with the technique and achieve desired results.
Are there alternatives to K2tog for decreasing stitches?
Yes, there are other decreasing techniques such as SSK (slip, slip, knit) or SKP (slip, knit, pass slipped stitch over).
Each method creates a slightly different effect, so choose the one that best suits your project’s requirements and desired outcome.
Seriously? Could it get any easier?
Armed with the knowledge of how to remove a stitch in knitting and/or add a stitch you now how the power to give your knitted projects shape!
You can now create a sweater or hat that’s tailored to fit you exactly! You can literally knit gloves that fit you like a glove.
Pun totally intended… he he he
Remember, practice and experimentation will help you become more proficient in using the K2tog decrease and other knitting techniques.
Don’t be afraid to try different methods to achieve the desired results in your knitting projects.
Thank you for coming to my blog! By sharing my content and/or making a purchase you are making it possible for me to continue producing and sharing free content for everyone to enjoy. I sincerely appreciate your support!
Until next time… Happy Knitting!


Please Share!