Hello, crochet beginners!
Today I want to teach you something vitally important to your crochet journey.
It’s how to make a foundation chain, also known as making a chain stitch.
This stitch is so important that it is literally the second thing you should learn in crochet after learning how to make a slip-knot.
Don’t believe me?
**This post may have affiliate links. See my full Disclosure Policy for details.
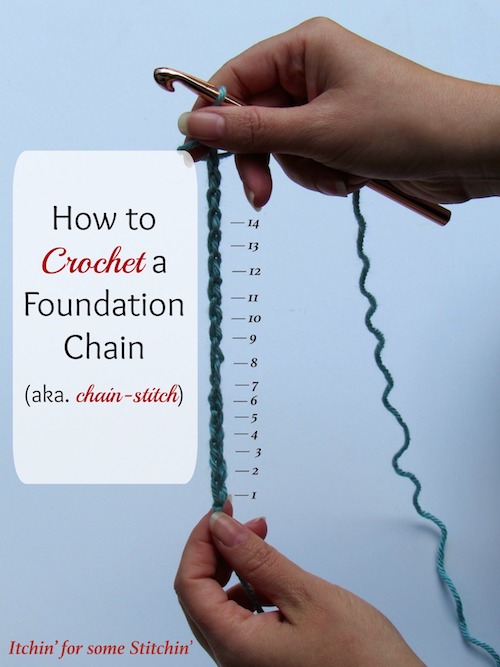
Well, I can tell you that my first attempt at crochet was a failure.
I tried over and over to figure out what I was doing wrong, but it was hopeless.
The pot holder I was working on only got smaller and smaller. Eventually, I gave up.
Ten years later, I finally figured out where I went wrong. Yes, you read that right – it took me 10 years to figure out this one simple thing — It was chaining. I failed at chaining.
Believe me now?
Chaining is a simple skill, but an extremely important one in crochet.
For some reason, I just couldn’t get a grip on the concept when I first picked up a hook all those years ago.
If you are a crochet beginner, I’d like to save you my frustration.
Other Patterns & Stitches You’ll Love!
What is a Foundation Chain?
First, let me explain what chaining is.
Chaining in crochet is when you create a loop (called a stitch in crochet) by pulling the yarn through an existing loop (stitch) with your hook.
Most crochet projects start with a foundation chain, which is simply a series of loops (stitches) specified by your pattern.
For instance, your pattern might say, “Start by chaining 25”. This means to make 25 loops. These 25 loops are hooked together creating one foundation chain.
The rest of your crochet project is built by adding to this foundation chain.
In other words, if you don’t know how to chain stitch, you simply cannot make a crochet project!
Thus, it’s importance cannot be understated.
How to Crochet the Chain Stitch
Click HERE for a video for those of you who like to see things in action!
[list style=”style6″]
[li]Pin to Pinterest for later HERE and be sure to follow all my boards![/li]
[/list]
Materials
- Yarn – I find it best for beginners to start with medium 4 worsted weight yarn. You can find this at your local craft store, Walmart, and even online through my Amazon affiliate link.
- Hook – For beginners, I suggest a larger hook such as an N/15 10mm for practicing.
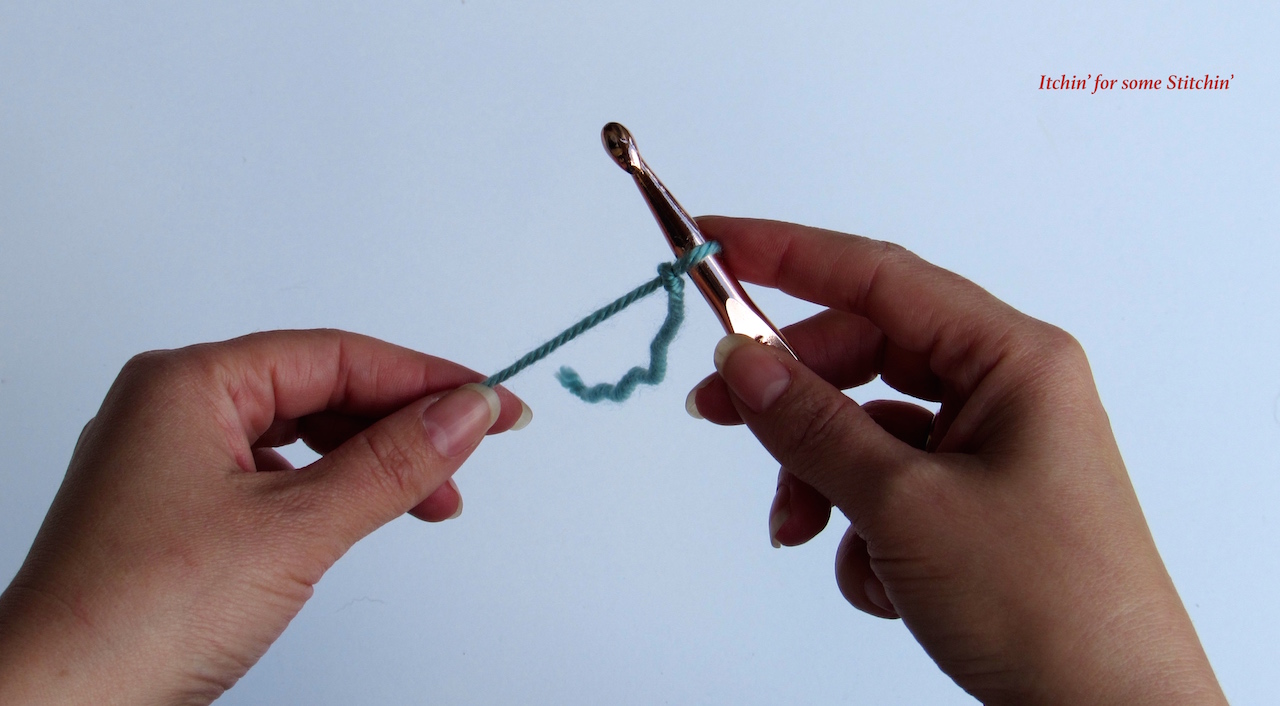
Step One
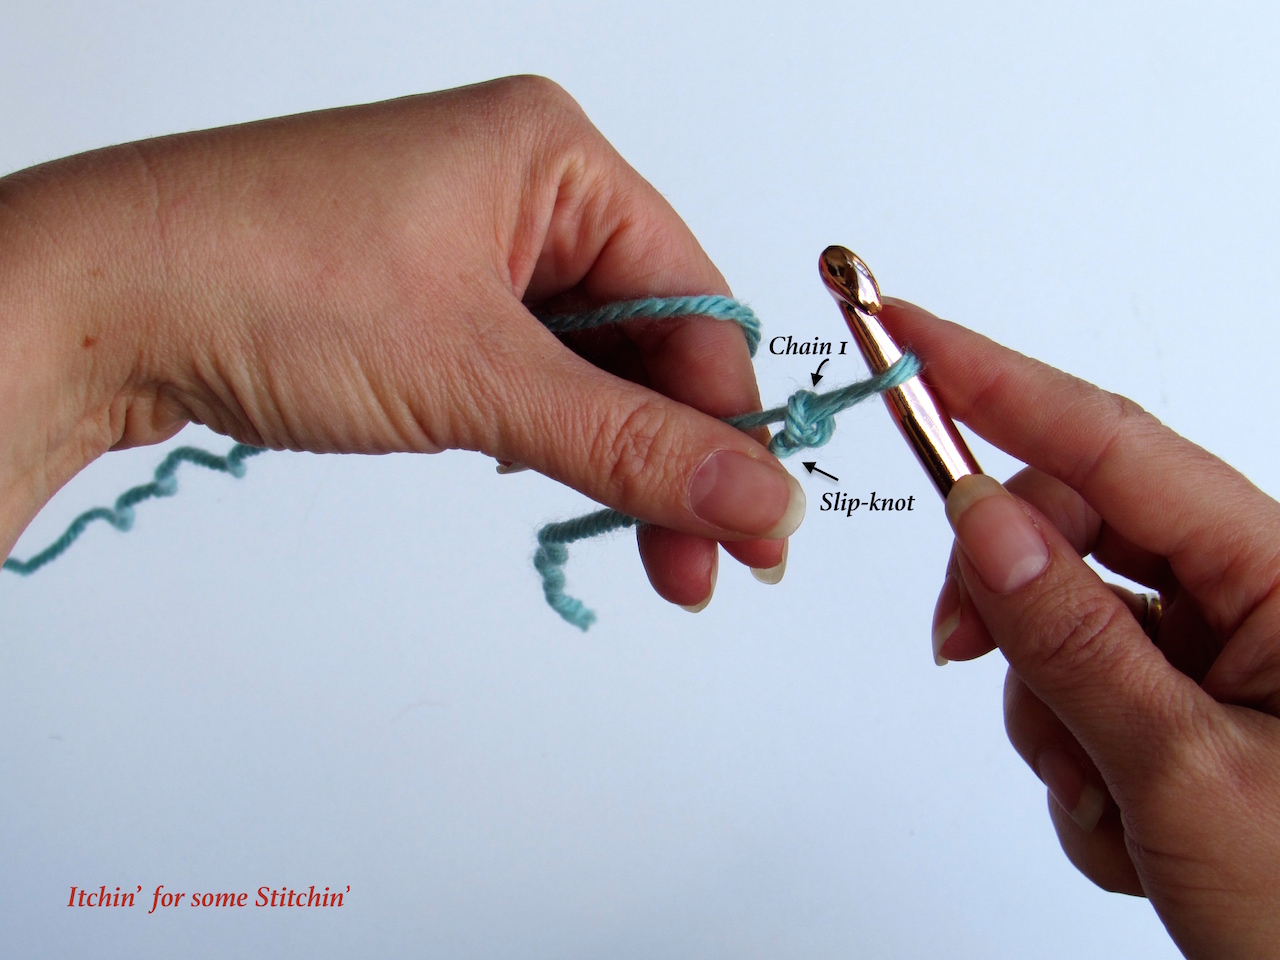
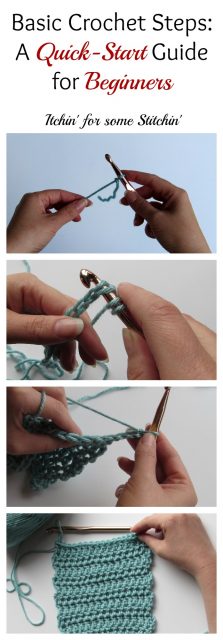
Start by making a slip-knot. The slip-knot is basically one loop that is wrapped around your crochet hook.
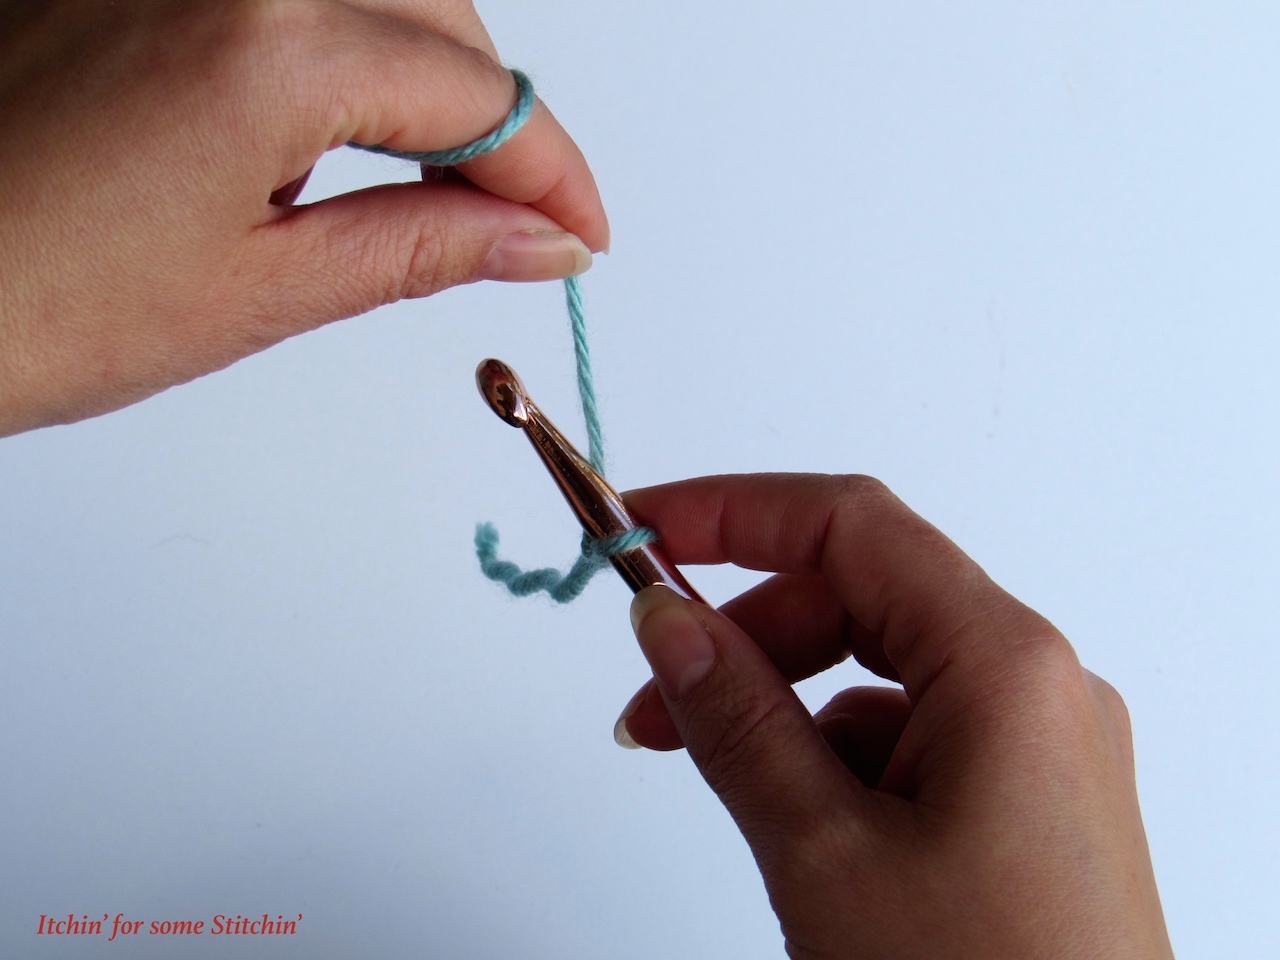
Step Two
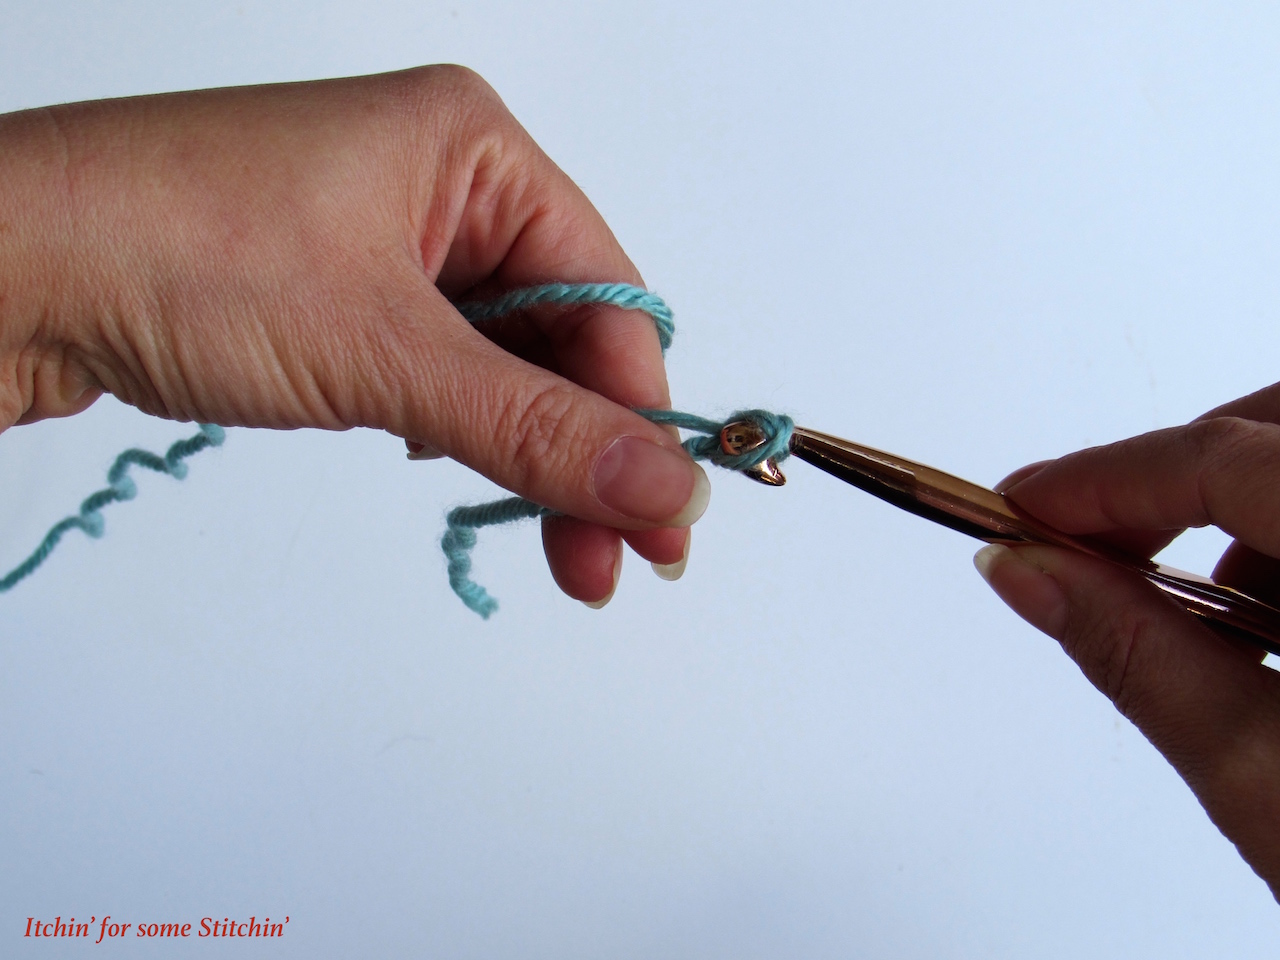
Hold the base of the slip-knot (step 2a) and bring the yarn over the hook from the back to the front (step 2b).
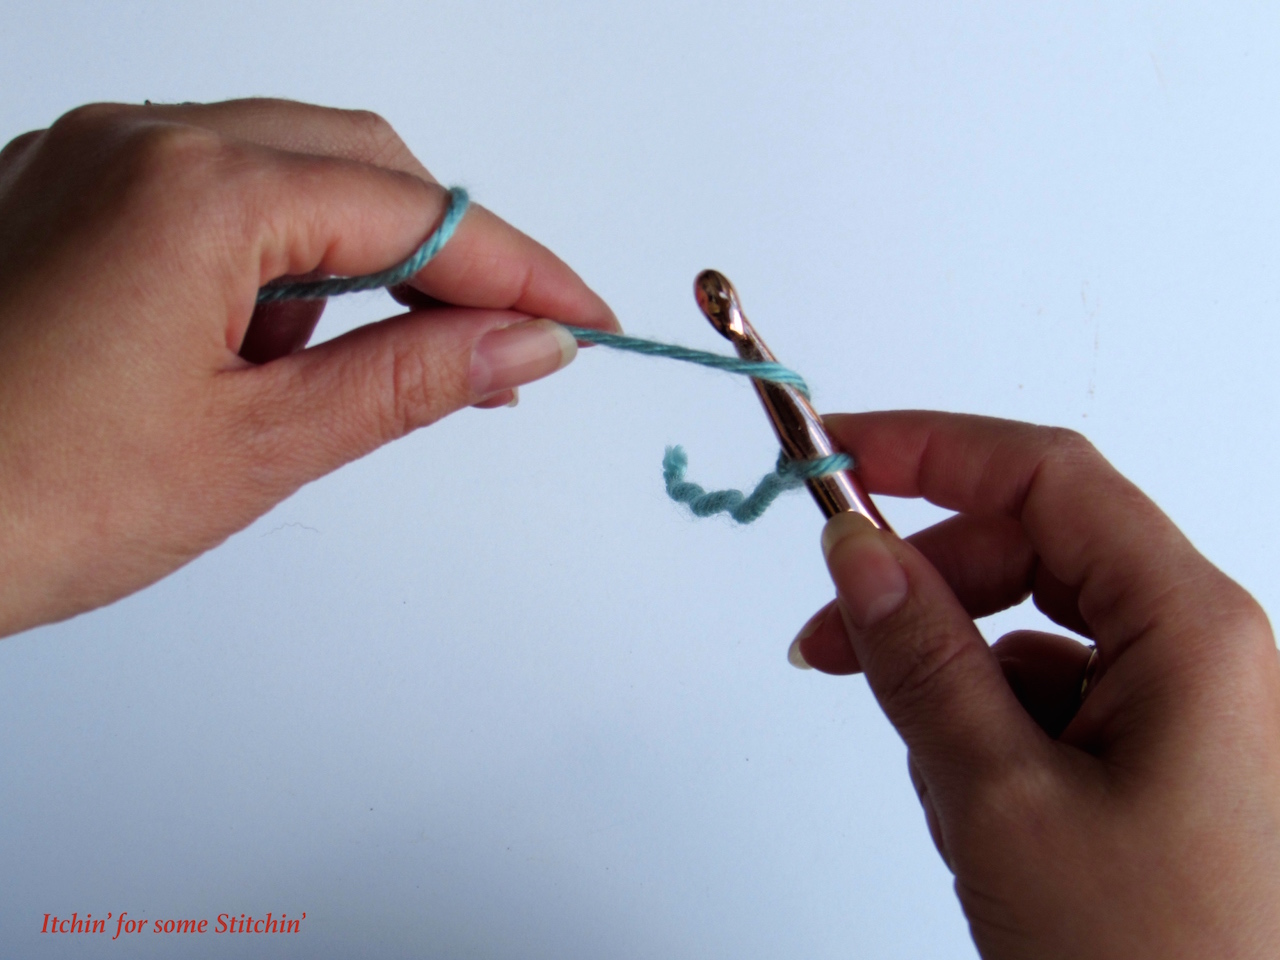
Step Three
Pull the yarn through the slip-knot. This makes one chain, sometimes called a chain-stitch.
Note: The slip-knot does not count as a chain.
Step Four
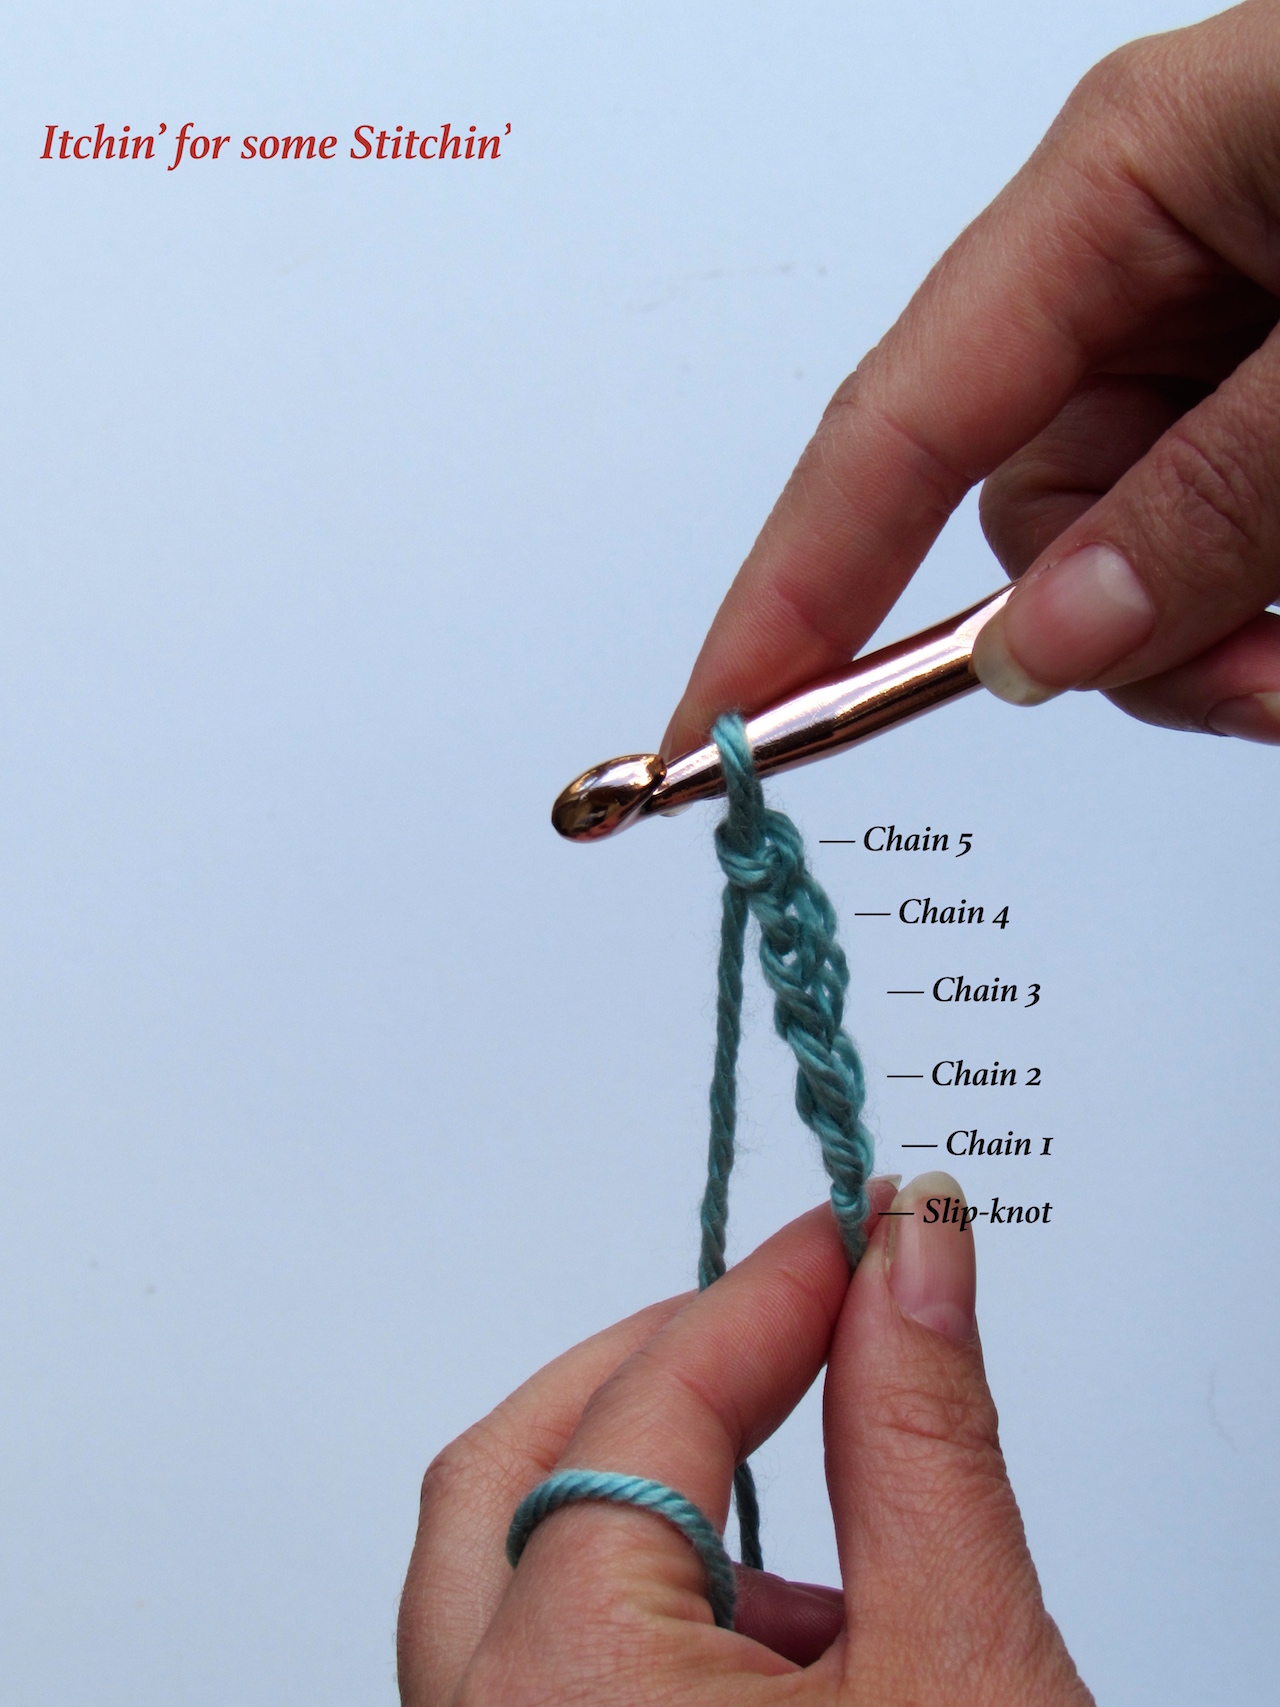
Repeat steps two & three as many times as your pattern states. For instance, if your pattern calls for chaining 25 then you would do steps two & three 25 times.
Tips
- After each new stitch, be sure to always move your thumb and pointer (index) finger up the chain closer to the crochet hook. Hold here gently as you make your next chain stitch.
This helps you to control the work.
- To keep the starting chain stitches from becoming too tight, you should also pull each new stitch up onto the working area of the hook.
The working part of the hook is also called the shank or the shaft. It is located between the head/hook and the grip/thumb rest.
In the above picture, it is right where my foundation chain is attached to the hook. To review the anatomy of a crochet hook see: How to Pick Your First Crochet Hook.
- You should practice creating chains until you are comfortable with the flow of yarn and your grip of the crochet hook.
In the beginning, your work may be uneven. Some chain stitches may be loose while others are tight.
- While you’re learning, try to keep the chain stitches loose.
This will make it easier for you to build onto the foundation chain. As your skill increases, the foundation chain should be firm, but not tight, with all chain stitches even in size.
Once your foundation chain is complete, turn your work and build the rest of your crochet project by creating new stitches through each loop of the foundation chain.
Your pattern should tell you how to crochet each row that gets built upon this chain.
More Crochet Tips & Tutorials
Ready to learn more? Check these out!
1. How to Hold the Yarn When Crocheting
3. How to Yarn Over in Crochet
4. The 10 Best Crochet Tips for Absolute Beginners
5. How to Read a Crochet Pattern
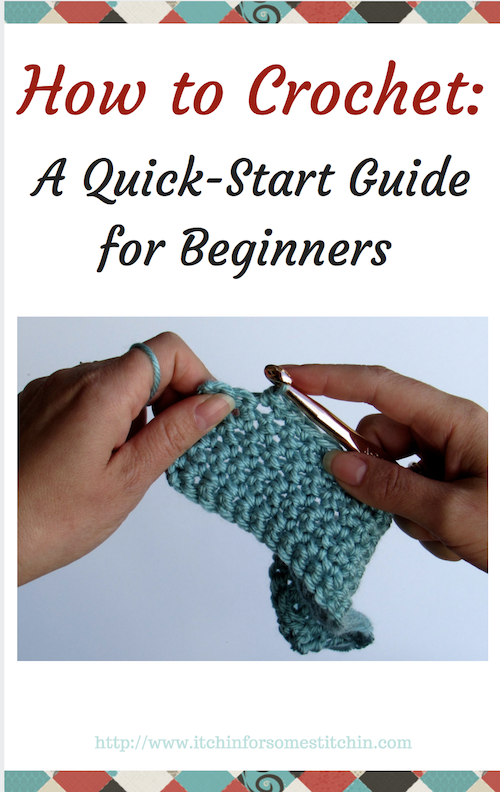
You can also download my free Beginner’s Guide: How to Go From Crochet Clueless to Crochet Confident in Just 9 Steps! (click on the photo below)
But… these steps are really just the tip of the iceberg – there’s so much more to learn!
If you want to be able to crochet beautiful blankets and afghans, gorgeous clothing, fun handbags, and even simple squares (and more!) – mastering the beginning steps and stitches are critical!
And there are definitely some ways I can help you!
One.
You can follow me on Facebook and join my Facebook group for crochet beginners!
I share lots of tips & tutorials to help you along in your crochet journey!
Plus, since it’s open to experienced crocheters too, you can get some really great advice from different perspectives – all the while gaining new friends and crafty inspiration!
Two.
You can add your name to the wait list for my upcoming Crochet Beginner ebook and video course to follow!
I will take you step-by-step through all the content found here and in the beginner’s guid, plus so much more!
No links to redirect you to a tutorial. Every skill, stitch, and technique will be mapped out for you in beautiful photographic/videographic detail .
Oh and did I mention patterns? Yep, that’s right. My ebook and video course will come complete with crochet projects that are just right for beginners!
However, I will only be making this ebook and video course if there is enough interest. I need at least 100 people to sign up before I get started.
So, if your interested, don’t delay!
Sign Me Up!
Thank you for coming to my blog! By sharing my content and/or making a purchase you are making it possible for me to continue producing and sharing free content for everyone to enjoy. I sincerely appreciate your support!
Until next time… Happy Crocheting!
Please Share!


Mommo
Wednesday 13th of July 2016
I am trying to find the information on the instructions for the One Skein Wrap explaining where they are (Dc3tog) and (dc7tog). I downloaded this pattern and could not find the "special terms" instructions on the website.
Itchin4Stitchin
Wednesday 13th of July 2016
Hi, Thanks so much for stopping by! I am sorry you couldn't find the One Skein Wrap. It was one of my original posts & needs to be updated! Here is the link to it, http://wp.me/p5JCk7-2H. Let me know if you have any problems. Best wishes, RaeLynn.
Susanne
Monday 20th of June 2016
Great post! I'm a knitter, not a crocheter, but learning crochet is definitely on my to-do list. I'll have to come back to this once I'm ready to start!
Itchin4Stitchin
Monday 20th of June 2016
Thanks! Needle crafts are my passion. Come back when you are ready & I am sure you will find tons of tutorials to help you advance your crocheting skills!