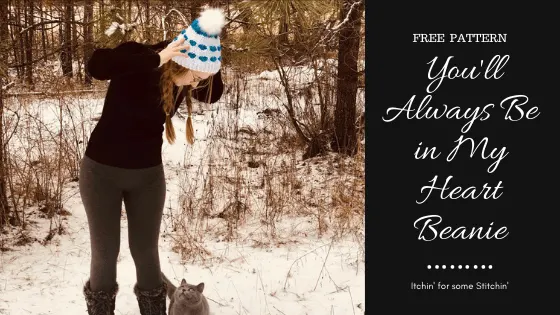
Well folks, it’s closing in on Christmas.
Can you believe it is only a few weeks away?
That means now is the perfect time to share my latest free crochet beanie pattern!
It’s called the You’ll Always Be In My Heart Crochet Beanie and it’s perfect for gift giving this holiday!
I designed it with little hearts all the way around it – such a sweet way to say “I love you”.
Which is one of the things that makes it perfect for holiday gift giving!
Is there a better way to show your affection then by crocheting up a gift covered in hearts and putting it under the Christmas tree or in someone’s stocking?

If you have a little girl in your life, a daughter, grand-daughter, niece, etc. she is sure to love this one!
It’s also a lovely way to show your mom, grandmother, or sister how much you care.
Yarn Details: It’s all about the yarn baby!
The the fabulous thing about this fun crochet beanie pattern is that it is a great stash buster!
It requires less than a skein of yarn and just a few yards of color to create such a memorable beanie for someone you love.
I’ve now made three of them!
I picked Red Heart Super Saver in White, Royal, and Bright Yellow and Red Heart With Love in Hollyberry for my three beanies because I had an ample supply of them in my yarn stash.
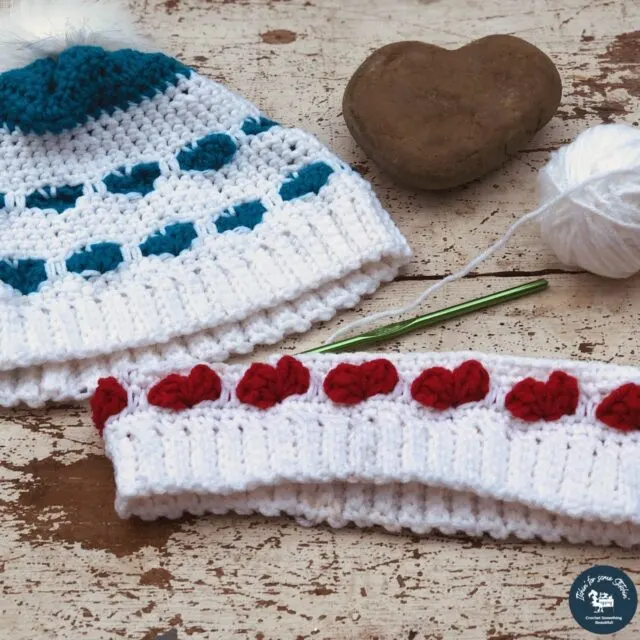
In truth, you can use any medium 4 worsted weight yarn, but I do like Red Heart brand because it has a wide array of colors and it doesn’t hit your pocket book hard!
You get a lot per skein and at such a reasonable price too!
However, if you are looking for something a bit softer, you could always check out KnitPicks/We Crochet Wool of the Andes as an alternative.
It’s a great inexpensive yarn that comes in loads of colors – making it perfect for a variety of projects!
You can purchase it via my affiliate link below.
Recommended:
How to Crochet a Beanie with Hearts
**THIS IS AN ORIGINAL PATTERN. Please see my Copyright Statement for details.
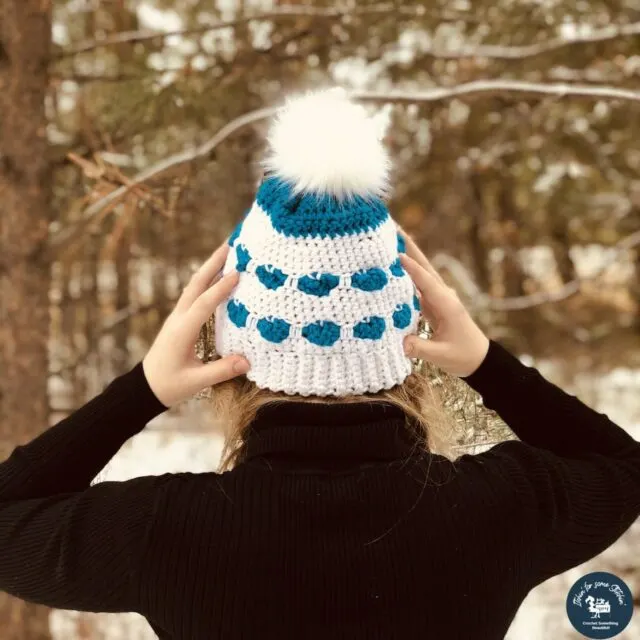
Ya’ll the You’ll Always Be In My Heart Crochet Beanie is such a sweet and fun hat to put together!
I love the look of the cute little hearts and the beanies are quick & easy to whip up – taking only a few hours to crochet!
Prefer a PDF?
The You’ll Always Be in My Heart Crochet Beanie Pattern is available as a high quality, ad-free, printable PDF.
Find it in the following places:
SUMMARY:
Express your love with style! The You’ll Always Be In My Heart Crochet Beanie is perfect for Valentine’s Day or to simply wear for fun. Designed using only basic crochet stitches, the simple beanie hat is both quick and easy to whip up!
DIFFICULTY: Level 2 – Easy
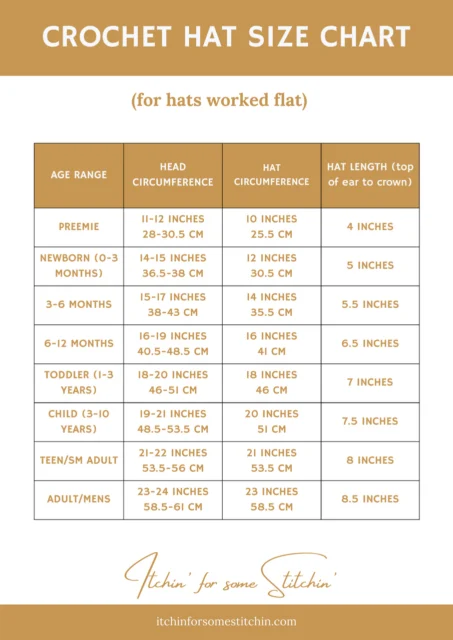
FINISHED DIMENSIONS:
This crochet beanie pattern can be easily made to any of the following dimensions according to your needs. See pattern for details.
GUAGE:
14 stitches and 17 rows = 4-inches in single crochet (sc) using I I/9 – 5.50mm hook & crocheted in the round
MATERIALS:
- Medium 4 worsted weight yarn, two colors – Color A & Color B
~ Total Yardage – Color A = approximately 50 yards / 46m to 100 yds/ 91m; Color B = approximately 25 yards / 23m to 50 yards / 46m; approximately 75 yards / 69m to 150 yards / 137m for both colors.
- Hook sizes: I/9 – 5.50mm (body) and G/6 – 4.00mm (brim)
- Scissors
- Tapestry needle for weaving in ends
- Stitch markers (optional)
- Measuring tape
ABBREVIATIONS:
Pattern is written in US terms. *Click on abbreviation names for tutorials
Stitch/es (st/sts)
Slip – Stitch (slp – st)
Half double crochet (hdc)
Back post only (bpo)
Back loop only (blo)
Chain #-space (ch#-sp)
*____* Repeat indicated instructions
ADDITIONAL NOTES:
Read all pattern notes, instructions, and other provided details carefully before starting the project to make sure you understand everything. It could save you hours & a lot of headaches!
- Make a swatch that measures at least 10 x 10 cm / 4 x 4 inches using the stitch provided under the Gauge Section.
Read all pattern notes, instructions, and other provided details carefully before starting the project to make sure you understand everything. It could save you hours & a lot of headaches!
- Make a swatch that measures at least 10 x 10 cm / 4 x 4 inches using the stitch provided under the Gauge Section. If your swatch matches the gauge, then you are all set to start the project. If the gauge is wrong, you might need to change your crochet hook – increase your hook size if your stitches are smaller & decrease your hook size if your stitches are larger.
- All measurements given are unblocked.
- Provided measurements are as exact as possible, but are given as approximates. This is because yarn variances, crochet tension, & individual technique might give variations in the result, which changes from person to person.
- The body of this pattern is worked in the round.
- Care Instructions: hand wash, lay flat to dry or follow the care instructions on the yarn packaging.
INSTRUCTIONS:
Brim
With color A and G / 4.00mm hook
Preemie to 12 months
ch 4
Row 1: Sc in the BPO of the 2nd ch from the hook and in each ch across (3sc)
Row 2: Turn work, ch 1, sc in the BLO of each st across (3sc)
Repeat row 2 until the project reaches the appropriate hat circumference for your size according to the Finished Dimensions chart above.
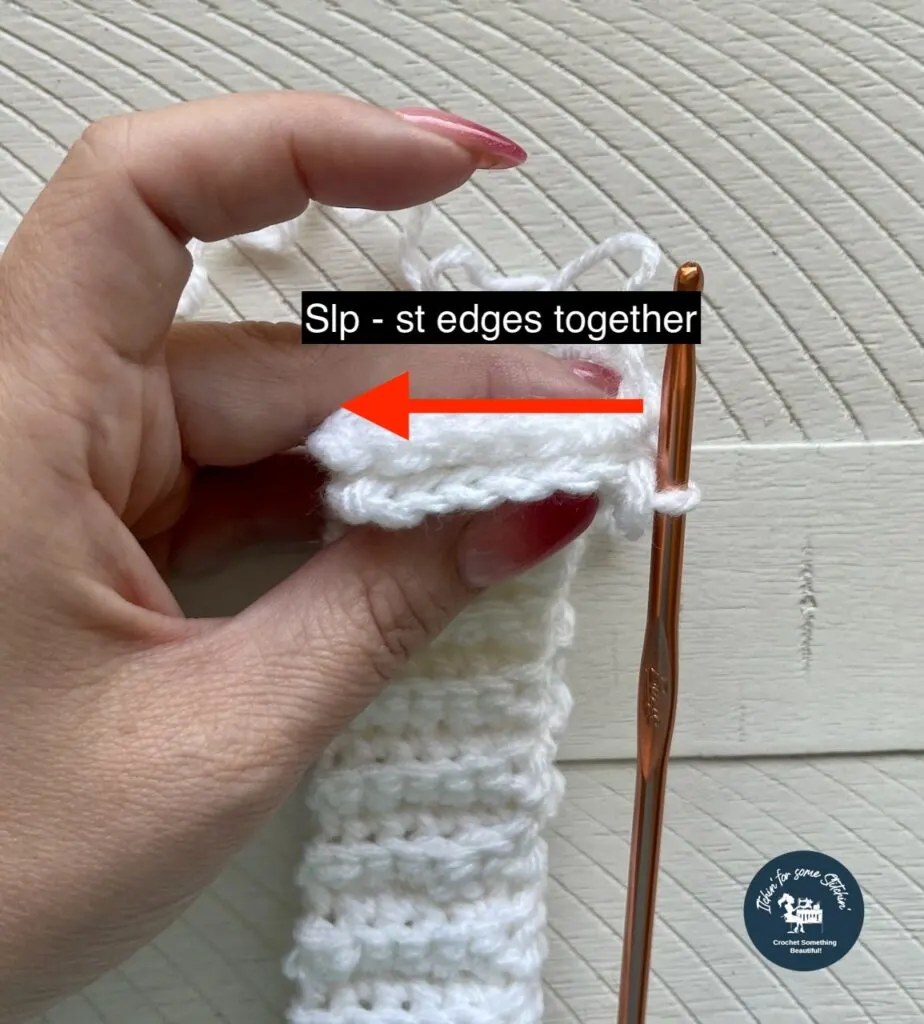
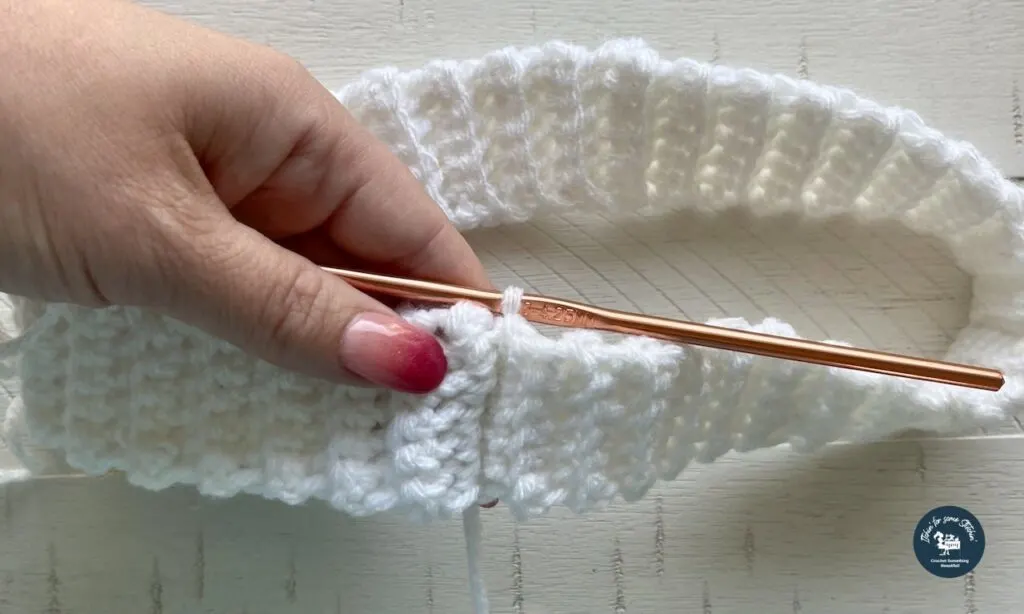
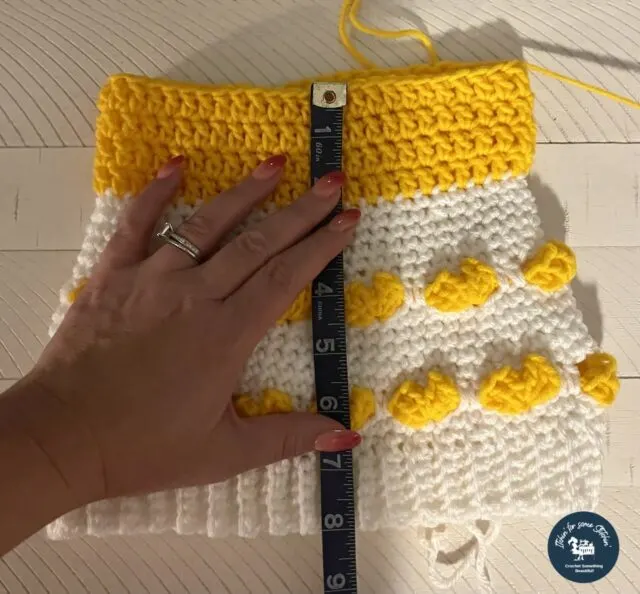
- Fold brim in half and slp-st the two edges together to form a large ring, flip ring so that the seam is on the inside, do NOT bind off, continue to rnd 1.
SEE IMAGES 1 & 2 BELOW
Toddler to Adult/Mens
ch 7
Row 1: Sc in the BPO of the 2nd ch from the hook and in each ch across (6sc)
Row 2: Turn work, ch 1, sc in the BLO of each st across (6sc)
Repeat row 2 until the project reaches the appropriate hat circumference for your size according to the Finished Dimensions chart above.
- Fold brim in half and slp-st the two edges together to form a large ring, flip ring so that the seam is on the inside, do NOT bind off, continue to rnd 1.
SEE IMAGES 1 & 2 BELOW
Body
All sizes: Change to I/5.50 mm hook
Rnd 1: Ch 1, sc around the brim in multiples of 6, slp – st at the seam to close.
PRO TIP: Mark seam with a stitch marker.
Rnd 2: Ch1, sc in each st around, slp – st to close.
Rnd 3: Change to color B, ch 3 (counts as a dc) work 2 dc in the 1st st, ch 2, work 3 dc into the same st, *ch 2, skip 5 sc, (3 dc, ch 2, 3 dc) in the next st*; Repeat from * to * the last 5 sts, ch 2, slp – st to top of ch 3 to close.
PRO TIP: Mark slp – st with a stitch marker after each rnd.
Rnd 4: Change to color A, *Ch 1, sc in the next ch2-sp, ch 1, hdc in each of the 2nd and 3rd sts of the skipped 5 sc of the previous rnd*; Repeat from * to * to end, slp-st to close.
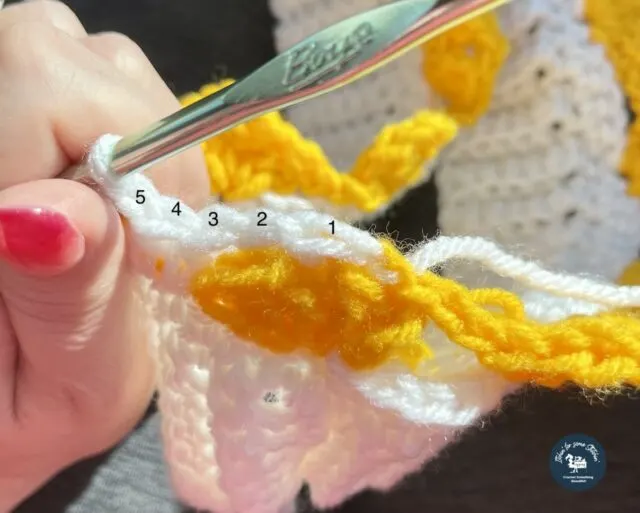
NOTE: Rnd 4 creates 5 sts between each (3 dc, ch 2, 3dc) cluster. These 5 sts are: 1. Sc in ch2 sp, 2. Ch1, 3. Hdc in 2nd st of sk sts, 4. Hdc in 3rd st of sk sts, and 5. Ch1
Rnd 5: Ch 1, sc in each st around, slp-st to close.
NOTE: Stitch count should be reduced by 13 sts / 2 heart sts
Preemie to Newborn
Rnds 6 – 8: Repeat rnd 5
Rnd 9: Ch 1, *Sc in the next 5 sts, sc2tog the next two sts,*; Repeat to end, slp – st to close. If you get to the last sc2tog and there are 6 or less sts remaining, sc in each of the remaining sts.
Rnd 10: Ch 1, sc in each st around, slp -st to close.
Rnd 11: Change to color B, ch 3, dc in each st around, slp -st to top of ch 3 to close.
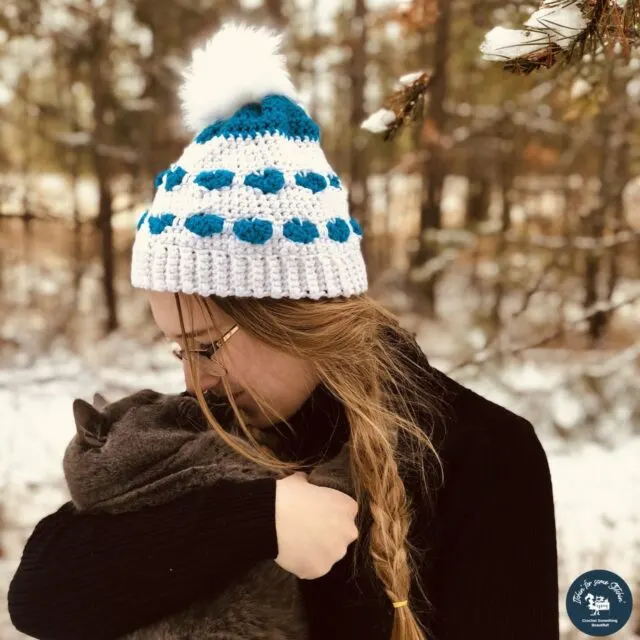
Repeat rnd 11 until you have reached the hat length for your size according to the chart in the Finished Dimensions section above. See image 4 below for reference; note that image 4 depicts Teen/Sm Adult to Adult/Mens.
Bind off leaving a long tail. Continue to the Finishing section.
3 – 6 months to 6 -12 months and Toddler to child
Rnds 6 – 9: Repeat rnd 5
Rnd 10: Ch 1, *Sc in the next 5 sts, sc2tog the next two sts,*; Repeat to end, slp – st to close. If you get to the last sc2tog and there are 6 or less sts remaining, sc in each of the remaining sts.
Rnd 11: Ch 1, sc in each st around, slp -st to close.
Rnd 12: Change to color B, ch 3, dc in each st around, slp -st to top of ch 3 to close.
Repeat rnd 12 until you have reached the hat length for your size according to the chart in the Finished Dimensions section above. See image 4 below for reference; note that image 4 depicts Teen/Sm Adult to Adult/Mens.
Bind off leaving a long tail. Continue to the Finishing section.
Teen/Sm Adult to Adult/Mens
Rnds 6 – 9: Repeat rnd 5.
Rnd 10: Change to color B, ch 3 (counts as a dc) work 2 dc in the 1st st, ch 2, work 3 dc into the same st, *ch 2, skip 5 sc, (3 dc, ch 2, 3 dc) in the next st*; Repeat from * to * the last 4 sts, ch 2, slp – st to top of ch 3 to close.
Rnds 11 – 13: Repeat rnds 4 – 7.
Rnd 14: Change to Color A, Ch 1, *Sc in the next 5 sts, sc2tog the next two sts,*; Repeat to end, slp – st to close.
NOTE: If you get to the last sc2tog and there are 6 or less sts remaining, sc in each of the remaining sts.
Rnd 15: Ch 1, sc in each st around, slp -st to close.
Rnd 16: Change to color B, ch 3, dc in each st around, slp -st to top of ch 3 to close.
Repeat rnd 16 until you have reached the hat length for your size according to the chart in the Finished dimensions section above.
Bind off leaving a long tail. Continue to the Finishing section.
FINISHING:
- Insert the yarn needle – attached to the long yarn tail – into the top edge of the hat. Push the edge of the hat along the tapestry needle so that the top cinches up. You may have to push the needle out and re-insert it several times.
- Once the top rim of the beanie has been cinched up, use the yarn attached to the tapestry needle to seal up any remaining hole.
- Use the yarn tail to attach the beanie.
Crochet Community on Facebook
Looking for lots of crafty inspiration, tips, tutorials, and a great crochet community? Join my Facebook group!
I’d love to see your You’ll Always Be in My Heart Crochet Beanie!
Please be sure to share your makes with me on social media with #itchinforsomestitchin and #beinmyheartbeanie.

Thank you!
I sincerely appreciate you visiting my blog! By sharing my content and/or making a purchase you are making it possible for me to continue producing and sharing free content for everyone to enjoy. I sincerely appreciate your support!

Please Share!
Love Pinterest? I do!
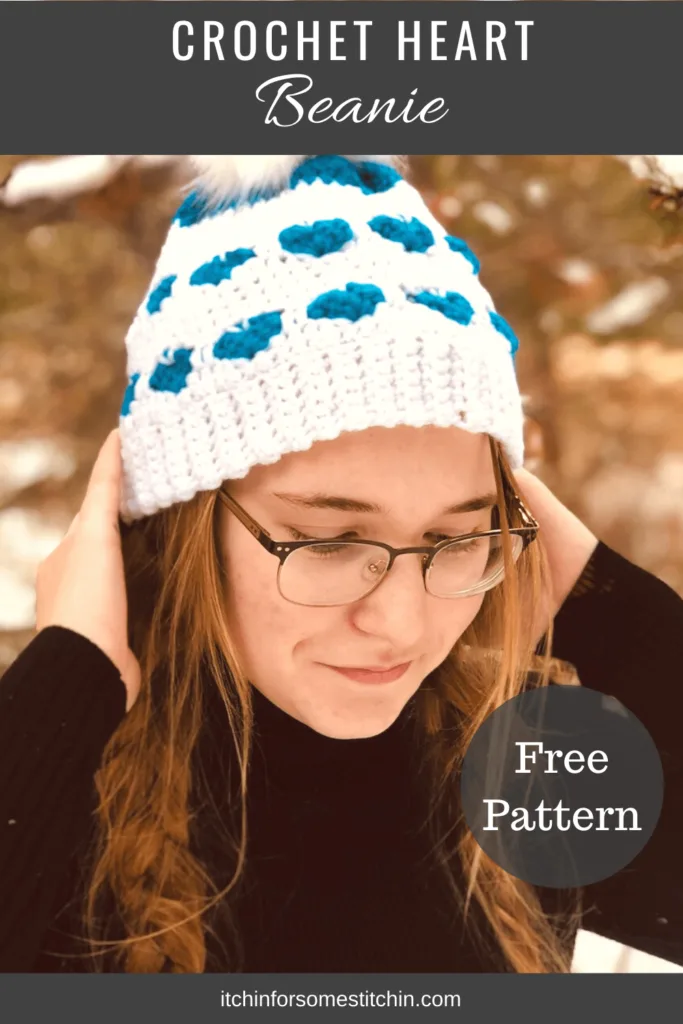
PIN this crochet beanie pattern to your Pinterest boards for later HERE.
You can also follow all my boards!

Barb
Wednesday 29th of December 2021
Gauge... 114 stitches? Maybe should read 14 stitches?
Itchin4Stitchin
Monday 3rd of January 2022
Hi Barb,
Oh my goodness... thank you so much. That is definitely a typo. Fixing it now!
Best,
RaeLynn