Understanding the Language of Crochet
Did you know that reading crochet patterns is one of the biggest problems crocheters face?
But truly, it doesn’t have to be as difficult or as intimidating as it may seem!
Let me walk you through it in today’s guide on how to read crochet patterns. 🙂

Believe it or not, reading crochet patterns actually a struggle for many experienced crocheters as well as beginners.
In fact, I’ve had people in my Facebook group who’ve been crocheting for 20+ years and yet, cannot read a crochet pattern!
Sounds impossible, right?
But it’s completely true.
Many crocheters have learned the basic crochet skills, either on their own or from a friend or family member, and simply use those skills to create crochet projects by eye without ever using a pattern.
It’s AMAZING!!
And of course, there is YouTube, which don’t get me wrong is a fabulous crochet resource.
Crocheters can master complex stitches and even do entire patterns without looking at it in black and white.
Following videos is actually one of my favorite ways to learn!
In truth, you don’t ever have to read a crochet pattern to be a successful crocheter.
So, then why is “reading crochet patterns” the number one struggle I hear from fellow crocheters?
Looking for lots of crafty inspiration, tips, tutorials, and a great crochet community? Join my Facebook group!
Well, I’ll tell you what some of these crocheters have told me.
It’s because not every lovely pattern they want to crochet comes in a video format.
Sometimes, the only way someone can crochet that project that they really love is by following a written pattern or graph.
So, if you’re one of those crocheters who fall in this category – someone who wants to learn how to read crochet patterns because you want to be able to crochet the projects of your dreams, then this is the tutorial for you!
The most important thing to remember as you go forward is to take it slow because reading a crochet pattern is quite literally like looking at a foreign language.
Crochet has its own words, abbreviations, and symbols. If you don’t know them or understand the sentence structure it will be very easy to get lost, confused, and frustrated.
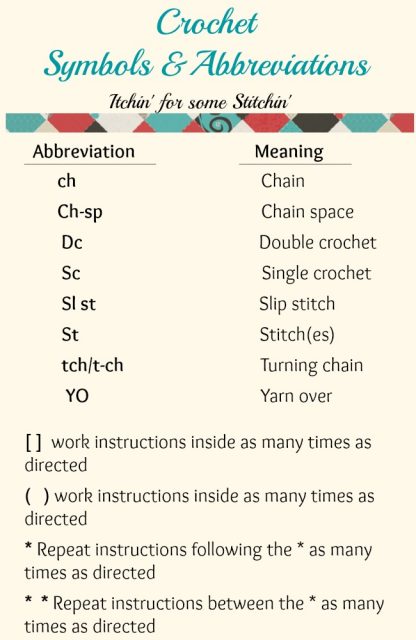
The best thing to do is to have a chart of crochet symbols, abbreviations, and their meanings handy when you are crocheting.
Lucky for you, I’ve made one and I am going to share it with you. 😃
But before we get into that, there are a few things you need to keep in mind.
Crochet Pattern Reading Tips
- Patterns can be written in rounds, rows, or combinations of both. If it is written in rounds then your project will be worked in a circular or oval shape. If it is written in rows it will be horizontal or vertical.
- Most crochet patterns have a level of difficulty rating. These include beginner, easy, intermediate and advanced. As noted in The 10 Best Crochet Tips for Absolute Beginners, if you are a beginning crocheter, then find a crochet pattern labeled BEGINNER. You should always choose the level of difficulty most suited to your crochet abilities. Working with a crochet pattern that is too advanced will only lead to frustration. As you become more experienced, you will be able to successfully take on more difficult patterns.
- Be sure to count your stitches as you work to make sure that you have the number of stitches in each row or round as the pattern indicates.
If you struggle with counting stitches and/or rows, please check out my free video course: How to Count Stitches and Rows in Crochet.
- Always check your gauge. This is less important when crocheting a project where the size of the project doesn’t matter or you have plenty of yarn with which to work. However, when working on a project where the size is important, checking your gauge can be the difference between success and failure.
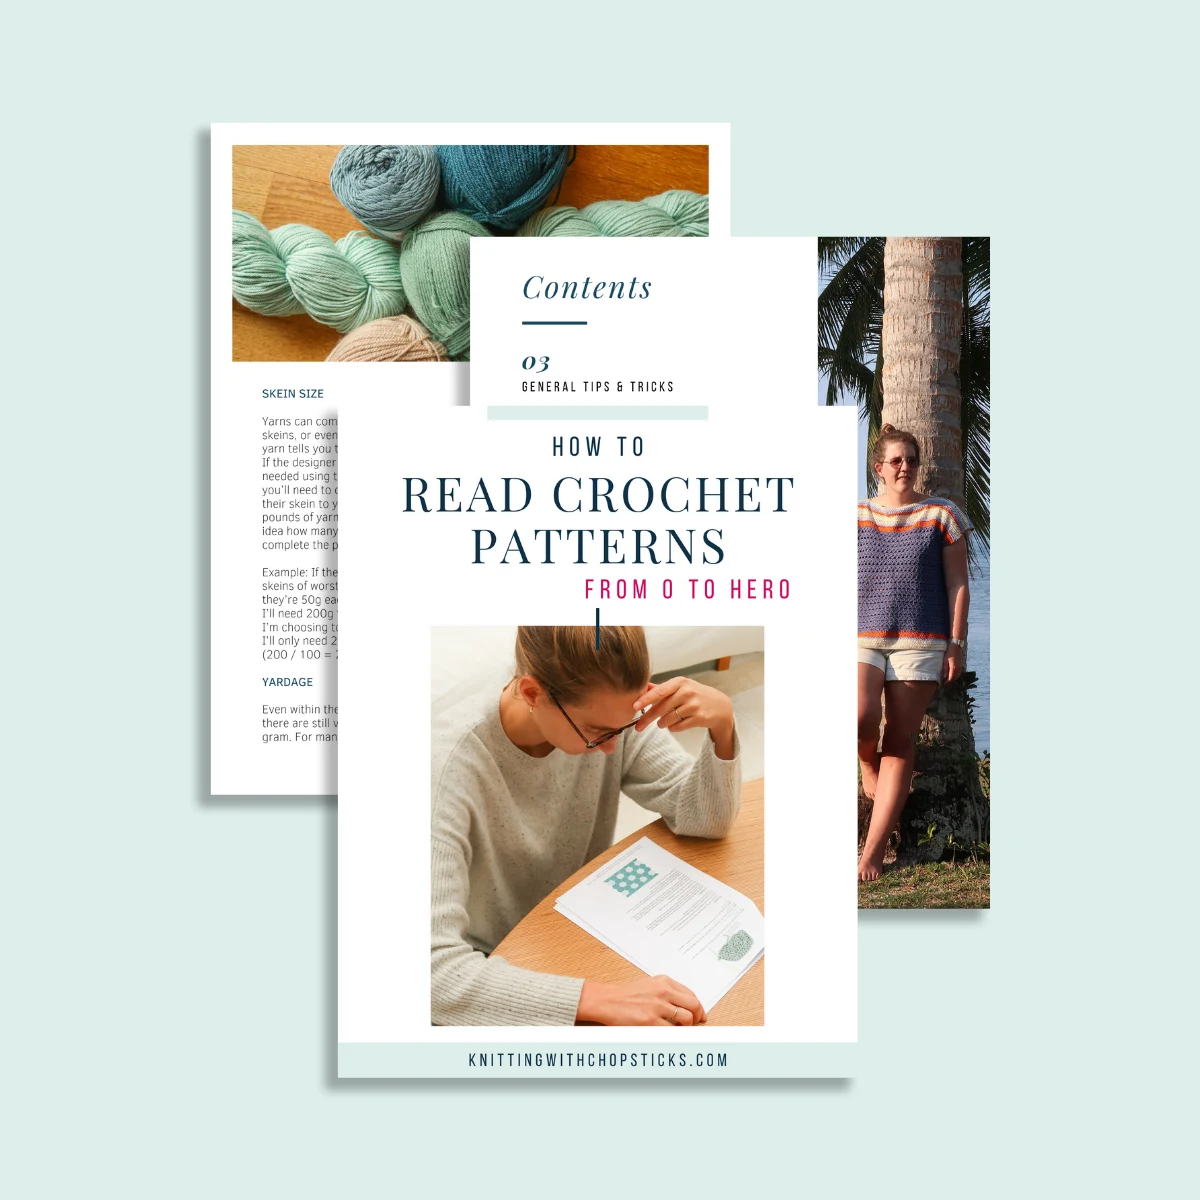
If you don’t know how do gauge, this ebook not only takes you through the pattern reading basics, but also teaches you this technique and others that are necessary for crocheting garments.
Click on the image to check it out!

Now let’s move onto the symbols and abbreviations.
Here is a mini-listing of some of the most basic crochet symbols and abbreviations.

Now that you have the symbols and abbreviations guide, it’s time to learn how to use the symbols and /abbreviations guide when reading crochet patterns.
The best way to do this is to look at some real examples that you would see in a typical crochet pattern and how to interpret what it means in standard American English.
The examples I have provided below are from several different actual crochet patterns, but together do not make up a pattern.
**Make sure that you have your guide handy!
Example 1
Pattern reads: Use G hk. With CA ch 19.
Interpretation: Using hook size G, make a foundation chain with 19 chains using Color A. ~OR~ Chain 19 using Color A using a hook size G.
Example 2
Pattern reads: Row 1–Dc in the 2nd ch from the hk, dc across ch (28dc), ch 2 (beg hdc of next the row).
Interpretation: For row 1–double crochet in the second chain from the hook, double crochet across the foundation chain (you should have 28 double crochets), chain 2 (this will be the beginning half double crochet of the next row).
Example 3
Pattern reads: Rnd 1–4 Dc in 4th ch from hk (ch-3 counts as Dc), dc in the next 14 ch, 5 dc in last ch, working on opposite side of beg ch , Dc in next 14 sts; join with sl st to top of ch-3. 38 sts.
Interpretation: For round 1–Double crochet 4 times in the fourth chain from the hook (the first 3 chains from the hook count as 1 double crochet), double crochet in the next 14 chains, make 5 double crochets in the last chain, working on the opposite side of the beginning chain, double crochet in the next 14 stitches; join with a slip stitch to the top of the first 3 chains from the hook, which counted as one double crochet. You should have 38 stitches.
Example 4
Pattern reads: Rnd 5–Ch 3, Dc, [dc in the next 4 sts, 2 dc in the next st] around. Join. (45)
Interpretation: For round 5–Chain 3, make 1 double crochet in the first stitch, then double crochet in the next 4 stitches and make 2 double crochets in the following stitch—-you keep repeating “then double crochet in the next 4 stitches and make 2 double crochets in the following stitch” all the way around your project until you are back at the beginning. You join the working yarn to the beginning stitch usually with a slip stitch even if it is not stated. You should have 45 stitches.
Example 5
Pattern Reads: Rnd 9–Ch 1, (sc, ch4, sc) all in the first dc; sk next dc, *(sc, ch4, sc) all in the next dc, repeat from * around; join.
Interpretation: For round 9–Chain 1, in the first double crochet of the previous round make a single crochet then chain 4 then make another single crochet, skip the next double crochet, then in the next double crochet of the previous round make a single crochet then chain 4 then make another single crochet—repeat “then in the next double crochet of the previous round make a single crochet then chain 4 then make another single crochet” all the way around your project until you are back at the beginning. You join the working yarn to the beginning stitch usually with a slip stitch even if it is not stated.
Example 6
Pattern Reads: Row 2-3–Dc in 2nd st of prev row, *1 Fpdc in each of the next 3 st, 1 Bpdc in each of the next 3 st* across, 2 hdc in each of the last 2 st, ch2 (beg hdc of next row), turn.
Interpretation: For Rows 2 and 3 you will double crochet in the 2nd stitch of the previous row, then work 1 double crochet in the front post of the next 3 stitches, then work 1 double crochet in the back post of each of the next 3 stitches. Repeat “then work 1 double crochet in the front post of the next 3 stitches, then work 1 double crochet in the back post of each of the next 3 stitches” across the project until you get to the last 2 stitches. Then work 2 half double crochets in each of the last 2 stitches, chain 2 (this becomes the beginning half double crochet of the next row), turn your work.
NOTE: Sometimes you will see double asterisks ** , usually in combination with a single asterisk * or set of single asterisk instructions. This can have 2 meanings.
1. Repeat instructions between or from double asterisks as directed.
Example
Pattern reads: Row 1–Ch 26, 1 Sc in 2nd ch from hk, **sk 2 ch, 5 Dc in next ch, sk 2 ch, 1 Sc in next ch. Repeat from ** to end of row. Turn.
Interpretation: For row 1–make 1 single crochet in the second chain from the hook, skip the next 2 chains, make 5 double crochets in the next chain, skip the next 2 chains, and single crochet in the next chain. Repeat “skip the next 2 chains, make 5 double crochets in the next chain, skip the next 2 chains, and single crochet in the next chain” to the end of the row. Turn your work.
2. Work a partial set of repeat instructions as indicated by double asterisks.
Example
Pattern reads: Row 5–2 Dc in first st, *ch 2, sk next st, 4 Sc in next st, ch 2, sk next st**, 2 Dc in next st, rep from * around, ending last rep at **
interpretation: For row 5–make 2 double crochets in the first stitch, chain 2, skip the next stitch, make 4 single crochets in the next stitch, chain 2, skip the next stitch, make 2 double crochets in the next stitch. Repeat “chain 2, skip the next stitch, make 4 single crochets in the next stitch, chain 2, skip the next stitch” around, ending last repeat at “skip the next stitch”.
I realize that even after reviewing this post, learning to read a crochet pattern can be daunting, but don’t get discouraged!
Reading crochet patterns takes practice.
You should keep the symbols & abbreviations chart on hand while you crochet.
At first, you may find yourself constantly looking at the chart as you work to interpret a pattern.
However, soon you will find you have memorized each symbol and abbreviation, as well as what they mean.
Before you know it, you won’t need the chart anymore!
Thank you for coming to my blog! By sharing my content and/or making a purchase you are making it possible for me to continue producing and sharing free content for everyone to enjoy. I sincerely appreciate your support!
Until next time… Happy Crocheting!

Please Share!

Sandy
Tuesday 5th of January 2021
I don't understand what it means when a pattern says the turning chain counts as a stitch. Would it be easier if I don't worry about it and just continue with the directions?
Itchin4Stitchin
Tuesday 5th of January 2021
Hi Sandy,
No, you definitely don't want to continue the pattern ignoring those instructions. Whenever you end a row you make a turning chain before you turn your work and start working the next row. When your pattern says "the turning chain counts as a stitch" it means that it counts as your first stitch AND it actually changes the location of where you place your first actual stitch. If you ignore this your stitch count will be off. Does this make sense?
I have a course on How to Count Stitches and Rows in Crochet and an Absolute Beginner's Course that goes over this in detail. You can find them via this link: https://the-crochet-academy.teachable.com/
Best wishes,
RaeLynn
Alicia M Anderson
Wednesday 2nd of December 2020
I'm having issues reading a pattern. Could you write it out in plain English? I'd be willing to compensate you for your time. I promised this project to a relative and I am feeling so blocked I almost want to tell her no. A little help would really get me back on track. If you are willing to help, please respond to this email. If not, thanks for the help already given via this beginners pattern reader web page. Alicia Anderson
Itchin4Stitchin
Thursday 10th of December 2020
Hi Alicia,
Thanks so much for your comment. Reading patterns is indeed the number one problem I hear people complain about for crochet. If you want to send me the pattern you are working on, I may be able to to help you interpret it. But as far as actually learning how to read crochet patterns, have a video course in the works to help, but right now a friend of mine has put out an ebook that might help. I think it compliments my instructions given in this post and will add the link to it for anyone else who needs it.
I'll give you my affiliate link here as well: https://transactions.sendowl.com/stores/14422/199479
I am glad this post has helped you! Please feel free to reach out to me via email if you need more specific assistance.
Best wishes,
RaeLynn
Lina
Sunday 17th of June 2018
Can you help me figure out what this person is trying to say on this part of a not very well written pattern that people with 45 -30 year experienced crochet people cannot even make sense of it ? "Torn Top of Pants (TTP St): (Unless stated otherwise, all base sts are done in the dc stem from Rnd 1) 2 dc (A), ch 3, sk ch, (sc, 2 dc) in next ch, 2 dc in stem of dc (A), sk st, 2 dc (B), ch 4, sl st in the coordinating green rnd from Rnd 6 - straight below, sc in next ch, dc, 3 dc in next ch, dc in stem of dc (B), sk st, dc, sc, dc (C), ch 2, 3 dc in stem of dc (C), sk st, 2 dc (D), ch 3, sk 2 chs, dc (E), ch 3, sl st in the coordinating green rnd from Rnd 5 - straight below, sk ch, 2 sc, 4 dc in stem of dc (E), dc in stem of dc (D), sk st, 2 sc, 2 dc (F), ch 4, sl st in the top of dc from (E), 4 dc, dc in stem of dc (F)."
Itchin4Stitchin
Sunday 17th of June 2018
Hi! I would be happy to write this out for you. However, is there some way I can get access to the complete pattern? Usually (A), (B), (C), etc... indicate different colors, but I am not sure if that is true for this pattern. It would help if I can see the entire pattern.
Also, if you don't know what the dc stem is, here is a great video by Moogly Crochet that will help you: https://www.mooglyblog.com/post-stitches-raisedrelief/
Once, I have the whole pattern I can email you with it written out completely and I may even work the pattern as to better assist you.
May I continue this conversation with you via email?
Sincerely,
RaeLynn
nariman owes
Monday 15th of May 2017
so cute
Itchin4Stitchin
Monday 15th of May 2017
Thank you! Glad you stopped by!