Do you like to DIY?
Me too! Instead of buying, I’ll attempt to make anything I think I can make better or for cheaper. Attempt is the key word here folks.
I said I’ll attempt it. I never said that I would always be successful. In fact, I’ll admit that more often than not I fail in the DIY department, but that doesn’t stop me from trying!
Let me tell you about my most recent DIY flop. It was so simple, you’ll wonder how on earth I managed to mess it up. But I did.
* This post contains affiliate links. See my full Disclosure Policy for details.
It was pom poms. Yes, those little puff balls of yarn were a major DIY disaster.
That’s why today I am sharing with you my tutorial on how to make pom poms. It’s absolutely the best way!
Are Pom Poms Safe For Babies?
I’m sure you’ve seen tons of pom pom tutorials on Pinterest, Facebook, or perhaps in a Google search.
They look simple, right? That’s because they ARE simple.
I tried out multiple ones for my ribbed baby beanie pattern. I wanted a green pom pom on the top of the ribbed beanie I made in Seahawks colors for my son.
Using these tutorials I have successfully made DIY pom poms using my hand, a fork, a deck of cards, and a piece of cardboard. Truth be told, making the pom poms is not where I failed.
It was the pom poms themselves that failed.
They’d fall apart after 2-3 washings and even worse, my son could pick them apart at 9 months!
Let me tell you, folks, it’s a horrible experience to hear your son choking and then discover it’s your fault.
Or at least you feel like it’s your fault because he was choking on a piece of yarn easily pulled out of the pom pom from the beanie you just put on his head!
Yes, folks, that really happened. I stopped making DIY pom poms after that incident.
Yet, I noticed that the pom poms from my store-bought slippers never fell apart, even after 20+ washings. They even hold up to my son’s destructive tendencies.
So, I made it my mission learn how to make yarn pom poms that were better and safer for my son. I just knew there had to be a way.
The Solution:
Clover Pom Pom Makers
And I was right! I found the solution by accident. I was in Michael’s armed with the gift card I had received for my birthday a few weeks before.
Now, I was only planning on purchasing yarn for Lilly, my first granddaughter. I was crocheting her a cape. A cape that called for pom poms, which I had decided to omit.
That all changed the moment I saw pom pom makers hanging right there near the yarn, practically in front of my face. That’s right, I said pom pom makers.
I just had to give these a try!
How to Use a Clover Pom Pom Maker
The pom pom makers were by Clover, a company that I had, at that time, no experience with.
They came in four sizes. Two sizes per package.
The large package had pom pom makers that created pom poms of 2-1/2-inch and 3-3/8-inch in diameter.
While the small package had pom pom makers that created pom poms of 1-3/8-inch and 1-5/8-inch in diameter.
Since the outfit I was making was for a 0 to 3-month-old, I chose the package with the two smaller sizes.
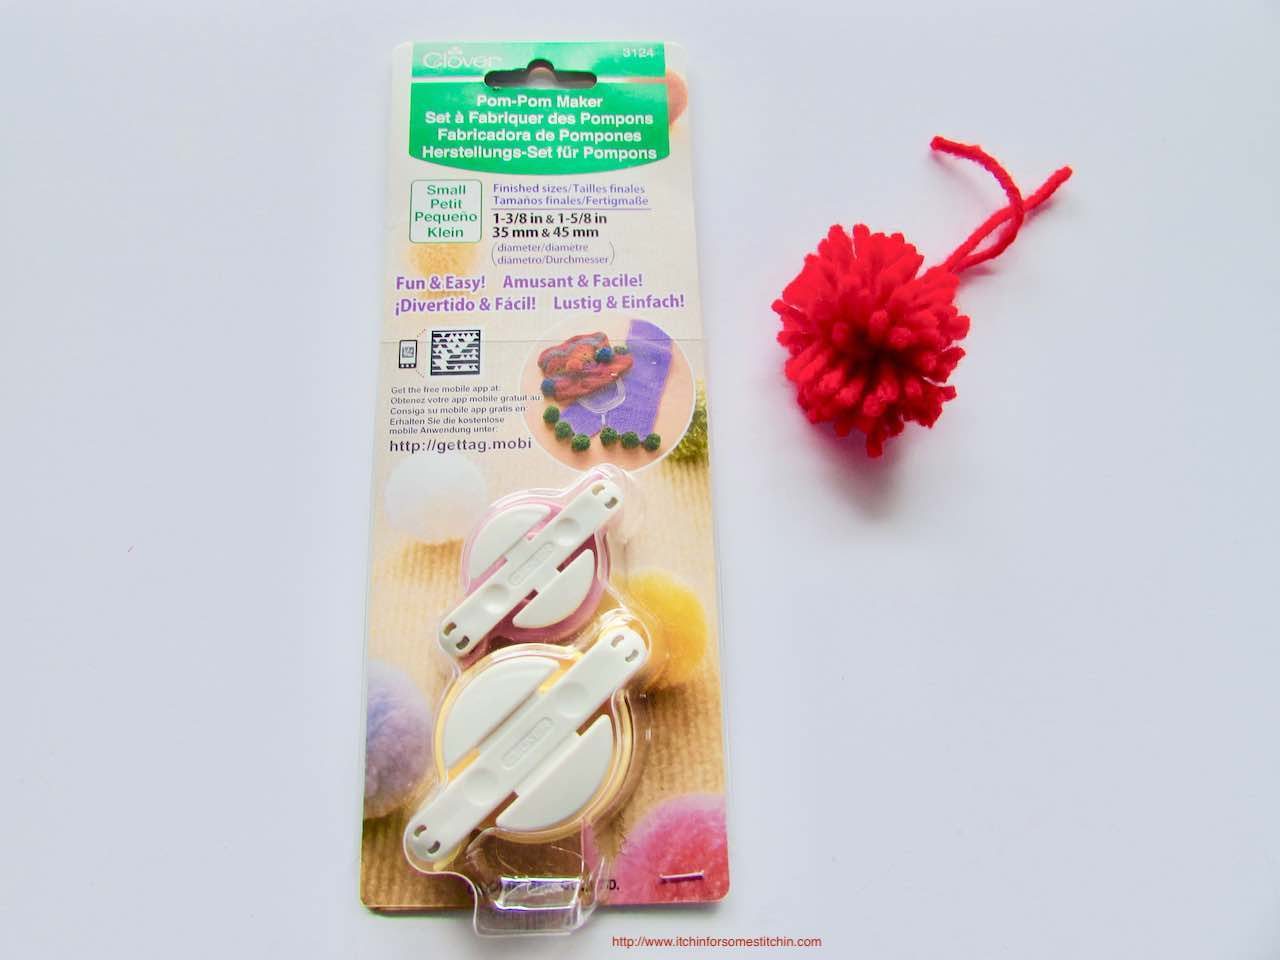
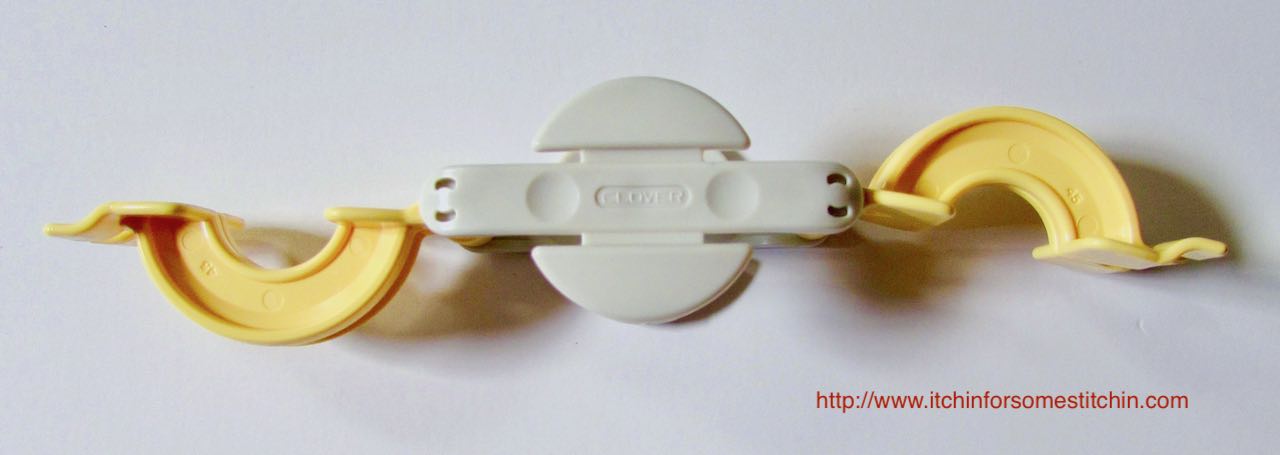
When you take the pom pom makers out of the package, they will look like they are made from only one piece.
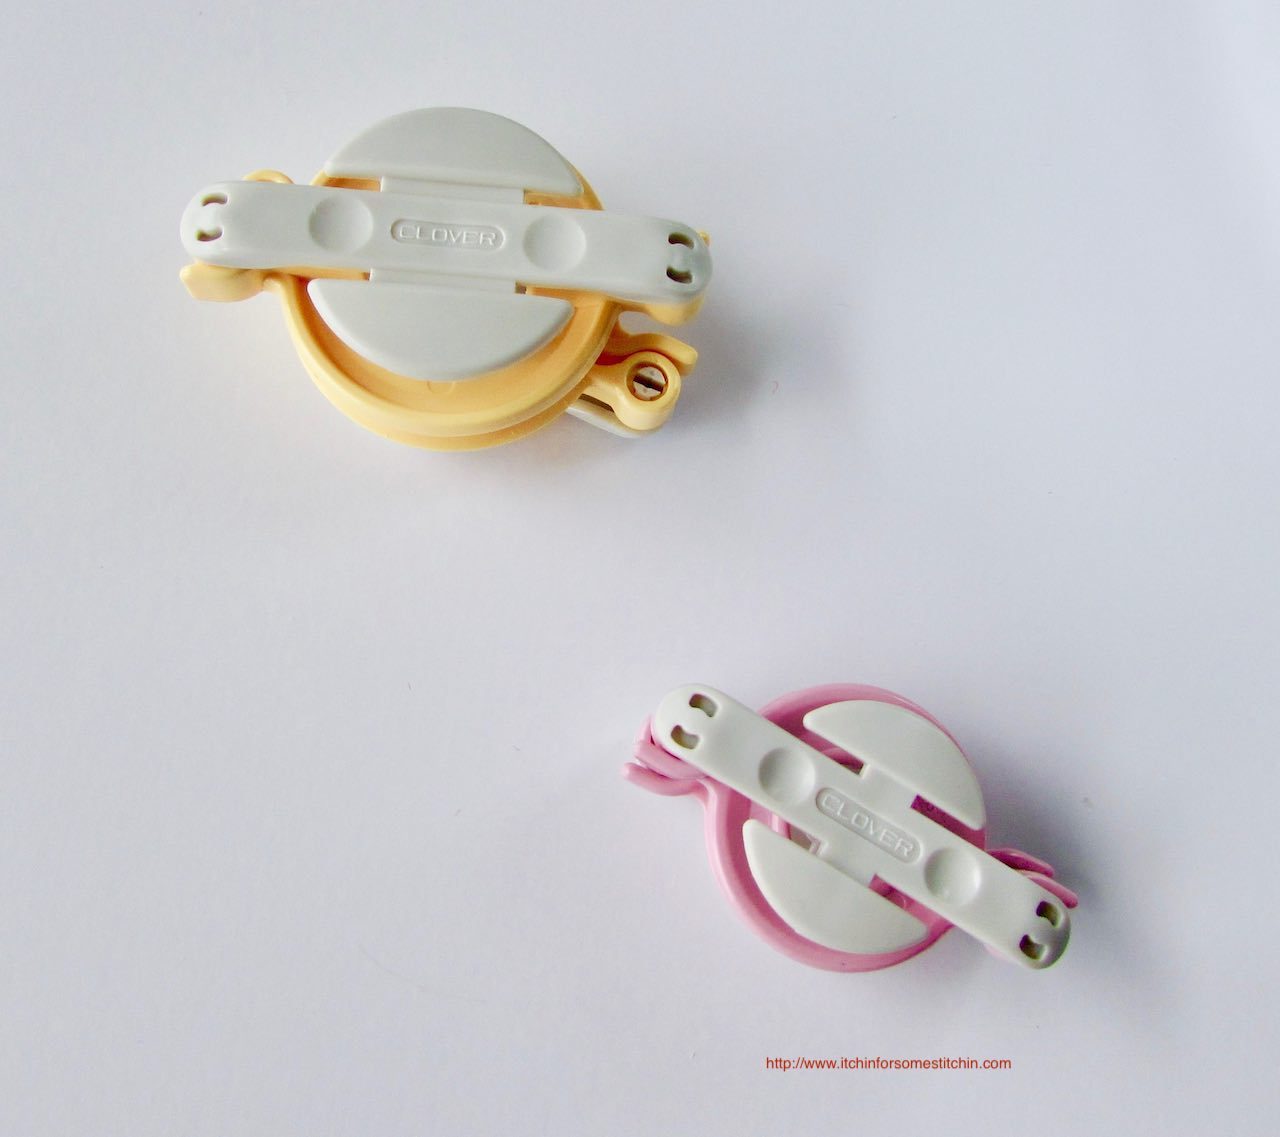
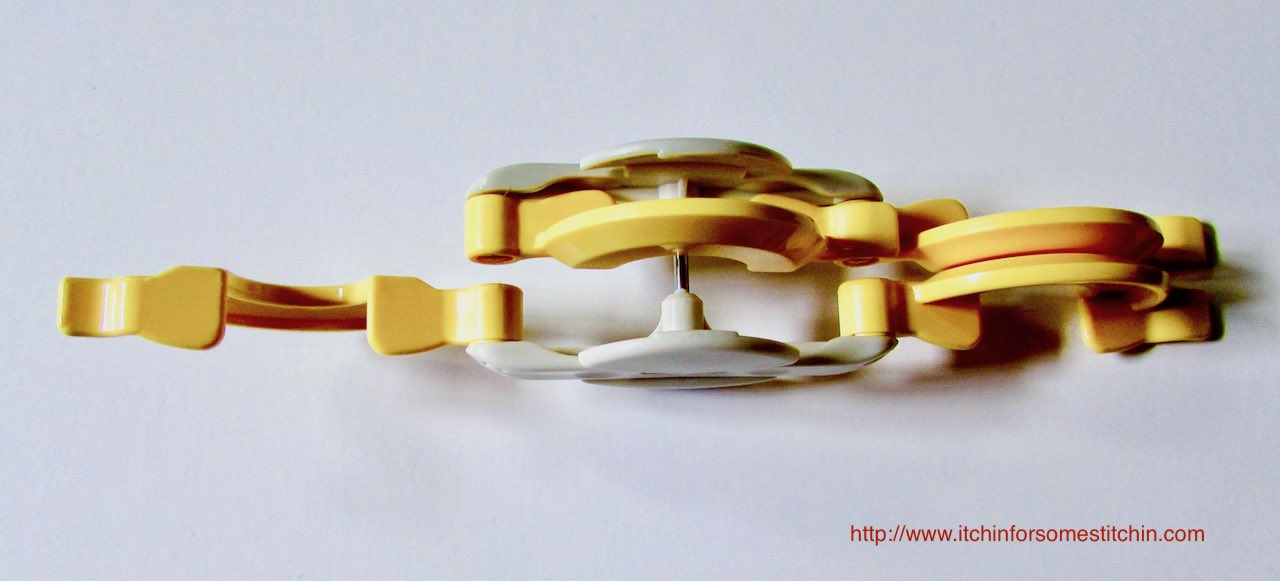
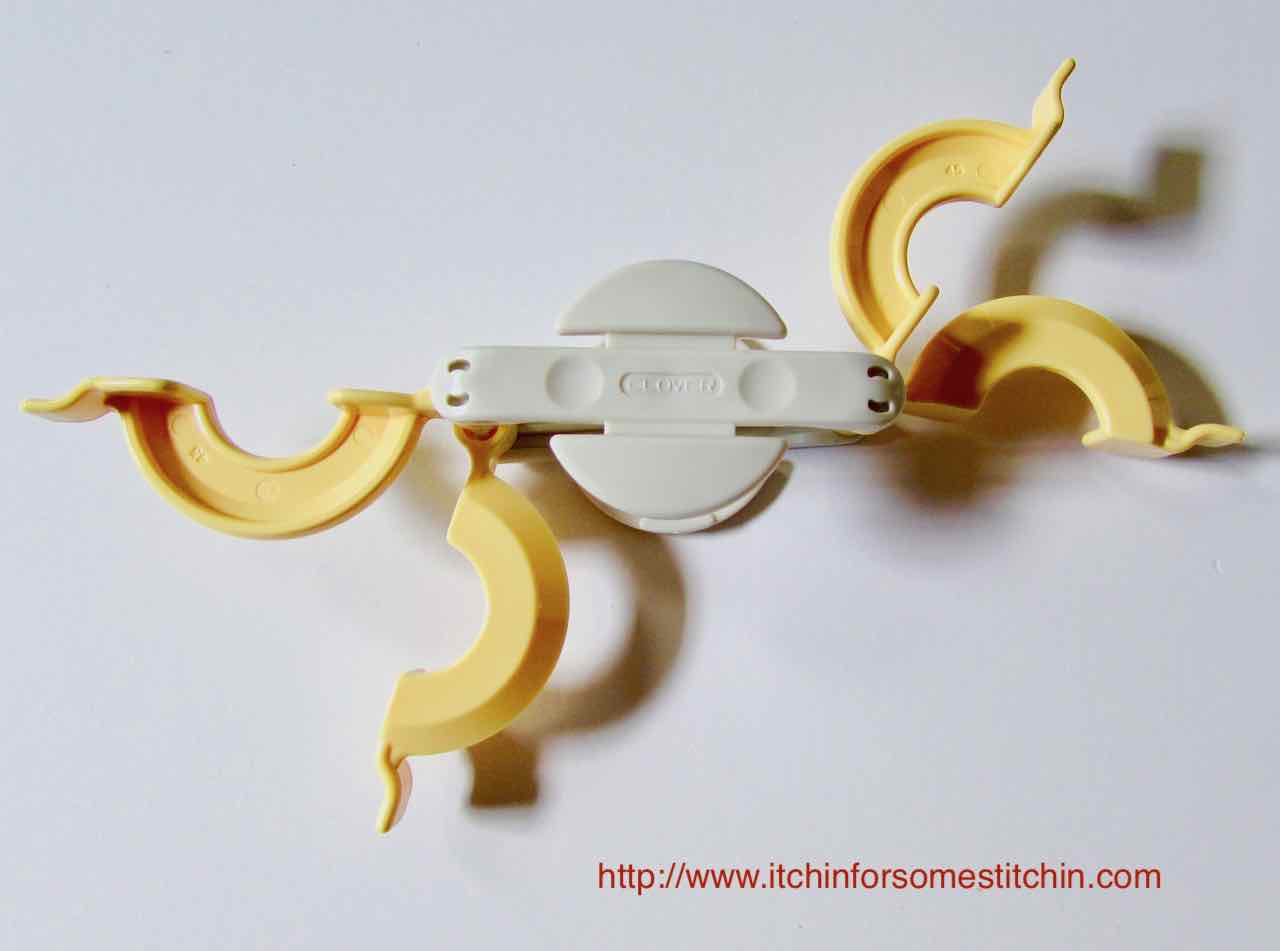
However, each pom pom maker is actually made up of two halves held together in the middle by a pin.
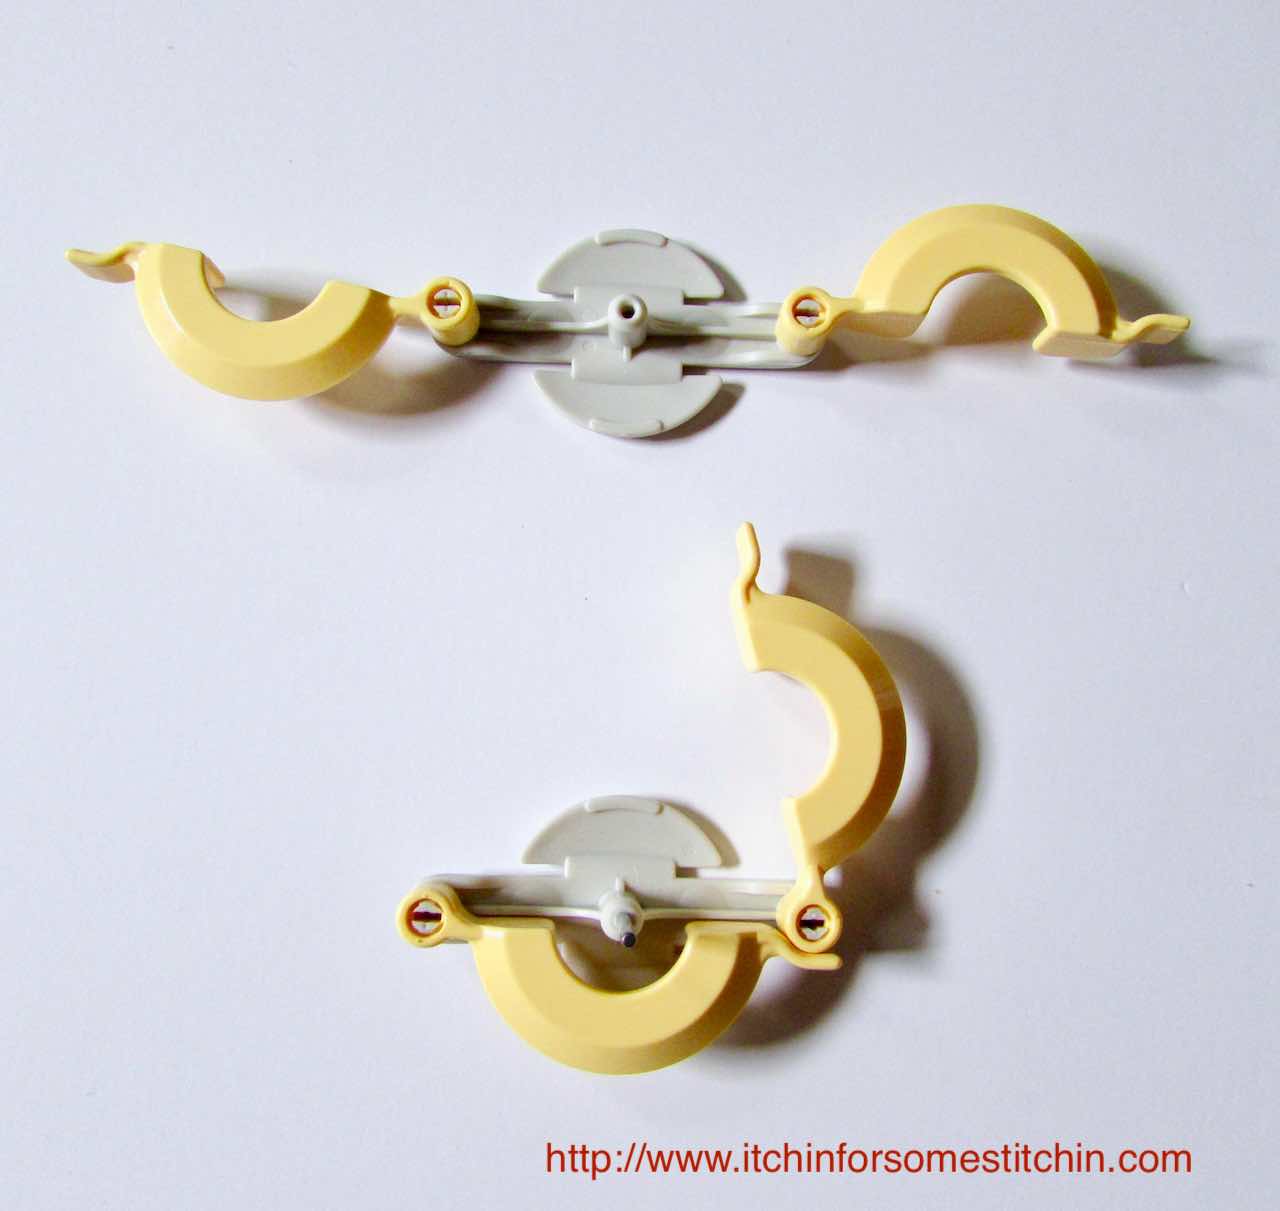
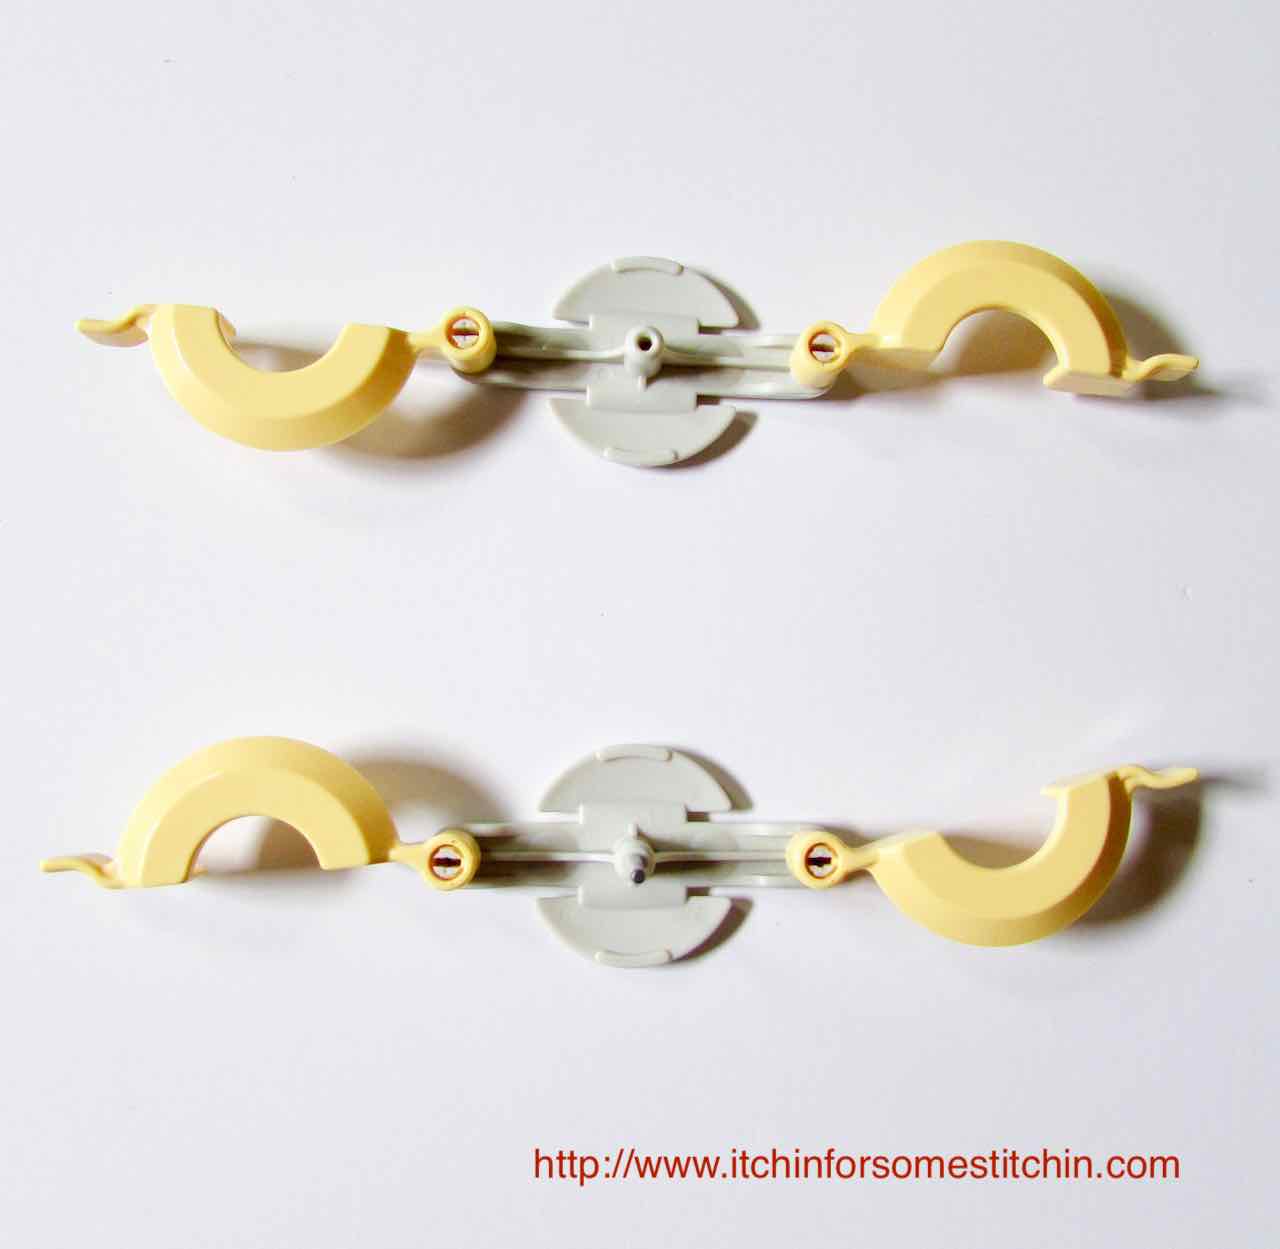
Each half has two arms, one on each side. These arms open and close.
When the two halves are put together, the arms (two on each side) can be moved as a unit of two or independently of each other.
How to Make a Pom Pom with a Clover Pom Pom Maker
Step 1
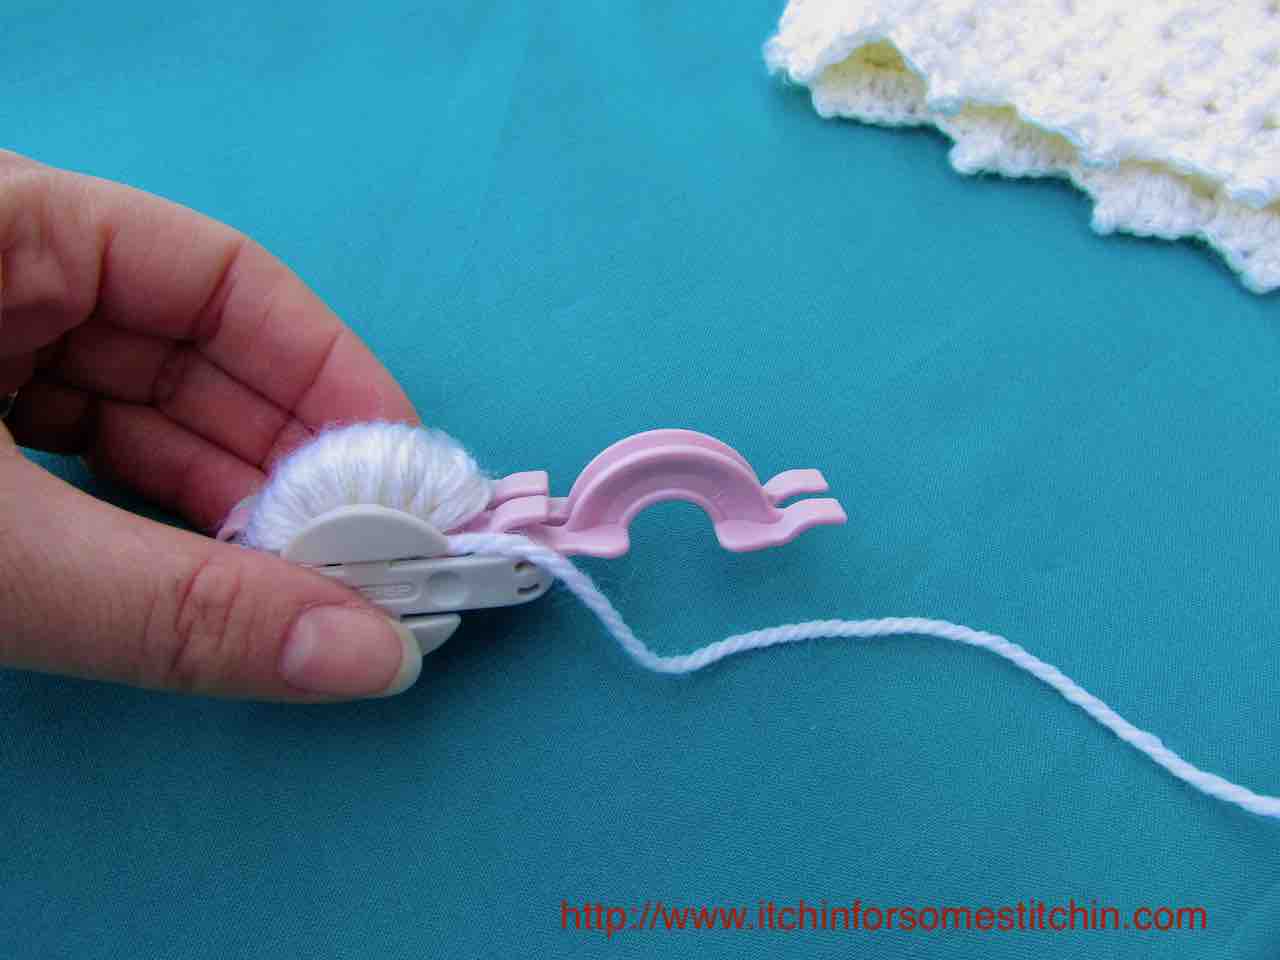
Open one side of the pom pom maker and wind the yarn around the pom pom maker arms.
You will have two tails when done. That’s perfectly fine. They will become part of the fluffy strands of the pom pom when finished.
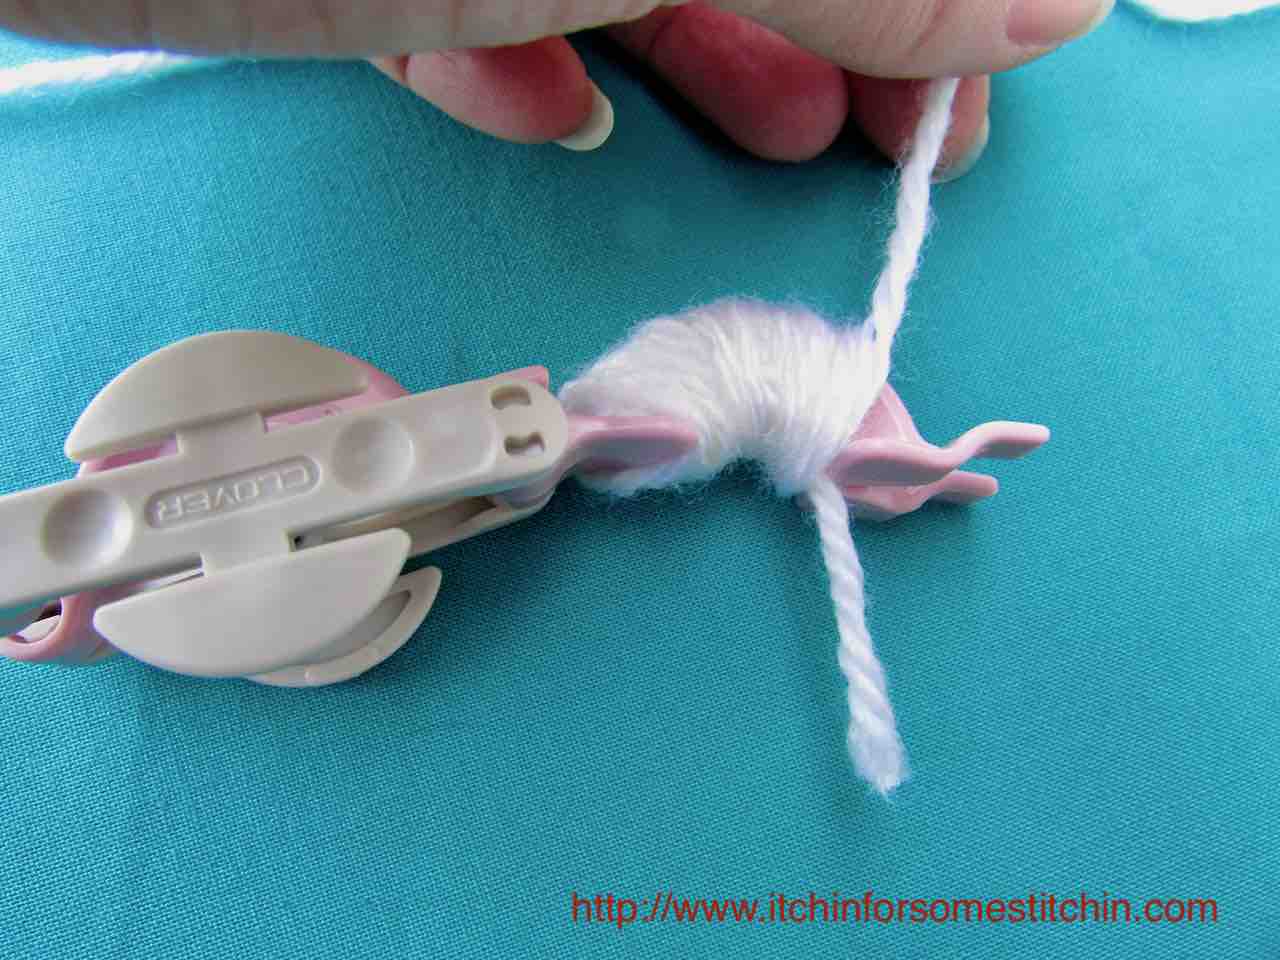
Close the now full side of the pom pom maker and open the empty side.
Step 2
Repeat step one with the other side of the pom pom maker.
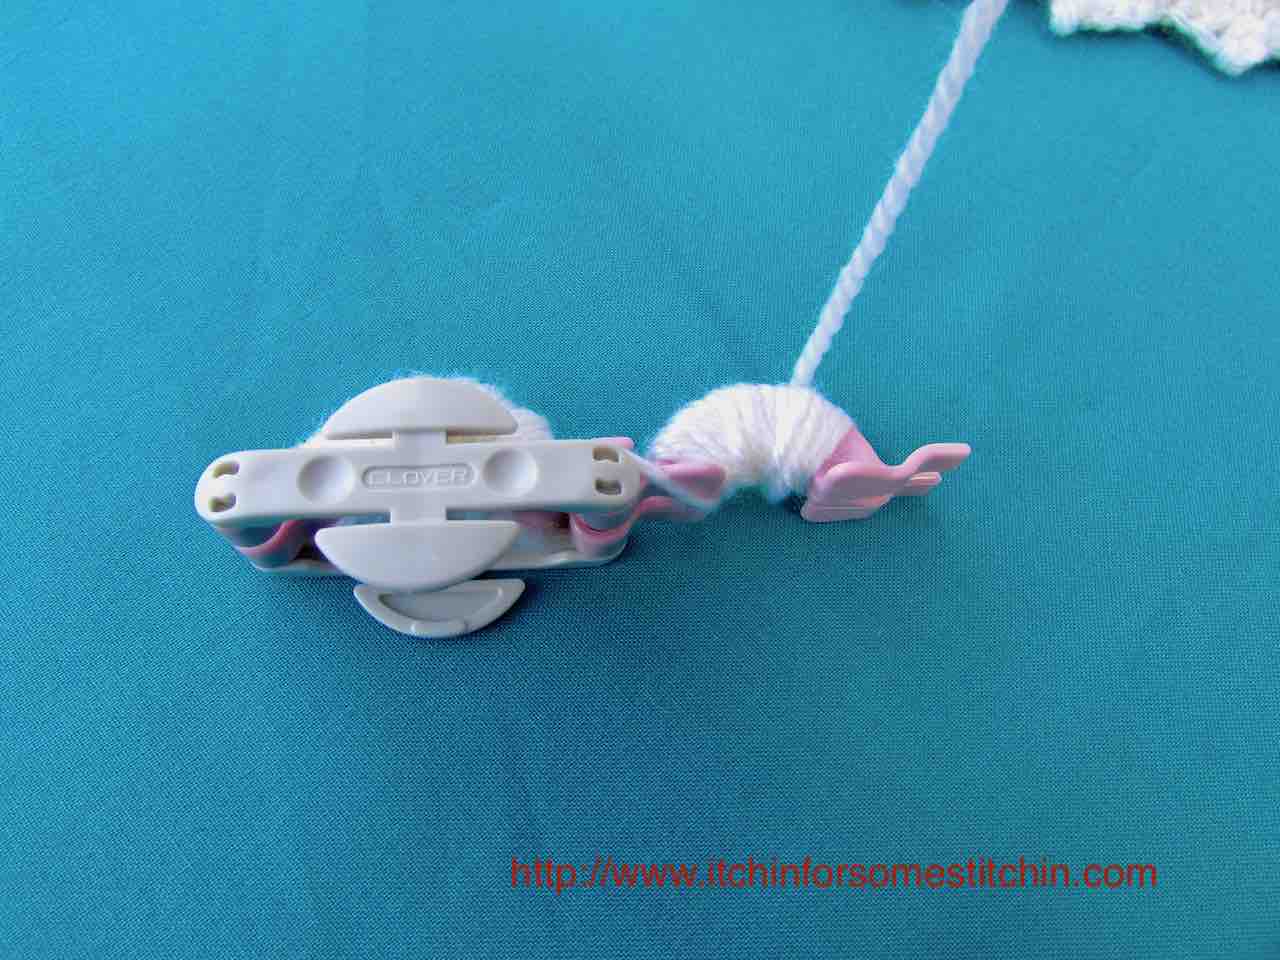
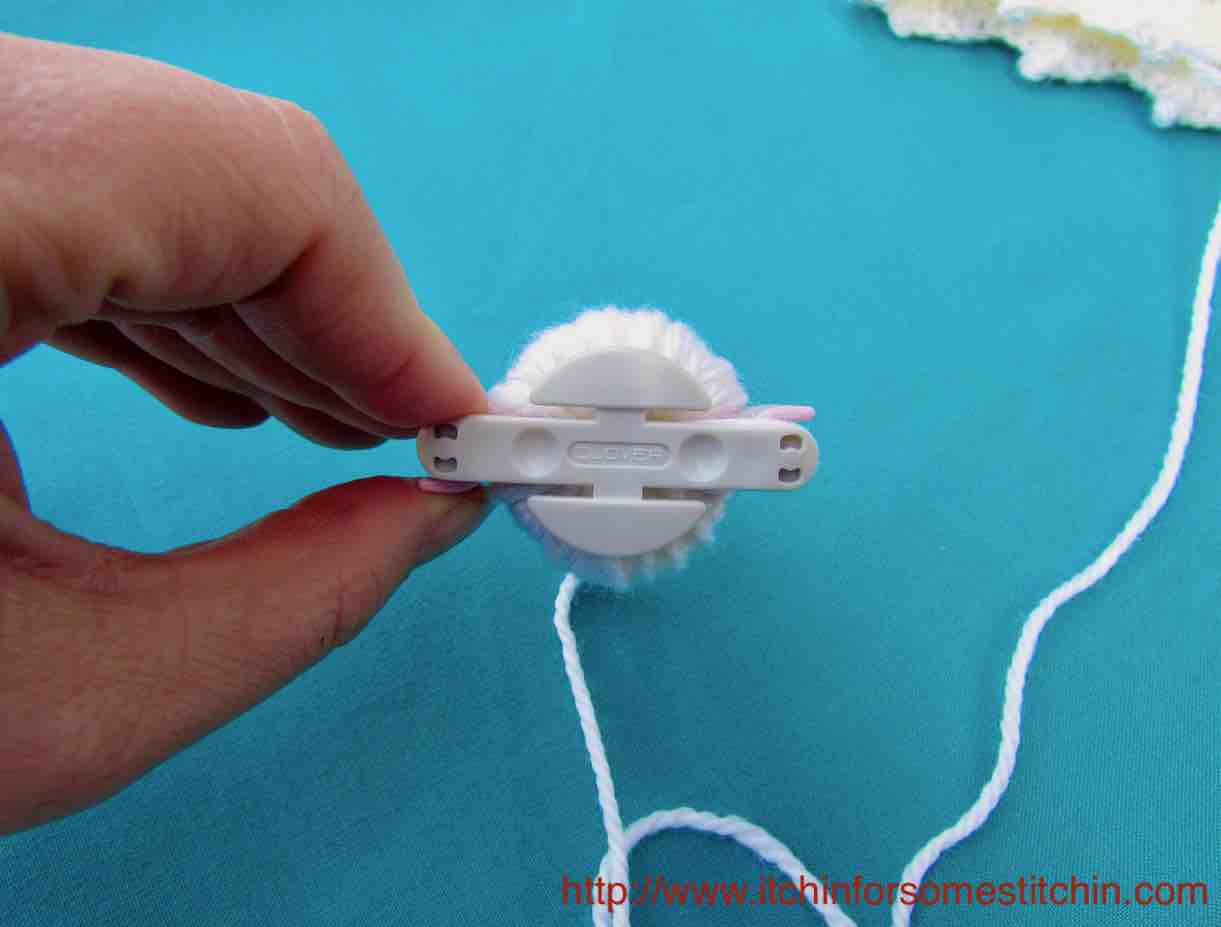
Close the second side. Both sides should be full of wrapped yarn.
Step 3
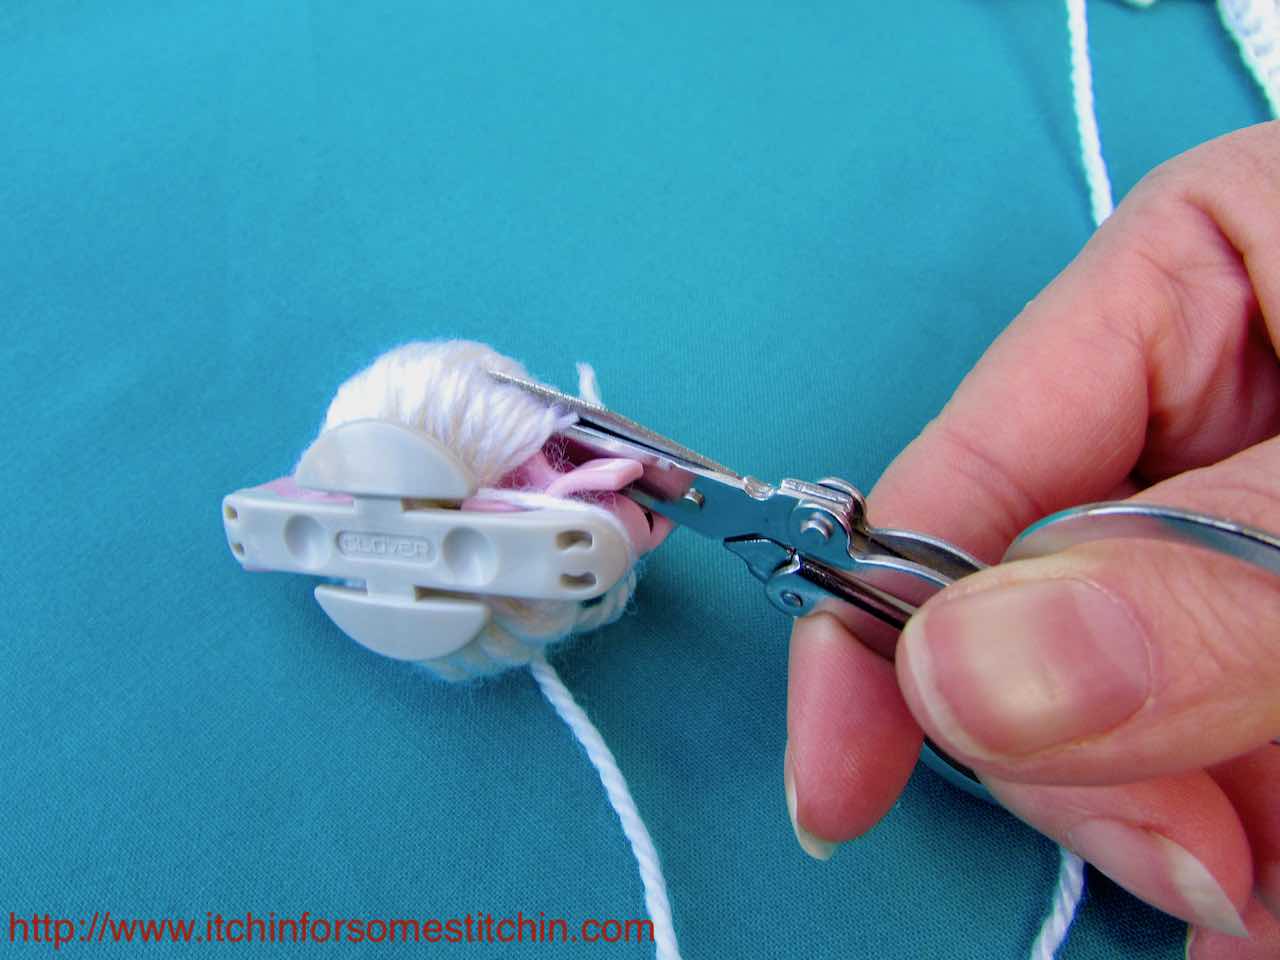
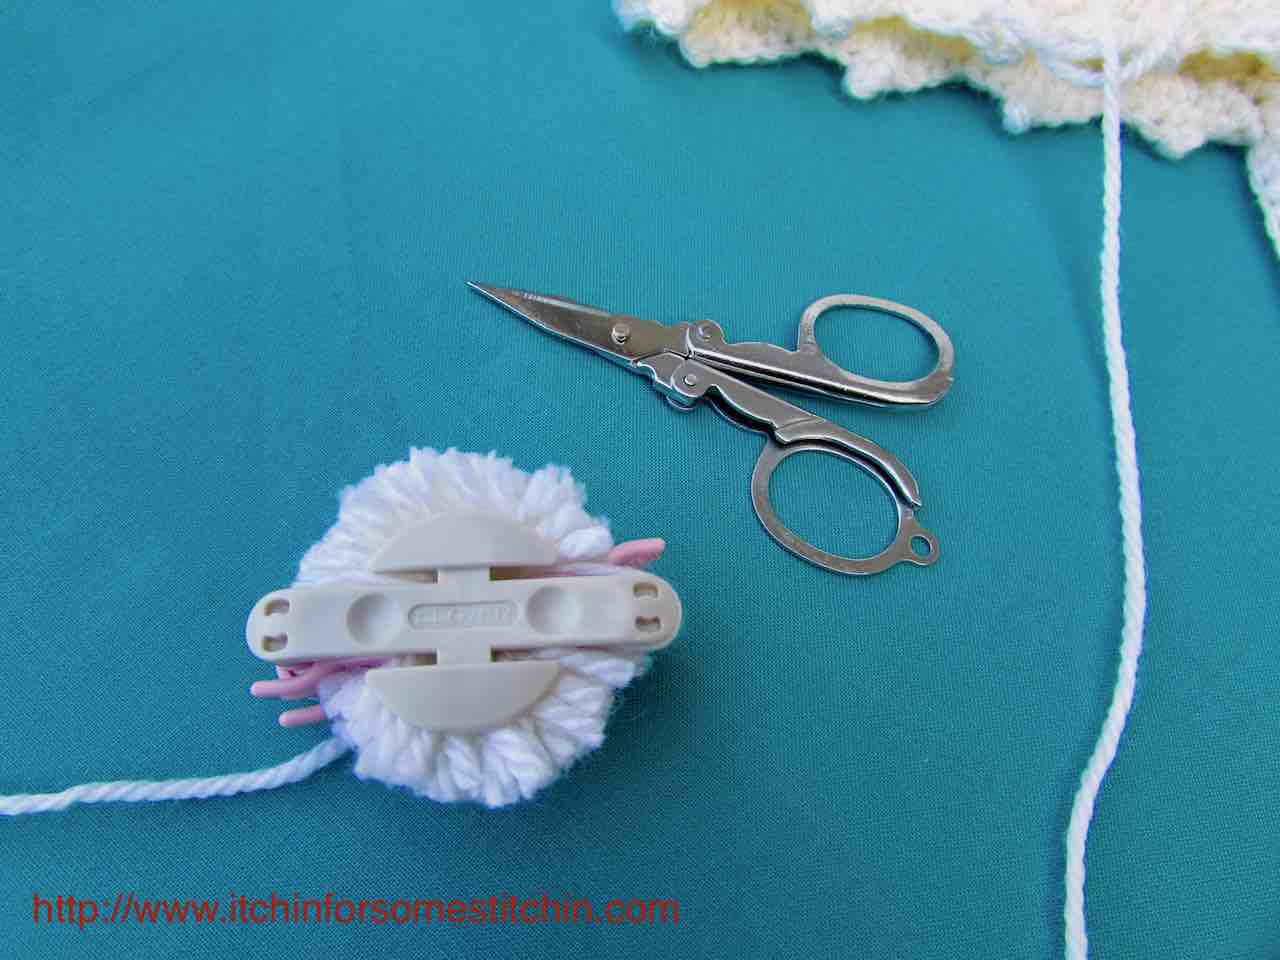
Cut the wound yarn on both sides.
Step 4
Cut the end of the yarn that still attached to your skein of yarn.
Step 5
Insert the middle of a long piece of thread or yarn into the center of the pom pom maker.
Pull both ends of the binding thread forward so that the thread visually disappears inside the pom pom maker.
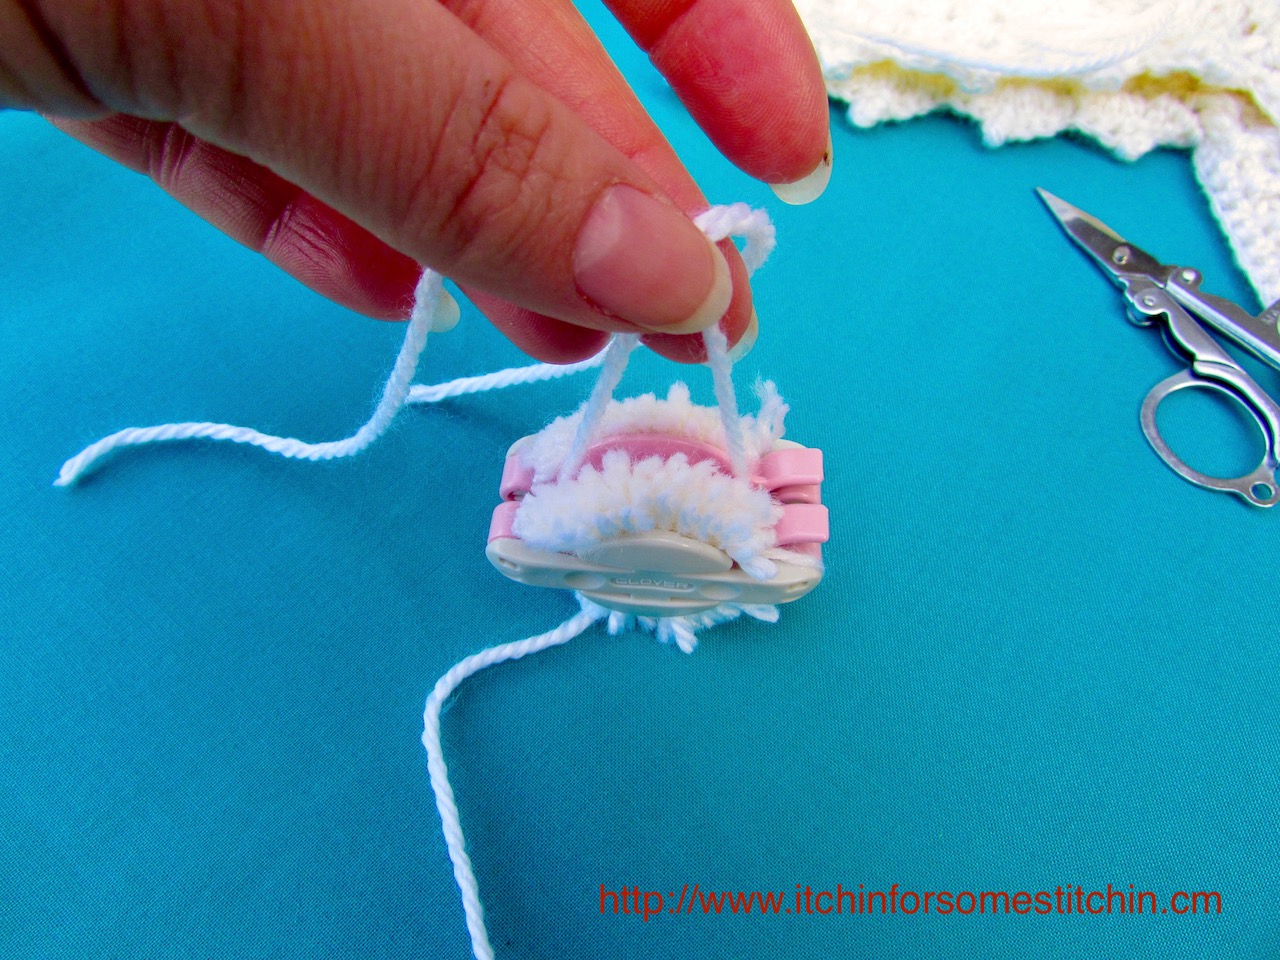
Use the two loose ends to snuggly tie the pom pom. I actually tie and wrap my yarn around the center of the pom pom maker multiple times to make sure there is a tight hold.
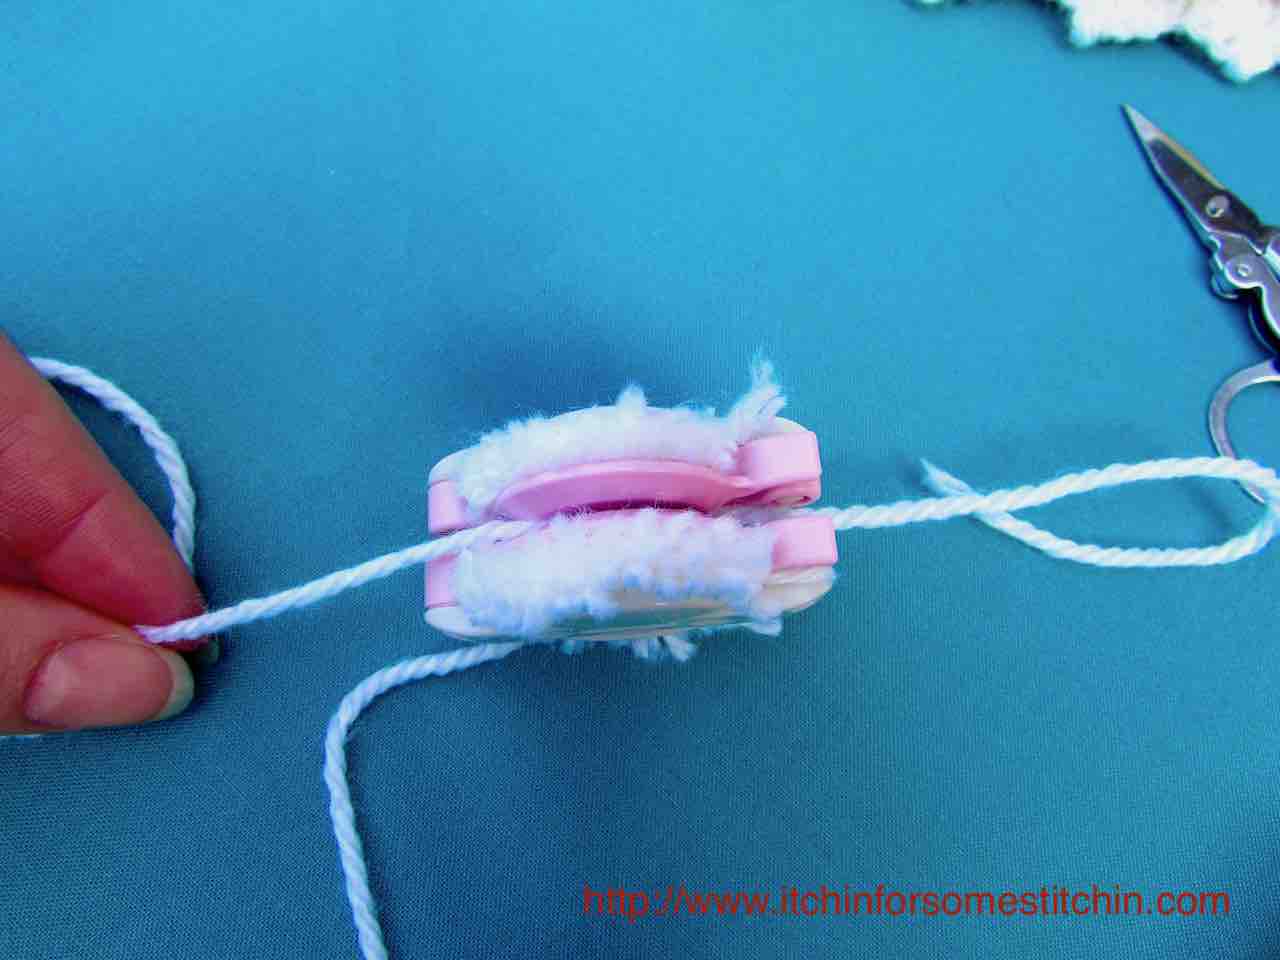
Step 6
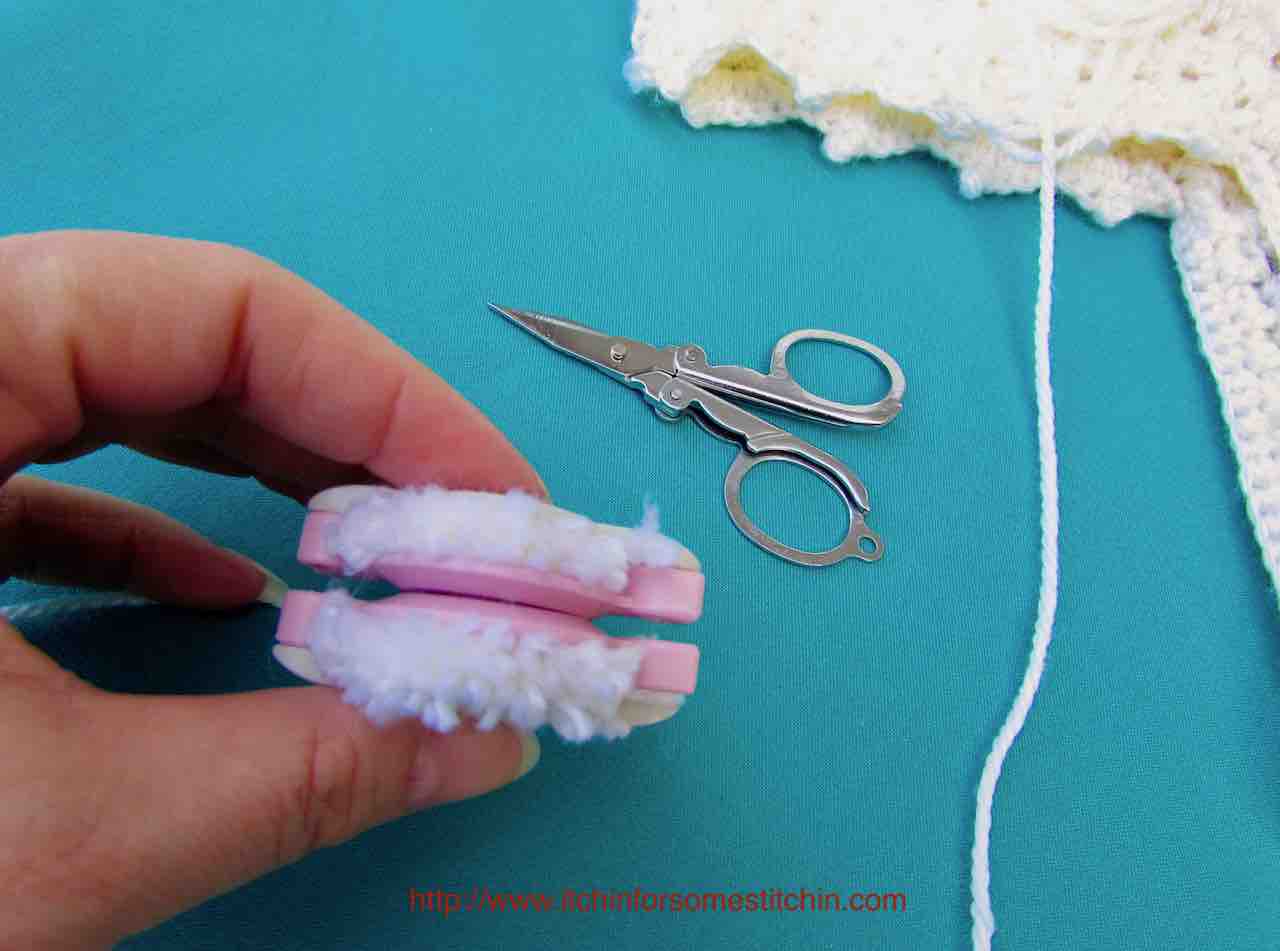
Pull the pom pom maker apart. You do this by opening the two colored sides and then pulling apart the middle gray sections.
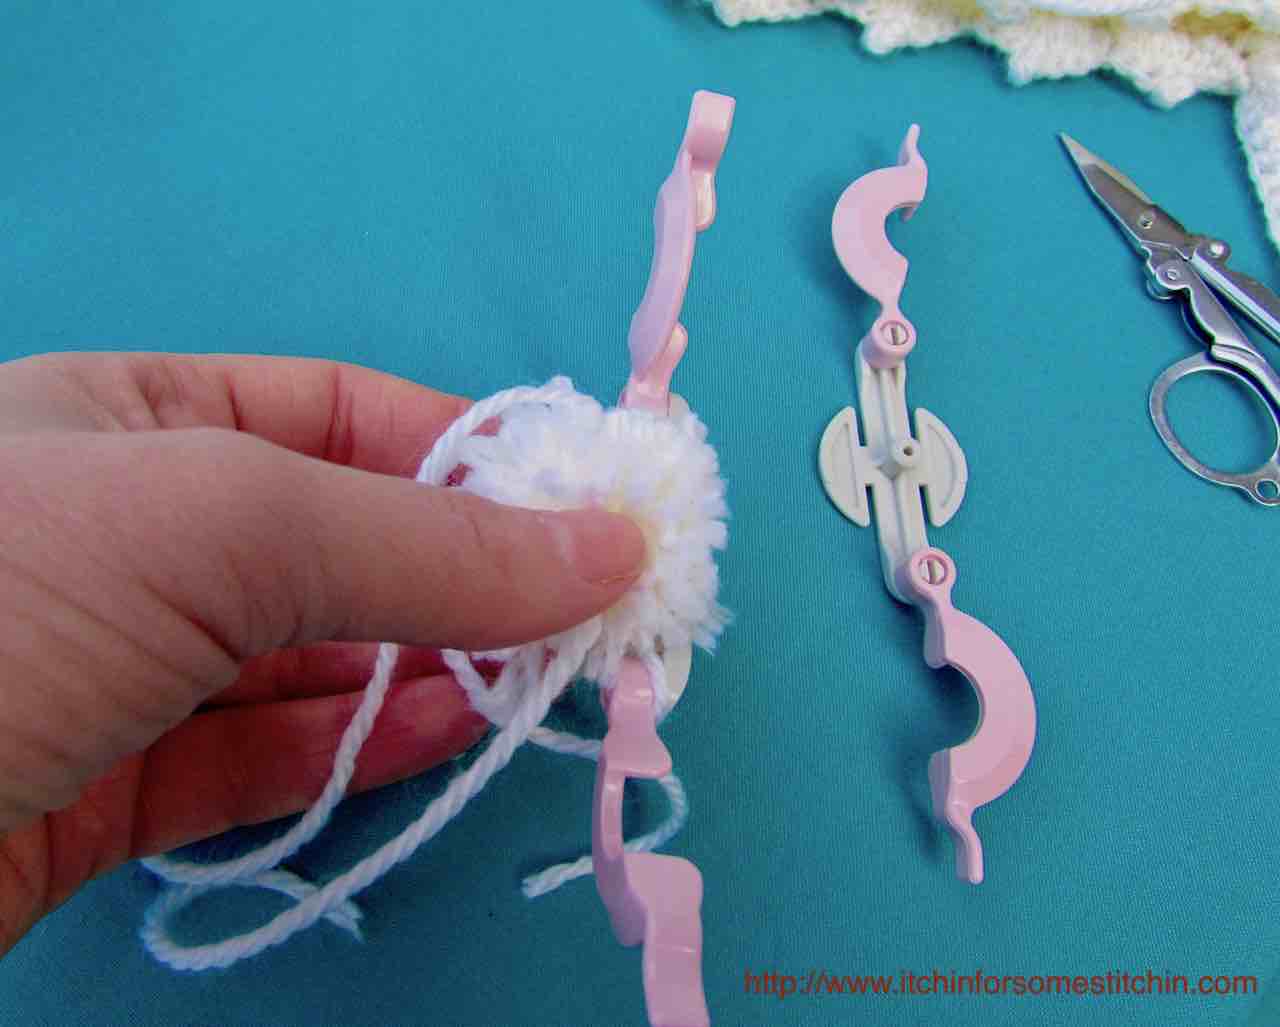
Step 7
Use scissors to trim the pom pom to your liking.
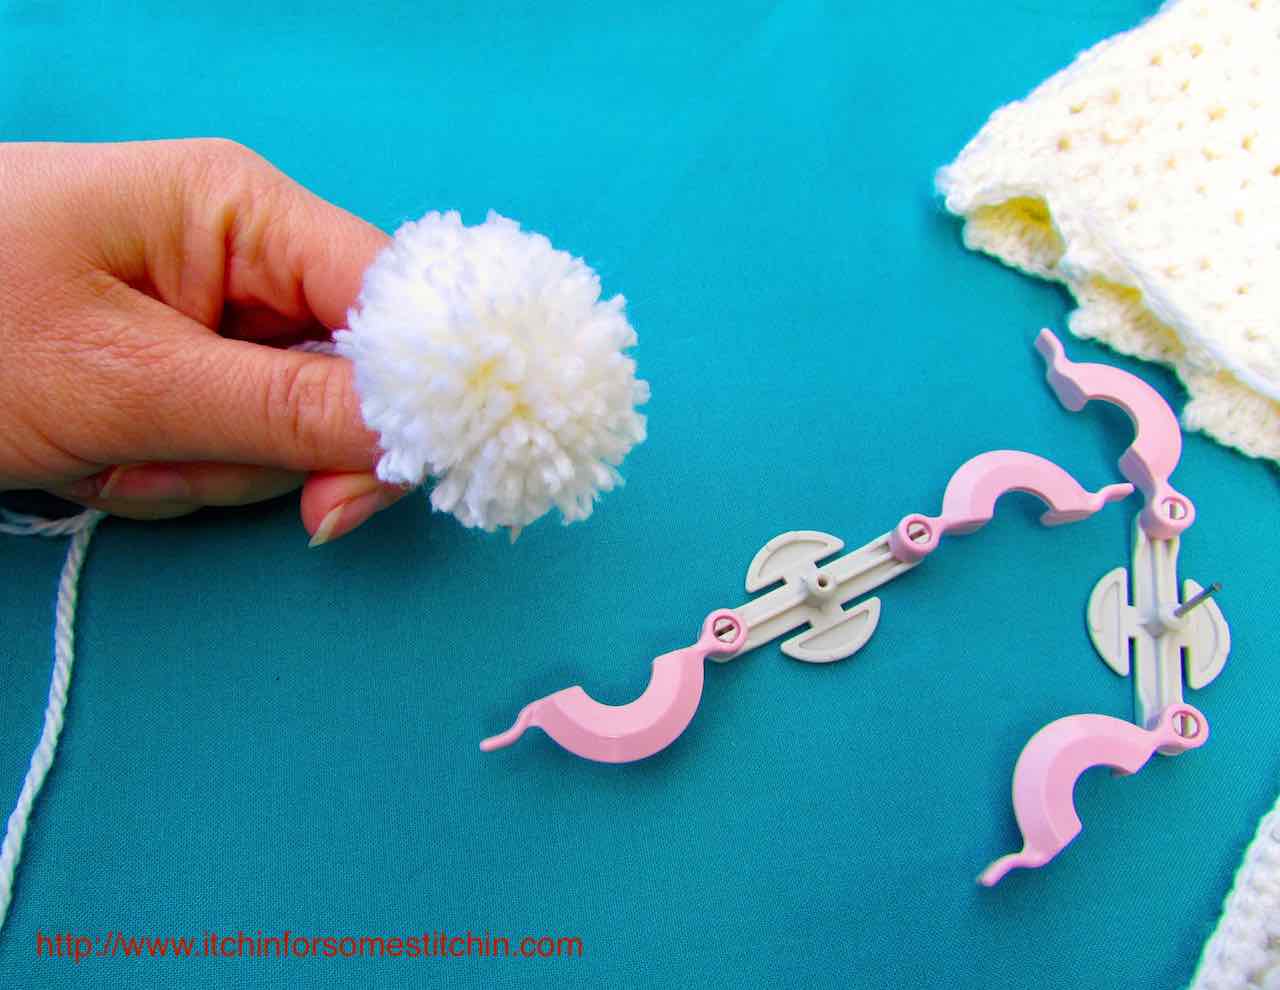
So easy, right? I will never go back to the fork and cardboard methods ever again!
DIY Pom Poms versus Clover Pom Pom Maker Pom Poms
Okay, you might be wondering how pom poms made using Clover pom pom makers hold up when compared to DIY pom poms (the ones I make anyway).
As far as machine washing and drying goes, the answer is amazingly well!
My DIY pom poms fall apart after 2-3 runs through the washer and dryer. On the other hand, I have at least two pom poms made with the pom pom maker that have been washed and dried 22 times and are still holding together…. albeit a bit warped and not as fluffy, but still together.
Lilly is now nearly a year old and the ones on her cape are still fully intact.
Whether this is because Lilly is less destructive than my son was at the same age or because the pom poms are in fact better, is something I can’t say for sure.
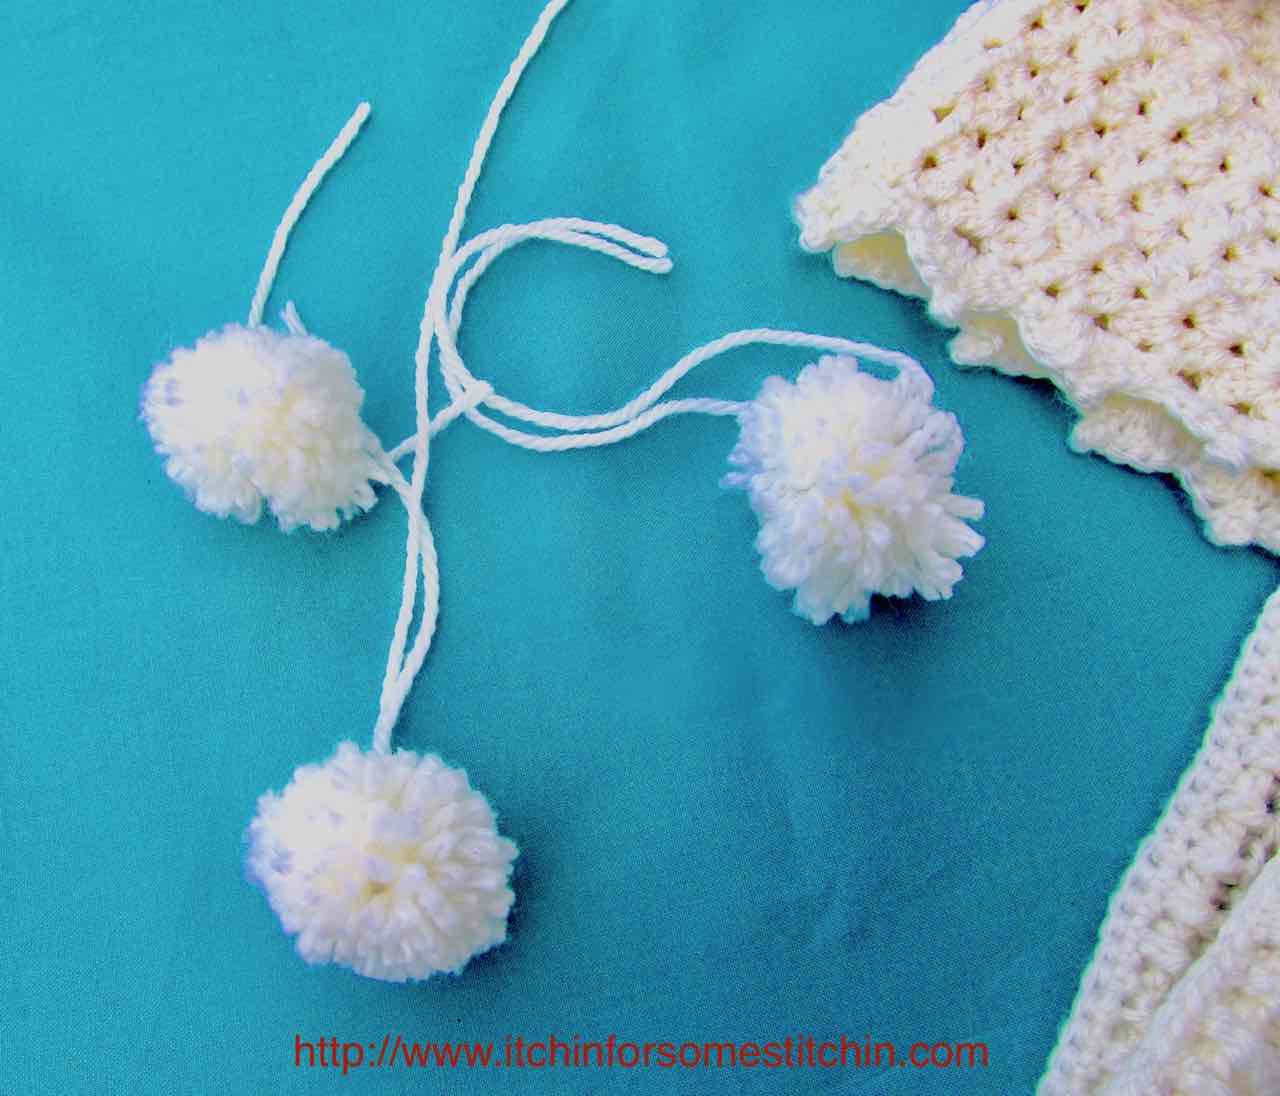
As for the child safety factor, unfortunately, I have no hard evidence. I can only tell you what I have experienced.
What I can tell you is that my son ripped apart DIY pom poms at 9 months of age after only a few seconds.
Then at 18 months, he ripped apart pom pom maker made pom poms in a matter of seconds.
Keep in mind that there is quite an age gap between 9 and 18 months.
As I said, Lilly has not ripped her pom poms apart at all and she is currently 10 months old.
Pom Pom Warning
Regardless of the method you use to make pom poms, I urge you to keep all pom poms out of the reach of children.
Watch all children carefully if their clothing or blankets have pom poms. These are wonderful adornments but could be choking hazards.
Please be cautious!
The other thing to note is that just because my DIY pom poms don’t hold up well doesn’t mean yours won’t.
I could just be an exceptionally poor DIY pom pom maker!
Whether that’s true or not, I prefer the Clover pom pom maker pom poms based on my personal experiences. Plus, they are super easy & quick to use!
The Pros and Cons
I love Clover pom pom makers! That being said, very few things in life are perfect. Clover pom pom makers have their good and bad points, just like most other things.
Pros
- Super easy to use.
- You don’t have to search for items around your house, like forks & card decks, to find something that will make the perfect pom pom size you are looking for.
- Pom poms made with pom poms makers may hold up better than DIY pom poms, depending on your personal skill level with each method.
Cons
- The instructions provided by Clover on how to use the pom pom makers are seriously lacking, which is, in part, why I made this tutorial.

Lilly
Pom poms are perfect embellishments for bags, sweaters, blankets, pillows, scarves, and, of course, capes. 🙂
They also make fun craft projects for kids! Just make sure the pom poms are super well made or that your child is out of the destructive phase.
Traditional pom poms are made with yarn, but for a different effect, you could use strips of fabric, tulle, or ribbon.
Regardless, you can whip up these fantastic embellishments in no time with this easy-to-use pom pom maker by Clover!
Lilly’s Crocheted Cape
The crochet gods must have really wanted these pom poms on Lilly’s cape because if it hadn’t been for Clover pom pom makers it wouldn’t have any.

I am so grateful I found them and learned how to make pom poms in, what I consider, to be the absolute best way!
Have fun creating your own poms poms with these easy-to-use tools. Experiment with different colors and try variegated yarn to make multi-colored pom poms.
By the way, if you want really fluffy pom poms, check out this video by Blossom Crochet.
Pom poms can even be a great scrap buster project!
Use your leftover yarn to make pom poms and add them to lampshades, pillows, or fringe on a blanket.
There are so many possibilities!
What’s your favorite way to use pom poms?
Until next time… Happy Crafting!


Bev
Friday 23rd of March 2018
I can t get into your website I put my name and e mail address in and it tells me I m already registered but when I put my info in again it takes me back to the same registration page not to your site
Itchin4Stitchin
Friday 23rd of March 2018
Hi Bev,
Okay, so I have looked into this a bit. You are already signed up for the newsletter so you don't need to sign up again. When you tried to sign up and it told you that you were already registered, there should have been an option for you to return to the website. It sounds as if maybe this option was missing or you may have missed it. I will double check with my email service to make sure that this does not happen in the future.
I am terribly sorry for the inconvenience and hope you were able to get back to the website. By the way, you do not need to register in order to access the website so maybe that is part of the confusion. I will send you an email to try and get it cleared up.
Sincerely,
RaeLynn