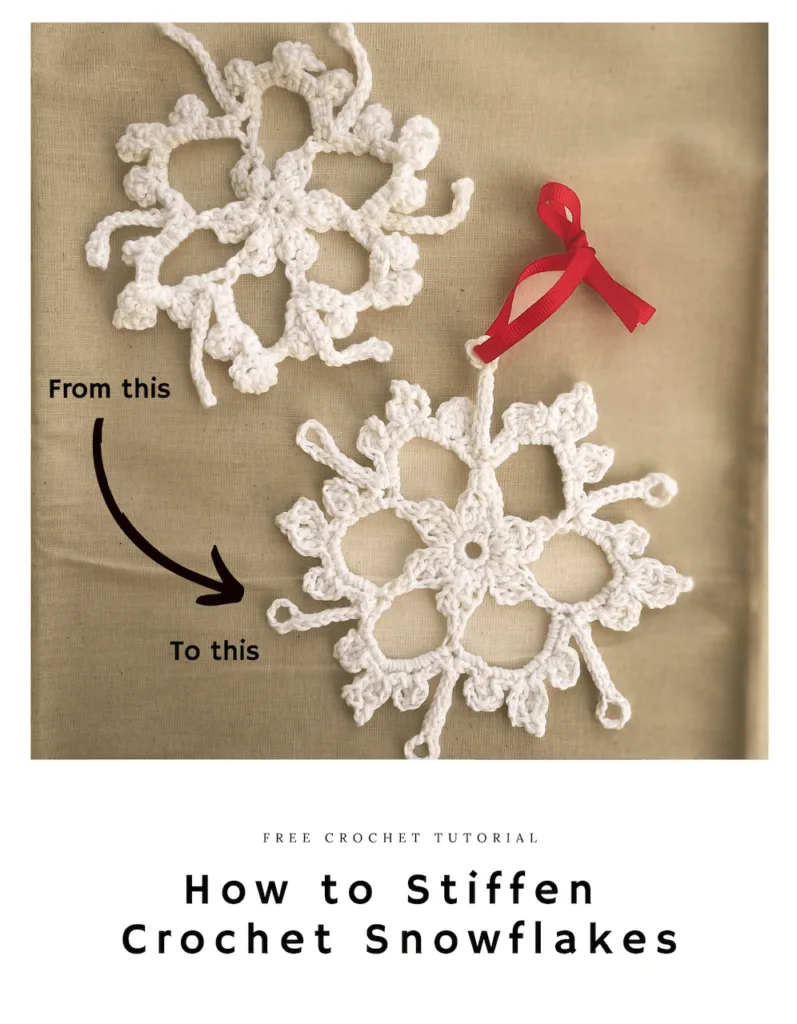
Learn how to stiffen crochet snowflakes with this step-by-step guide, complete with a simple solution recipe and tips for perfectly shaped, long-lasting decorations.
Crocheting snowflakes is both creative and rewarding, but stiffening them is the key to bringing out their intricate beauty and ensuring they maintain their shape.
Whether you are creating ornaments, garlands, or other decorative pieces, stiffening your crochet snowflakes enhances both their look and functionality.
In this guide, I’ll walk you through each step of the stiffening process, from preparing your workspace to pinning and drying your snowflakes.
I also include a simple sugar-based stiffening solution recipe, as well as multiple alternative solutions, to help you achieve flawless results.
Why Stiffen Crochet Snowflakes?
Crochet snowflakes are delicate works of art. Without stiffening, they may curl, lose their shape, or look bland instead of showcasing the beautifully intricate patterns you’ve worked so hard to create.
Stiffening them ensures they retain their defined edges and details, making them perfect for:
- Holiday ornaments for your Christmas tree
- Garlands and bunting for festive decorations
- Window or wall hangings for winter decor
- Gift tags or embellishments for presents
Using a stiffening solution also gives you the opportunity to add a bit of sparkle with glitter or shimmer spray, making your snowflakes even more magical!
Get Free Crochet Snowflake Patterns
Are you ready to take your crochet snowflakes to the next level?
Whether you’re just getting started or you’re looking for fresh inspiration, my Let It Snow! Crochet Collection is here to help!
This collection features stunning, detailed snowflake patterns available for free right here on the website.
Each pattern is beginner-friendly and comes with step-by-step instructions to guide you through the process of creating your own gorgeous snowflakes.
These designs are perfect for holiday decorations, gifts, or even personalized keepsakes!
What’s Included:
- 12 Beautiful Snowflake Patterns: Each unique design captures the magic of winter.
- Detailed Instructions: Clear, easy-to-follow steps for crocheters of all skill levels.
- Versatile Uses: Great for ornaments, garlands, gift tags, and more!
Head over to the Let It Snow! Crochet Collection Main Page to check out the free patterns and start creating your winter wonderland today!
Bonus Tip: Once you’ve crocheted your snowflakes, come back to this guide to learn how to stiffen them and make them shine. Don’t forget to sprinkle them with glitter for that extra festive touch!
Be sure to check out my comprehensive guide on How to Add Glitter and Ribbon to Crochet Snowflakes to learn how to add that extra special magic to each of your handmade creations.
Supplies You’ll Need
Before you begin, gather the following materials and tools to ensure a smooth stiffening process:
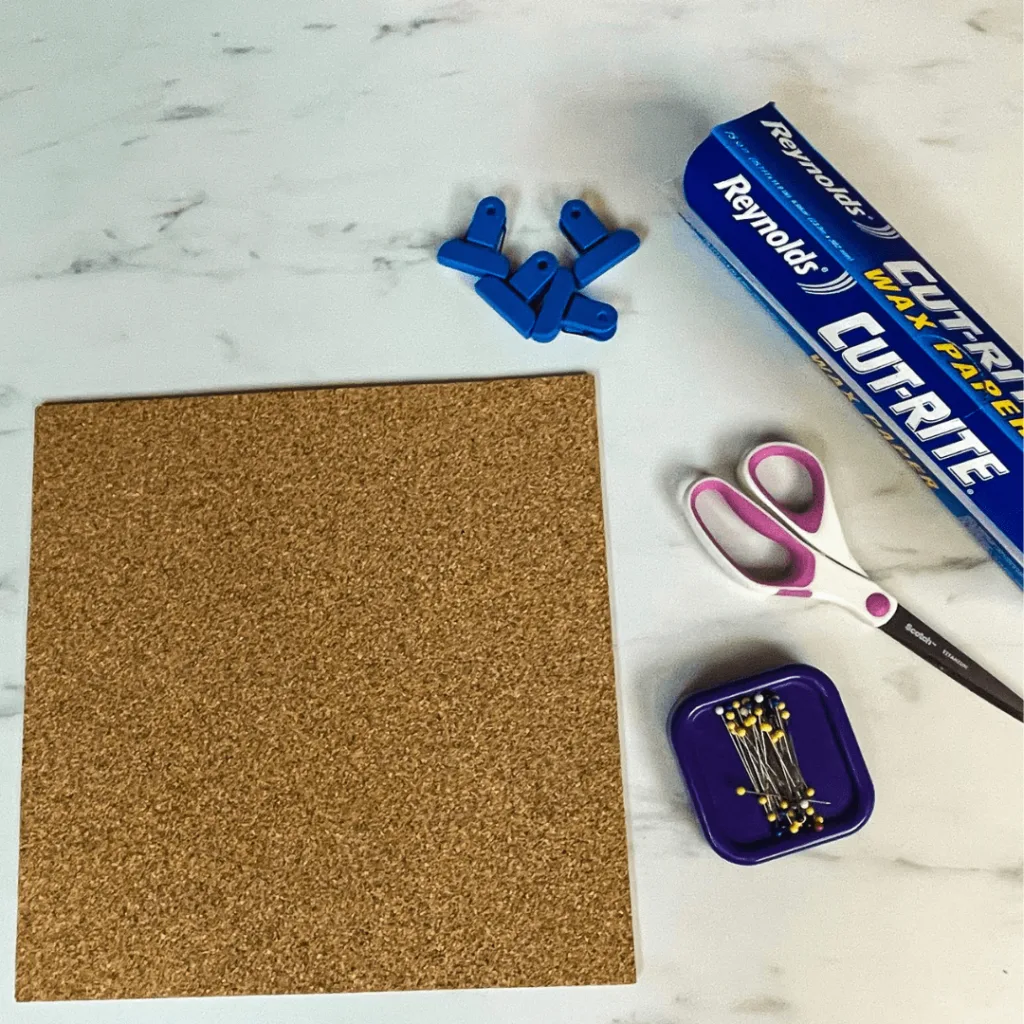
- Crochet snowflakes (made with cotton or other natural fibers for best results)
- Stiffening solution (recipe included below)
- Corkboard or foam board
- Wax paper or plastic wrap
- Towel and/or paper towels
- Rust-proof straight pins
- (Optional) Glitter or glitter spray
- (Optional) Spoon
Step 1: Prepare the Stiffening Solution
For this guide, I am using a classic sugar-based stiffening solution.
This method is affordable, effective, and produces beautiful results.
Follow this recipe to prepare your solution:
1:1 Sugar-Based Stiffening Solution Recipe:
- Measure equal parts granulated white sugar and water (e.g., 1 cup sugar and 1 cup water).
- Pour the sugar and water into a medium-sized pot.
- Heat the mixture over low to medium heat, stirring until the sugar dissolves completely.
- Bring the solution to a gentle boil, then reduce the heat and simmer for 2-3 minutes.
- Remove the pot from the heat and allow the solution to cool for 5-10 minutes before use.
Note: While sugar is an effective natural stiffener, it can attract ants in humid climates. Living in dry Arizona, this wasn’t an issue for me, but if you’re in a more humid area, you might consider using fabric starch or a commercial stiffener as an alternative
Step 2: Prepare Your Workspace
A well-prepared workspace is essential for a hassle-free stiffening process. Here’s how to set up:
1. Protect Your Surface: Cover a corkboard or foam board with wax paper or plastic wrap to prevent the stiffening solution from soaking into the board or causing damage. Secure the edges with tape or clips.
2. Gather Tools: Keep a towel, paper towels, and rust-proof straight pins within arm’s reach. These will be essential for blotting excess solution and shaping your snowflakes.
3. Work in a Clean, Well-Ventilated Area: Ensure your workspace is free of dust and debris. Ventilation is especially important if you’re using spray glitter or commercial stiffeners.
Step 3: Soak the Snowflakes in the Stiffening Solution
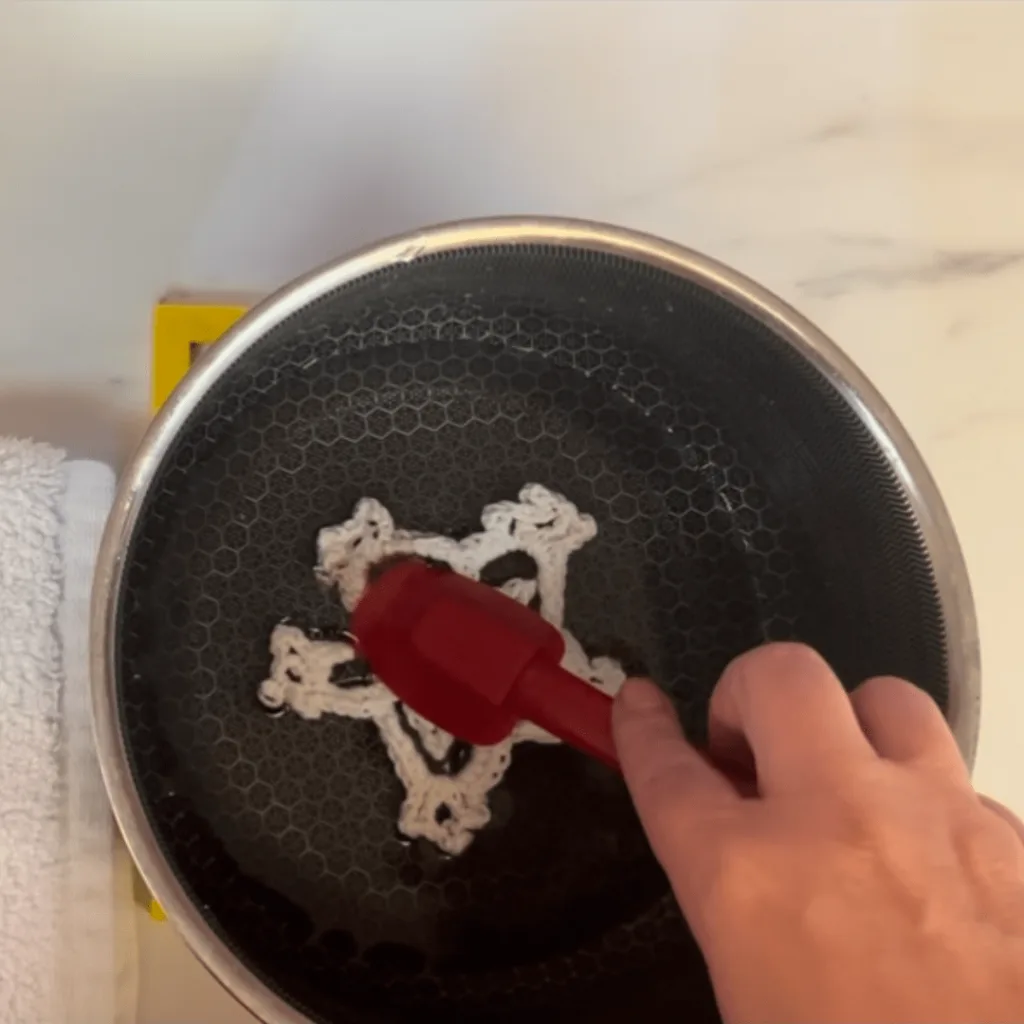
Once your solution is prepared and your workspace is ready, it’s time to soak your crochet snowflakes.
1. Place your snowflakes in the pot of stiffening solution.
2. Use a spoon or your hands to gently press the snowflakes into the solution, ensuring they are fully saturated on both sides.
3. Let the snowflakes soak for about 1-2 minutes. This allows the solution to penetrate the fibers, ensuring even stiffening.
Step 4: Blot Excess Solution
After soaking, it’s important to remove excess stiffening solution to avoid drips or pooling during the drying process.
- Carefully remove each snowflake from the solution.
- Place the snowflakes on a clean towel or paper towels.
- Gently blot them with another towel to remove excess moisture, being careful not to distort their shape.
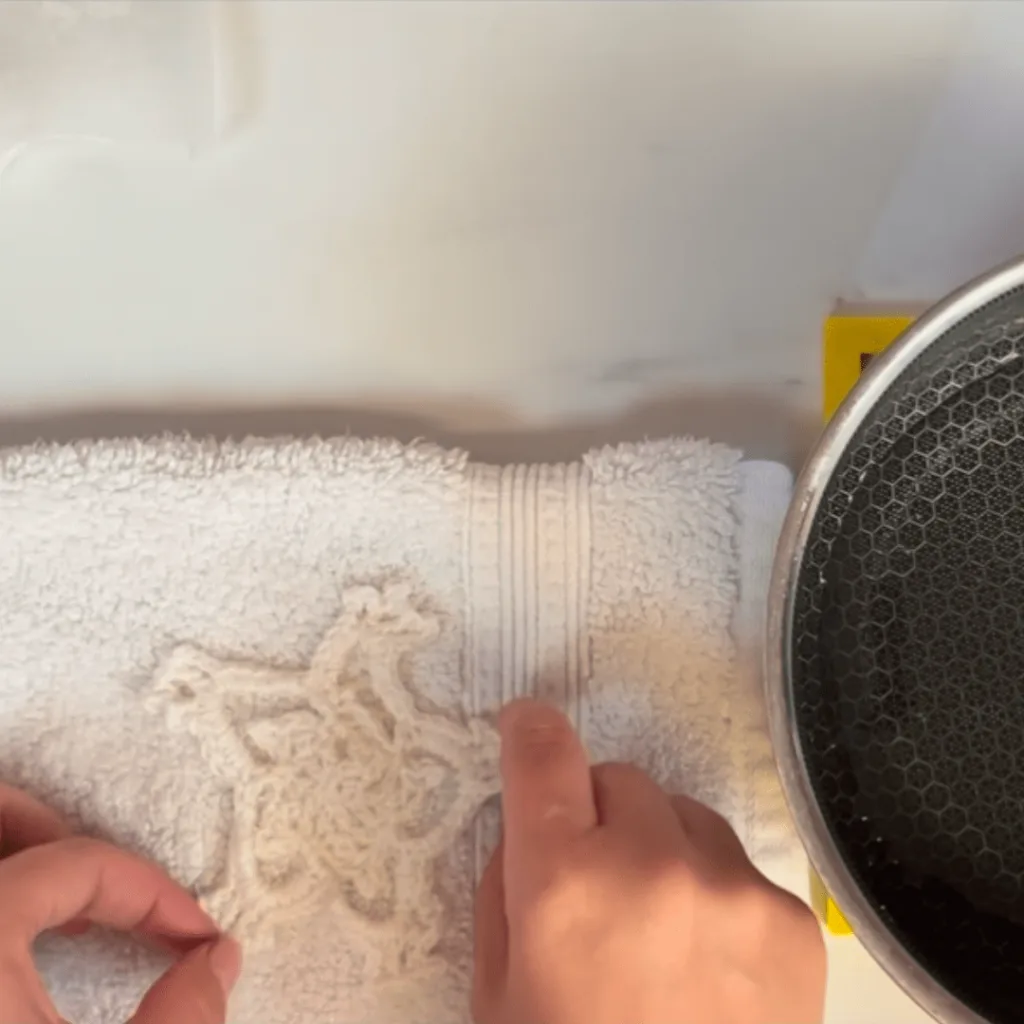
Step 5: Arrange the Snowflakes on the Covered Board
Once your snowflakes are blotted, transfer them to your prepared corkboard or foam board.
- Lay each snowflake flat on the wax paper or plastic wrap.
- Arrange them with enough space between each snowflake to allow for proper pinning and drying.
Step 6 (Optional): Add Glitter or Spray
If you want your snowflakes to sparkle, this is the time to add glitter.
- Sprinkle Glitter: While the snowflakes are still damp, sprinkle fine glitter over the surface. Focus on the edges or specific areas for a more delicate look, or cover the entire snowflake for maximum shimmer.
- Spray Glitter: Alternatively, use glitter spray for a more uniform application. Lightly mist the snowflakes, holding the spray can about 6-8 inches away.
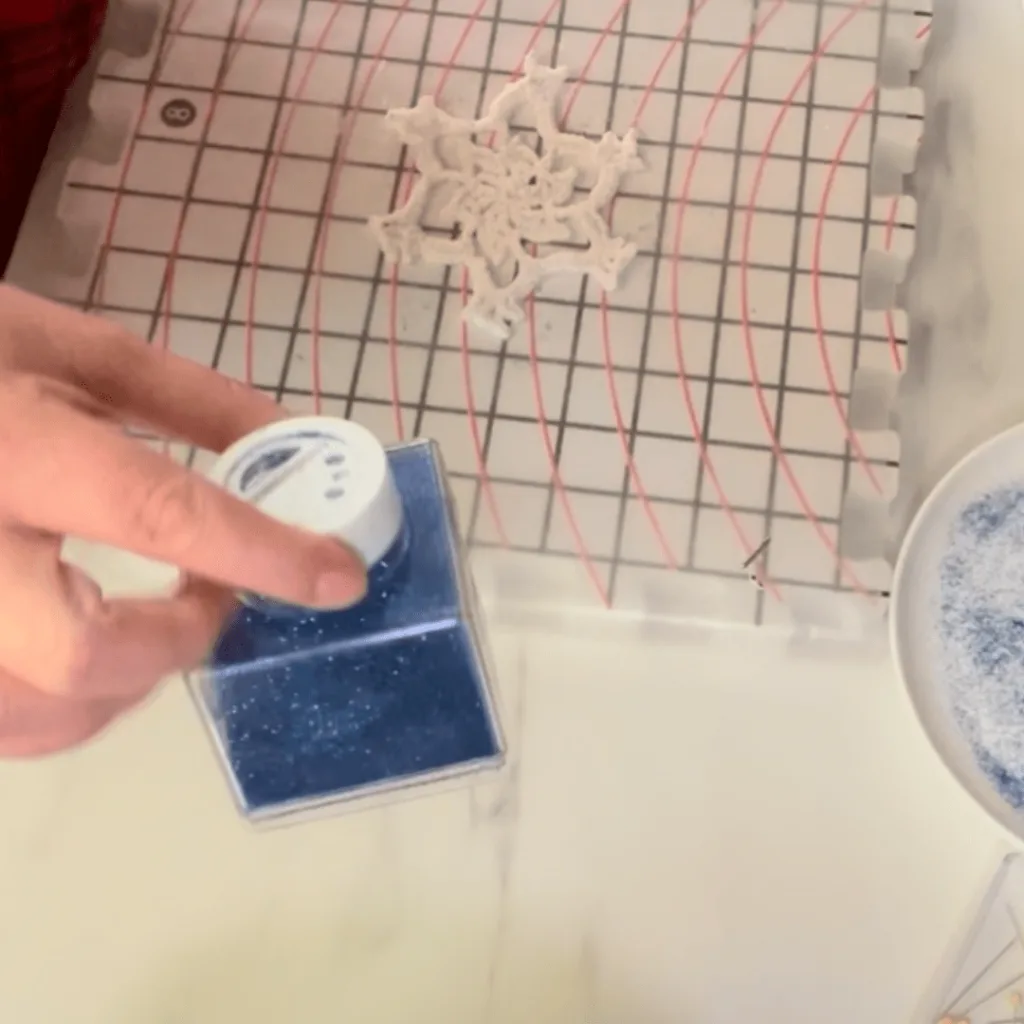
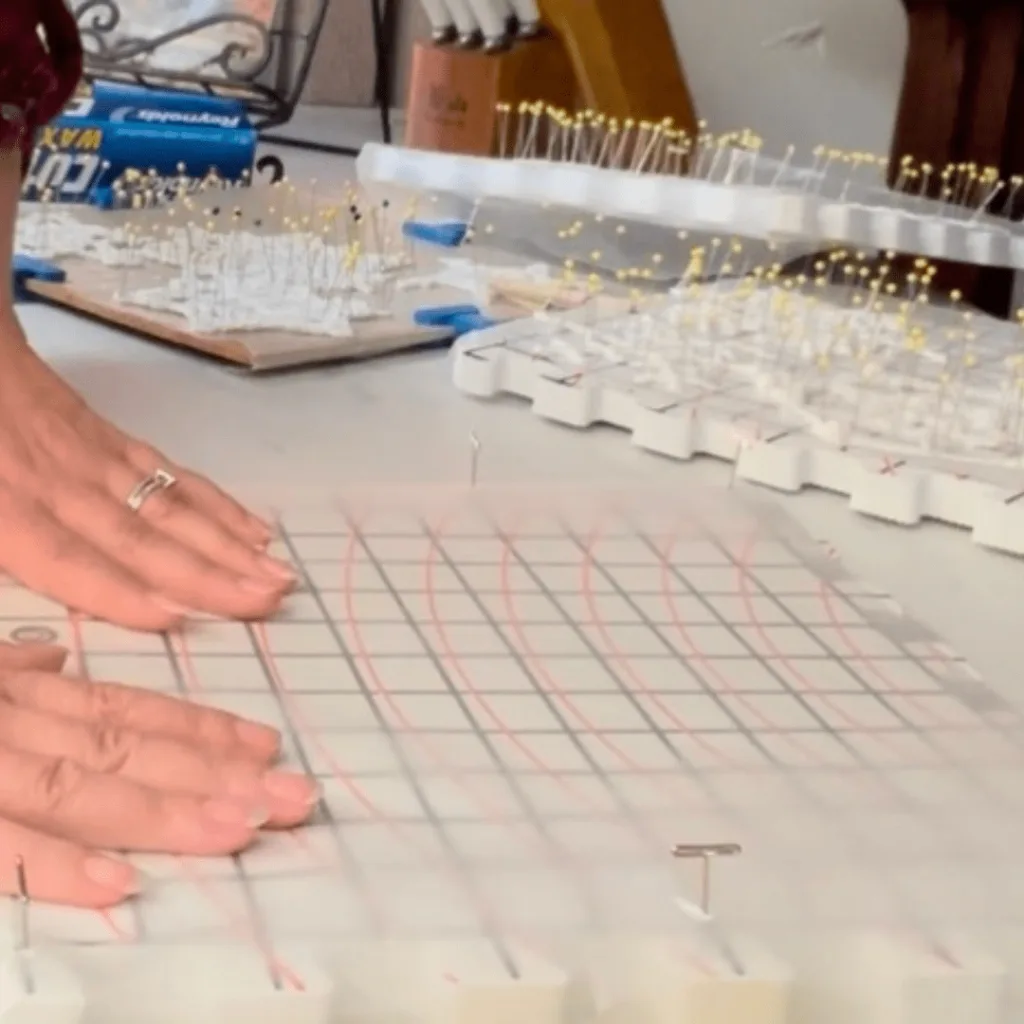
Step 7: Shape and Pin the Snowflakes
Shaping your snowflakes is the most critical step in this process. Proper shaping ensures that your finished pieces are symmetrical and showcase their intricate designs
- Gently pull and stretch each snowflake into its desired shape.
- Pin each point or edge to the board using rust-proof straight pins. Insert the pins at an angle to keep the snowflakes taut and secure.
- Pay attention to symmetry. Use additional pins if needed to ensure the snowflake’s pattern is evenly displayed.
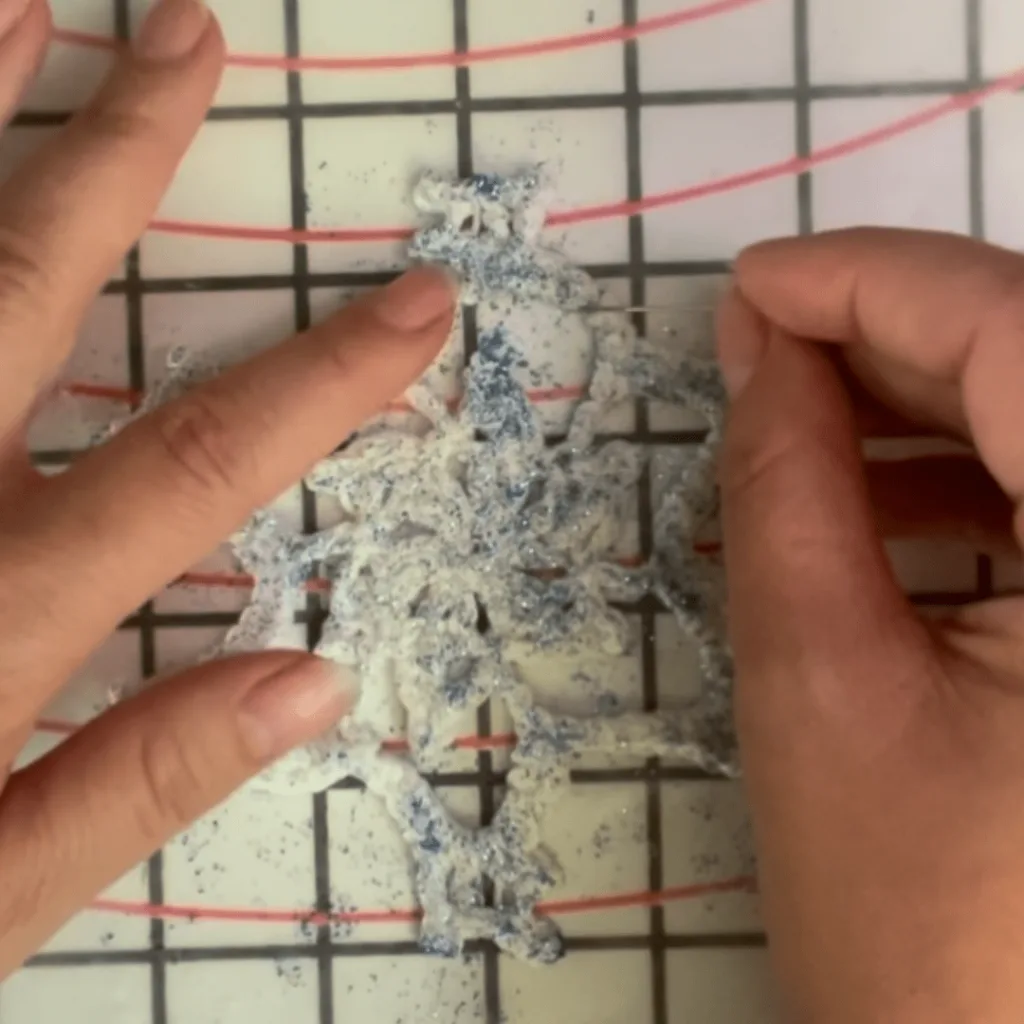
Step 8: Let Dry Completely
Drying is the final step, and patience is key to achieving perfectly stiffened snowflakes.
- Leave the snowflakes pinned to the board for 24-48 hours, depending on the humidity in your area.
- Check the snowflakes after 24 hours. If they feel stiff and hold their shape, they’re ready to unpin. If not, let them dry for another day.
Pro Tip: Avoid placing your drying board near direct heat or sunlight, as this can cause uneven drying or discoloration.
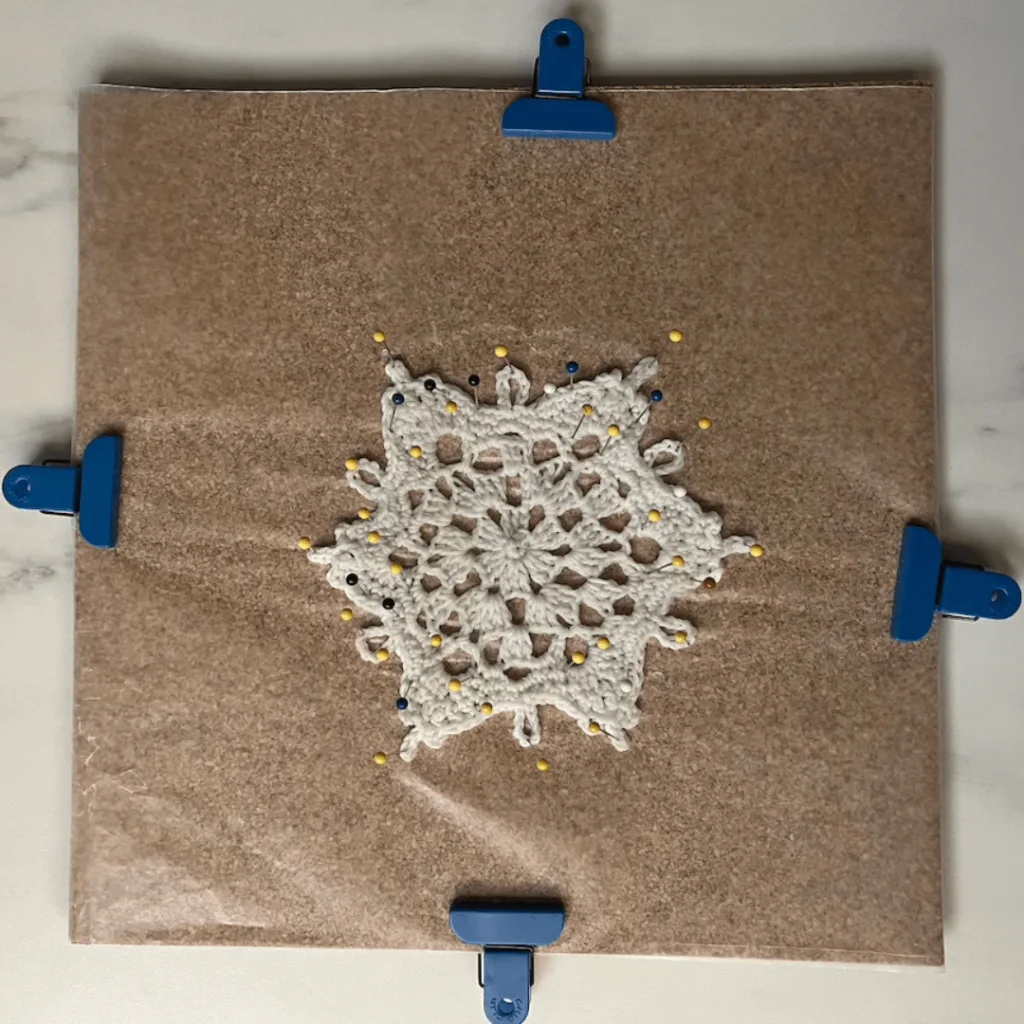
Troubleshooting Common Issues
Here are some common problems you might encounter and how to address them:
Problem: The Snowflakes Aren’t Stiff Enough
- Reapply the stiffening solution by brushing it on with a small paintbrush.
- Repeat the shaping and pinning process, then allow them to dry for another 24 hours.
Problem: The Snowflakes Are Sticky
- This can happen if the sugar solution wasn’t fully dissolved or if the snowflakes were not blotted properly.
- Rinse the snowflakes in warm water to remove excess sugar, then repeat the stiffening process.
Problem: The Snowflakes Lost Their Shape
- If the snowflakes warp during drying, re-soak them in the stiffening solution and start the process again.
Alternative Stiffening Methods
If you’re looking for an alternative to the sugar-based solution, here are some other options:
Fabric Starch
- Mix equal parts liquid fabric starch and water.
- Follow the same steps as above for soaking, blotting, shaping, and drying.
Commercial Stiffeners
- Use a product like Mod Podge Stiffy or Aleene’s Fabric Stiffener for long-lasting results.
- These products are particularly useful if you’re worried about sugar attracting pests.
Glue-Based Solution
- Mix equal parts white glue and water.
- This creates a strong, durable stiffener that’s perfect for heavy-duty ornaments.
Cornstarch-Based Solution
- Mix 3 tablespoons cornstarch and 1 cup of water.
- Easy to make and less prone to attracting pests than sugar based solutions.
Tips for Long-Term Care
To keep your stiffened snowflakes looking their best:
- Store Them Properly: Place them in a flat, dry box or between sheets of wax paper to prevent crushing or warping.
- Avoid Moisture: Keep them away from damp areas to prevent rehydration or mildew.
- Refresh Stiffness as Needed: Over time, snowflakes may lose their stiffness. Reapply the solution and repeat the process if necessary.
Final Thoughts
Stiffening crochet snowflakes is a simple but transformative process that enhances the beauty and versatility of your handmade creations.
By following these steps and using the sugar-based solution, you’ll be able to preserve your intricate designs and create decorations that last for years.
Whether you’re crafting for yourself, giving gifts, or selling your creations, properly stiffened snowflakes are sure to impress.
Frequently Asked Questions
Q: Can I use a store-bought stiffener instead of the sugar-based solution?
A: Yes! Commercial stiffeners like Mod Podge Stiffy or Aleene’s Fabric Stiffener work wonderfully and may be easier to use if you’re short on time or live in a humid climate. Just follow the product instructions.
Q: Can I stiffen snowflakes made with acrylic yarn?
A: While it’s possible, natural fibers like cotton work best because they absorb the stiffening solution more effectively and hold their shape better after drying. Acrylic may need additional applications of stiffener.
Q: How do I avoid sticky snowflakes when using a sugar-based solution?
A: Sticky results often happen if the sugar solution isn’t fully dissolved or if too much solution is left on the snowflake. Ensure the solution is fully dissolved before soaking and blot away excess before drying.
Q: Can I reuse the stiffening solution?
A: Yes, you can store leftover sugar-based stiffening solution in an airtight container in the refrigerator for up to a week. Reheat it gently before using it again.
Q: How long do stiffened snowflakes last?
A: With proper care, stiffened snowflakes can last for many years. Store them in a dry, flat place and avoid exposing them to moisture.
Q: Can I dye my stiffened snowflakes?
A: Yes, you can dye your snowflakes before stiffening by soaking them in fabric dye. Alternatively, use colored glitters or sprays for a festive touch after stiffening.
Thank you for visiting my blog!
Your support, whether through sharing my content or making a purchase, enables me to keep creating and sharing free content for everyone’s enjoyment.
Your support is truly valued and greatly appreciated!

Until next time… Happy Crocheting!

Help us reach more readers – Share this post now!

